How To Install WHMCS #
WHMCS(Web Host Manager Software) is a web hosting client management panel. The main tasks of the software in web hosting business are:
- Used as a billing software
- Build and manage hosting packages
- Customer support system- thru’ a ticketing system
- Automated domain management system, just to mention a few.
Requirements:
To install the WHMCS software, you require an active domain or subdomain connected to a hosting service, WHMCS installation files, and its license.
WHMCS Installation Procedure #
Note: The procedure illustrations were done on Cpanel. This however works on other panels as well.
- Login to your Cpanel and upload the WHMCS installation zip file on the root folder of your domain or subdomain. See how to upload a website here: https://truehost.com/support/knowledge-base/how-to-upload-a-website-to-your-cpanel-2/
- Extract the uploaded zip file. At this stage, you can rename the folder under which the files were extracted. In this example, the files were uploaded in the whmcs folder
- Create a MySQL database, and a user, and assign all the privileges. See how to create a MySQL database here: https://truehost.com/support/knowledge-base/how-to-create-a-database-in-cpanel/ . Take note of the database name, database username, and password as these will be used on the WHMCS setup.
- In the whmcs folder, locate configuration.php , click on edit and input the details created in step 3. The fields to make the changes are
a. db_username: database user created in step 3
b. db_name: databasename created in step 3
c. db_password: password created in step 3
d. db_port: 3306
e. db_host: localhost - In this example, our domain is https://example.com. Having extracted the files under whmcs folder, access the installation link . ie. https://example.com/whmcs/install. Note that the install folder might be renamed. Rename the folder back to install to follow along with this guide.
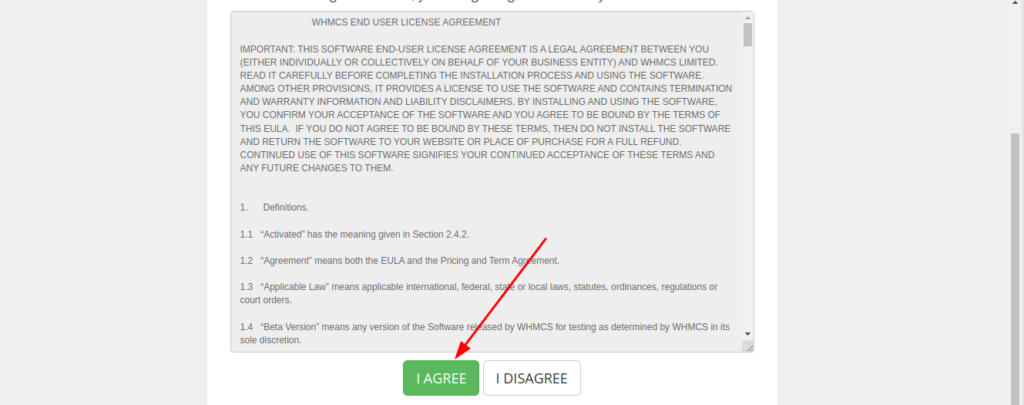
6. Click on agree and proceed with the setup. In the License Key page, fill in the details available in the configurations.php in step 4 above.
7. The last stage is to delete the install folder and set up a clone job. See the guide on how to set up a clone job on this guide: https://truehost.com/support/knowledge-base/create-cron-jobs/
Proceed with other WHMCS setups.
How To configure Truehost Domain reseller module
1. Visit our website and place an order for the Domain Reseller API.
2. An order is processed, and an email sent with a download link for the domain reseller module
3. Download the reseller module. Navigate to the root folder of your whmcs installation folder, locate modules, then registrars. Under this folder, upload the domain reseller zip file here, and extract it.
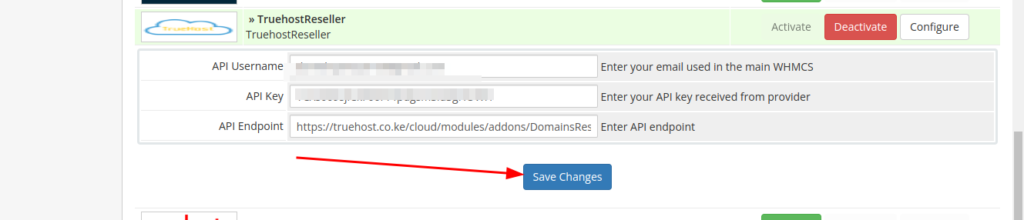
4. Back to your whmcs admin dashboard, click on system settings and search for Domain registrars. Select Activate next to Truehost reseller and input the Api username, the Api key, and the Api Endpoint and click on save.
How to retrieve the API username (Email address), API key and API Endpoint (API Url).
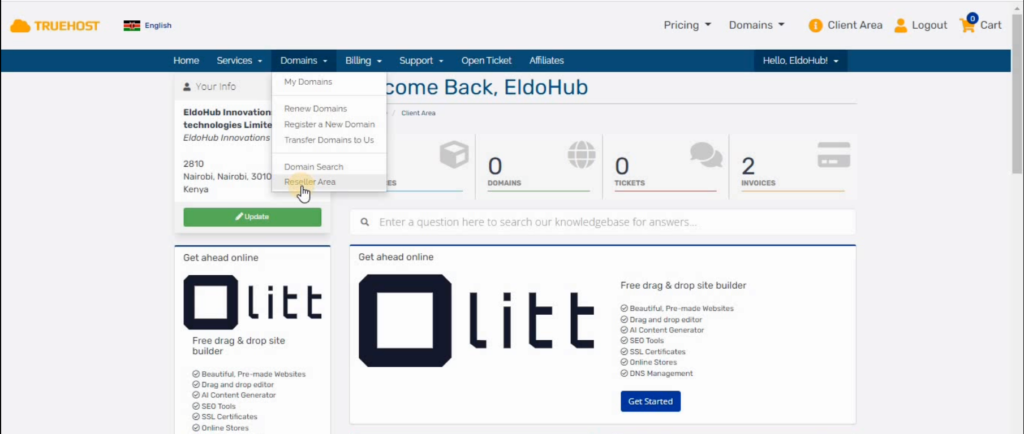
1. Login to your client area > Go to Domains > Reseller Area>
2. Then go to settings.
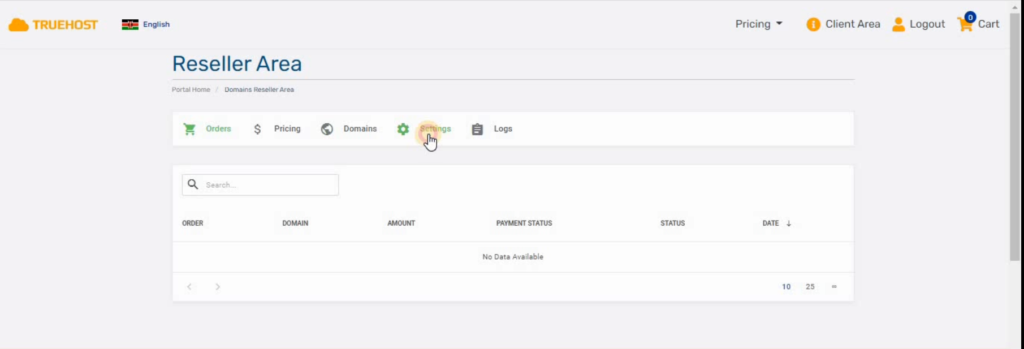
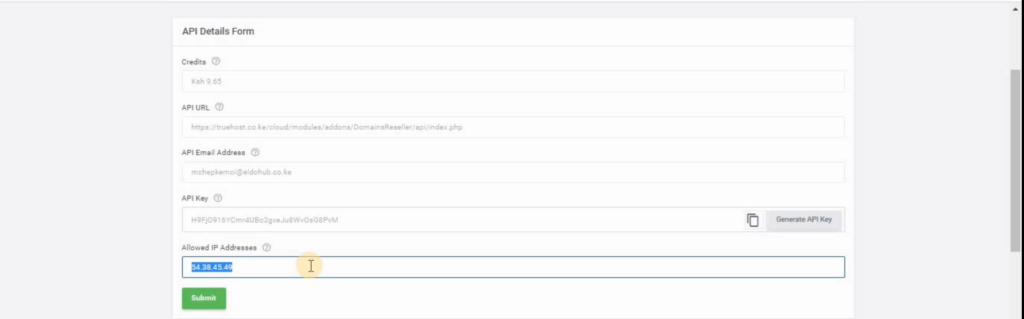
3. Check for the following details:
API URL (API Endpoint) > this will auto fill itself.
API Email Address (API Username) > Client email as it is in the contact details.
API key > You may use the generated API Key or Click generate to get a new one.
Allowed IP Addresses > Server IP address for your WHMCS installation.
Once done, the Whmcs system will be configured. Once your client purchases a domain from your website, the domain can automatically be registered on our end. Ensure you have enough credit.


