A complete guide to safely access your server in Rescue Mode and back up your critical files, emails, and databases.
What is Rescue Mode? #
Rescue Mode boots your server into a temporary recovery environment, allowing you to access your server’s disks even if the main operating system is offline or unavailable. This is essential when you need to recover files before rebuilding or decommissioning your server.
⚠️ Important: Rescue Mode is for data recovery only. Do not attempt live deployments here.
What You’ll Need #
Your Rescue Mode login credentials (provided by support)
An SSH client (Terminal on Mac/Linux, PowerShell or PuTTY on Windows)
Access to another server or a local computer to store backups
Enough free storage space (at least as much as your data size)
Step 1: Connect to Rescue Mode #
Open your terminal or SSH client and connect to your server:
ssh root@YOUR_SERVER_IP
Example:
Enter your Rescue Mode password when prompted. You’re now connected to the recovery environment.
Step 2: Find Your Data Disks #
List all available disks and partitions:
lsblk
You’ll see output similar to this:
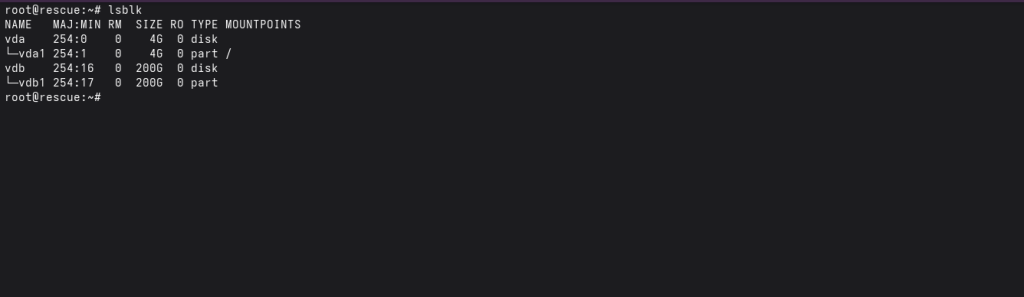
The largest partition typically contains your website files, emails, and databases. Note its name for the next step.
Step 3: Create a Folder for Access #
Create a temporary folder where you can access your files:
mkdir -p /mnt/
Step 4: Access Your Disk #
Mount the partition (using the disk name from Step 2):
mount /dev/vdb1 /mnt/
Verify it worked:
df -h
You should see your partition listed with its size and free space.
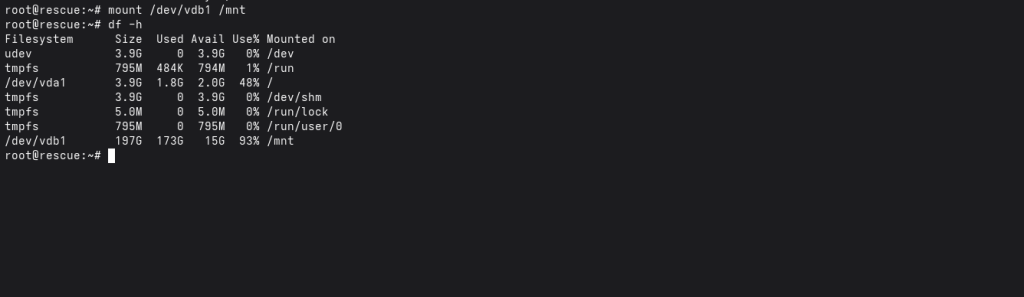
Your files are now available under /mnt/ i.e navigate to /mnt/home/, /mnt/root/, /mnt/var/ e.t.c to view and interact with your files respectively
Step 5: Back Up Your Website Files #
Website files are typically stored in the /home directory. Create a compressed backup:
tar -I pigz -cpf website-backup.tar.gz /mnt/home
What does this command do?
tar = archiving tool
-I pigz = compress with pigz (faster than gzip)
-cpf = create, preserve permissions, and save to file
website-backup.tar.gz = output filename
Check the backup size when finished:
ls -lh website-backup.tar.gz
Step 6: Back Up Your Email Data #
Email files are usually in the mail directory:
tar -I pigz -cpf email-backup.tar.gz /mnt/home/*/mail
Step 7: Back Up Your Databases #
If you have MySQL or MariaDB databases, back up the database files(for proper recovery, back up everything in the database folder):
tar -I pigz -cpf mysql-backup.tar.gz /mnt/var/lib/mysql
For a database, more technical know-how is required to properly restore it in production.
Step 8: Transfer Backups to Another Server #
Now that you have backups, you need to move them to safe storage. Use SCP (secure copy) to transfer them.
Option A: Using SCP (Simple Copy) #
Copy a backup file to another server:
scp website-backup.tar.gz user@backup-server:/backups/
Example: Copy to 203.0.113.20
scp website-backup.tar.gz [email protected]:/root/backups/
Enter the password for the destination server when prompted. The file will copy over.
Tip: Copy all three backups this way (website, email, database).
Option B: Using Rsync (Better for Large Files) #
For large backups, rsync is faster and more reliable:
rsync -avP website-backup.tar.gz user@backup-server:/backups/
Benefits of rsync:
Shows progress as it transfers
Can resume if interrupted
Faster for multiple files
Step 9: Verify Your Backups #
Always verify backups before considering them safe. Test the backup file:
tar -tf website-backup.tar.gz | head -20
This shows the first 20 files in the backup. If you see your files listed, the backup is good.
Also test that the file isn’t corrupted:
gzip -t website-backup.tar.gz
No output means the file is intact. If there’s an error, the backup may be corrupted.
Step 10: Clean Up #
Once all backups are transferred and verified, unmount the filesystem:
umount /mnt/
Verify it’s unmounted:
mount | grep mnt/
If no output appears, you’re done with the unmount.
Common Issues & Solutions #
Issue: “Device is busy” when unmounting #
This means a process is still using the mounted files. Change to a different directory:
cd / umount /mnt
Issue: Can’t find the right partition #
Use fdisk or blkid to get detailed partition information:
fdisk -l blkid
Issue: Backup is taking too long #
Large backups can take hours. Consider backing up individual accounts instead of the entire /home directory, or use rsync to resume if interrupted.
Best Practices #
Always transfer backups to a separate server immediately
Verify backup integrity before requesting server recreation
Keep at least two copies of critical backups
Label backups with dates so you know which is which
Do not run production services from Rescue Mode
Test restoring from backups to ensure they work
You’re Done! #
Once all your files are backed up, verified, and safely stored on another server, you can contact support to request server recreation or redeployment.
Your data is now secure and can be restored whenever needed.


