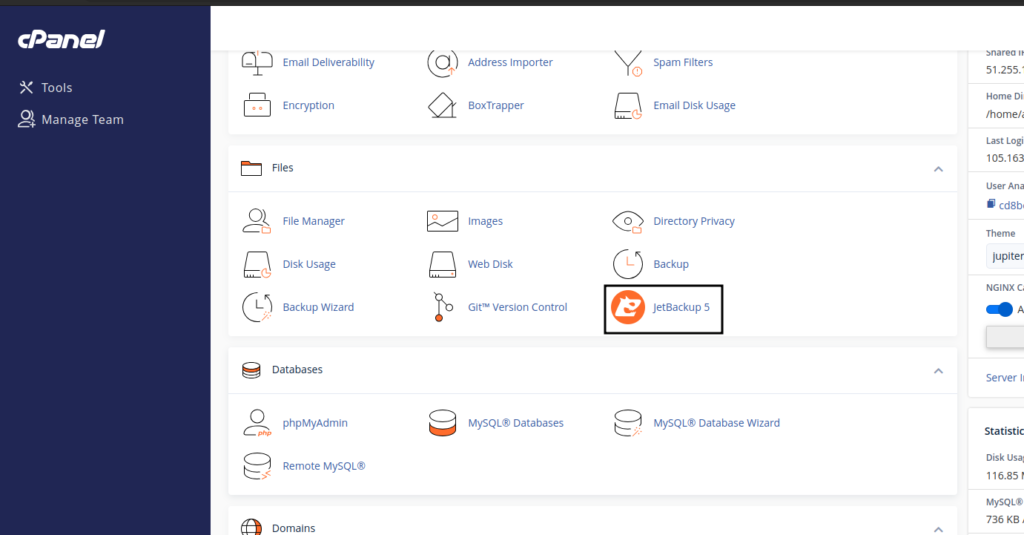
Restoring specific files in cPanel via JetBackup 5 is a simple process that safeguards your site’s integrity. Follow these steps:
- Log in to cPanel (see How to Access cPanel) and access JetBackup 5 in the ‘Files’ section.
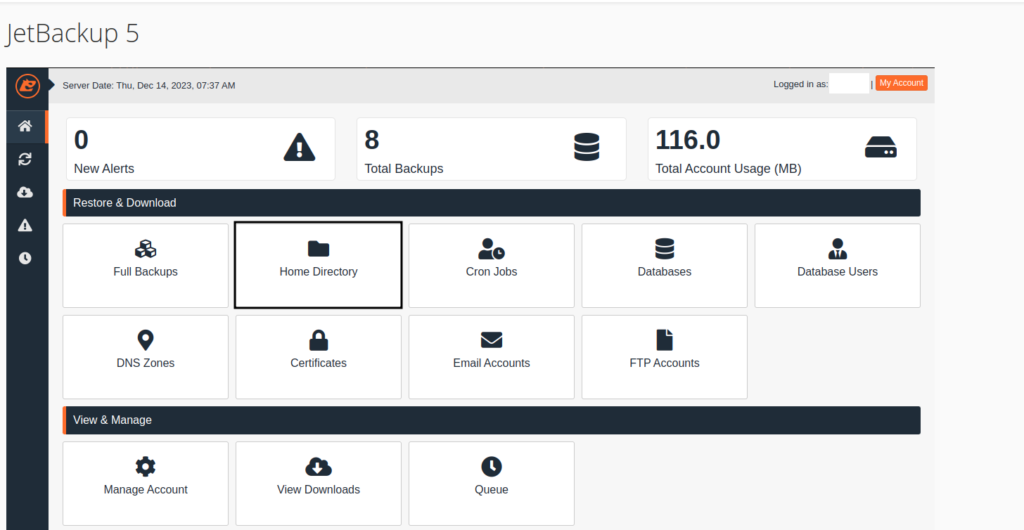
2. Click ‘Restore & Download’ and choose ‘Home Directory’ to encompass all files.
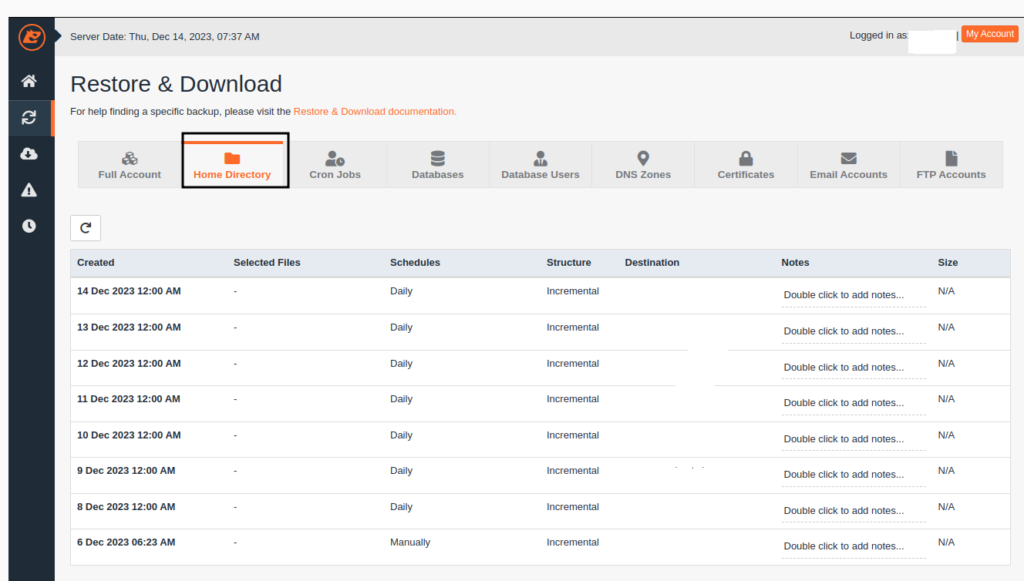
3. Select the backup date you prefer from the calendar.
4. Optionally modify file selection by using the ‘Change Files Selection’ button.
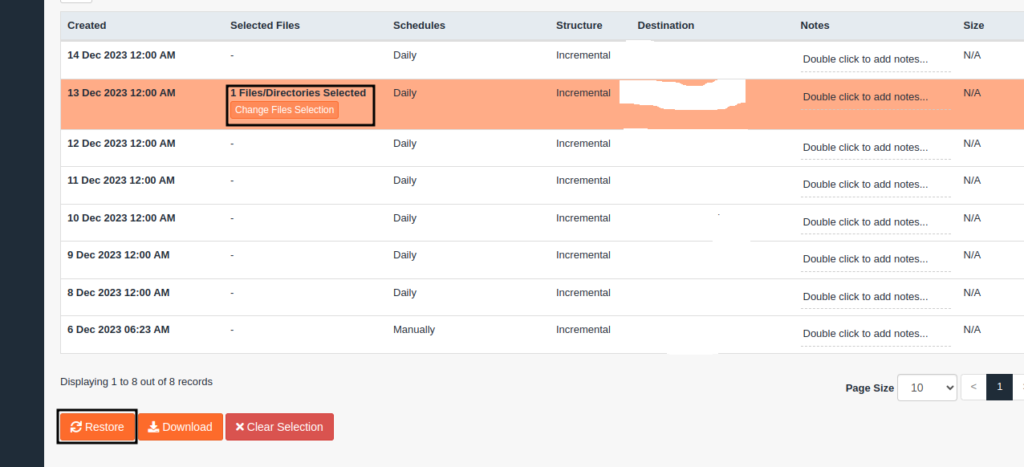
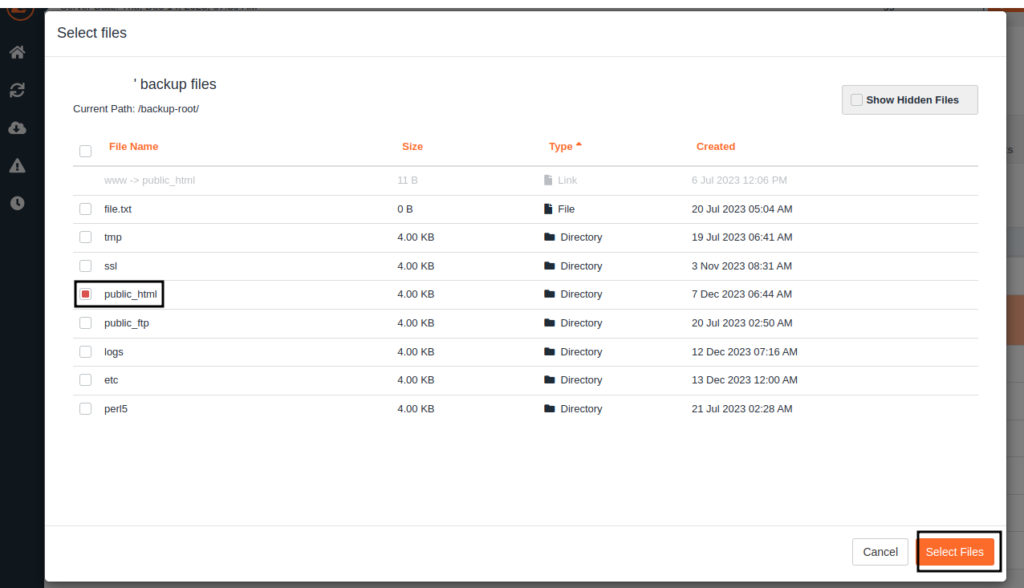
5. Navigate and choose the specific files or directories to restore then click select files.
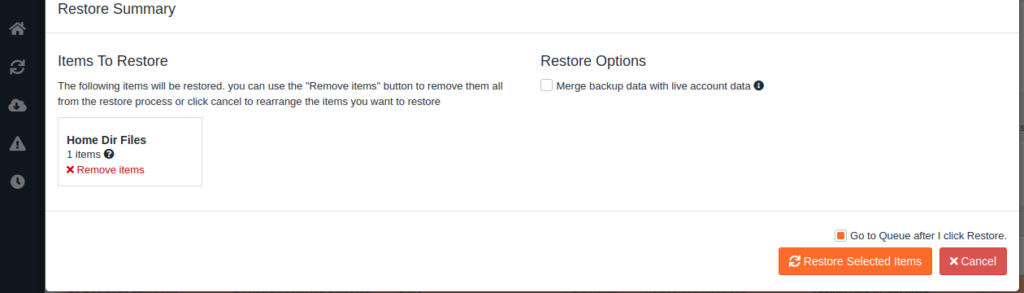
6. Initiate restoration by clicking ‘Restore Selected Items’ in JetBackup 5.
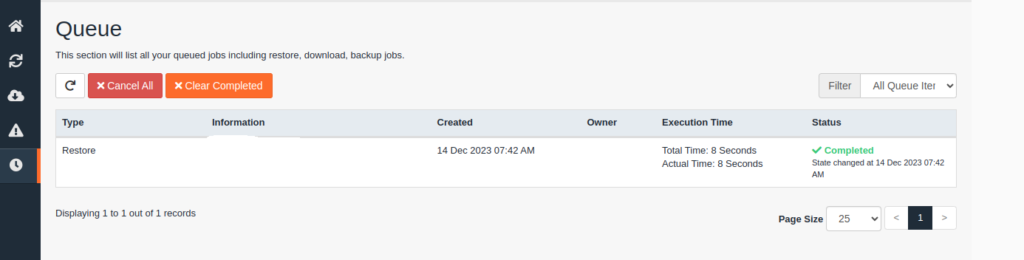
7. Confirm the process completion and verify restored files.
8. Check the restored locations to ensure proper functionality.


