When moving your domain to Cloudflare, one of the things that can get affected your emails. You may notice that after migrating to Cloudflare you do not receive emails anymore.
This guide will show you how to fix this so that you enjoy the benefits of CLoudflare while still receiving emails.
For this example, assume your domain name is called truehostcloud.com.
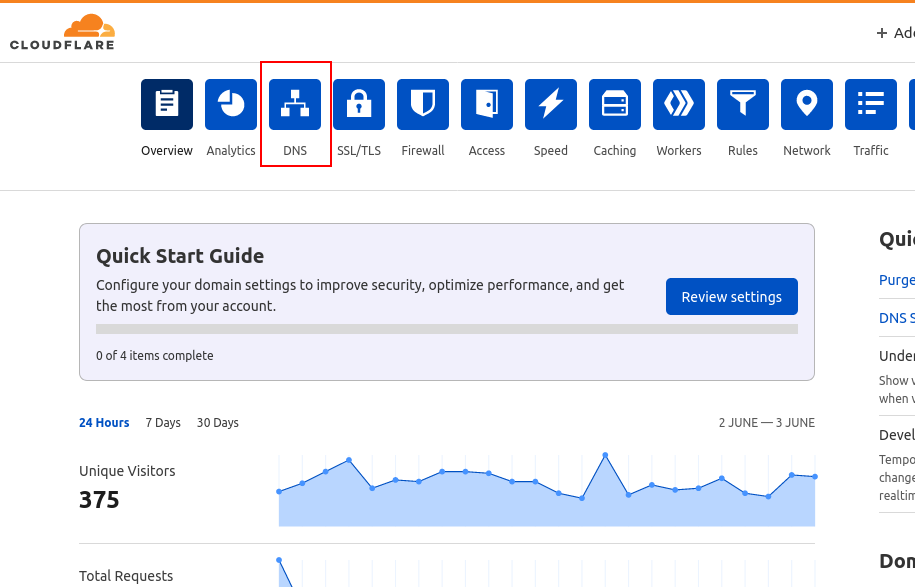
1 Login to Cloudflare
2 If you have more than one domain on your Cloudflare account, you will need to click on it first, otherwise go to step 3
3. Click DNS tab
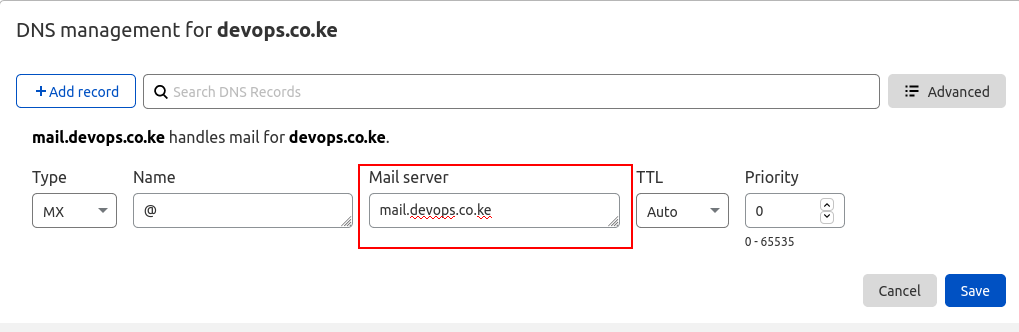
4. Find the CNAME record for mail.truehostcloud.com (change to your domain name.) and delete it
5. Create an A record for mail.yourdomain.tld and point it to your hosting IP address. Read this guide on how to create an A record at Cloudflare
If you do not know your IP, you can consult on our support team via Live Chat, Call or Ticket 24/7
Also, remove the Cloudflare proxy so that the Proxy Status is DNS Only.
6. Now, go to your MX record and change the Mail Server to mail.yourdomain.tld then Save
7. Wait for an hour or for propagation.
NOTE:
- This example assumes you use Truehost Cloud’s shared hosting packages for your mails. if you use other providers like Office 365 or Google Workspace (Gsuite), you can reach out t our support team for further guidance in case you get stuck.


