The Litespeed cache is an all-in-one page optimizer plugin for WordPress. This post will show you how to clear Litespeed cache.
It is intended to enhance the functionality and speed of websites by caching dynamic content and more effectively serving it to users.
Visitors can load pages more quickly due to a large reduction in server load and an improved response time.
Why use LiteSpeed? #
- Increased website performance- significantly improves the speed of your website, especially for dynamic content. This leads to a better user experience and improved search engine rankings.
- Reduced server load- helps reduce your server’s load by caching static content and dynamic pages. Frees up resources for other tasks like running applications or serving other websites.
- Improved security- improves your website’s security by caching static content and dynamic pages. Makes it more difficult for attackers to exploit vulnerabilities in your website.
- Supports purging- useful if you need to update your website or if you need to clear the cache for a specific page or group of pages.
- Content delivery network (CDN) integration seamlessly integrates with popular CDNs to further enhance the performance of static assets.
There is more than one method to clear Litespeed cache. We’ll discuss three to help you clear your cache instantly.
Method 1: Using the Litespeed cache plugin #
It’s an easy-to-use plugin that purges your website cache and makes it load fast. Here is the procedure to do this;
- Login into your WordPress
Fill in your credentials to proceed. Reset your password if you can’t recall it.
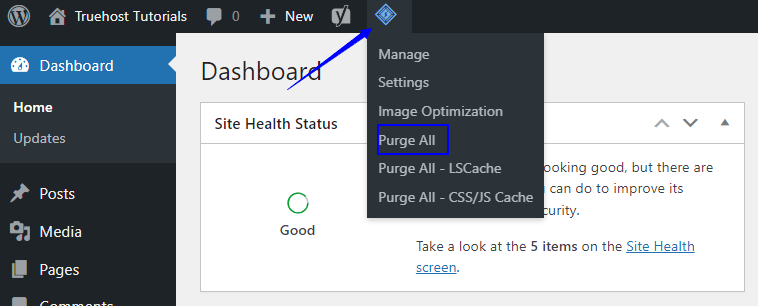
Under the Dashboard, proceed and click the Litespeed icon. Choose Purge All and clear the cache.
- Alternatively, under the Litespeed panel, select Toolbox. Click on Purge All to clear the cache.

Use this easiest method to clear the cache and improve the metrics of your site. Schedule purges for your site for convenience.
Method 2: Using cPanel #
cPanel is diverse; use it to optimize your WordPress site for greater performance. To do this, let’s proceed by;
- Login into your cPanel by visiting the assigned link and credentials. Proceed to the advanced tab and click on Litespeed Web Cache Manager.

- Select Flush LSCache
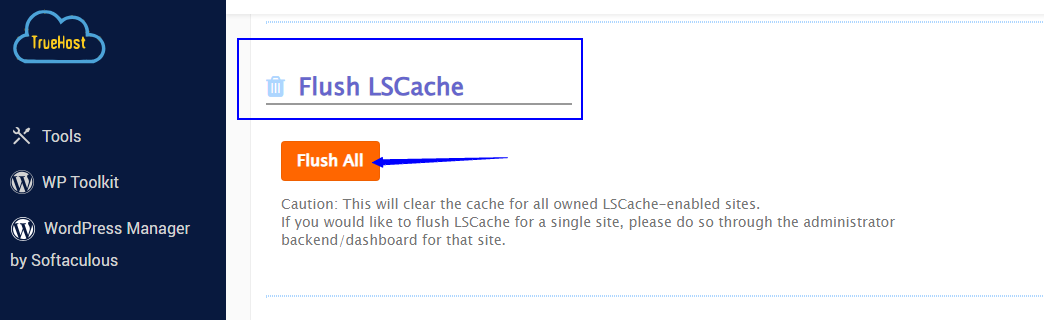
A pop will display; click ok to allow to purge all cache. That’s it!
Method 3: Using WP CLI #
WP CLI is a powerful tool that makes processes easy and fast. It is convenient as you don’t need a browser, just a command line interface.
To flush all types of Litespeed cache, navigate to the WordPress directory and use the WP CLI command:
“wp litespeed-purge all”
That’s how you clear your Litespeed Cache for a reliable site.


