Requirements:
- Compressed website files (tested and working on localhost). Zip format
recommended. - requirements.txt (a list of the Django packages for your application)
Procedure:
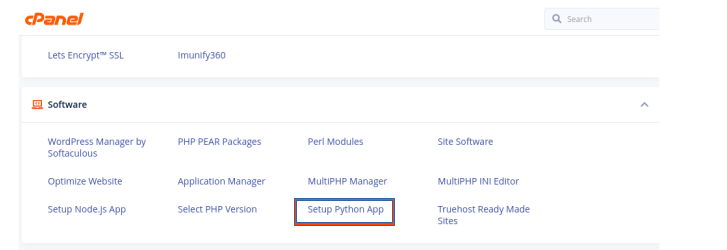
- Login to your Cpanel; Under Software, select ‘Setup python App’
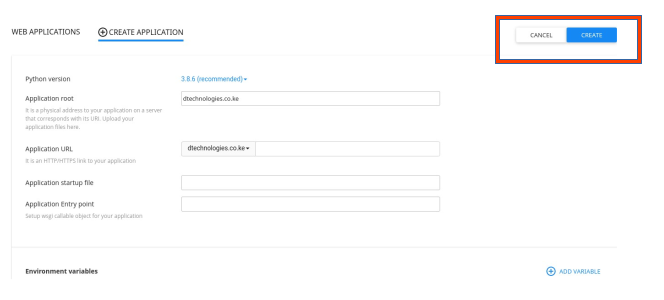
2. Click on ‘Create Application’

3. In the create Application Page :
- Python Version: Select the python version (Depending with the version you used to develop your web application. It is advisable you use the latest version)
- Application root: Set the root application folder for your application. It is advisable to use the domain name.
- Application Url: select the domain on which you wish to install the Django application on.
- Leave the other fields blank; they will be pre-filled once the application has been created; then click on ‘CREATE’
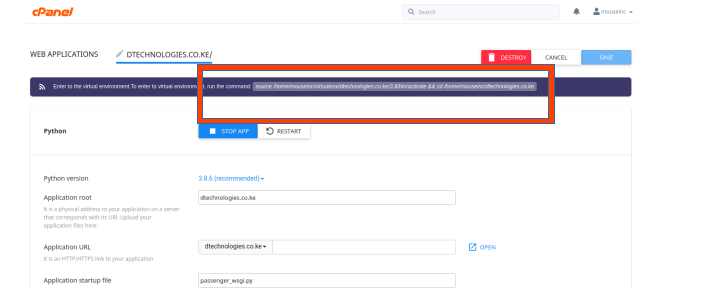
4. Copy the highlighted text below for use in a later stage
5. Navigate to the root folder of your project and upload the compressed project
folder; extract the files.
6. On your root directory; select and edit passenger_wsgi.py ; delete the content and
add the following line;
from testproject.wsgi import application
where testproject is the folder containing the wsgi file, usually the parent folder created by django-admin startproject testproject
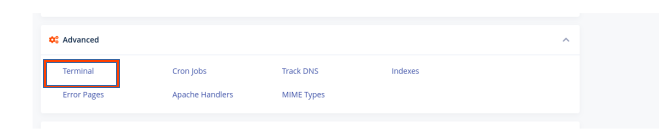
7. On your cpanel homepage, select terminal under Advanced group
8. Paste the text copied in step 4. -If you did not copy, go back to setup python app
script and click edit application and copy the link. This launches the virtual
environment created for our Django project; ready to execute commands and run
the following lines of code;
I. pip install -r requirements.txt → to install all the modules for our project
II. python manage.py makemigrations → To create project tables
III. python manage.py migrate → to map project tables to our database
IV. python manage.py createsuperuser → To create an super user /administrator
account
V. python manage.py collectstatic → To map django static files in the respective
folders ; -This is defined during development
9. Navigate back to the root folder for your project; and locate the parent folder ,
testproject in this case, select and edit the settings.py and edit the following line;
I. ALLOWED_HOSTS = [‘enter your domain name here eg mydomain.com’]
II. DEBUG = False → Let this remain True for debugging but do not forget to
turn it off when done ;
In this stage, our site should be up . When DEBUG= True, we will be able to tell in case
there is an issue .
Lastly, you will realize that if you try to access the admin page youdomain.com/admin;
the static files may be missing.
To fix this click on F12 on your computer; here you will see where your site is trying to retrieve
the static files; This depends on the location you had set in your settings.py . Copy
the django default static files to the respective folder for the static files to load correctly.
Lastly in the settings.py , remember to set DEBUG to False DEBUG = False
Quick Troubleshooting
If your site still throws errors; ( server error 500) launch the terminal (step 7 and step 8) and enter the
following command:
python manage.py runserver
In case of server error 503, recreate the python application using a lower/higher python version.


That was a great read there. Helped me in hosting a django app real quick.
cant see terminal on advanced. instead i see light speed web cache manager
Which plan will I have to purchase
Wazi bro been struggling with this, now I am perfectly okay.