Sending Mails from Gmail #
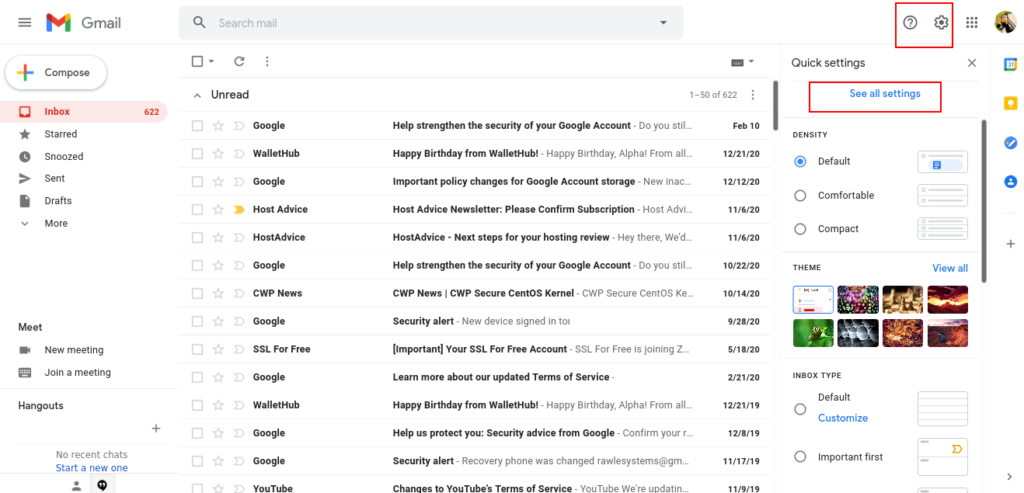
1. Login to Gmail
2. On the top left Corner, click Settings icon then See All Settings
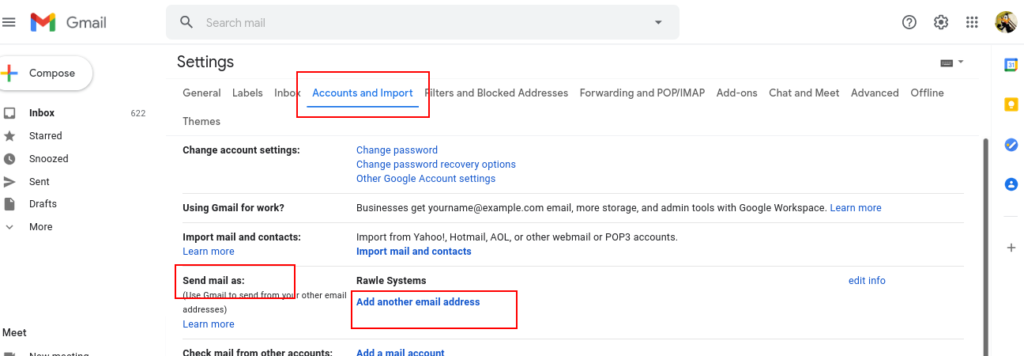
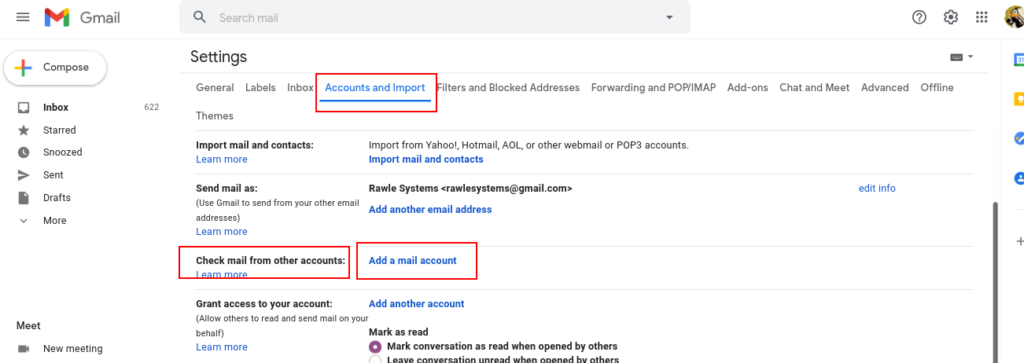
3. Click Accounts and Imports
4. Under Send Mail As section, click Add another email address
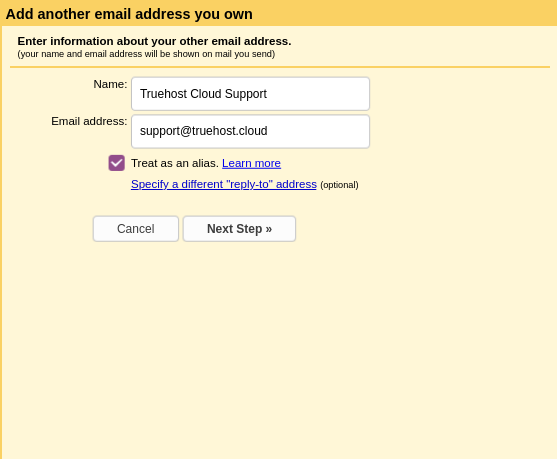
5. On the page that appears, enter your Name and the email address you want to configure then click Next. eg Name: Truehost Cloud, Email: [email protected]
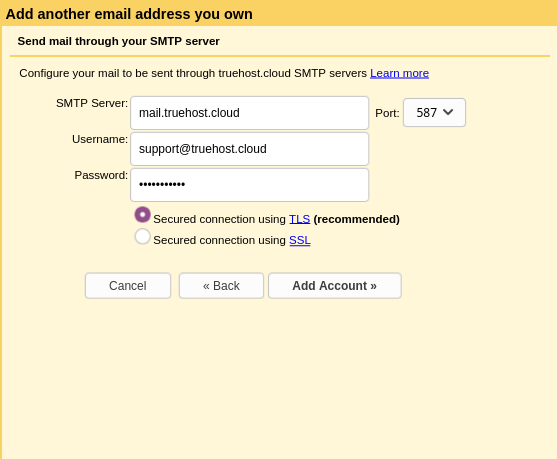
6. On the next page, fill in the details as follows: Assume my domain is called truehost.cloud
SMTP Server: mail.truehost.cloud (replace with your domain name)
Username: [email protected] (replace with your email address)
Password: email password
Select the option below:
Port: 587
Then click Add Account
You will then receive a verification code from Google on your email address, in my case [email protected]. Check your email for the code and Copy-Paste it on the dialog box
Once done, you can now move to the section below
Receiving Mail to Gmail Address. #
To receive your mails to your Gmail account, follow the steps below
1.Follow steps 1 to 3 above.
2. Click on Check mail from other accounts then Add a mail account
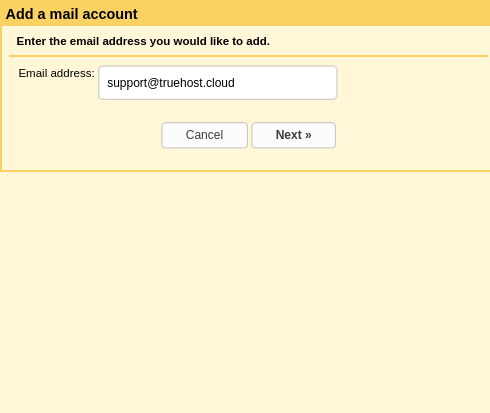
3.Enter your email address and click Next
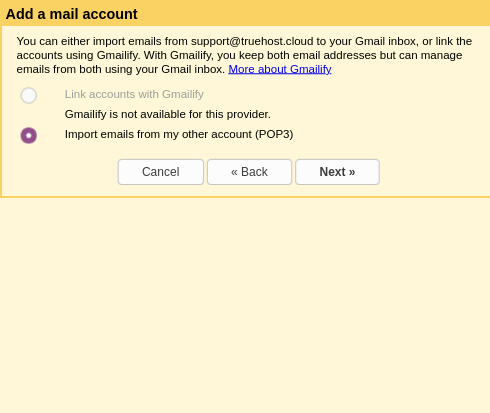
4.Select Import emails from my other account (POP3) as shown below then click Next
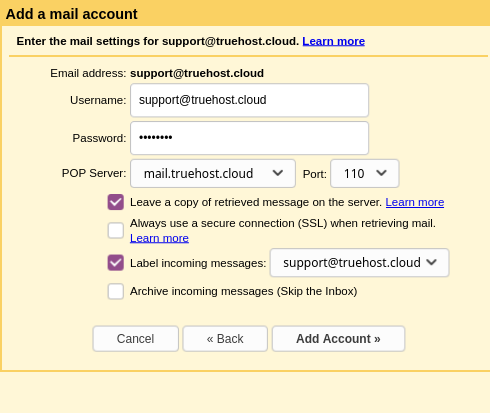
5. Enter the details as below
Username: Full email address eg [email protected]
Password: password to the email
POP Server: mail.truehost.cloud (replace with your domain)
Port: 110
Select the option Leave a copy of retrieved message on the server and Label incoming messages
Click Next
Your set up is now complete!!! You should be able to Send and also Receive your webmail emails on Gmail.


Well I tried it and failed due to unknown issues to me.
I don’t know which email password to use. The Gmail email or the domain email?
For domains whose Name Servers are routed through a CD or custom DNS, this settings may not work.
I have set via GMAIL but it says that the account is suspended