For most third party services such as Google Search Console, Blogger, etc you are required to verify that you own a specific domain before you can use it with the third party service.
Generally, three methods are provided to allow verification of the domains:
- DNS method
- HTML method
- File upload method
With DNS method, you will be provided with a TXT record or CNAME record and asked to update that on your domain DNS Manager. If you succeeded in this, it means you own the domain hence you will have verified ownership.
Similarly, for HTML method, you are provided with a some HTML content and asked to update this on your website files. This may be often complex as most people use CMS to build their websites and may have a hard time locating <head></head> section of the files for them to insert needed content.
Finally, in File upload method, you are provided with a file and asked to upload it on your web server at a specific location. This may also present some challenges depending on the way your site was built.
Therefore, the method we recommend is DNS method. This is what we will further on in this article.
Verifying Ownership using DNS Method. #
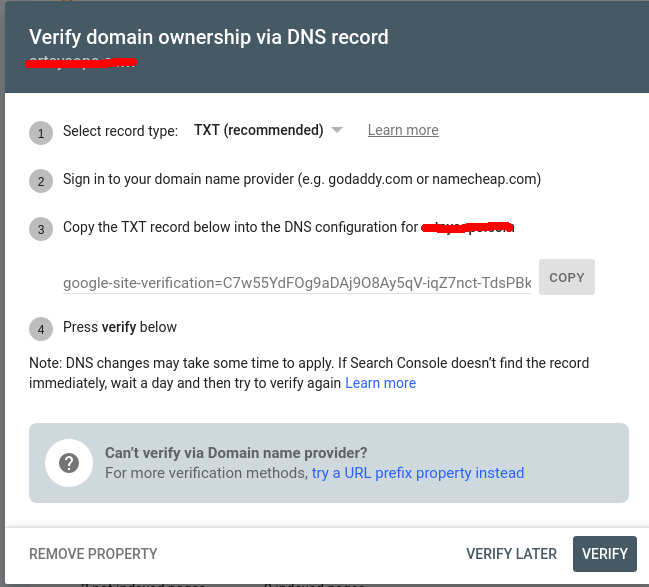
The first thing would be to get the DNS records you are required to use. These are provided by the service provider. For example, if I want to verify my domain so I can consume Google Search Console services, I will be provided with DNS records by Google on my dashboard as follows
Then you need to copy the DNS records and sign in to your DNS Management platform. Here, we will consider the three popular DNS platforms below:
cPanel Zone Editor #
This applies if you have cPanel hosting. If you do not, please skip these steps and go to the next section
- Login to your cPanel
- Navigate to Zone Editor and click Manage
- Click Add Record button. Change the Type column to TXT then copy in the DNS records
Olitt DNS Manager #
If you do not have hosting, we provide free DNS management platform via Olitt. All you need to do is create an account with us then use this guide to login to your DNS dashboard.
Once there, follow these steps to add your domain
- Go to DNS Management
- Click Manage next to your domain name. If not listed, you can click Add Domain button on your top right
- Click Add Record button and type in your DNS record details.
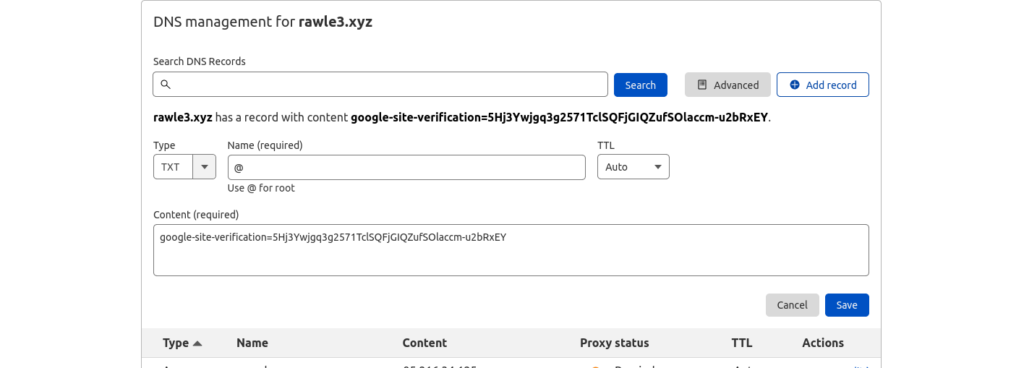
Cloudflare #
If you use Cloudflare for your DNS, follow these steps instead.
- Login to Cloudflare
- Click on your Domain name then click DNS tab on the left menu
- Add your DNS record then click Save.
If you use an external DNS service, check with the Support Team on how to update the DNS records successfully.
Once done, you need to go back to your third party service provider that wanted you to verify ownership and initiate a check. Normally, a button labelled Verify or Check is provided for you to complete the process.


