DKIM and DMARC records are used to enhance email security.
DKIM records are used to sign an email message so that to confirm to the receipeint server that the email they have received has not been altered since it first left the sender’s server.
DMARC on the other hand, is designed to prevent spoofing of emails. It checks the DKIM and SPF records and determines if both these record match the domain name at the From Email Address.
It is recommended to include both in your DNS for better email security
Adding DKIM Record #
1.Login to your Cloudoon Mail using the Administrator account. This is typically the first email account that was created for you. If unsure, please contact support.
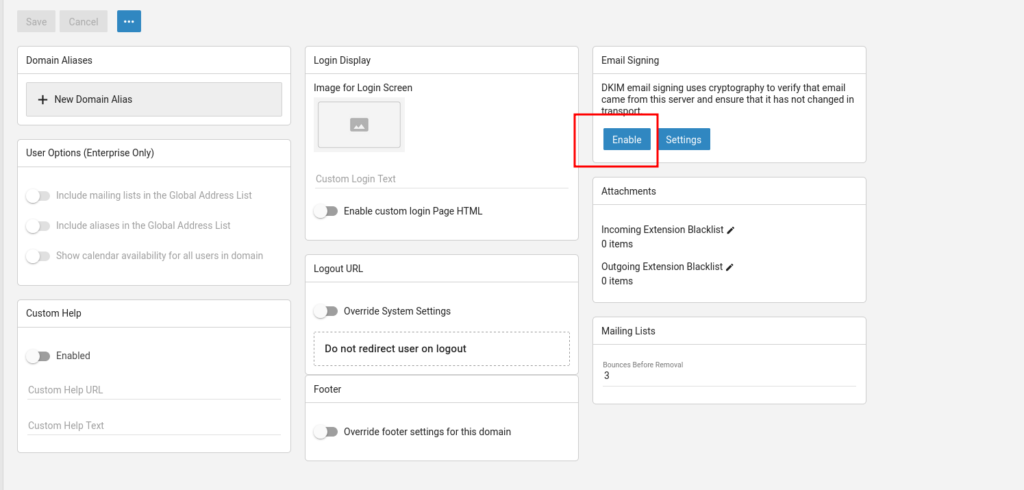
2.Navigate to Settings icon then click Email Signing then Enable

3.Click Enable to view the following
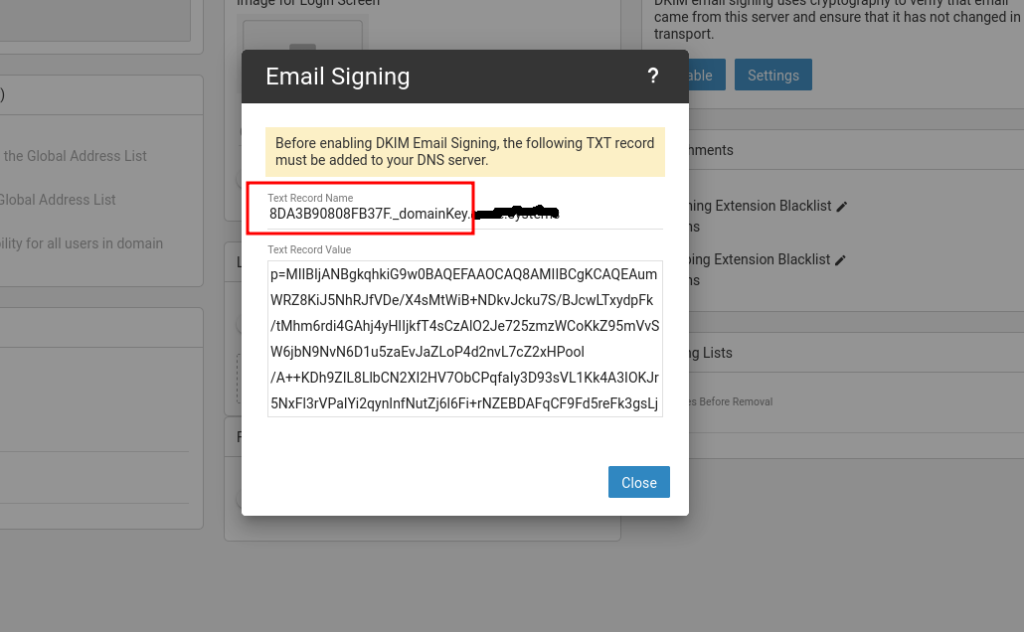
4.Now on your browser, open a different tab and access your DNS management platform. Type in the following [Read the note below the table regarding DKIM record]
| Name/Host | TTL | Record Type | Value/Destination |
| 8DA3B90808FB37F._domainKey | 3600 | TXT | v=DKIM1; k=rsa;p=MIIBIjANBgkq……. |
NOTE: On the Value/Destination column, you must first add the characters v=DKIM1; k=rsa; before copying the long text value that starts with p=…. provided on your Cloudoon Mail interface. This is not included on the Cloudoon Mail interface but is assumed you will add it while creating your DKIM Record
5. Finally return to your Cloudoon Mail interface and click Enable once again so that DKIM is now enabled.
Adding DMARC Record #
For DMARC, simply add the record below
| Name/Host | TTL | Record Type | Value/Destination |
| _DMARC | 3600 | TXT | v=DMARC1; p=quarantine; sp=quarantine; fo=1; adkim=r; aspf=r |
If you want to know more about how DMARC record above was generated, please refer to this article


