Virtualizor is a powerful , all in one web based VPS control panel. It is utilized in provisioning and managing of VPS purchased at Truehost.
It also comes with an END user panel that allows users to perform some VPS tasks.
Here is an overview of how it looks and works.
Accessing the Virtualizor
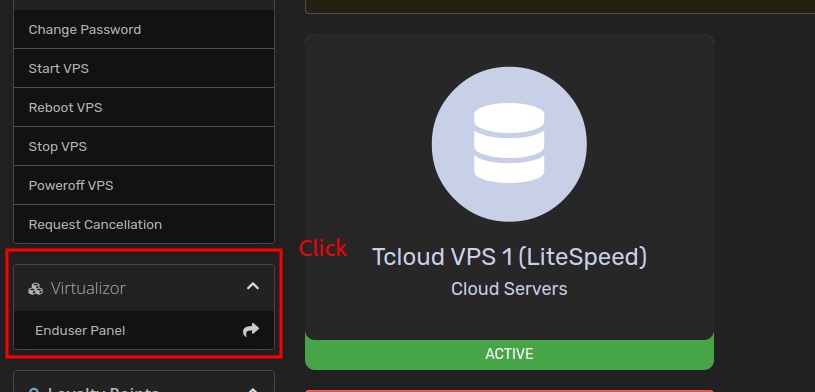
11. Login to your Truehost Client Area -> Products/Services -> Click on your VPS.
2. Click Enduser Panel.
3. Overview the End User Virtualizor Dashboard.
Here you can
List VPS servers.
Add SSH Keys
Upload your own ISO
Manage Firewall.
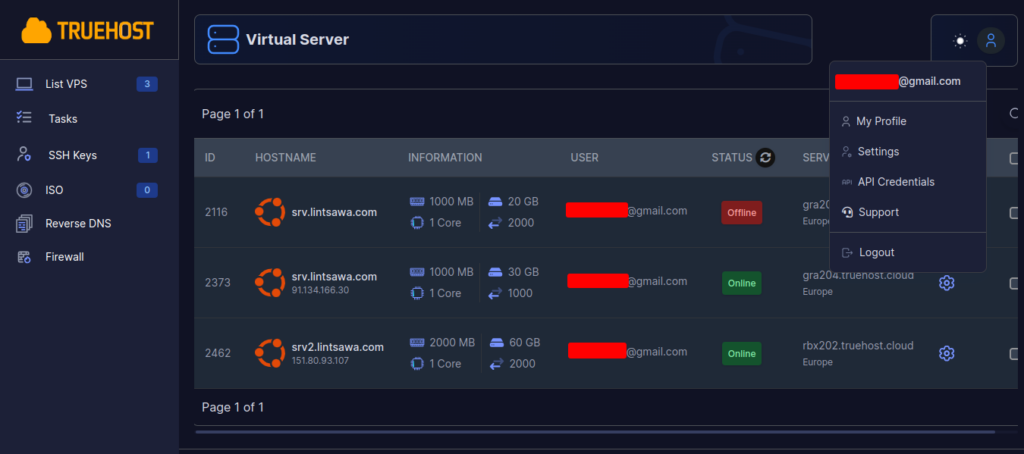
Click on the Settings Icon to Open The next Page for more Overview.
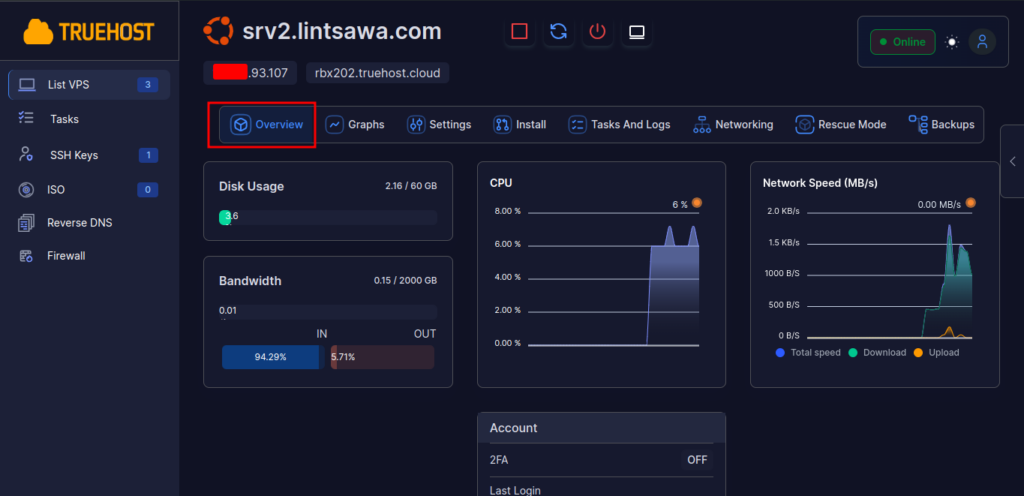
4. Overview.
Here you can have a quick overview of:
Server Actions to perform.
Power off the VPS.
Restart the VPS.
Connect to VNC.
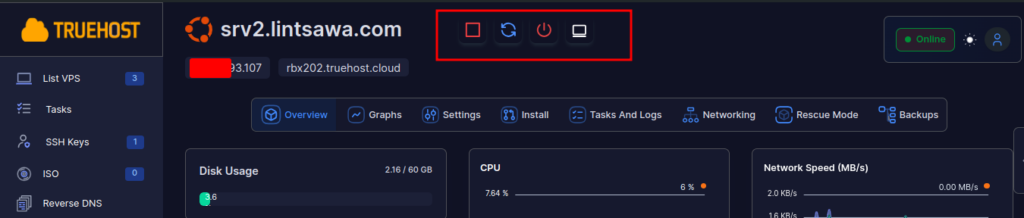
Your IP and the Node your VPS is hosted on. In my case it is on NODE-rbx202.truehost.cloud
Disk Usage.
CPU usage
Network Speed (MB/s)
Account.
5. The Graph Section.
The Graph section is divided into 2.
Bandwidth Statistics and System Statics.
Part 1: Bandwidth Statistics.
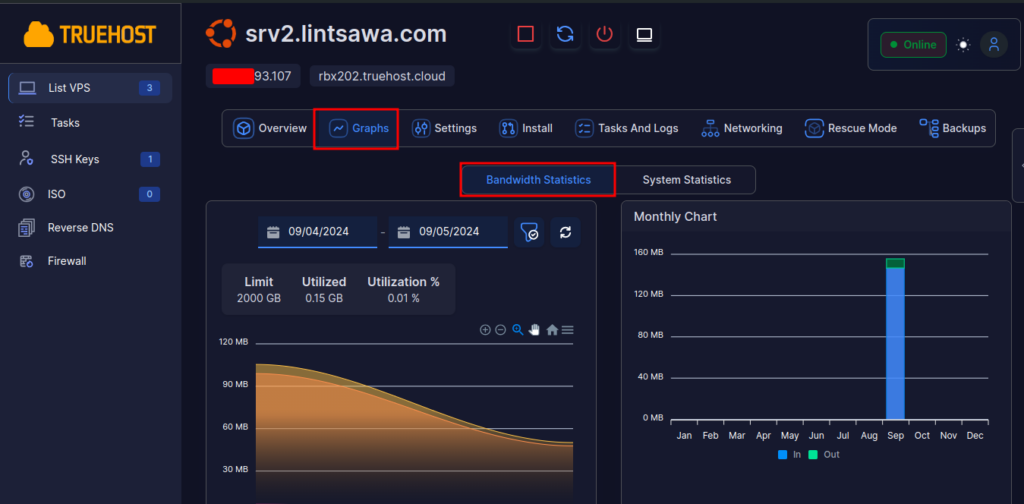
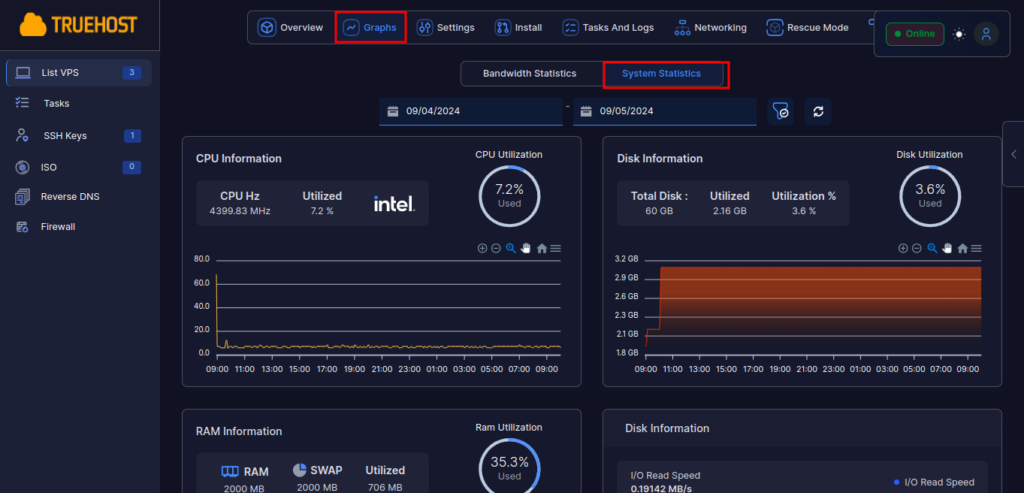
Part 2 : System Statistics.
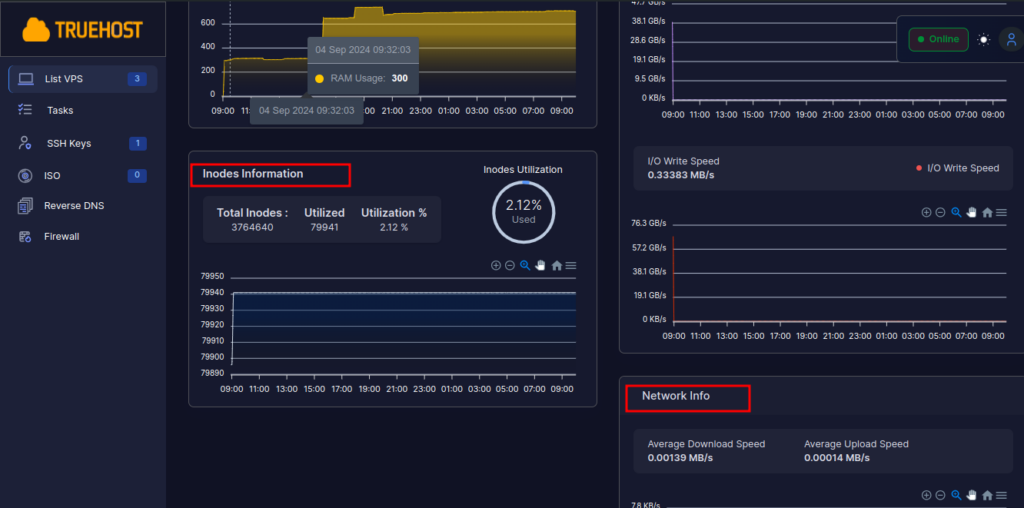
Here you will see
CPU Information.
Disk Information.
Ram Information.
Inodes Information.
Network Information.
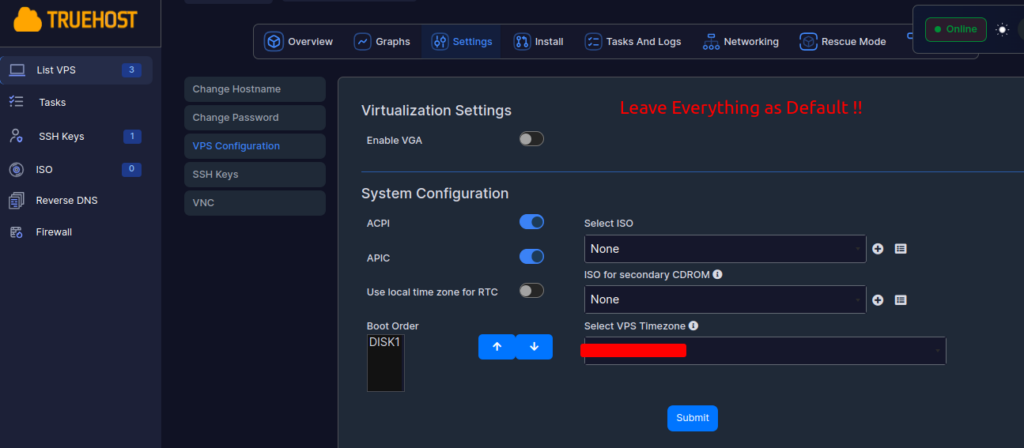
6. Settings
On the Settings Tab, you can
Change Hostname
Change VPS root Password.
Add and use SSH keys
Launch VNC and Change VNC password.
Configure VPS.

For VPS configurations, leave default as changing settings here may break your system or cause the server to go offline.
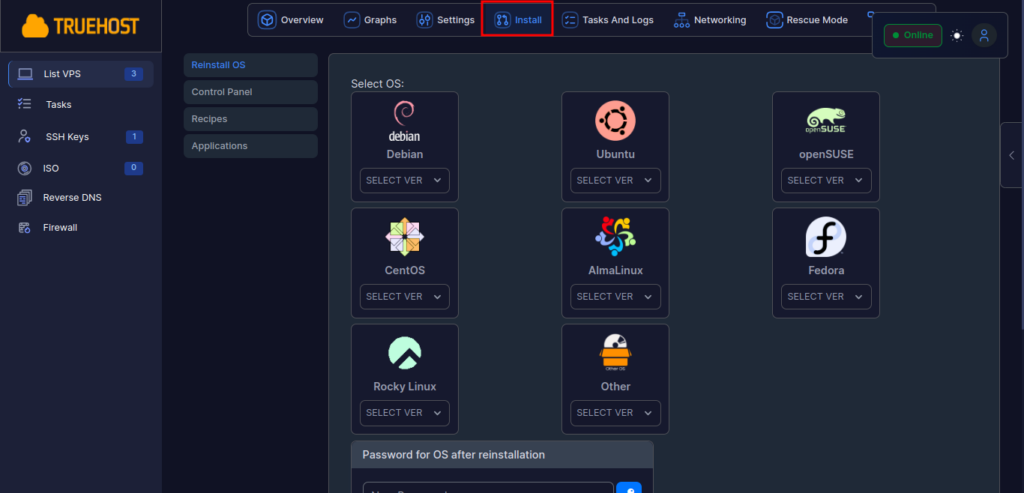
7. Install.
The Install tab allows you to
Re-install OS.
Install a Control Panel.
Execute premade scripts/ Recipes
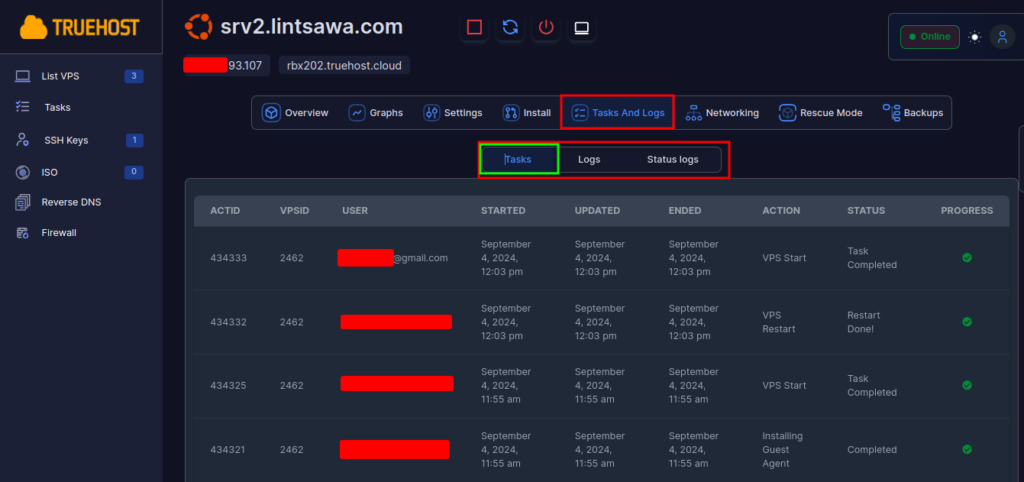
8. Tasks and Logs
Here you can view your VPS tasks, logs and Status logs.
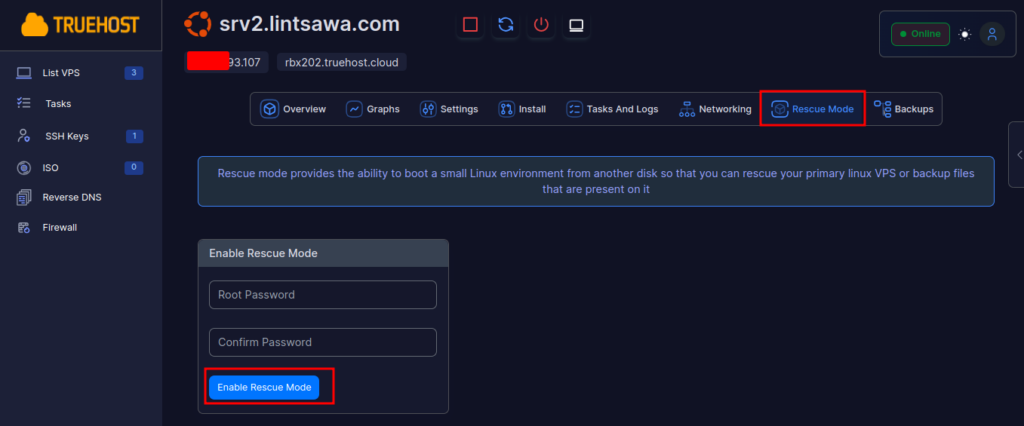
9. Rescue Mode.
Here you can enable Rescue mode to perform server repair or other activities.
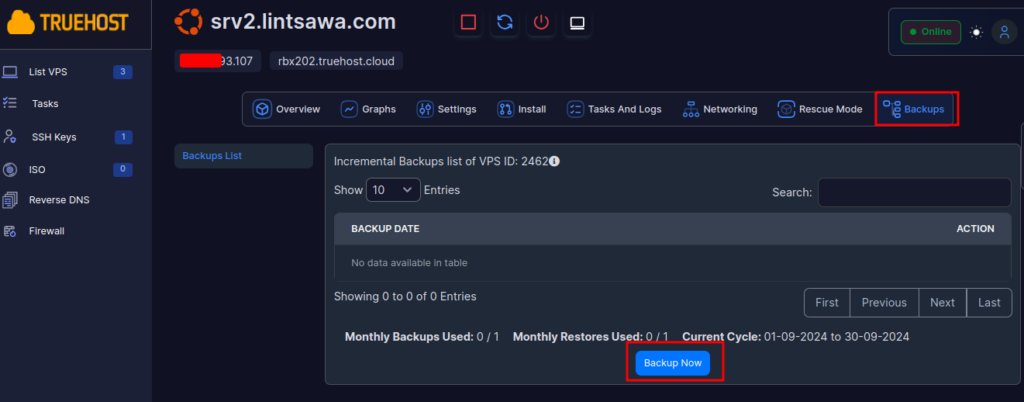
10. Backups.
Will only work if you have subscribed to Backup plans as the VPS do not have backups by default.
That was a quick overview of the Truehost Virtualizor Panel.
Send me my VNC username and password i can’t login to my Vnc in my client area help me send me back the username and password to login