CyberPanel, a popular hosting control panel powered by OpenLiteSpeed, provides robust features for managing websites and servers. However, securing your server is essential to protect data, ensure uptime, and prevent unauthorized access. This article outlines how to implement effective firewall and security measures in CyberPanel.
1. Enabling and Configuring the Built-in Firewall #
CyberPanel includes a built-in firewall tool that integrates with ConfigServer Security & Firewall (CSF). Here’s how to enable and configure it:
- Log in to CyberPanel: Access your CyberPanel dashboard using your admin credentials.
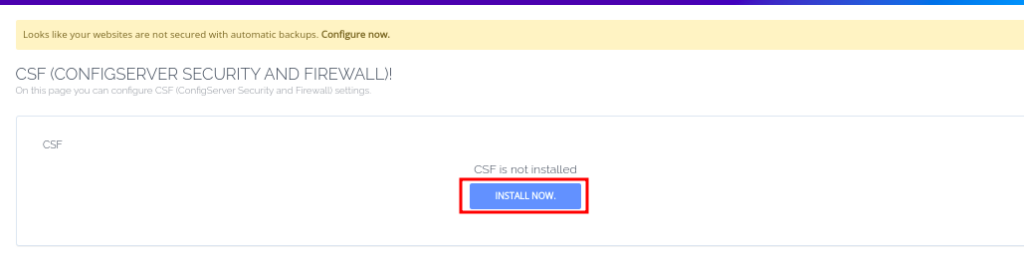
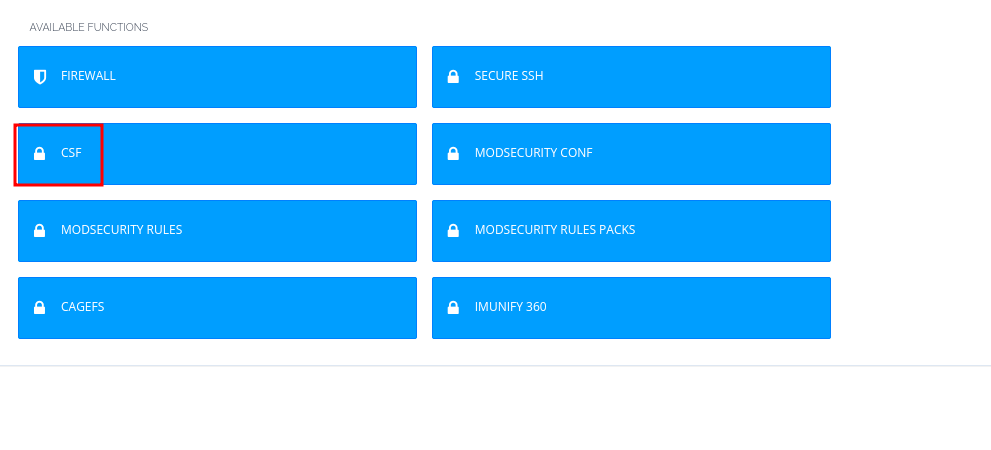
- Navigate to Firewall, then Go to Security > CSF Firewall.

- install CSF, if not installed, by clicking on the install button that is provided
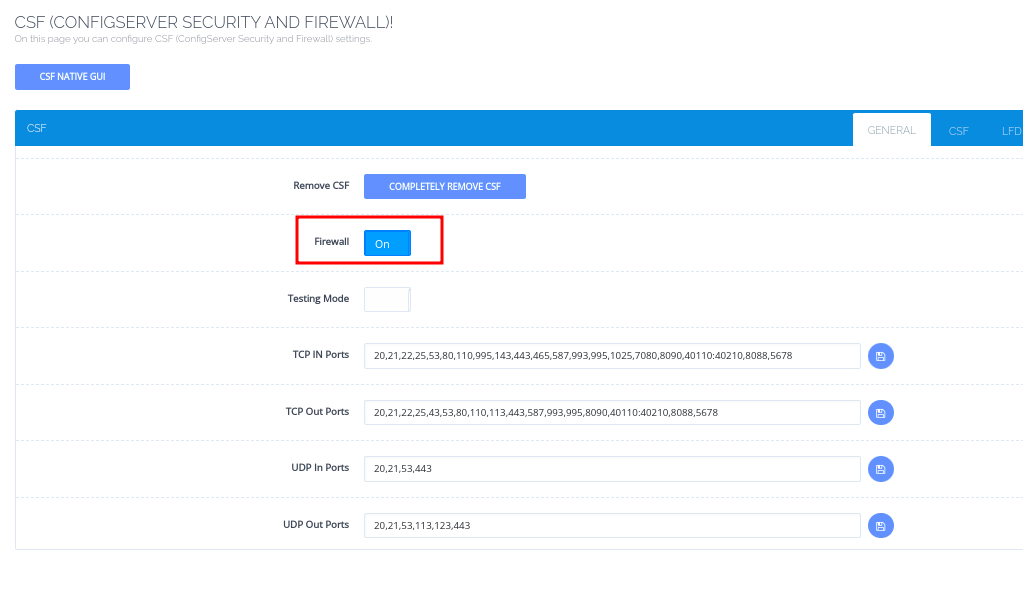
- Enable CSF: If not already enabled, toggle the firewall settings to activate it.
- Add Firewall Rules:
- You can define inbound and outbound rules.
- For instance, allow specific ports like 80 (HTTP), 443 (HTTPS), or SSH (default 22) and block unnecessary ports to reduce attack surfaces.
- To do that, you can just add the ports in the field provided, and separate them with comas, then click the save button.

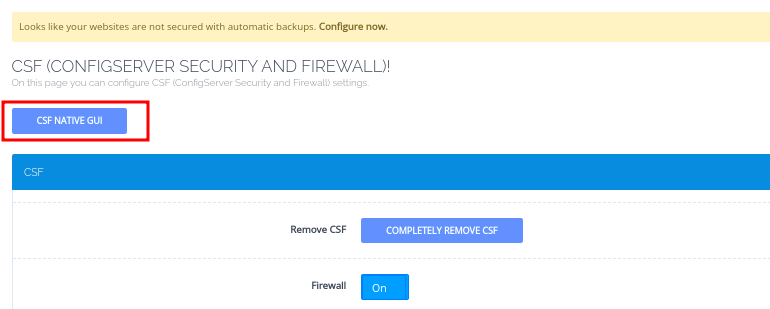
- You can also use the CSF Native GUI then go to Firewall Configuration

- Once done, click on the Add button to add the rule.

- Scroll down to IPv4 Port Settings section and add the ports that you want to enable, under TCP_IN, TCP_OUT, UDP_IN, UDP_OUT
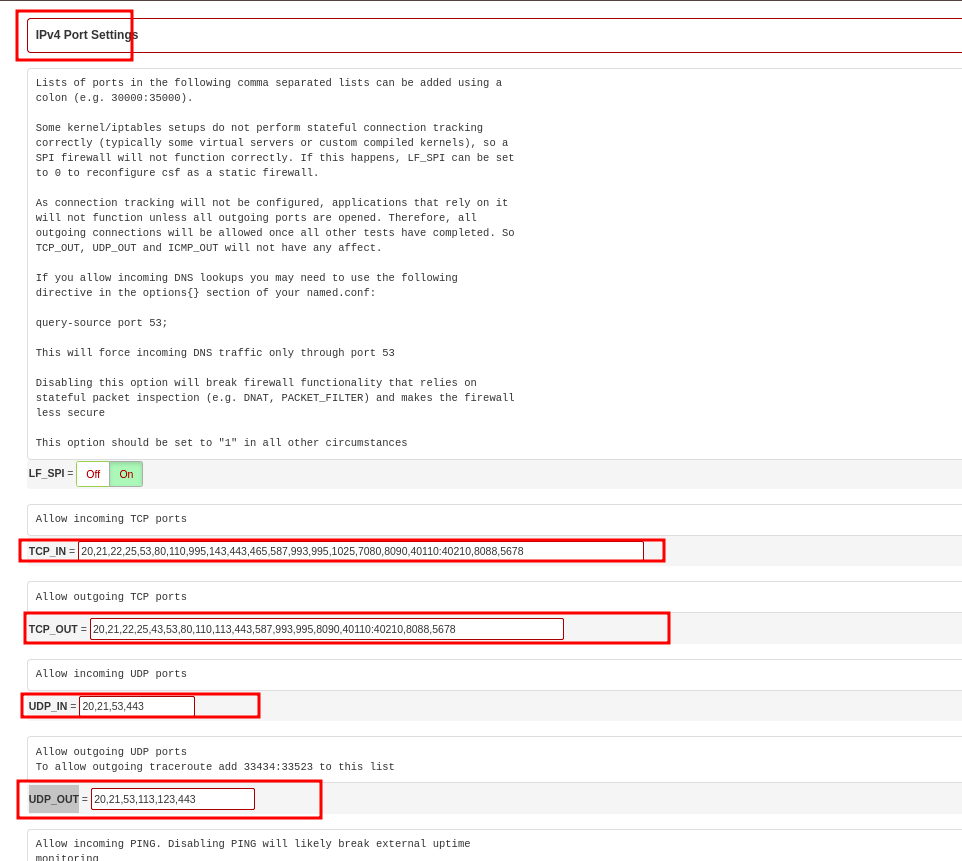
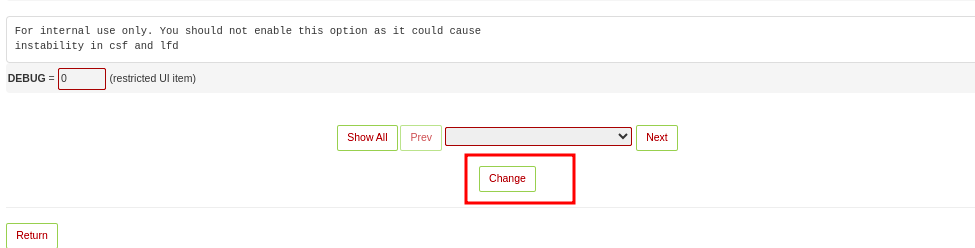
- Once done, scroll to the very bottom of the page and click on Change, to save changes.
2. Using IP Address Banning #
Blocking suspicious IP addresses is crucial to thwart repeated login attempts and DDoS attacks:
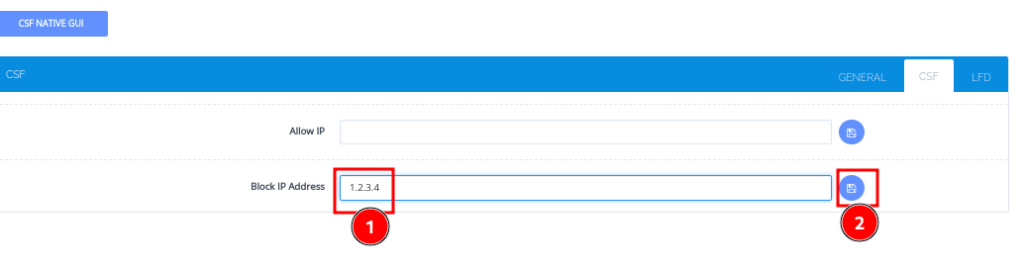
- Navigate to Security > CSF
- Click on CSF tab to see two options; one for Allow IP and the other for Block IP Address

- Enter the IP addresses you want to block in the Block IP Address field and click the Save icon
- You can also do that from the Configurations section, by adding the IP in the Quick Deny Section, then give it a comment to show why you denied it
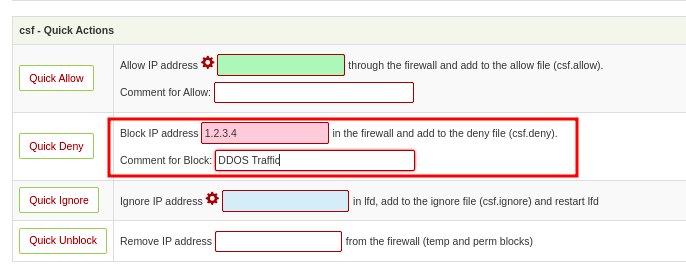
- You will then click on Quick Deny to block the IP.
Additionally, configure IP Limiting under CSF settings to automatically block IPs after a certain number of failed login attempts.
3. Implementing ModSecurity for Web Application Protection #
ModSecurity is a web application firewall (WAF) that helps protect against common vulnerabilities:
Enable ModSecurity:
- Go to Security > ModSecurity in CyberPanel.

- Install Mod Security using the installation button provided.
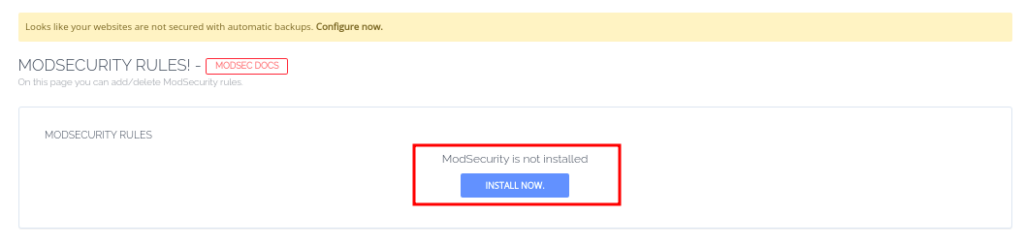
- Once done, you can switch it on for your domains.
Install Rulesets:
- Use default rules or download rulesets like the OWASP ModSecurity Core Rule Set (CRS) for comprehensive protection against SQL injection, XSS, and other web attacks.
4. Managing SSH Security #
Unsecured SSH access can be an entry point for attackers. Enhance its security with these measures:
- Change the Default SSH Port:
- Avoid using port 22 to minimize brute-force attacks. See this article on how to.
- Disable Root Login:
- Prevent direct root access via SSH by following these instructions.
- Use SSH Keys:
- Enable key-based authentication for added security. Here is how to
5. Enforcing Strong Password Policies #
Weak passwords are a major vulnerability. CyberPanel lets you enforce strong password policies for all users:
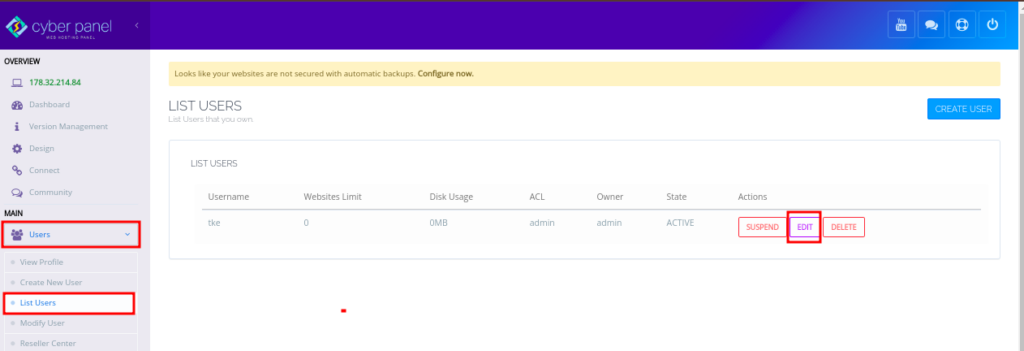
Go to Users Management:
- Navigate to Users > Edit User.
Update Passwords:
- Encourage the use of passwords with a mix of uppercase, lowercase, numbers, and symbols.
6. Enabling Two-Factor Authentication (2FA) #
- Two-factor authentication adds an additional layer of security. You can set it up suing these steps
7. Regular Security Updates #
- Outdated software is a common vulnerability. Ensure that CyberPanel, OpenLiteSpeed, and all installed applications are up to date:
Check for Updates:
- Log in to CyberPanel and navigate to Version Management.
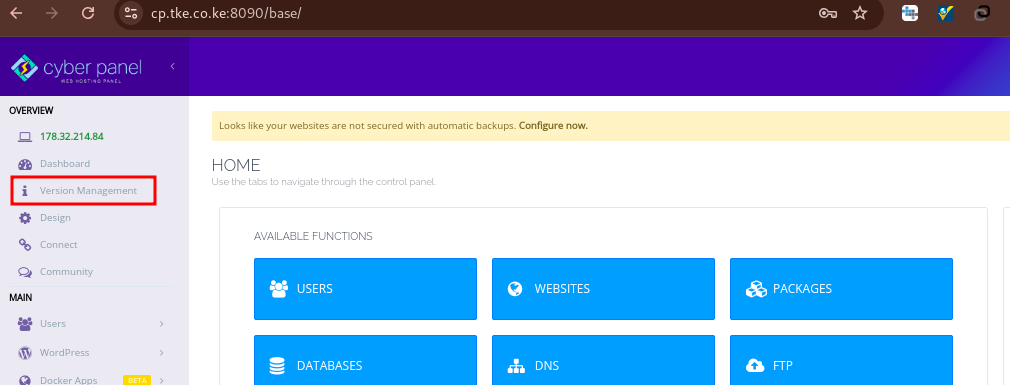
- If you see a message that says Note: Latest commit does not match, please upgrade then you will need to SSH to your Cyberpanel server and upgrade it by running the command below;
cyberpanel_utility- You will then type 1, followed by Enter to upgrade the Cyberpanel
- You can then update other packages following these steps
8. Configuring Backups #
- Always have a backup strategy in place.
- You can Set Up Automated Backups on your Cyberpanel server to ensure that you have something to recover from, if anything goes wrong.
9. Monitoring and Logs #
Stay vigilant by monitoring your server activities:
- View Logs:
- CyberPanel provides logs for SSH, web traffic, and email. Regularly review them for unusual activity.
- Install Monitoring Tools:
- Use tools like Fail2Ban to monitor failed login attempts and ban malicious IPs automatically.
10. Educating Users #
Finally, educate users and administrators about best practices, such as:
- Avoiding phishing attempts.
- Recognizing signs of malware or hacking attempts.
- Using secure communication protocols like HTTPS and SFTP.
Author’s Final Word #
Implementing a firewall and security measures in CyberPanel is crucial for maintaining server integrity and protecting against cyber threats. The above the steps can help you create a secure hosting environment that ensures data safety and minimizes risks.