CloudPanel is a contemporary, free server control panel that obsesses on simplicity in server configuration and management.
Use a High-Performance Technology Stack to quickly run Python applications, PHP, Node.js, static websites, and reverse proxies.
Installation #
To install Cloudpanel is a seamless process that can be achieved by following the steps below.
Requirements #
a) Root user access to the server
b) OS – Have a fresh installation of either Debian 11 /12, or Ubuntu 22 or 24.
Steps #
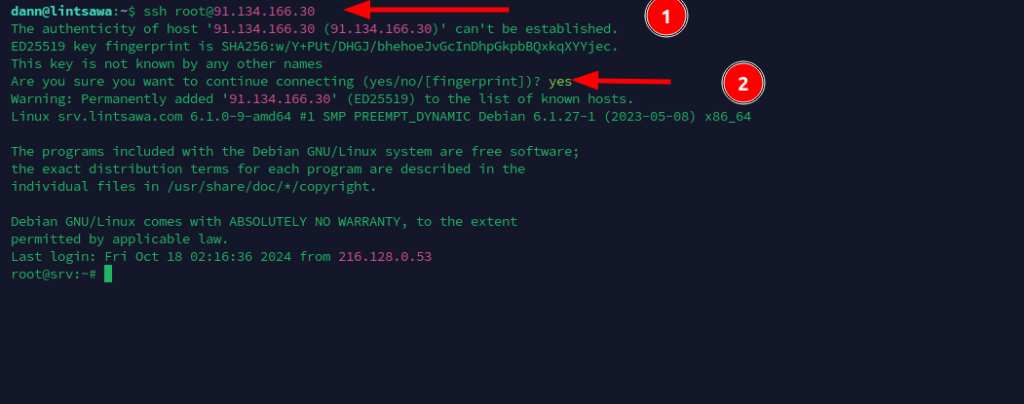
Step 1: Login to your server via SSH.
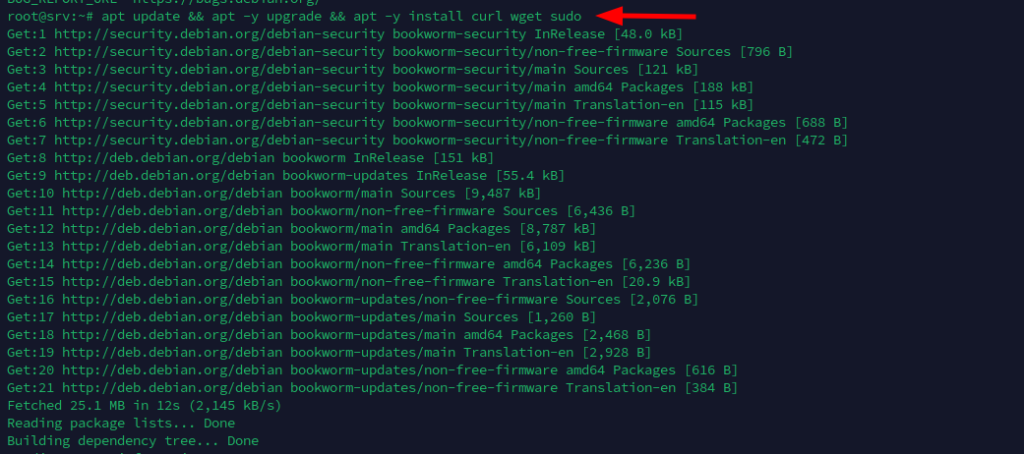
Step 2: update the system and install the required packages.
apt update && apt -y upgrade && apt -y install curl wget sudo
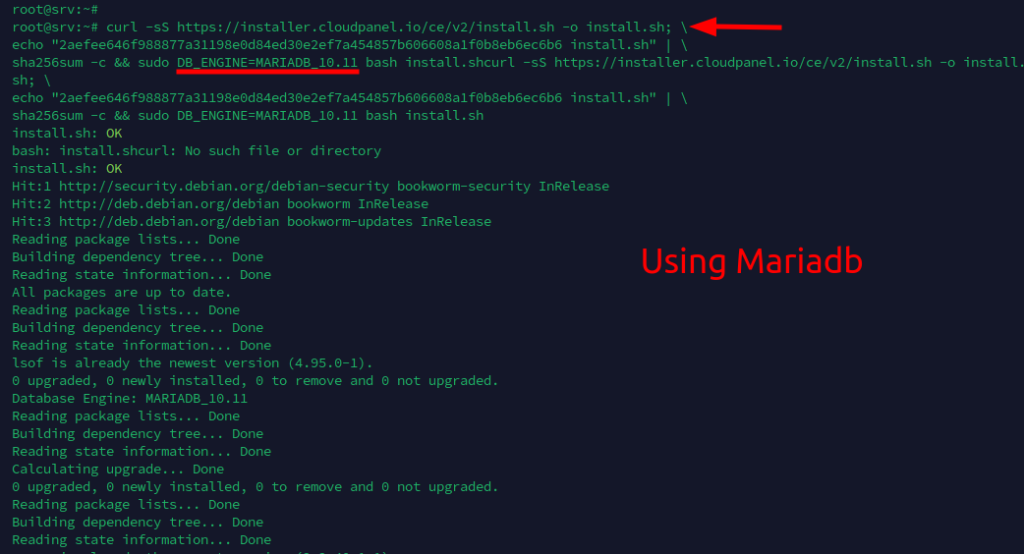
Step 3: Run the installer with your preferred Database Engine.
Mariadb 10.11 #
curl -sS https://installer.cloudpanel.io/ce/v2/install.sh -o install.sh; \
echo "2aefee646f988877a31198e0d84ed30e2ef7a454857b606608a1f0b8eb6ec6b6 install.sh" | \
sha256sum -c && sudo DB_ENGINE=MARIADB_10.11 bash install.sh
Mysql 8.0 #
curl -sS https://installer.cloudpanel.io/ce/v2/install.sh -o install.sh; \
echo "2aefee646f988877a31198e0d84ed30e2ef7a454857b606608a1f0b8eb6ec6b6 install.sh" | \
sha256sum -c && sudo bash install.sh
Should you need a lower database version, Ensure you use Ubuntu 22 or Debian 11.
Ubuntu 24 and Debian 12 only support mysql 8.0 and mariadb 10.11
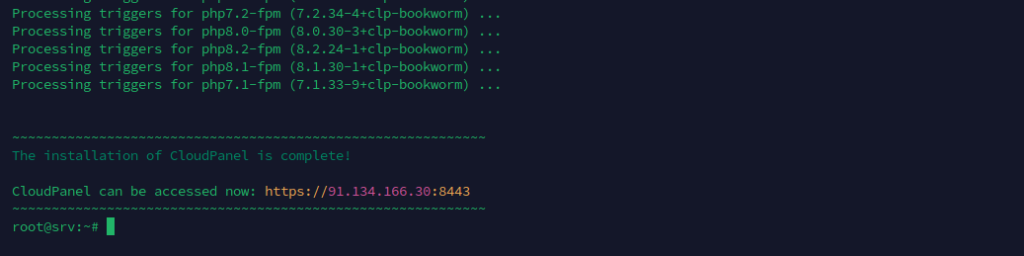
Once Installation is completed, copy the URL to access the dashboard.
https://11.22.33.44:8443
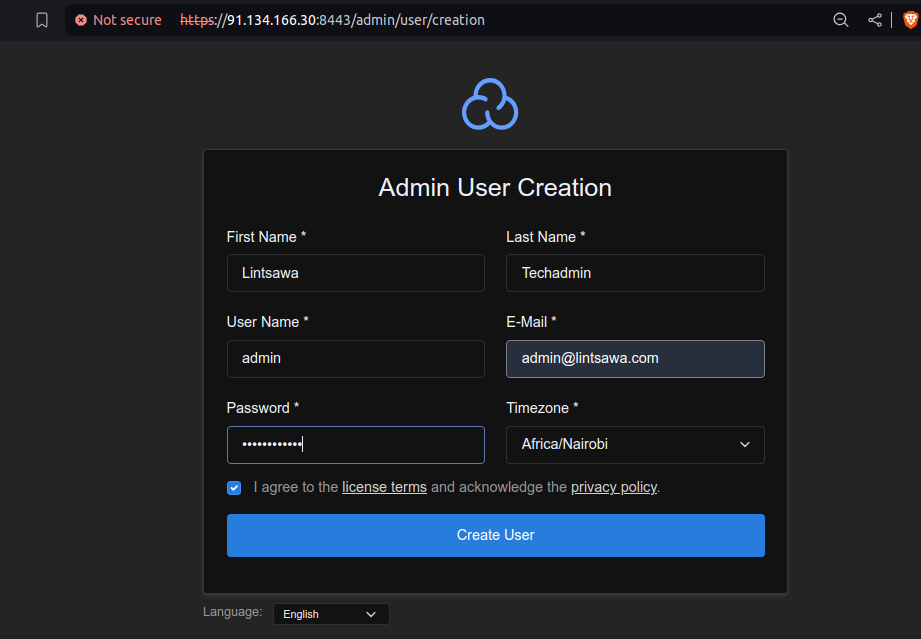
Step 4: Create admin user account
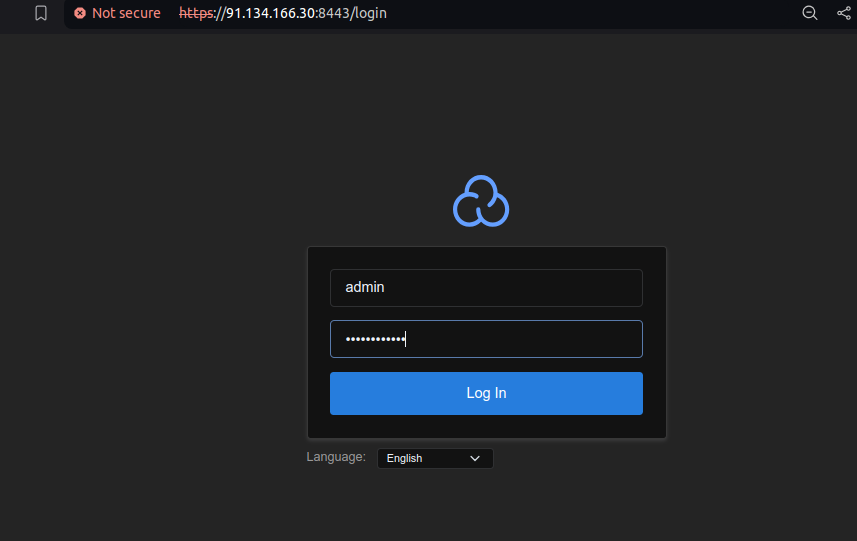
Step 5: Login to Cloudpanel using the credentials created in previous step.
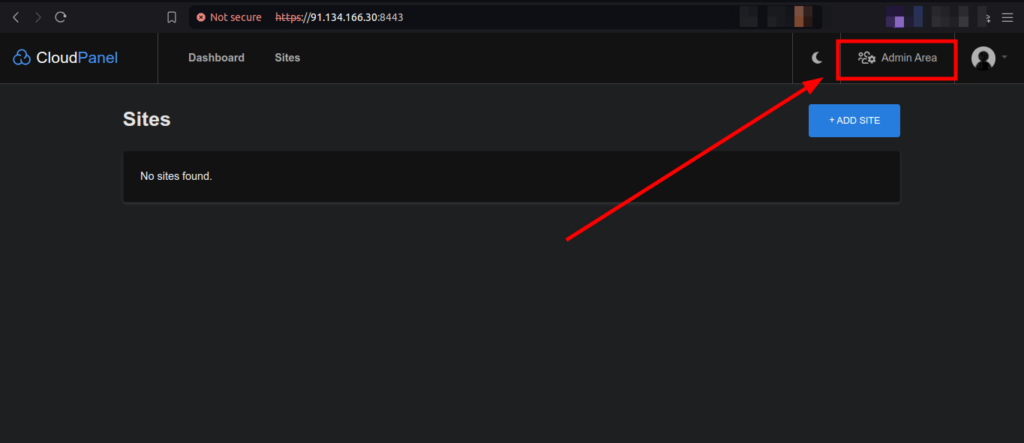
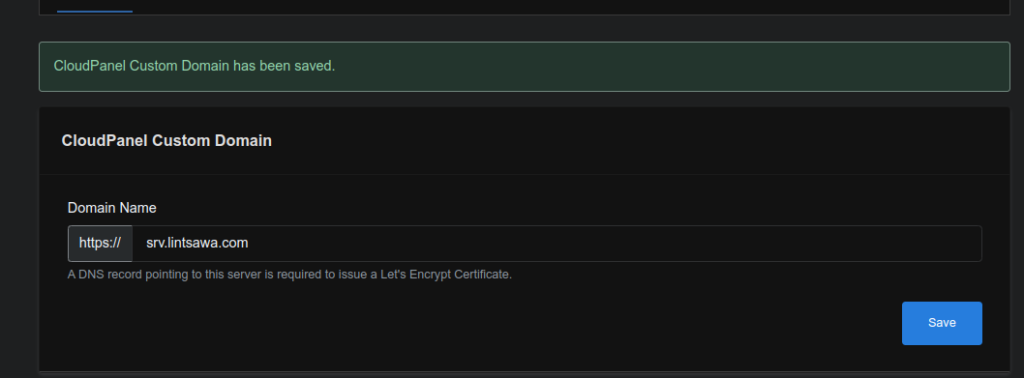
Step 6: Setup your hostname for accessing the dashboard.
Click on Admin Area
Go to settings and setup hostname.
Ensure the name being used has a DNS record pointed to the server.
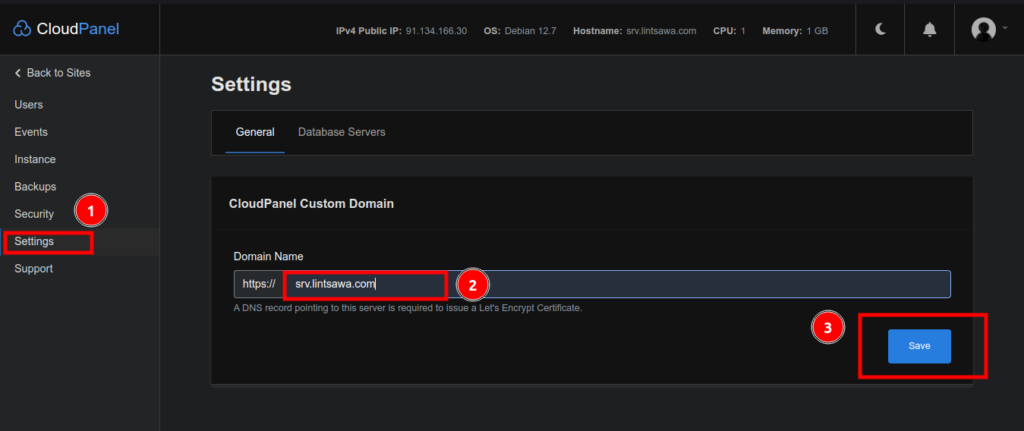
You will see “CloudPanel Custom Domain has been saved.“
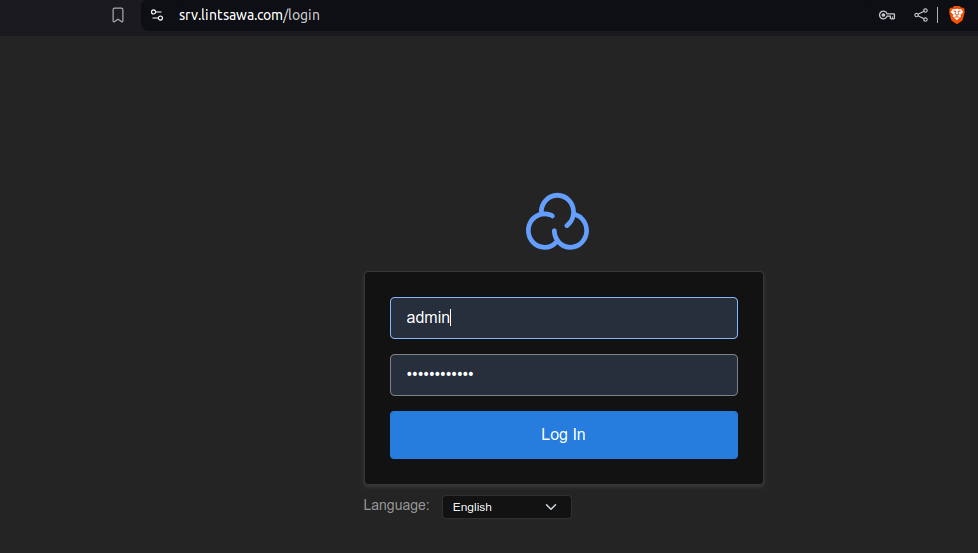
Step 7 : Access Cloudpanel using the new hostname
https://server.yourdomain.com/login
That’s it. All done!
Happy Hosting!!!