WordPress is one of the most popular content management systems (CMS) in the world, powering millions of websites. However, its popularity also makes it a prime target for hackers and malicious attacks. Ensuring your WordPress site is secure is crucial to protecting your data, your users, and your online reputation.
Fortunately, Softaculous, a popular auto-installer available in cPanel, makes it easy to enable robust security features for your WordPress site.
In this article, we’ll walk you through the steps to enable these security features using Softaculous.
Step 1: Log in to cPanel #
To get started, log in to your hosting account’s cPanel. You can usually access cPanel by navigating to yourdomain.com/cpanel and entering your username and password.
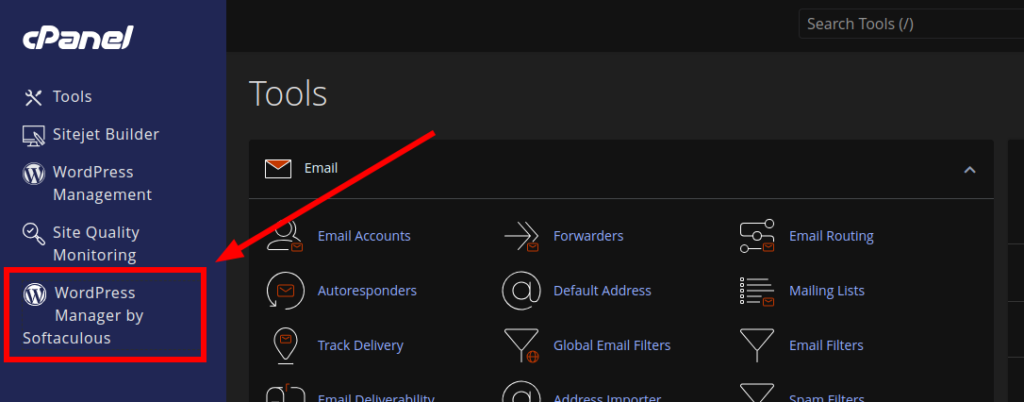
Step 2: Access WordPress Manager by Softaculous #
Once you’re logged into cPanel, locate the Softaculous Apps Installer icon and click on it. This will open the Softaculous dashboard. From the left-hand menu, click on WordPress Manager. This tool allows you to manage all your WordPress installations in one place.
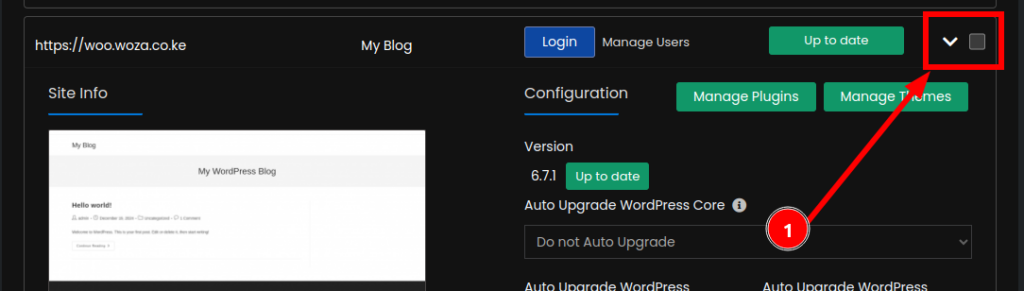
Step 3: Select the WordPress Site to Secure #
In the WordPress Manager, you’ll see a list of all the WordPress websites you’ve installed using Softaculous. Find the site you want to secure and click on the drop-down icon on the far left of the selected site or domain name. This will expand a menu with additional options.
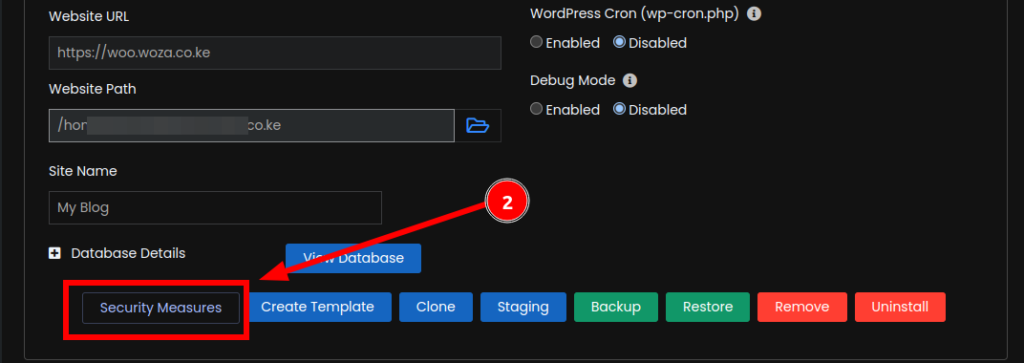
Step 4: Locate and Click the Security Measures Button #
In the drop-down menu, locate and click the Security Measures button. This will open a new page dedicated to WordPress security settings.
Step 5: Review and Enable Security Features #
On the Security Measures page, you’ll see a list of security options that can be enabled for your WordPress site. These features are designed to protect your site from common vulnerabilities and attacks. Here’s a breakdown of the available options:
- Select which security measures you want to apply:
- All (Critical and Recommended): Enables all critical and recommended security measures.
- Critical Only: Enables only the most essential security features.
- Choose Manually: Allows you to select specific security measures.
- Change default administrator’s username: Changes the default “admin” username to something more secure.
- Restrict access to files and directories: Prevents unauthorized access to sensitive files and directories.
- Block unauthorized access to xmlrpc.php: Disables XML-RPC, which can be exploited by hackers.
- Block access to .htaccess and .htpasswd: Protects these critical configuration files from being accessed.
- Turn off pingbacks: Disables pingbacks to prevent spam and potential DDoS attacks.
- Disable file editing in WordPress Dashboard: Prevents users from editing theme and plugin files directly from the WordPress admin panel.
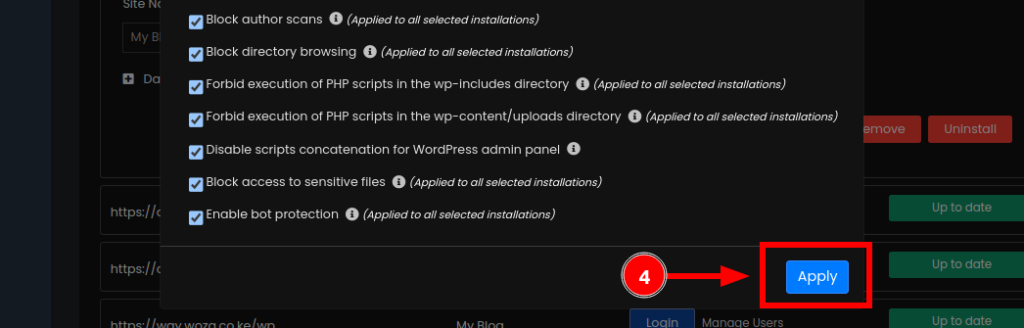
- Block author scans: Stops attackers from scanning your site for usernames.
- Block directory browsing: Prevents visitors from viewing the contents of directories without an index file.
- Forbid execution of PHP scripts in the wp-includes directory: Stops PHP scripts from running in the
wp-includesfolder, which is a common target for attacks. - Forbid execution of PHP scripts in the wp-content/uploads directory: Prevents PHP scripts from running in the uploads folder.
- Disable scripts concatenation for WordPress admin panel: Improves security by disabling script concatenation in the admin panel.
- Block access to sensitive files: Protects files like
readme.html,license.txt, and others from being accessed. - Enable bot protection: Blocks malicious bots from accessing your site.
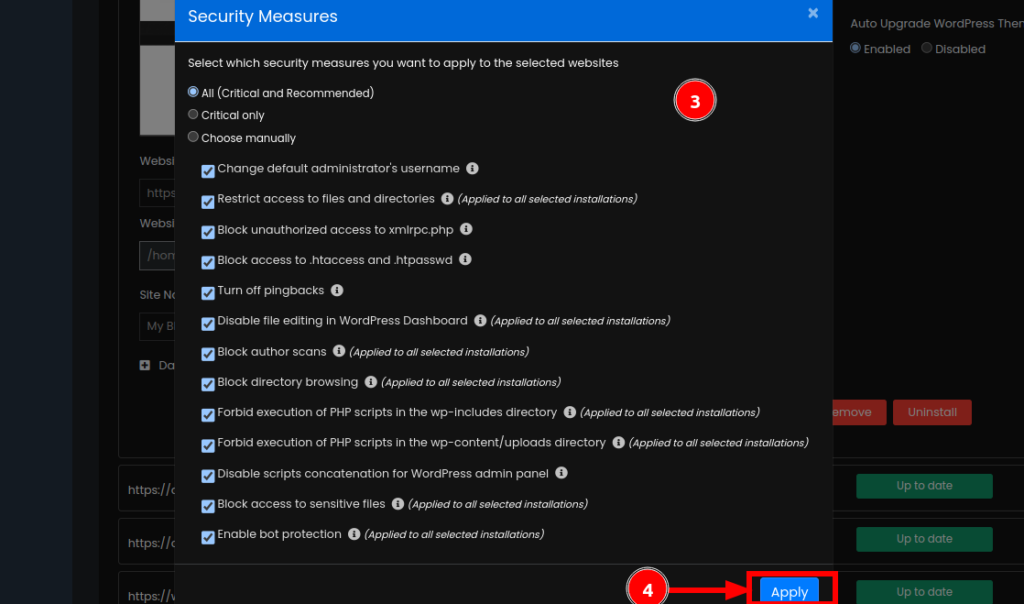
Step 6: Apply the Selected Security Measures #
After selecting the security features you want to enable, click the Apply button. Softaculous will then apply the chosen security measures to your WordPress site. This process may take a few moments, depending on the number of features you’ve selected.
Step 7: Verify the Changes #
Once the security measures have been applied, it’s a good idea to verify that everything is working as expected. Check your WordPress dashboard and site functionality to ensure there are no issues. If you encounter any problems, you can always revisit the Security Measures page in Softaculous and adjust your settings.
Conclusion #
Enabling security features for your WordPress site is a critical step in safeguarding it against potential threats. With Softaculous, the process is quick, easy, and accessible even for users with limited technical expertise. By following the steps outlined in this article, you can significantly enhance the security of your WordPress site and enjoy peace of mind knowing your website is protected.
That’s all for now.
Happy Hosting!