Deploying a React App on CyberPanel is a straightforward process that can be completed in just a few steps. Whether you’re a beginner or an experienced developer, this guide will walk you through the entire process, from building your React app to making it live on CyberPanel.
Prerequisites #
Before you begin, ensure you have the following:
- A React app ready for deployment.
- Access to a CyberPanel account with a hosted domain or subdomain.
- Basic knowledge of file management in CyberPanel.
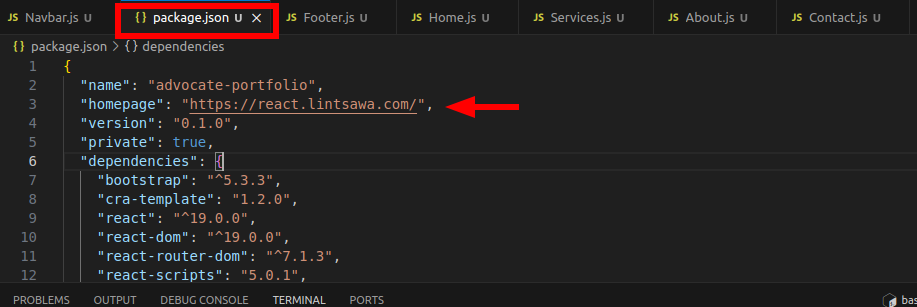
Step 1: Add the Homepage (Domain) URL to Your package.json File #
First, open up your React app project. Locate and open your package.json file. Add a “homepage” attribute as shown below:
{
  "homepage": "http://yourdomainname.whatever"
}
Replace http://yourdomainname.whatever with your domain or subdomain.
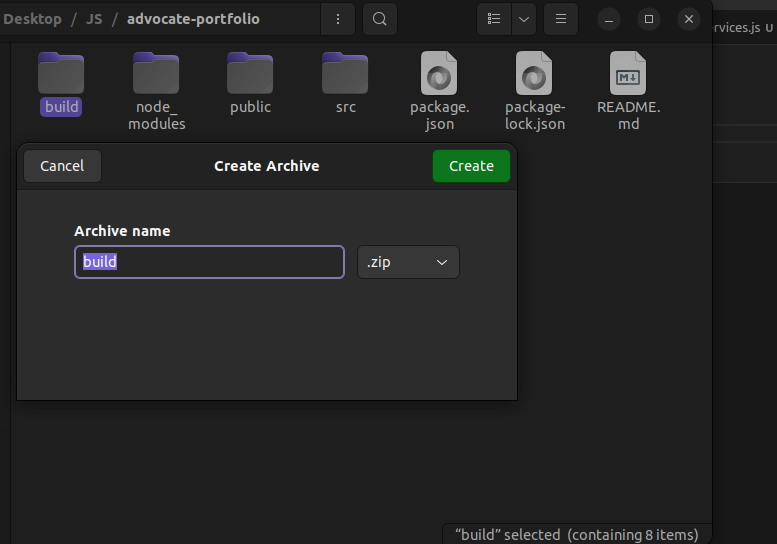
Step 2: Create the Build Folder #
To create a production-ready build of your React app, run the following command in your project directory:
npm run build
You’ll notice a new directory named build in your project. The build folder contains optimized files ready for deployment.
Now, generate a ZIP file of the build folder to prepare it for upload.
Step 3: Access CyberPanel and Create a Website #
- Log in to your CyberPanel account.
- Navigate to Websites > Create Website.
- Fill out the required fields (domain name, email, and PHP version) and click Create Website.
If your domain or subdomain already exists, skip this step.
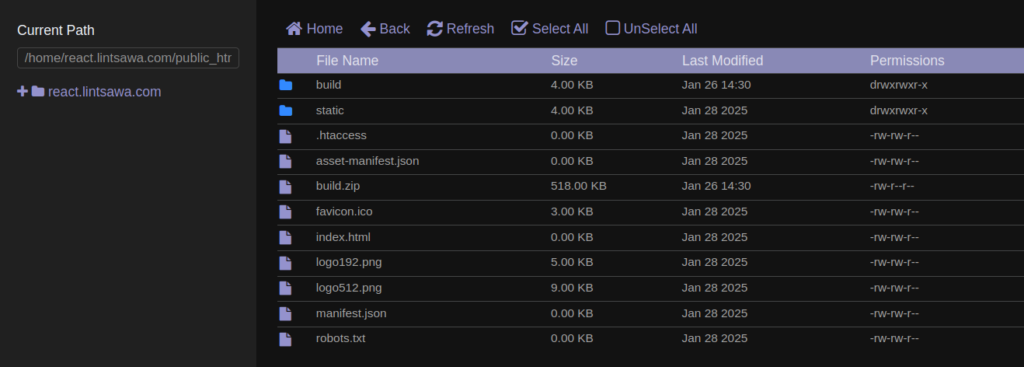
Step 4: Upload and Extract the Build Folder #
- In CyberPanel, go to Websites > List Websites and select File Manager for your domain.
- Navigate to the root directory of your domain (e.g.,
/public_html). - Upload the ZIP file containing your
buildfolder. - Once uploaded, extract the ZIP file.
- Move all files from the
buildfolder to the root directory of your domain (e.g.,/public_html).
Step 5: Add an .htaccess File for Routing #
To handle client-side routing with React Router, create an .htaccess file in the root directory (/public_html) with the following content:
<IfModule mod_rewrite.c>
  RewriteEngine On
  RewriteBase /
  RewriteRule ^index\.html$ - [L]
  RewriteCond %{REQUEST_FILENAME} !-f
  RewriteCond %{REQUEST_FILENAME} !-d
  RewriteRule . /index.html [L]
</IfModule>
This ensures proper routing and prevents 404 errors when accessing other pages of your React app.
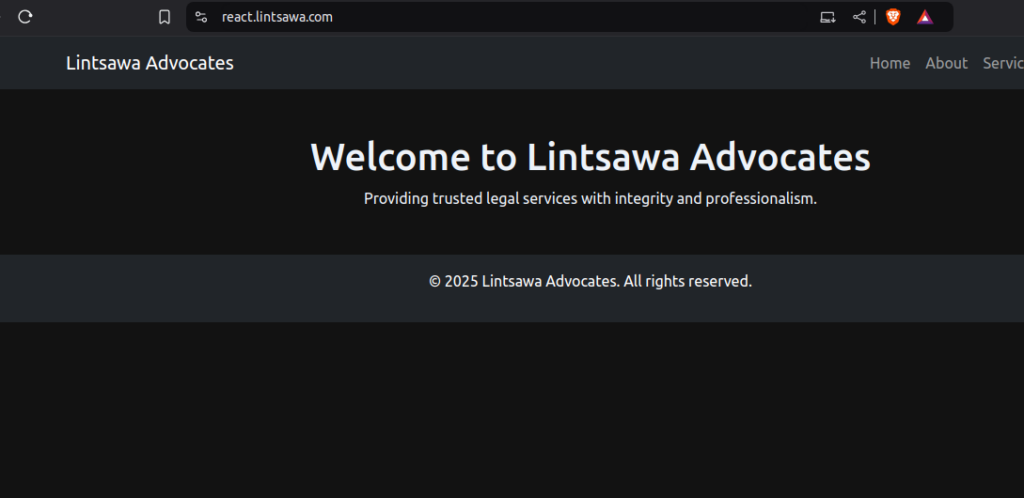
Step 6: Test Your Deployment #
Visit your domain or subdomain in a browser to see your React app live. If you encounter a 404 error, double-check the .htaccess file and ensure all files are correctly placed in the root directory.
Additional Guide: Automating Deployment with GitHub Actions #
For seamless deployment, consider automating the process using GitHub Actions. This allows you to push updates to your repository and automatically deploy them to your server.
Conclusion #
Deploying a React app on CyberPanel is simple and efficient. By following this guide, you can have your app up and running in no time. Share your experience or questions in the comments below!
All done. Congratulations! You’ve successfully hosted your React app on CyberPanel.
Happy Hosting!!