Hosting a Node.js on Plesk is a seamless process that can be achieved by following the steps below. #
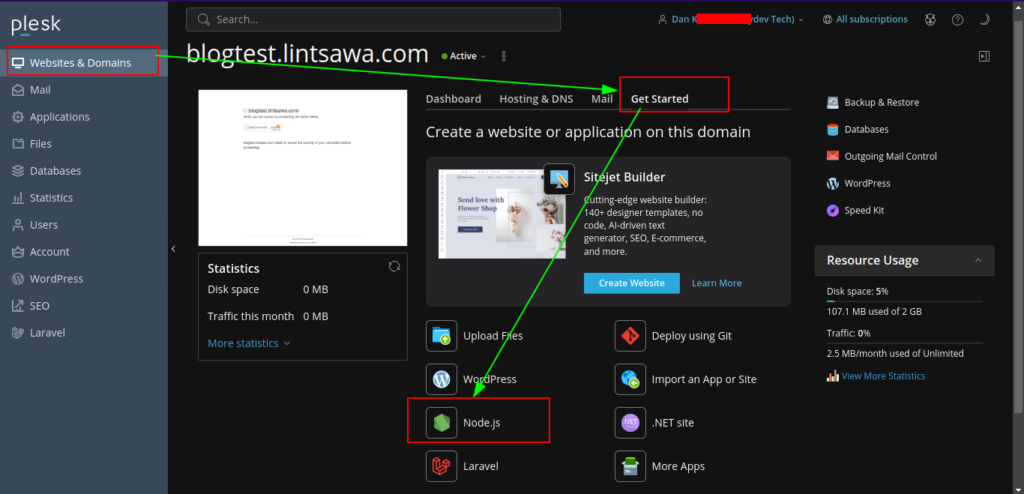
Step 1: Login to plesk and navigate to Websites & Domains and then to the domain or sub-domain you wish to install Node.js on. #
Step 2: Go to Get Started -> Click On Node.js Manager as attached below. #
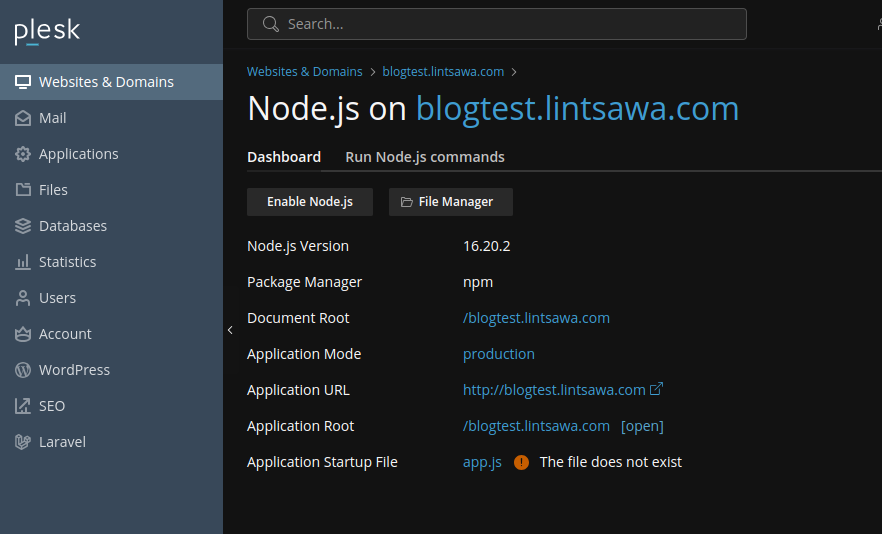
Once you click on Node.js , you may see a window like below.
We shall adjust some few things for things to work. First Upload Open File Manager on a new tab and upload your Node.js project Zip file.
Step 3: Upload your website – Uploading Nodejs Zip File. #
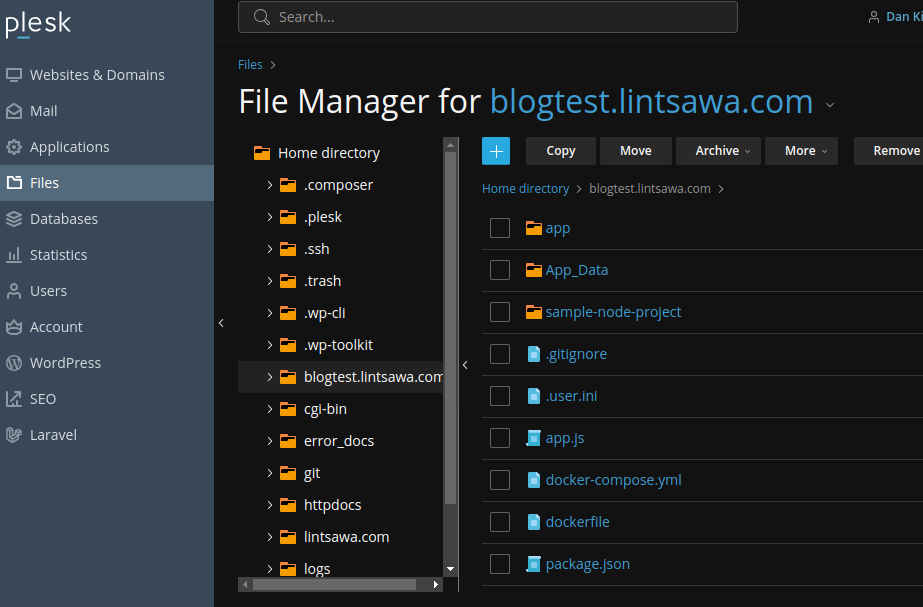
Once Uploaded go back to Nodejs manager app and Refresh the page.
You would see something like one below.
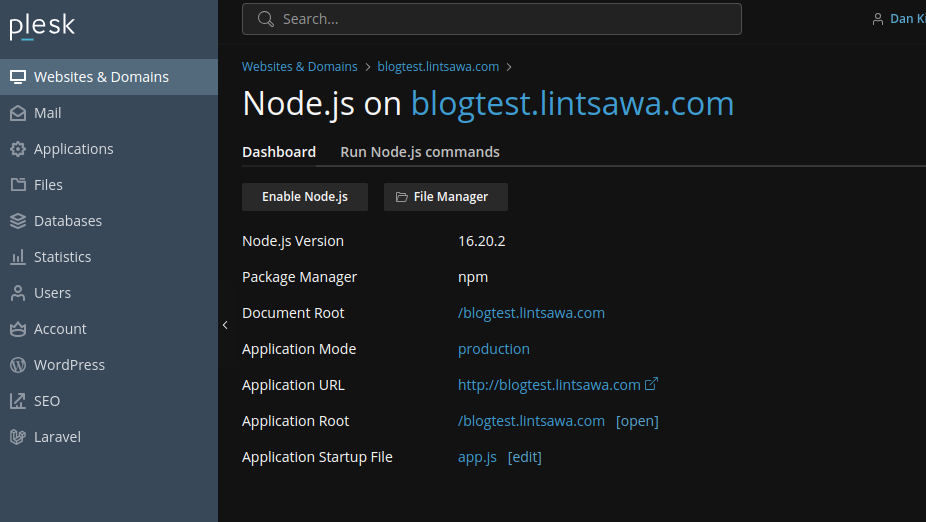
Step 4: Next Click on Enable Nodejs #
You will have access to other settings as below.

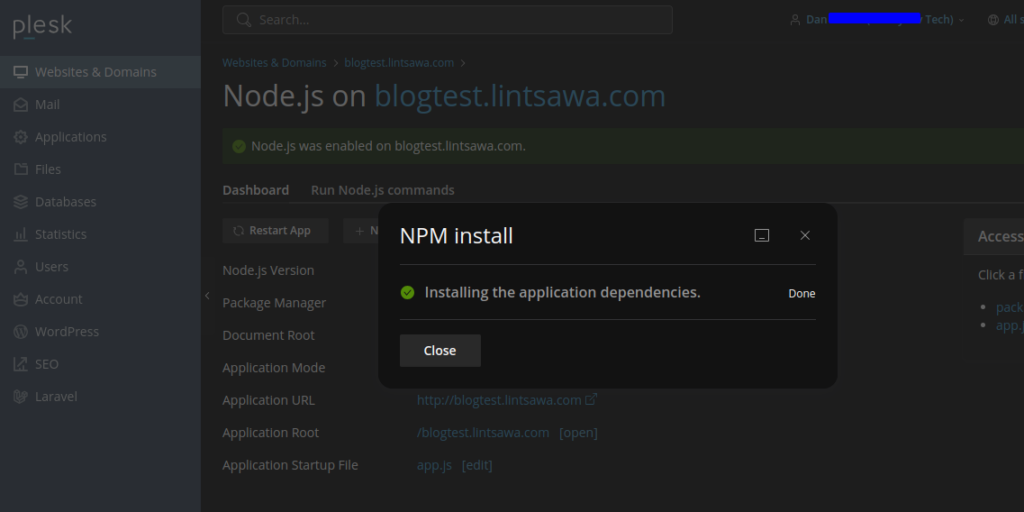
Step 5: Click on NPM Install. #
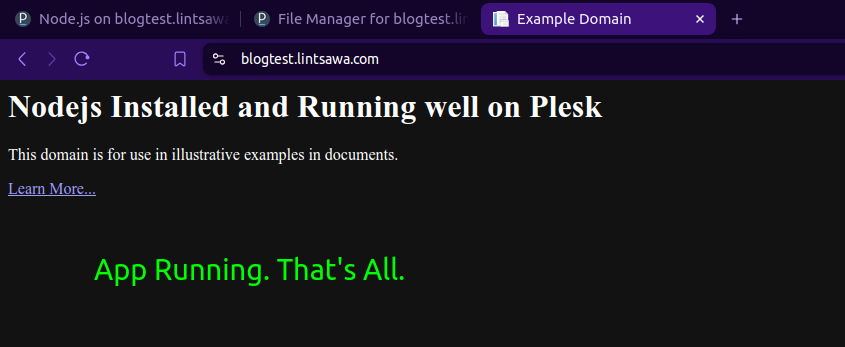
Step 6 : Access your domain and Node.js App should now be running well. #
NOTE : You will notice during this process, we used nodejs version 16. On Windows Server running Plesk, only one instance of Node.js can run. Thus this version is used server wide. If your application requires a different version, consider using a Linux Server where you have the option to select multiple Node.js versions.
That’s All. Happy Coding!!