Deploying a Next.js app on CyberPanel is easy with the right steps. This guide walks you through setting up a custom server.js, configuring LiteSpeed, and getting your Next.js app live quickly. Let’s get started!
Part 1: Preparing a Next.js App for Deployment #
To deploy a Next.js app on CyberPanel, follow these steps:
Step 1: Create a Custom Next.js Server (server.js) #
Next.js apps typically use the built-in server for development. However, for deployment on CyberPanel, you need to create a custom server.
- Create a
server.jsfile in the root directory of your project. - Add the following code to the file:
const { createServer } = require('http');
const { parse } = require('url');
const next = require('next');

const dev = process.env.NODE_ENV !== 'production';
const hostname = 'localhost';
const port = process.env.PORT || 3000;

const app = next({ dev, hostname, port });
const handle = app.getRequestHandler();

app.prepare().then(() => {
  createServer(async (req, res) => {
    try {
      const parsedUrl = parse(req.url, true);
      const { pathname, query } = parsedUrl;

      if (pathname === '/a') {
        await app.render(req, res, '/a', query);
      } else if (pathname === '/b') {
        await app.render(req, res, '/b', query);
      } else {
        await handle(req, res, parsedUrl);
      }
    } catch (err) {
      console.error('Error occurred handling', req.url, err);
      res.statusCode = 500;
      res.end('Internal server error');
    }
  })
    .once('error', (err) => {
      console.error(err);
      process.exit(1);
    })
    .listen(port, () => {
      console.log(`> Ready on http://${hostname}:${port}`);
    });
});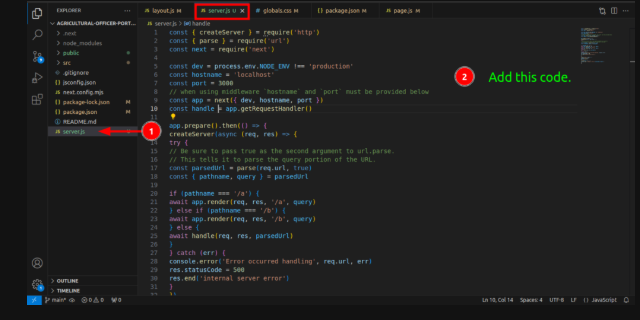
This code sets up a custom server to handle requests and serve your Next.js app.
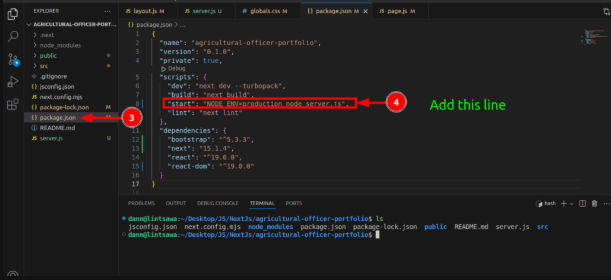
Step 2: Modify the package.json File #
Update the package.json file to use the custom server for production. Add the following to the start script:
"start": "NODE_ENV=production node server.js",This ensures that the custom server (server.js) is used when the app is deployed.
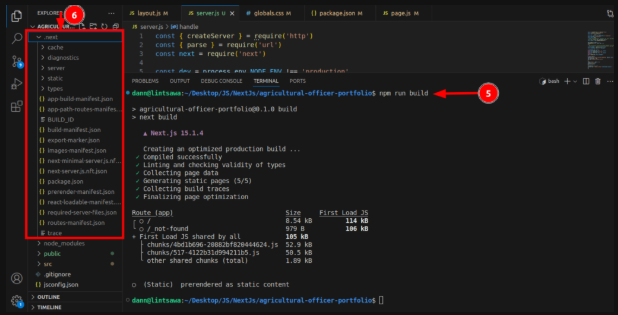
Step 3: Build the Next.js Application #
Before deploying, build your Next.js app by running:
npm run buildThis generates an optimized production build of your app. Ensure there are no errors during the build process.
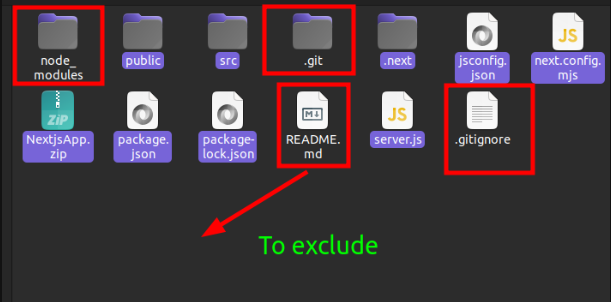
Step 4: Prepare Files for Deployment #
- Open your file manager and locate your Next.js project files.
- Enable visibility for hidden files (if necessary).
- Exclude the following files and folders:
node_modules.gitREADME.md.gitignore
- Select all remaining files and folders, then create a ZIP archive.
Excluding node_modules reduces the deployment package size. Dependencies will be installed on the server later.
Part 2: Deploying the Next.js App on CyberPanel #
Step 1: Install Node.js on CyberPanel Server #
Ubuntu Installation Guide #
Follow the guide at Truehost Support.
AlmaLinux Installation Guide #
- Ensure
curlis installed:
sudo yum install -y curl- Download the setup script for Node.js version 18: Replace with your preferred version.
curl -fsSL https://rpm.nodesource.com/setup_18.x -o nodesource_setup.sh- Run the setup script:
bash nodesource_setup.sh- Install Node.js:
dnf -y install nodejs- Confirm installation:
node -v
Step 2: Upload and Extract Next.js Project #
- Create a website in CyberPanel.
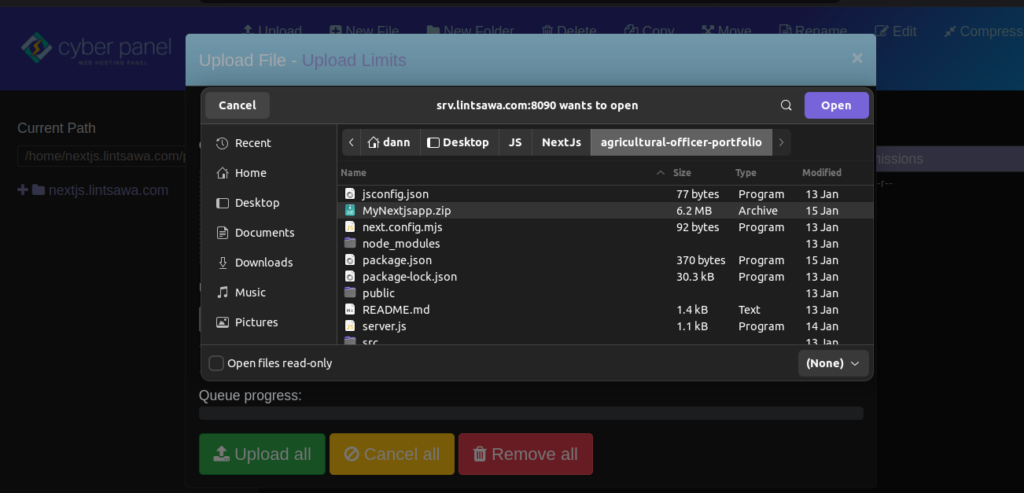
- Navigate to the File Manager and upload the Next.js archive.
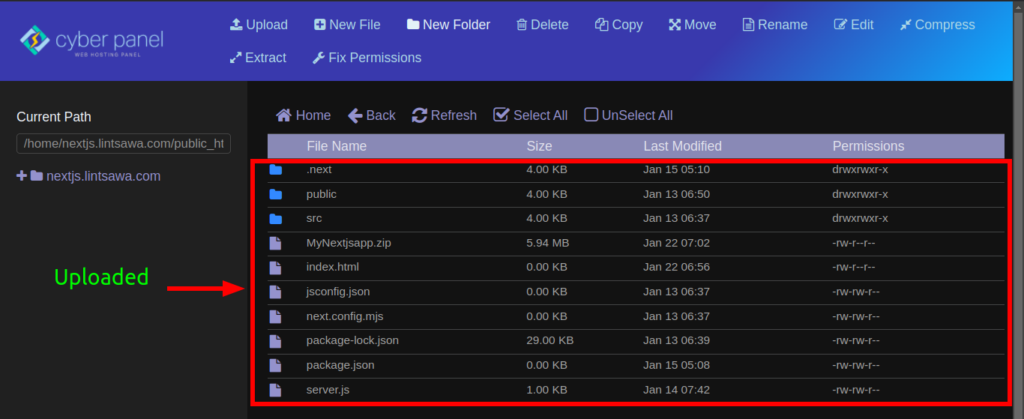
- Extract the files and ensure they are in the
public_htmlfolder, including theserver.jsfile.
Created:
Upload:
Step 3: Install Dependencies #
Via SSH, navigate to the website path and run npm install : ideally /home/yourdomain.com/public_html/
npm install 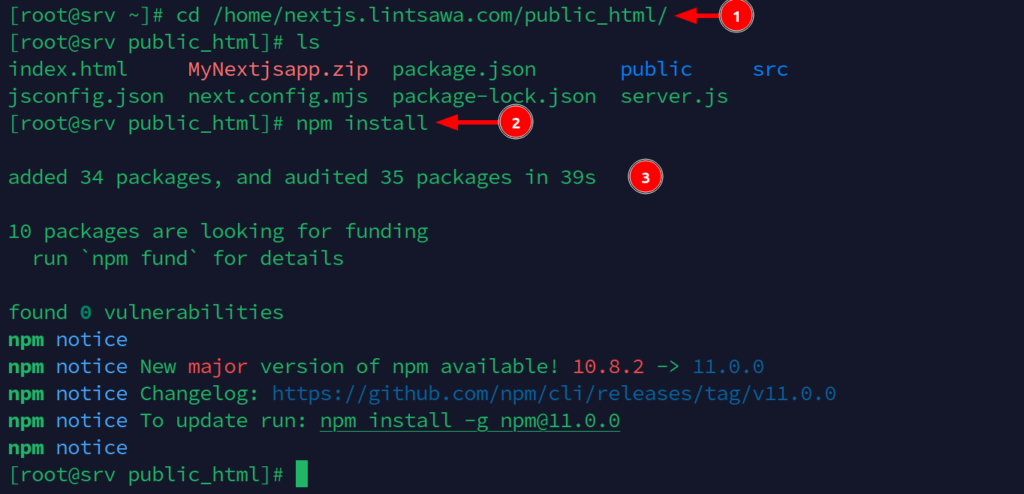
Part 3: Add Application Context in CyberPanel #
Step 1: Configure vHost #
- Go to CyberPanel dashboard > Websites > List Website (Your Domain Website) > Manage > Configurations > vHost.
- Add the following context to the vHost section: \
NOTE: Do note delete the existing content. Just scroll to the bottom and add your context.
context / {
  type                    appserver
  location                /home/yourdomain.com/public_html
  binPath                 /usr/bin/node
  appType                 node
  startupFile             server.js
  maxConns                100

  rewrite  {
  }
  addDefaultCharset       off
}
Ensure the location path matches your domain.
Ensure you include the startupFile : server.js in the context definition.
startupFile: This is key addition (Compared to Nodejs setups). It tells LiteSpeed which file to use to start your Next.js application. In this case, it should be server.js.
For Nodejs setup, adding startupFile is not required.
Restart Openlitespeed.
systemctl restart lsws
Step 2: Reload Your Site #
Once all steps are completed, reload your site, and your Next.js application should be running successfully on CyberPanel.

In case of Errors, use command below to troubleshoot and Fix the errors.
/usr/local/lsws/logs/error.log
By following these steps, you can easily deploy your Next.js app on CyberPanel and ensure a smooth deployment process.
Happy Hosting!