Deploying Laravel on a cyberpanel Server is a seamless process that can be achieved by following the steps below.
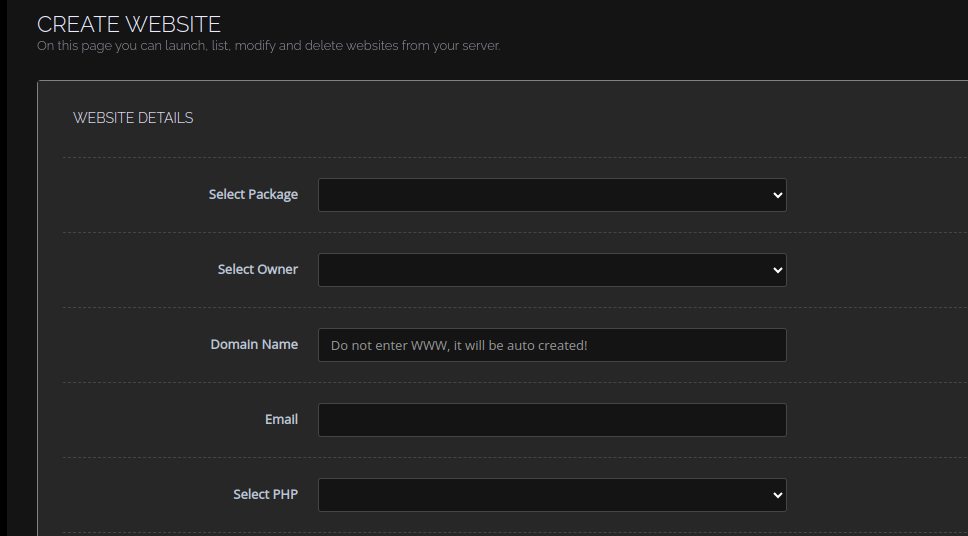
Step 1. Create a website on Cyberpanel #
Go to Cyberpanel -> Websites -> Create Website.
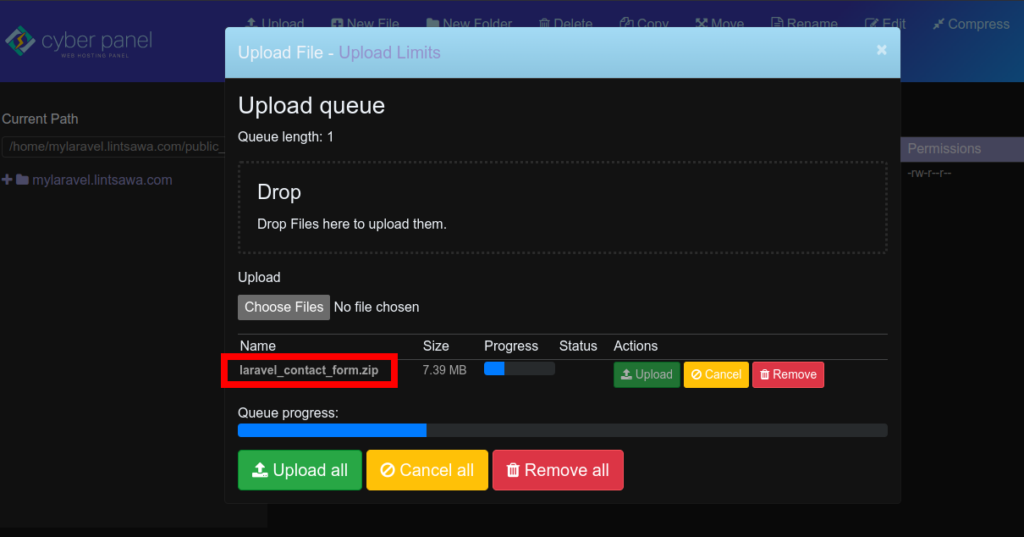
Step 2: Upload your website Files to Cyberpanel. #
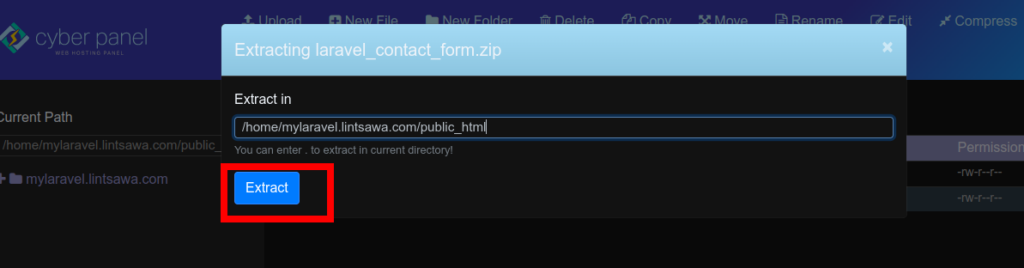
Step 3: Extract the uploaded files #
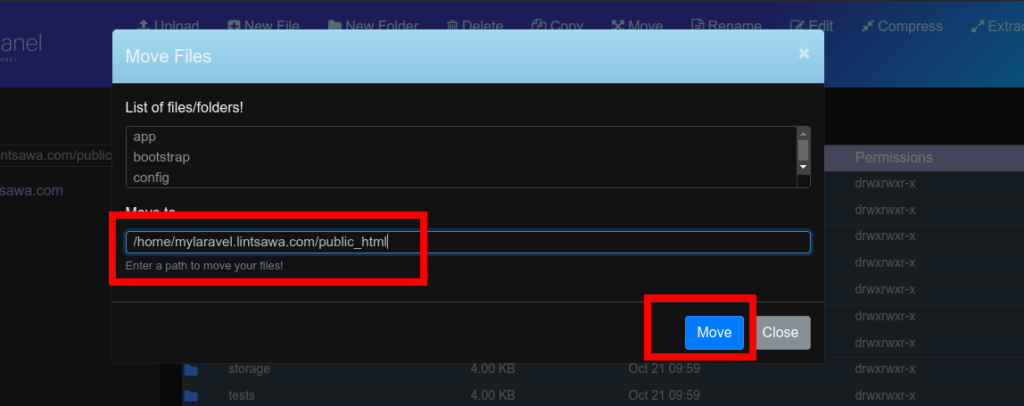
Extract the files and then move them to the public_html directory of your application.
Move the files
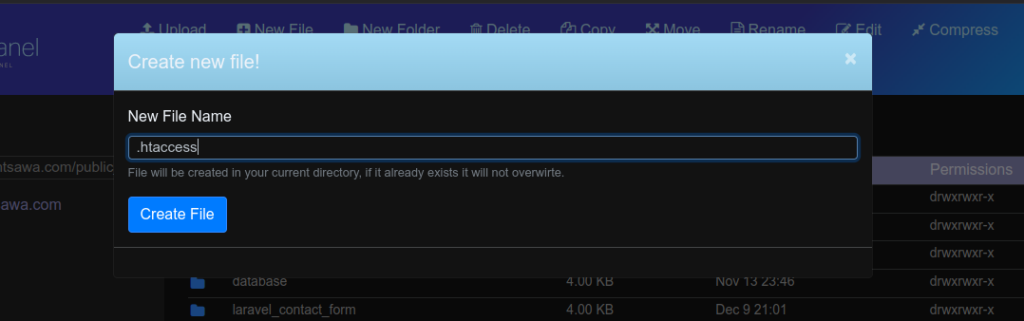
Step 4: Create a .htaccess #
Create a .htacess file and add the code snipped below so as to redirect to public folder inside your public_html folder
Code snippet.
<IfModule mod_rewrite.c>
RewriteEngine On
RewriteBase /
RewriteRule ^$ public/index.php [L]
RewriteRule ^((?!public/).*)$ public/$1 [L,NC]
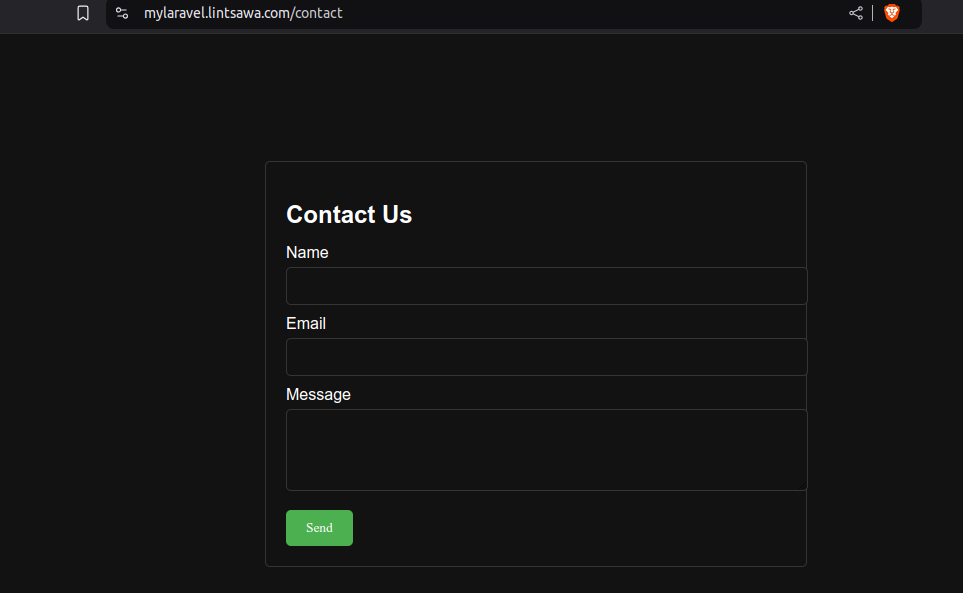
</IfModule>Step 5: Access your site. #
Step 6: Troubleshooting (In case of Issues) #
To troubleshoot errors
Error 404 – Ensure you’ve added the code snippet in your .htacess file.
Fix File permissions on Cyberpanel
Error 500.
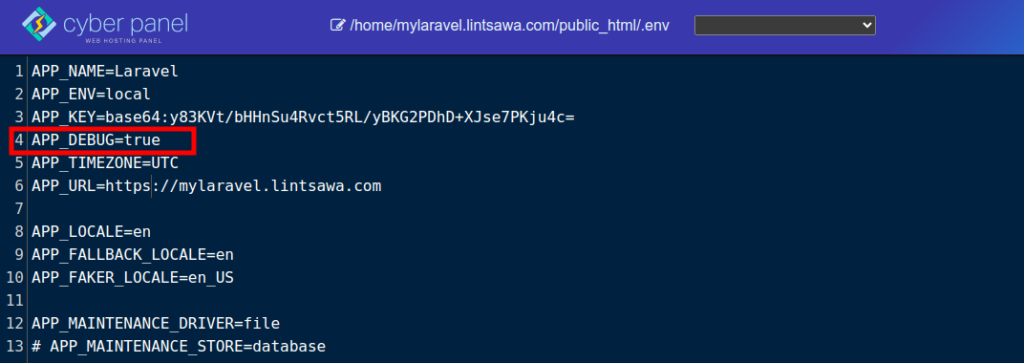
You may need to enable debug so as to troubleshoot error 500.
In Laravel, you can do this in 2 files below.
a) .env file
Open the .env file and locate the APP_DEBUG and change this from false to true.
Once done, revert back the changes.
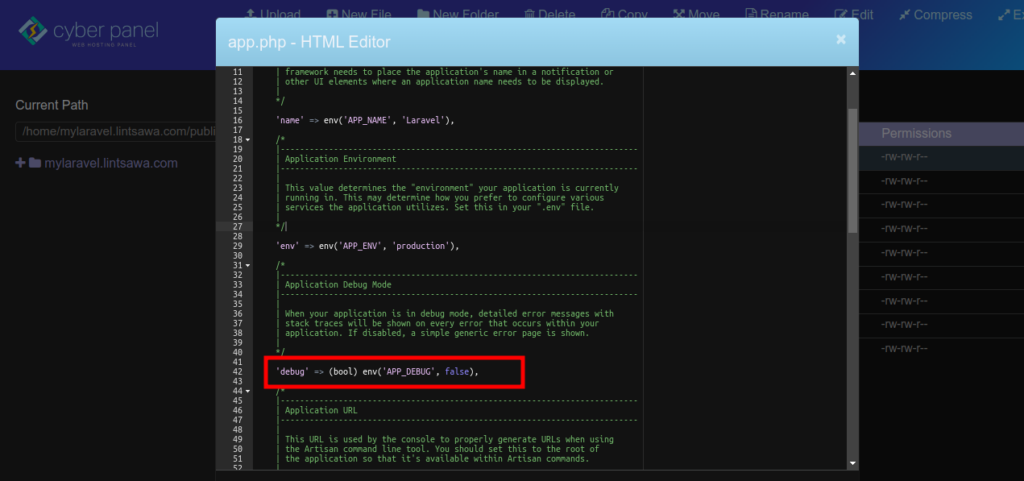
b) Open config/app.php file and locate
'debug' => (bool) env('APP_DEBUG', false),
Change the value to true.
You can also try clearing cache using commands below
php artisan config:cache
php artisan config:clear
Congratulations, You’ve successfully deployed your Laravel application on Cyberpanel.
Happy Hosting!