#
Cloning a WordPress website is a useful process when you want to create a duplicate of your site for testing, development, or migration purposes.
cPanel, a popular web hosting control panel, makes this process straightforward, especially when using tools like WordPress Manager by Softaculous. In this guide, we’ll walk you through the steps to clone a WordPress site on cPanel.
Step 1: Log in to Your cPanel #
- Open your web browser and navigate to your cPanel login page (usually
https://yourdomain.com/cpanel). - Enter your username and password to log in.
Step 2: Access WordPress Manager by Softaculous #
- Once logged into cPanel, scroll down to the Software section.
- Locate and click on WordPress Manager by Softaculous.

Step 3: Locate the Domain You Wish to Clone #
- In the WordPress Manager, you’ll see a list of all your WordPress installations.
- Find the domain or installation you want to clone.
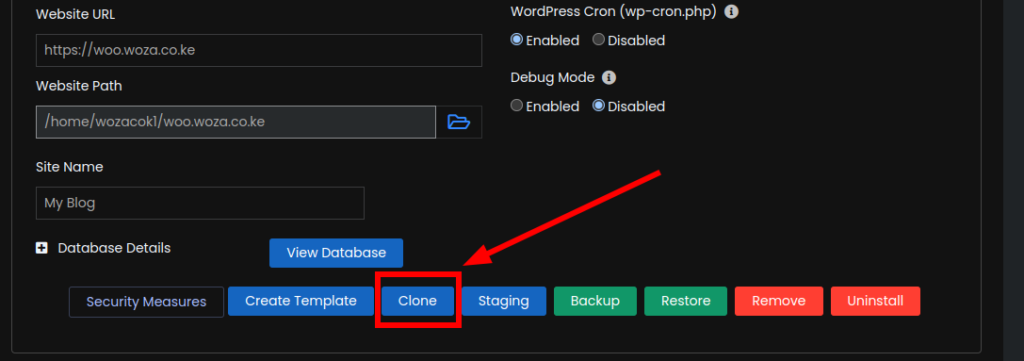
Step 4: Initiate the Clone Process #
- On the far right of the domain listing, click on the dropdown icon (represented by a small arrow).
- From the dropdown menu, click on the Clone button.

Click on the ‘Clone‘
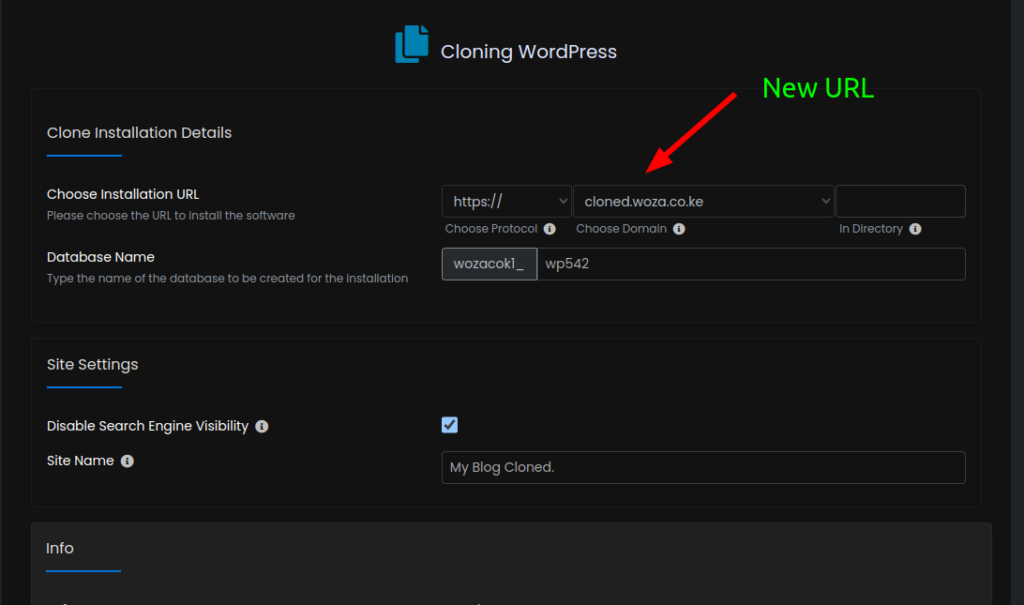
Step 5: Configure the New Clone Installation Details #
- On the “Cloning WordPress” page, you’ll be prompted to enter details for the new clone:
- Choose Domain: Select the domain or subdomain where the clone will be installed.
- In Directory: Specify the directory name if you want the clone to be installed in a subfolder (leave blank for the root directory).
- Database Name: Enter a name for the new database or use the default.
- Clone Settings: Review and adjust any additional settings as needed.
Step 6: Confirm the Information #
- Scroll down and double-check all the details you’ve entered.
- Ensure that the new domain, directory, and database information are correct.
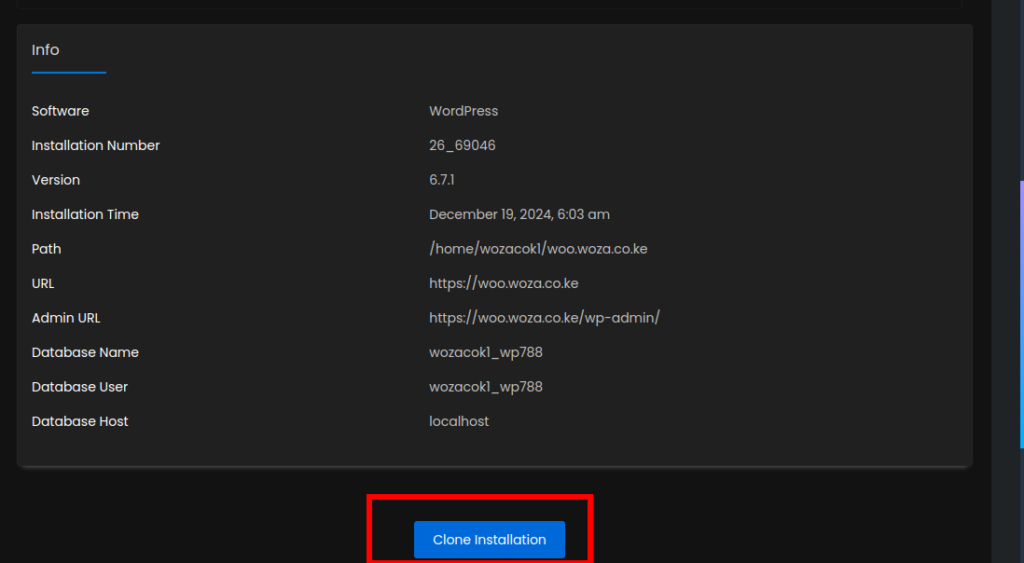
Step 7: Start the Cloning Process #
- Once everything is confirmed, click on the Clone Installation button.
- The cloning process will begin, and you’ll see a progress bar indicating the status.
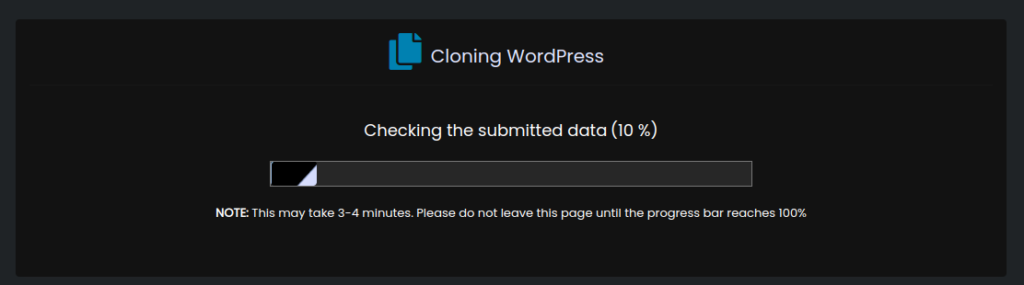
Step 8: Monitor the Progress #
- Wait for the process to complete. This may take a few minutes depending on the size of your WordPress site.
- Once done, you’ll see a congratulations message confirming that the clone has been successfully created.
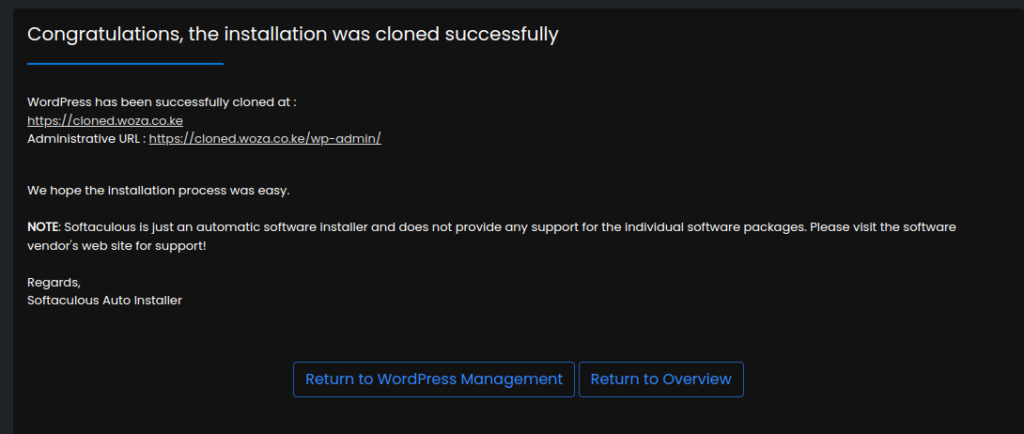
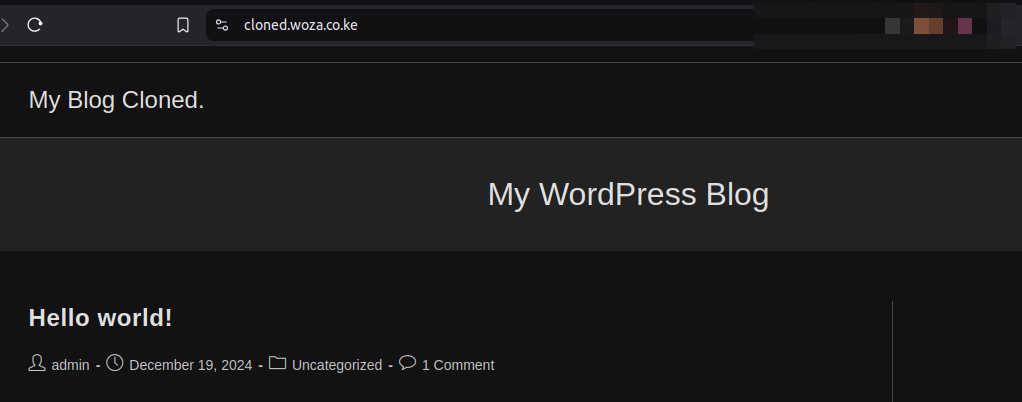
Step 9: Access the New Cloned URL #
- Open a new browser tab and navigate to the URL of the cloned WordPress site.
- Verify that the site loads correctly and all functionalities are working as expected.
All Done! #
Congratulations! You’ve successfully cloned your WordPress site using cPanel and Softaculous. You can now use the cloned site for testing, development, or any other purpose.
Tips for a Smooth Cloning Process: #
- Backup Your Site: Always create a backup of your WordPress site before cloning, just in case something goes wrong.
- Check Permalinks: After cloning, go to Settings > Permalinks in your WordPress dashboard and resave the settings to ensure proper URL structure.
- Update Links: If you’re cloning to a new domain, use a search and replace tool to update any hardcoded links in your database.
Happy hosting! 🚀