This guide will walk you through the process of deploying a website using Git version control on cPanel. It is divided into three parts: preparing your code application, setting up Git version control in cPanel for public repositories, and configuring access to private repositories.
Part 1: Prepare Your Code Application #
- Create a
.cpanel.ymlFile
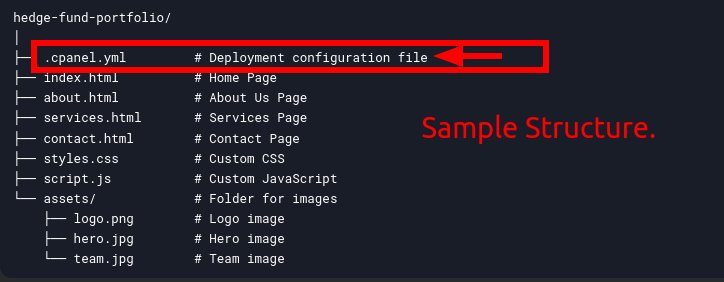
To enable deployment via cPanel, you need to create a.cpanel.ymlfile in the root directory of your application. This file defines the deployment tasks. Here’s how your folder structure will look:
2. Example .cpanel.yml File
Below is an example of a .cpanel.yml file. Replace /home/cpanelusername/public_html/ with the appropriate path for your deployment.
deployment:
  tasks:
    - export DEPLOYPATH=/home/cpanelusername/public_html/
    - /bin/cp index.html $DEPLOYPATH
    - /bin/cp about.html $DEPLOYPATH
    - /bin/cp services.html $DEPLOYPATH
    - /bin/cp contact.html $DEPLOYPATH
    - /bin/cp styles.css $DEPLOYPATH
    - /bin/cp script.js $DEPLOYPATH
    - /bin/cp -r assets/ $DEPLOYPATH
If you’re deploying to a subdomain or addon domain, replace public_html with the appropriate directory name (e.g., /home/cpanelusername/sub.domain.com/).
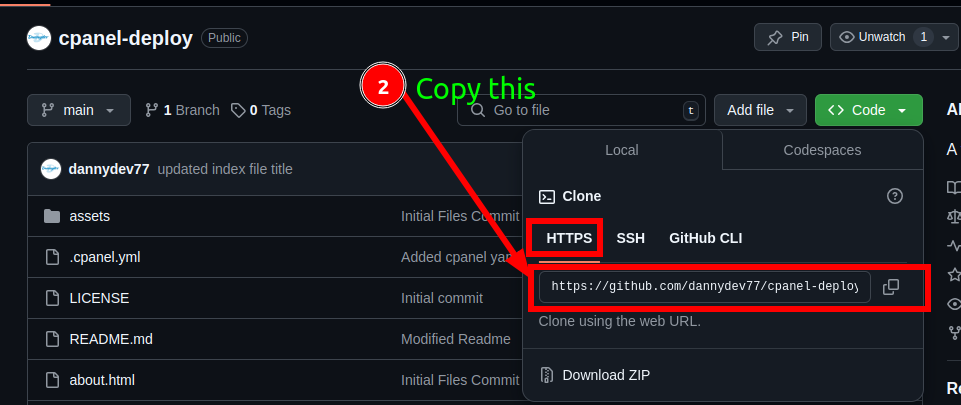
3. Push Changes to Your Repository
Commit and push the .cpanel.yml file to your remote repository (GitHub or GitLab). If you’ve already pushed changes, simply add the .cpanel.yml file and update the repository.

Part 2: Set Up Git Version Control in cPanel (Public Repositories) #
- Log in to cPanel
Access your cPanel account. - Navigate to Git Version Control
In the cPanel dashboard, locate and click on the Git Version Control icon. - Create a Repository
- Click Create or Clone a Repository.
- Enter the clone URL of your remote repository (GitHub or GitLab). Ensure the URL begins with
http://,https://,ssh://, orgit://. - Specify the Repository Path where the repository will be stored. If the directory doesn’t exist, cPanel will create it.
- Provide a Repository Name (this is for display purposes only).

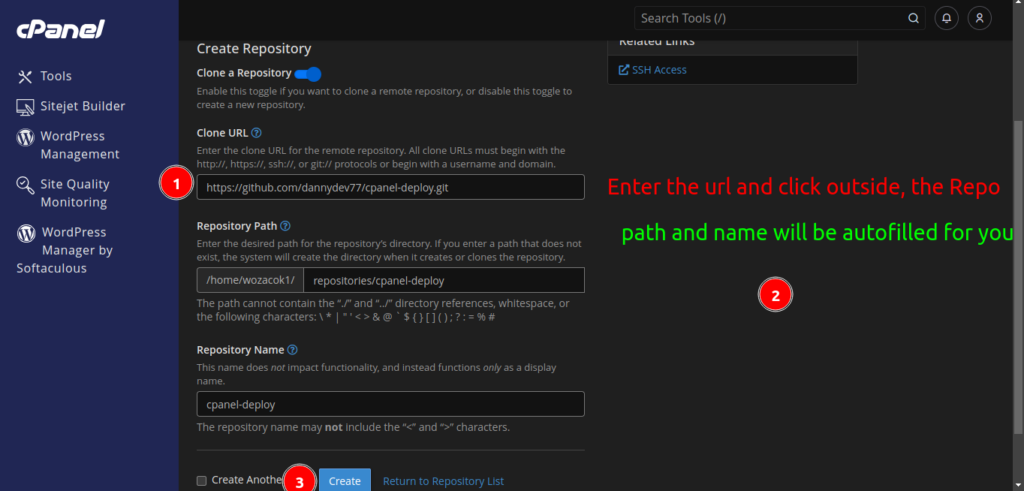
4. Clone the Repository
Click Create to clone the repository to your cPanel account.
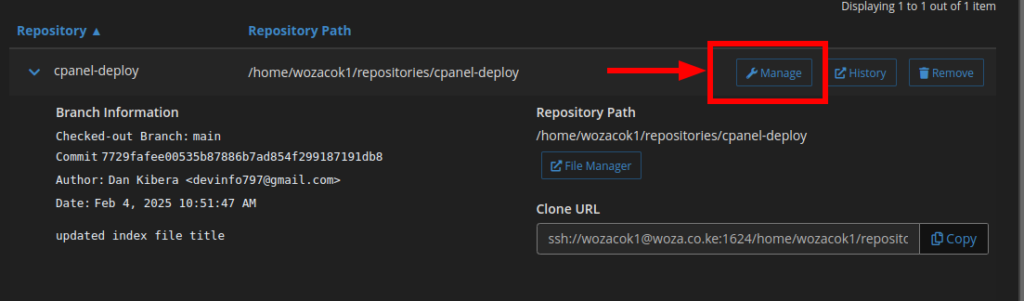
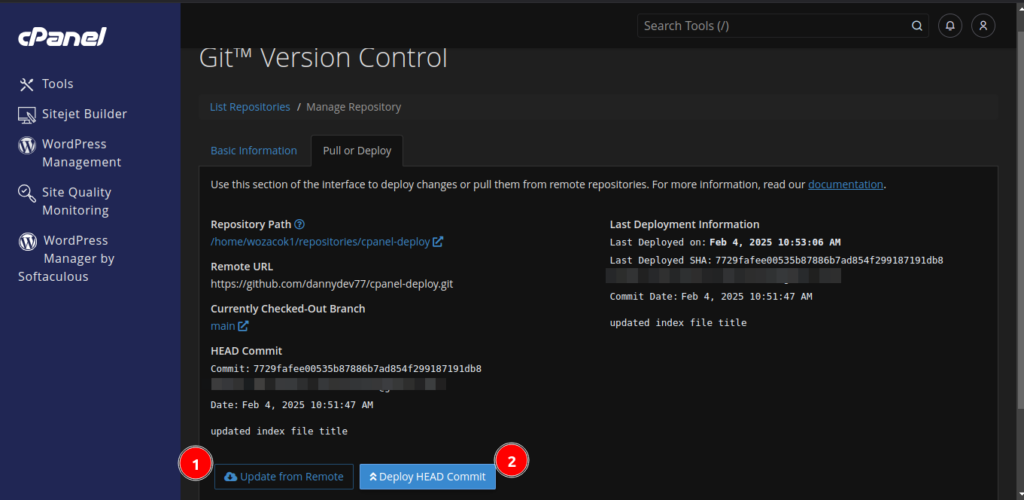
5. Deploy Changes
- After pushing changes to your remote repository, return to cPanel.
- Go to Git Version Control, select your repository, and click Manage.
- On the Pull or Deploy tab, click Update from Remote and then Deploy Head Commit.
- This will update your cPanel file manager with the latest code changes.
6. Verify Deployment
Access your website to ensure the updates are reflected.
Note: Do not delete the .git directory in your cPanel file manager, as this will break cPanel’s ability to manage your repository.

Part 3: Set Up Access to Private Repositories #
Generate an SSH Key
Use cPanel Terminal Access to generate an SSH key:
ssh-keygen -t rsa -f ~/.ssh/cpanel-private-repo -b 4096 -C "username@mydomain.com"
Create an SSH Configuration File
Create the SSH configuration file:
touch ~/.ssh/config
Update the file permissions:
chmod 0600 ~/.ssh/config
chown username:username ~/.ssh/config
Open the ~/.ssh/config file and add the following lines: Update where necessary.
Host *
IdentityFile ~/.ssh/cpanel-private-repo
Register the SSH Key with the Private Repository Host
Add the public key (~/.ssh/cpanel-private-repo.pub) to your GitHub or GitLab account under SSH keys.
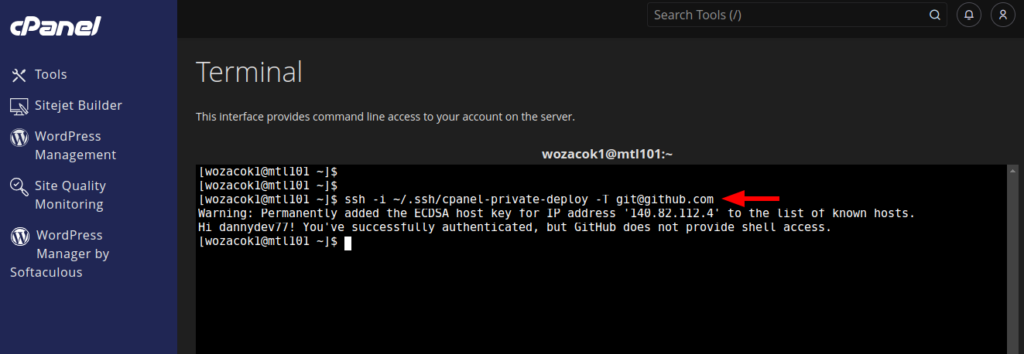
Test the SSH Key
Verify the SSH key works:
ssh -i ~/.ssh/cpanel-private-repo -T git@github.com
A success authentication message should appear.
Clone the Private Repository
Use the SSH URL to clone the repository:
git clone git@github.com:username/cpanel-private-repo.git
Reference Guides #
For more information, please refer to the cPanel documentation below.
- cPanel Git Version Control Documentation
- Guide to Git Deployment
- Guide to Git Setup for Private Repositories
By following this guide, you can efficiently deploy and manage your website using Git version control on cPanel, whether your repository is public or private.
Happy Hosting!