Creating a staging site for your WordPress website is an essential step for testing updates, experimenting with new features, or making significant changes without affecting your live site. With cPanel and the WordPress Manager by Softaculous, the process of setting up a staging site is simple and efficient. In this guide, we’ll walk you through the steps to create a staging site for WordPress on cPanel.
Step 1: Log in to Your cPanel #
- Open your web browser and navigate to your cPanel login page (usually
https://yourdomain.com/cpanel). - Enter your username and password to log in.
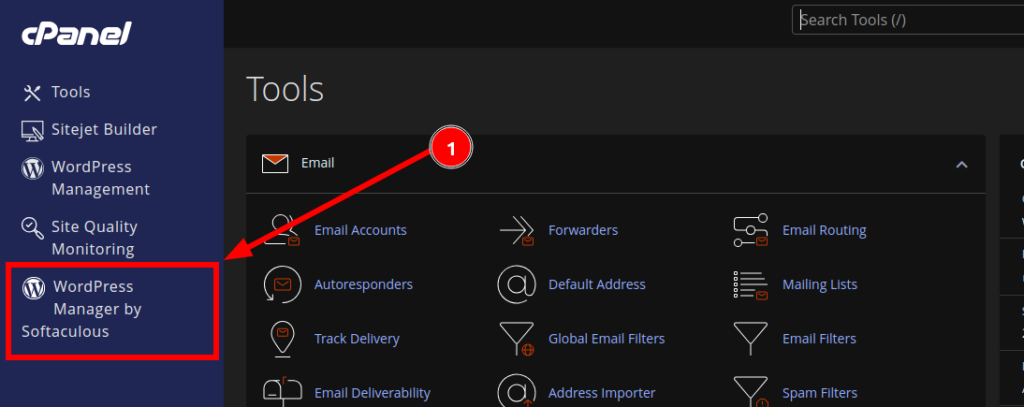
Step 2: Access WordPress Manager by Softaculous #
- Once logged into cPanel, scroll down to the Software section.
- Locate and click on WordPress Manager by Softaculous.
Step 3: Locate the Domain You Wish to Stage #
- In the WordPress Manager, you’ll see a list of all your WordPress installations.
- Find the domain or installation you want to use for staging.

Step 4: Initiate the Staging Process #
- On the far right of the domain listing, click on the dropdown icon (represented by a small arrow).
- From the dropdown menu, click on the Staging button.

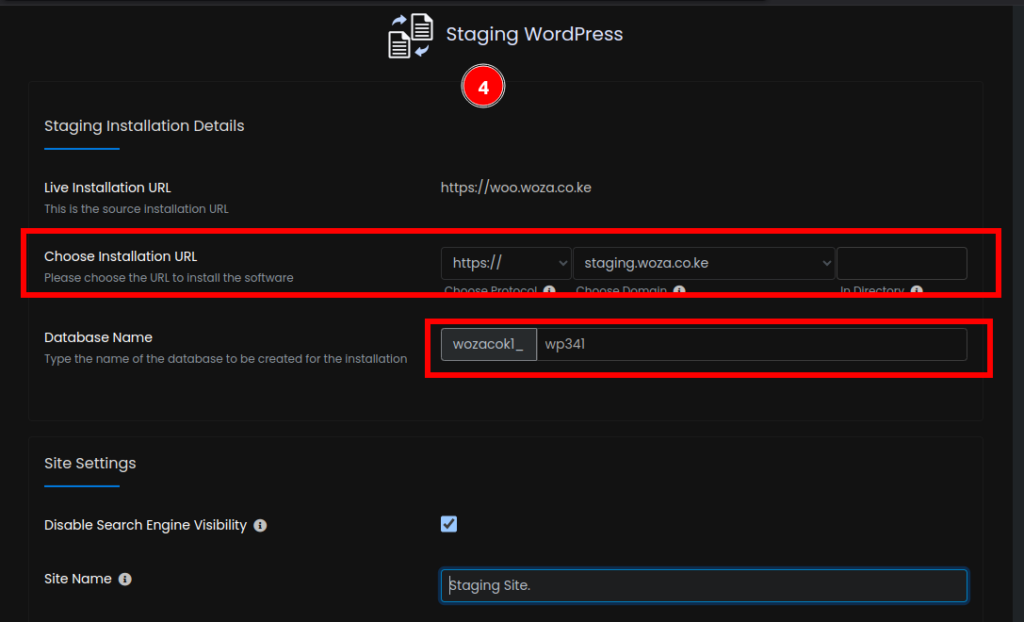
Step 5: Configure the New Staging Installation Details #
- On the “Staging WordPress” page, you’ll be prompted to enter details for the new staging site:
- Choose Domain: Select the domain or subdomain where the staging site will be installed.
- In Directory: Specify the directory name if you want the staging site to be installed in a subfolder (leave blank for the root directory).
- Database Name: Enter a name for the new database or use the default.
- Staging Settings: Review and adjust any additional settings as needed.
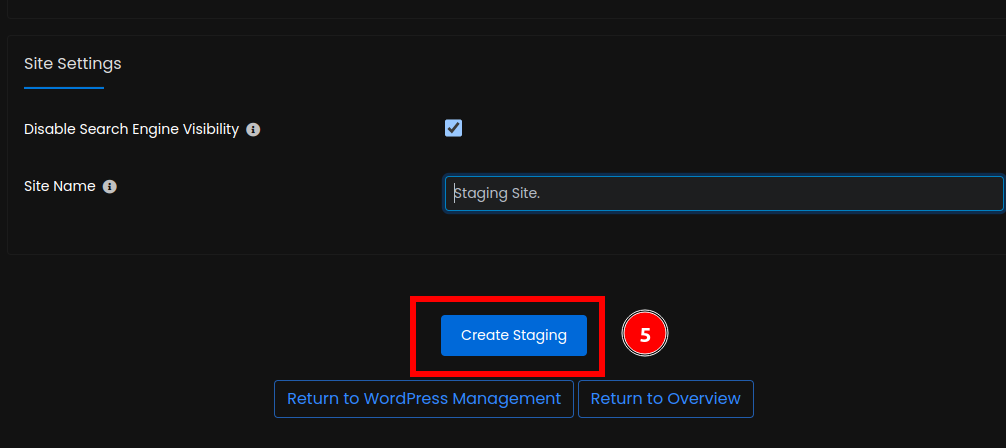
Step 6: Confirm the Information #
- Scroll down and double-check all the details you’ve entered.
- Ensure that the new domain, directory, and database information are correct.
Step 7: Start the Staging Process #
- Once everything is confirmed, click on the Create Staging button.
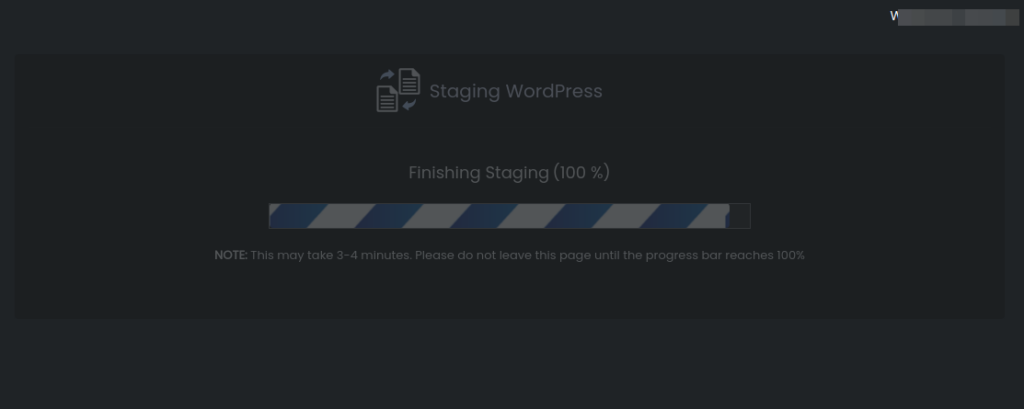
- The staging process will begin, and you’ll see a progress bar indicating the status.
Step 8: Monitor the Progress #
- Wait for the process to complete. This may take a few minutes depending on the size of your WordPress site.
- Once done, you’ll see a confirmation message indicating that the staging site has been successfully created.
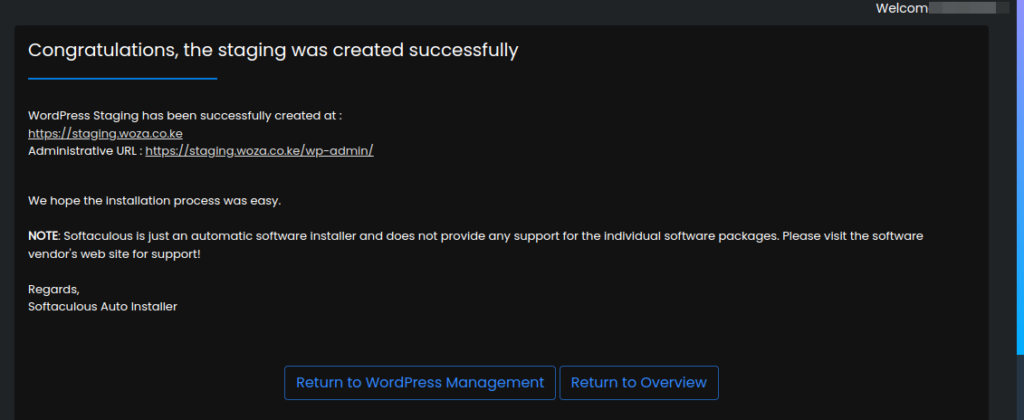
Step 9: Access the New Staging URL #
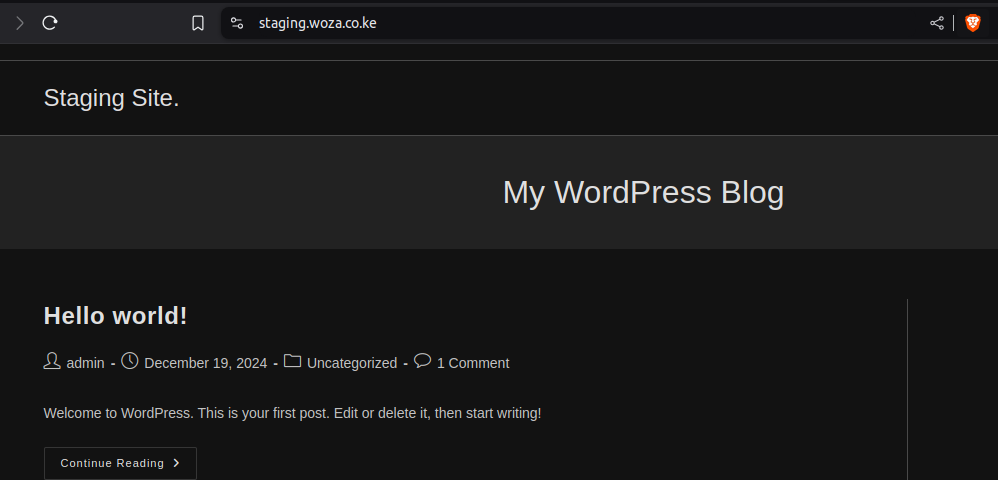
- Open a new browser tab and navigate to the URL of the staging WordPress site.
- Verify that the site loads correctly and all functionalities are working as expected.
All Done! #
Congratulations! You’ve successfully created a staging site for your WordPress website using cPanel and Softaculous. You can now use the staging site for testing, development, or any other purpose without affecting your live site.
Tips for a Smooth Staging Process #
- Backup Your Site: Always create a backup of your WordPress site before setting up a staging site, just in case something goes wrong.
- Check Permalinks: After staging, go to Settings > Permalinks in your WordPress dashboard and resave the settings to ensure proper URL structure.
- Update Links: If you’re staging to a new domain, use a search and replace tool to update any hardcoded links in your database.
Happy hosting! 🚀