#
FastPanel is a powerful and user-friendly hosting control panel that simplifies server management. One of the key features of FastPanel is its ability to easily install and manage databases like PostgreSQL.
Whether you’re setting up a new application or updating an existing one, installing PostgreSQL on FastPanel is a straightforward process. In this guide, we’ll walk you through the steps to install PostgreSQL on FastPanel.
Versions Currently Supported by FastPanel. #
FastPanel current supports the following Postgresql versions
Postgresql-11
Postgresql-12
Postgresql-13
Postgresql-14
Postgresql-15
Step-by-Step Guide to Install Postgresql on FastPanel #
Step 1: Log in to FastPanel #
- Open your web browser and navigate to the FastPanel login URL:
https://server-ip:8888/.- Replace
server-ipwith your server’s actual IP address.
- Replace
- Enter your username and password to log in to your FastPanel account.

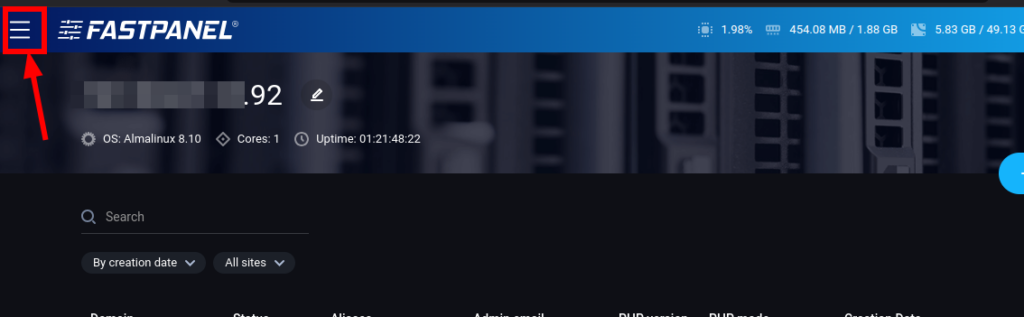
Step 2: Access the Menu #
- Once logged in, locate the menu icon ( represented by three horizontal lines) on the left side of the dashboard.
- Click on the menu icon to expand the options.
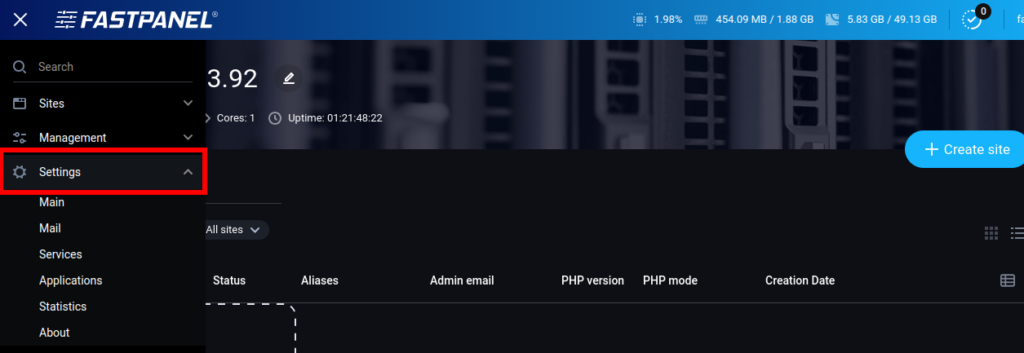
Step 3: Go to Settings #
- From the expanded menu, click on Settings.
- This will open a new set of options related to server configurations.
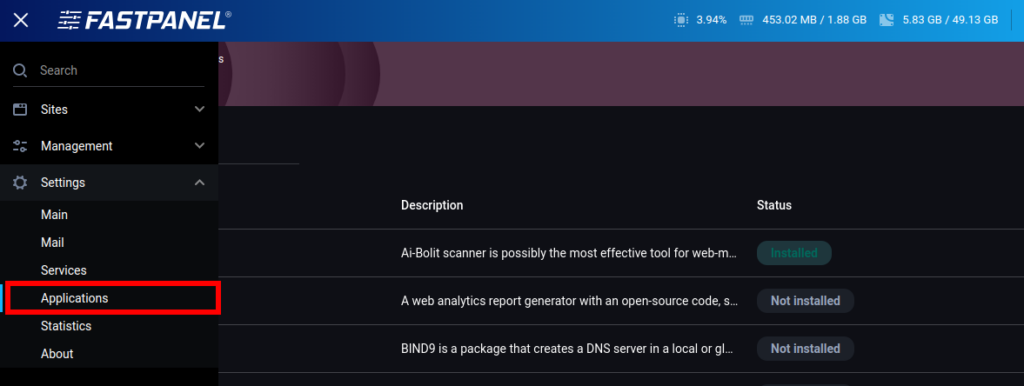
Step 4: Navigate to Applications #
- Under the Settings section, click on Applications.
- This will display a list of applications and software that can be installed or managed on your server.
Step 5: Locate PostgreSQL #
- Scroll through the list of applications to find PostgreSQL.
- FastPanel supports multiple database versions, so ensure you select the one that is compatible with your application. In this example, we select
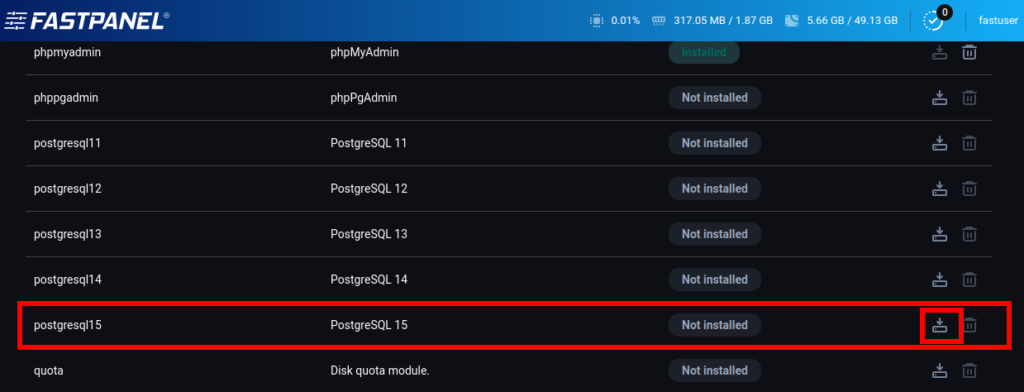
Step 6: Start the Installation #
- Once you’ve located PostgreSQL, click on the Download button next to it.
- This will initiate the installation process.
tep 7: Wait for Installation to Complete #
- After clicking the download button, you will see the status change to “Installing”.
- Allow a few minutes for the installation to complete. The time required may vary depending on your server’s speed and the PostgreSQL version being installed.
- We shall also install Phppgadmin

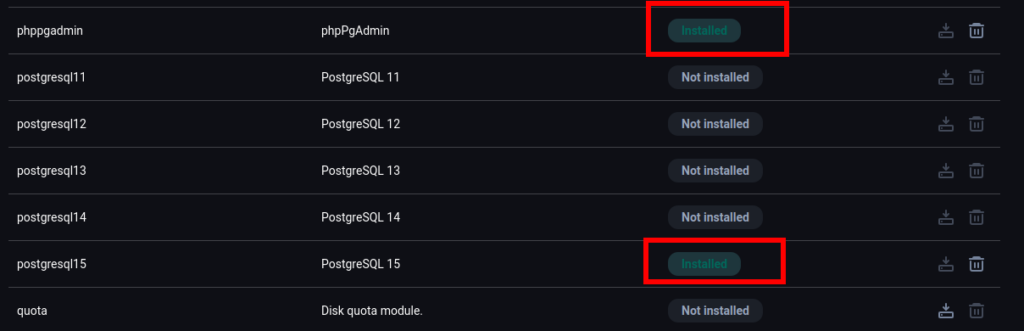
Step 8: Confirm Installation #
- Once the installation is complete, the status will change to “Installed”.
- You can now use PostgreSQL for your databases and applications.
- Since we’ve also installed phpPgadmin
Step 9: Confirm Postgresql is running via SSH. #
- You can login to your server via ssh
'ssh root@server_ip' - Run the command below to check postgress is in running status.
systemctl status postgresql-15
Replace 15 with the version you installed.

Conclusion #
Congratulations! You have successfully installed PostgreSQL on FastPanel. With PostgreSQL installed, you can now manage robust and scalable databases for your applications. FastPanel makes it easy to handle your server environment, so you can focus on building and maintaining your projects.
Happy Hosting! ?


