 Domain RegistrationFind and register the perfect domain for your website.
 .COM DomainChoose a widely recognized domain to build global credibility.
 All TLDsFind and register your perfect domain. Choose from local and global extensions.
 whoisCheck domain ownership details, expiration dates, and registrar information.
 US DomainRegister a .US domain and build trust in the USA.
 Web HostingEverything your website needs to run smoothly
 WordPress HostingWordPress hosting that just works
 Windows HostingReliable hosting for Windows environments
 Reseller HostingTurn hosting into your business
 Email HostingEmail that looks professional and works anywhere
 cPanel HostingFull control of your hosting with cPanel
 Affiliate ProgramJoin as a partner and earn commissions on every referral you send our way.
 Vps HostingScalable virtual servers that expand as you need.
 Dedicated ServersGet complete access and full control over your dedicated physical server.
 Managed vpsNot tech-savvy? We will take care of everything with our fully managed VPS hosting for you.
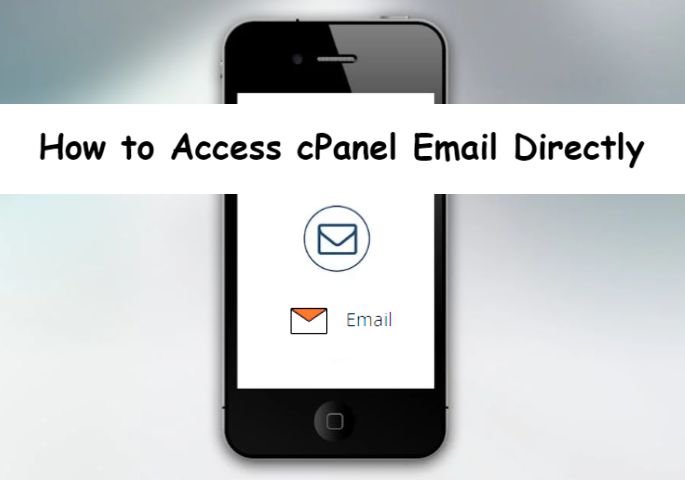
Wondering how to access cPanel email directly? You’ve come to the right place!
Whether you’re checking your business emails or keeping up with personal messages, getting straight into your cPanel email without any fuss is a breeze.
In this guide, we’ll walk you through the steps in a simple and fun way, so you can stay connected and organized with ease.
Let’s dive in and get those emails flowing directly to you!
What is cPanel?
cPanel is a super popular web hosting control panel that makes handling everything about your site a breeze, especially emails.
With cPanel, you can quickly set up, monitor, and protect your servers and sites, all through a user-friendly interface.
Some key features of cPanel related to email management include:
1. Creating and managing email accounts.
2. Setting up email forwarders and autoresponders.
3. Configuring spam protection and filters.
4. Accessing webmail to read and send emails directly from the cPanel interface.
cPanel offers a range of email services to meet different needs:
Webmail – Access your email through a web browser
Email forwarders – Forward emails from one address to another
Autoresponders – Automatically reply to incoming emails with a custom message
Compared to other email hosting options, cPanel’s email services are seamlessly integrated with its hosting management tools.
This means you can manage your website and emails from one single interface, making life so much easier.
Some awesome perks of using cPanel for email include:
Easy management: Handle your emails alongside your other hosting tasks effortlessly.
Customization: Tweak your email accounts and settings just the way you like.
Compatibility: Works well with different email clients and protocols.
However, if you’re running a large-scale operation or need advanced features, dedicated email hosting services might be a better fit.
But for most everyday needs, cPanel is a fantastic choice.
Prerequisites for Accessing cPanel Email
To access your cPanel email directly, you first need to have a hosting account that provides cPanel access.
If your hosting provider offers cPanel, you can typically access it through a URL like https://your-domain.com:2096 or https://your-ip-address:2087.

To set up an email account in cPanel, you can follow these steps:
1. Log in to your cPanel account and navigate to the Email Accounts section.
2. Enter the email address you want to create and set a password. You can also choose to generate a secure password.
3. Optionally, you can set the mailbox quota and choose to send a welcome email with client configuration instructions.
4. Click the Create Account button to complete the setup.
Once the email account is created, you can access it directly through the cPanel webmail interface by visiting a URL like https://your-domain.com/webmail and entering your email credentials.
Accessing cPanel Email via Webmail
To access your cPanel email directly via Webmail, follow these steps:
Using the cPanel Interface;
1. Log in to your cPanel account using the provided URL and your hosting account credentials.
2. Once in the cPanel dashboard, locate the Email Accounts section, typically found under the Email category.
Accessing Webmail;
3. From the Email Accounts section, click on the Webmail icon or link.
4. cPanel supports multiple Webmail clients, including Roundcube, Horde, and SquirrelMail. The specific client you see will depend on your hosting provider’s configuration.
Logging into Webmail;
5. In the Webmail interface, enter your full email address in the username or email field.
6. Enter the password you set when creating the email account.
7. Click the login or sign-in button to access your email inbox.
Setting preferences and configurations in Webmail
Once logged in, you can customize your Webmail settings and preferences:
1. Update your account information, such as name and signature.
2. Configure email forwarding or autoresponders.
3. Manage your inbox, including creating folders and filters.
4. Compose and send emails directly from the Webmail interface.
The specific options available will vary depending on the Webmail client used, but they generally provide a user-friendly way to manage your cPanel email directly from the web browser.
Accessing cPanel Email via Email Client

To access your cPanel email directly using an email client, follow these steps:
Choosing an Email Client
Popular email clients include Microsoft Outlook, Gmail, Yahoo Mail, Mozilla Thunderbird, and Apple Mail.
Using an email client offers several benefits over accessing email through a Webmail interface:
1. Offline access to your emails
2. Advanced features like calendars, contacts, and task management
3. Ability to use email protocols like IMAP or POP3 for better email management
Configuring the Email Client
To configure your email client to access your cPanel email, you’ll need the following information:
1. Your full email address (e.g., [email protected])
2. The password for your email account
3. The incoming mail server (typically “mail.your-domain.com”)
4. The incoming mail server port (143 for IMAP or 110 for POP3)
5. The outgoing mail server (typically “mail.your-domain.com”)
6. The outgoing mail server port (587 for SMTP)
With this information, you can follow the step-by-step guides provided by your email client’s documentation to set up the account.
Troubleshooting Common Issues
Some common problems that may arise during email client configuration include:
1. Incorrect server settings or port numbers
2. Authentication issues with your email credentials
3. Firewall or network settings blocking the connection
To troubleshoot these problems, you can try the following:
1. Verify that you have the correct server details and port numbers
2. Ensure your email credentials (username and password) are entered correctly
3. Check your firewall and network settings to allow the necessary connections
4. Contact your hosting provider if you continue to experience issues
By following these steps, you can successfully configure your preferred email client to access your cPanel email directly.
Accessing cPanel Email on Mobile Devices
To access your cPanel email directly on mobile devices, you can use popular email apps like Gmail or Outlook Mobile.

Here’s a step-by-step guide on how to configure your cPanel email on iOS and Android devices:
Configuring Email on iOS Devices
1. Open the Settings app on your iOS device.
2. Tap on “Mail” in the Settings menu.
3. Tap on “Accounts” and then “Add Account”.
4. Select “Other” as the account type.
5. Tap on “Add Mail Account”.
6. Enter your name, email address, password, and a description for the account.
7. Select “IMAP” as the account type (recommended).
8. Enter the following settings:
Incoming Mail Server:
Host Name: mail.your-domain.com
Username: [email protected]
Password: your-email-password
Outgoing Mail Server:
Host Name: mail.your-domain.com
Username: [email protected]
Password: your-email-password
9. Tap “Next” and verify the settings.
10. Tap “Save” to complete the setup.
Configuring Email on Android Devices
1. Open the Settings app on your Android device.
2. Tap on “Accounts” and then “Add account”.
3. Select “Personal (IMAP/POP)” as the account type.
4. Enter your email address and password, then tap “Manual setup”.
5. Select “IMAP account” as the account type.
6. Enter the following settings:
Username: [email protected]
Password: your-email-password
IMAP server: mail.your-domain.com
Security type: SSL/TLS
Port: 993
7. Tap “Next”.
8. Enter the following settings for the outgoing server:
SMTP server: mail.your-domain.com
Security type: SSL/TLS
Port: 465
Require sign-in: ON
9. Tap “Next” and verify the settings.
10. Tap “Finish setup” to complete the configuration.
With these steps, you can easily access your cPanel email directly from your mobile device using popular email apps.
Remember to use the correct incoming and outgoing server settings, as well as your full email address and password for authentication.
Security Considerations
When accessing your cPanel email directly, it’s crucial to ensure secure connections and follow best practices for email security.

Here are some important considerations:
Ensuring Secure Access
Always use secure connections (SSL/TLS) when accessing your cPanel email, whether through Webmail or email clients.
This helps protect your email communications from unauthorized access and eavesdropping.
In cPanel, you can configure security settings for email accounts, such as:
1. Enabling SSL/TLS for incoming and outgoing mail servers
2. Setting minimum TLS version requirements
3. Configuring IP address restrictions for email access
When configuring email clients, ensure that you select the appropriate security settings and port numbers for secure connections (e.g., IMAP over SSL/TLS on port 993, SMTP over SSL/TLS on port 465).
Best Practices for Email Security
To maintain email security, follow these best practices:
1. Use strong, unique passwords for each email account
2. Enable two-factor authentication (2FA) for an extra layer of security
3. Be cautious of phishing attempts that try to trick you into revealing your login credentials
4. Keep your email client and operating system up-to-date with the latest security patches
5. Consider using email encryption for sensitive communications
6. Recognize and avoid phishing attempts.
Phishing emails are designed to steal your personal information, such as login credentials or financial details.
Be wary of emails that:
1. Urgently request you to click on a link or open an attachment
2. Claim to be from a legitimate organization but have spelling errors or unusual sender addresses
3. Ask you to verify your account details or provide sensitive information
4. Offer prizes or deals that seem too good to be true
If you suspect an email is a phishing attempt, do not click on any links or open attachments.
Instead, contact the organization directly using a known, trusted method to verify the legitimacy of the request.
Conclusion
Accessing your cPanel email directly provides a convenient way to manage your communications.
By following the steps outlined in this article, you can easily log in to your cPanel email account and take advantage of the features and functionality offered.
Also,if you master the techniques covered in this article, you’ll be able to efficiently access and manage your cPanel email.
This will streamline your communication workflows and enhance your overall productivity.