Everyone wants convenience in emails. To do this, you must set up G-suite emails in cPanel. Google offers this at a small fee.
Ensure to acquire a Google Workspace subscription and successfully validate your domain’s ownership before moving further with the DNS setting.
Setting up G-Suite emails in cPanel can provide a streamlined email management solution. Also, get enhanced collaboration features, reliability, and security offered by Google.
Let’s walk you through setting up G-Suite mails in cPanel. Leverage the power of G-Suite while maintaining your cPanel hosting environment.
Why set up G-Suite? #
- Professional email communication- G-Suite offers a professional email solution that includes your domain name, creating a more credible and trustworthy image for your business. With G-Suite, you can have email addresses like [email protected], giving your communications a more professional appearance.
- Enhanced collaboration- G-Suite provides collaborative tools such as Google Drive, Docs, and Calendar, enabling seamless teamwork and efficient communication. Easily create, share, and collaborate on documents and presentations in real time.
- Reliability and security- backed by Google’s robust infrastructure, ensuring reliable email delivery and security measures to safeguard sensitive data. Google’s advanced security features provide peace of mind.
- Scalability- scale your email infrastructure easily as your business grows. You can add or remove user accounts as needed. G-Suite ensures the email system can meet your organization’s evolving needs.
- Simplified email management- G-Suite offers an intuitive web-based interface that makes managing emails, contacts, and settings a breeze. Access your emails from anywhere using any device with an internet connection.
Setting up G-Suite mails in cPanel #
Sign up for G-Suite #
Visit the G-Suite website and sign up for a G-Suite account that suits your business needs. Choose a plan that offers the required number of user accounts and features.
To create your G-Suite account, provide the necessary information, such as your domain name and business details.
Verify domain ownership #
You will be prompted to verify your domain ownership during the G-Suite setup process. This step ensures you control the domain you want to associate with your G-Suite emails. Follow the instructions provided by G-Suite to verify your domain, which may involve making DNS record changes or uploading an HTML file to your website’s root directory.
Access cPanel #
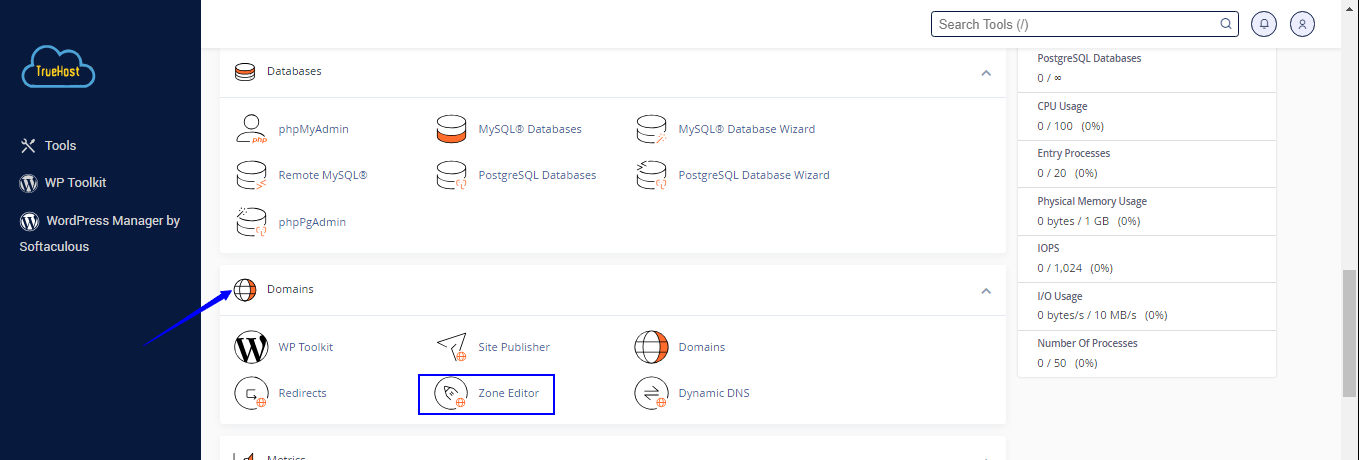
Log in to your cPanel account provided by your hosting provider. Look for the “Zone Editor” section on the domains tab.
Click the “Zone Editor” icon to access your email settings, where you will proceed to modify your MX records.
Choose the domain and proceed to manage #
It takes you to zone records. Navigate to MX records, where we’ll be adding a new record. Delete the existing record and click on add record. #
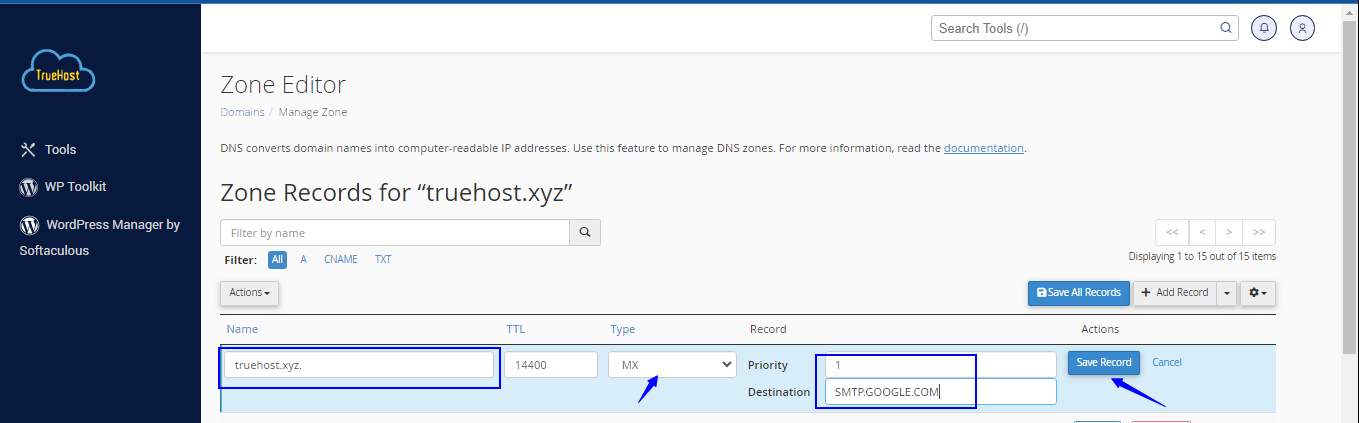
Fill in the above information and proceed to save the record. A popup message will show at the top confirming your new record.
This step ensures incoming emails are directed to the G-Suite servers instead of your cPanel hosting server.
Let’s now update the email routing #
Navigate to the “Email Routing” section. This section determines how cPanel handles incoming emails for your domain.
It’s under the Email section.

Choose your domain and select the “Remote Mail Exchanger” option to ensure all incoming emails are routed to the G-Suite servers.
This setting ensures that cPanel does not attempt to deliver emails locally, directing them to G-Suite instead.

Click on change, and wait at least 30 minutes for changes.
Set up G-Suite accounts #
Return to the G-Suite admin console and add custom links for your email. Under account settings, proceed to custom URLs.

You’ll provide your email details to ensure your emails are configured with Gmail, not cPanel.
Use the Gmail section #
Use the following settings to ensure your settings are updated, and you can access your emails through access https://webmail.domain.com link.
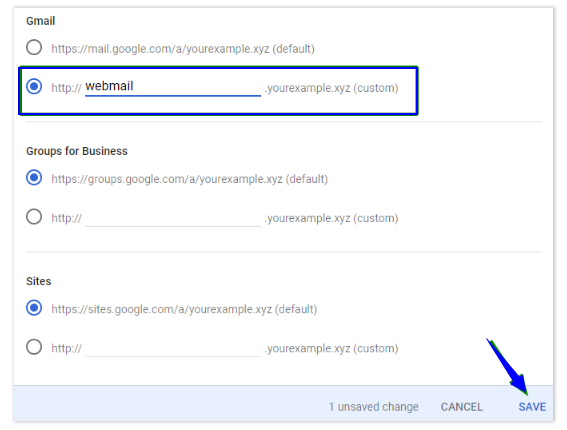
Remember to click once done. That’s it!
Test and verify #
Once you have set up G-Suite accounts and configured email clients, testing the setup is crucial to ensure everything works correctly.
Send a test email to your G-Suite account from an external email address and check if it is delivered successfully.
Reply to the test email to verify that you can send emails using the G-Suite interface or email clients.
This step confirms that your G-Suite emails are set up and functioning as expected. The propagation period can vary but typically ranges from a few minutes to 24 hours.
Some emails may still be delivered to your old mail server during this time.
Sum up; #
It’s an easy procedure that combines the power of G-Suite’s email and collaboration features with the convenience and control of your cPanel hosting environment.
Enjoy professional email communication, enhanced collaboration, reliability, security, and scalability.
Follow the steps outlined in this guide to seamlessly integrate G-Suite into your cPanel setup and elevate your email management experience.
With G-Suite, you can take your organization’s communication and productivity to new heights. Get started today.


