Supabase VPS Hosting
Truehost Cloud · Supabase VPS Hosting
Client Getting Started Guide
Everything you need to know — from placing your order to connecting your first app
Version 1.0 · 2026 · Truehost Cloud
In This Article
- Welcome to Your Supabase VPS
- The Ordering Process
- What Happens After You Order
- Your Welcome Email
- Accessing Supabase Studio
- Navigating the Studio Dashboard
- Using the Supabase API
- Your Domain and URL
- SSH Access to Your Server
- Reinstalling Supabase
- Getting Help
- Quick Reference Card
1. Welcome to Your Supabase VPS
Thank you for choosing Truehost Cloud for your Supabase hosting. This guide walks you through everything that happens after you place your order — what our systems do automatically, what you will receive, and how to connect your first app to your Supabase instance.
What is Supabase?
Supabase is an open-source backend platform built on top of PostgreSQL. It gives you a fully managed database, authentication system, file storage, and auto-generated REST and GraphQL APIs — all accessible through a clean web dashboard called Supabase Studio. Think of it as your own private Firebase, hosted entirely on your server.
Your Supabase instance runs on a dedicated Virtual Private Server (VPS) that belongs entirely to you. Unlike shared hosting, your server is not shared with other customers — which means better performance, full data privacy, and no usage limits imposed by us.
2. The Ordering Process
Placing your order for a Supabase VPS on Truehost Cloud takes just a few minutes. Here is a step-by-step walkthrough of what you will see.
Step 1 — Navigate to the Order Page
Log in to your Truehost Cloud account at truehost.cloud and find the Supabase VPS product. Click Order Now to begin. You will be taken to the server configuration page.
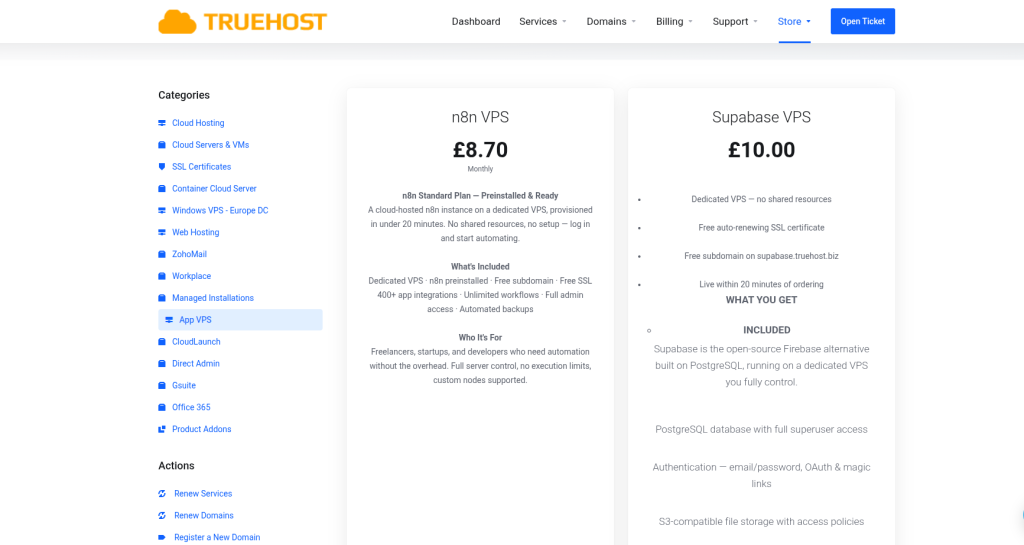
Truehost Cloud order page showing the Supabase VPS product and Order Now button
Step 2 — Configure Your Server
On the configuration page you will see the following fields to fill in:
| Field | What to do |
|---|---|
| Hostname | Enter your preferred hostname for the server (e.g. my-supabase-server). This is an internal label for your VPS and does not affect your Supabase URL. |
| Root Password | A secure root password is automatically generated for you. You can use the default or replace it with your own. Either way, save it — you will need it for SSH access. |
| Operating System | Select your preferred OS from the available options. Our Supabase VPS packages currently support Ubuntu 22.04 and Ubuntu 22.3. If you require a different operating system, raise a support ticket and our team will assist you. |
💡 Tip: The root password is shown only once during the ordering process. Save it somewhere secure before proceeding. It will also be included in your welcome email.
📷
Screenshot 2
Configuration page showing the Hostname, Root Password, and Operating System fields
Step 3 — Review and Check Out
Click Continue or Check Order to proceed to the checkout summary. Review your order details to confirm everything looks correct before completing payment.
📷
Screenshot 3
Order summary / checkout page showing plan details and total
Step 4 — Choose a Payment Method
Select your preferred payment method from the available options. Truehost Cloud supports multiple payment methods including card payments and mobile money. Complete the payment to confirm your order.
📷
Screenshot 4
Payment method selection page
Step 5 — Order Confirmed
Once your payment is received your order is confirmed and provisioning begins automatically. You will see a confirmation screen and receive a confirmation email. No further action is needed — our system handles everything from here.
3. What Happens After You Order
Once your order is confirmed, our provisioning system takes over completely. You do not need to do anything — just wait for your welcome email. Here is a summary of the key stages:
| # | Stage | What is happening |
|---|---|---|
| 1 | Order Confirmed | Your payment is received and our billing system activates your service. |
| 2 | Domain Configured | A unique subdomain (e.g. supabase-abc123.truehost.biz) is created and pointed to your VPS automatically. |
| 3 | Welcome Email Sent | You receive an email with your Supabase URL, Studio login credentials, API keys, and SSH access details. |
⏱ How long does this take? The full provisioning process typically completes within 10 to 15 minutes of your order being confirmed. You will receive your welcome email as soon as everything is ready.
4. Your Welcome Email
When provisioning is complete, you will receive a welcome email from Truehost Cloud. This email contains everything you need to access and connect to your Supabase instance. Keep it safe — it includes sensitive credentials.
| Item | Details |
|---|---|
| App URL | The full HTTPS web address for your Supabase instance (e.g. https://supabase-abc123.truehost.biz) |
| Studio Login | Your Supabase Studio username and auto-generated password |
| Anon Key | Your public API key — used in your app’s frontend code |
| Service Role Key | Your private API key — used for admin-level backend operations only |
| API URL | Same as your App URL — used when initialising the Supabase client in your code |
| VPS IP Address | The public IP address of your server |
| SSH Username | root — used for direct server access if needed |
| SSH Password | Your server root password for command-line access |
⚠️ Important: Keep your Service Role Key private at all times. Never expose it in frontend code or public repositories. It has full admin access to your database and bypasses all security rules.
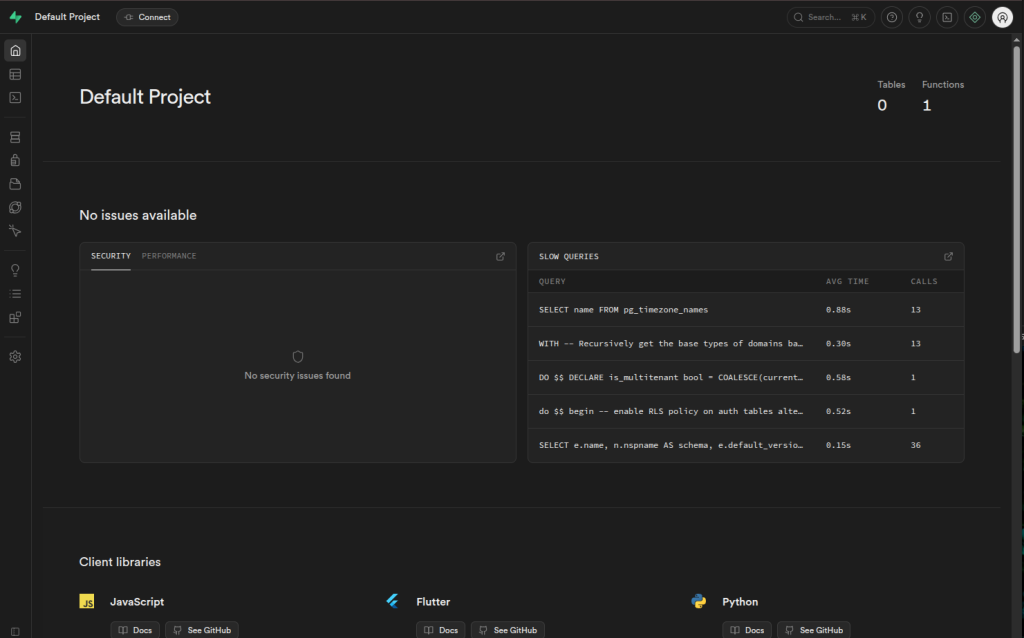
5. Accessing Supabase Studio
Supabase Studio is your control panel — a web-based dashboard where you manage everything about your backend: your database tables, your app’s users, your uploaded files, and your API keys. You access it directly from your browser using the URL in your welcome email. No installation is needed.
Logging In for the First Time
- Open your welcome email and copy your App URL (e.g.
https://supabase-abc123.truehost.biz). - Paste the URL into your web browser and press Enter.
- You will see a login prompt asking for a username and password. Enter the Studio username and password provided in your welcome email.
- Click Sign In. You will land on the Supabase Studio dashboard.
Supabase Studio login screen showing the username and password fields
⏳ URL not loading yet? After provisioning, DNS records can take up to 60 seconds to propagate. If your Supabase URL is not reachable immediately after receiving your welcome email, wait 2 to 3 minutes and try again. This is normal.
💡 About your login credentials: Your Studio username and password are set during provisioning and included in your welcome email. Unlike some dashboards, Supabase Studio does not have a built-in password change screen. If you need your credentials updated, please raise a support ticket with Truehost Cloud and our team will update them for you.
6. Navigating the Studio Dashboard
Once you are logged in you will see the Supabase Studio dashboard. On the left side of the screen is the main navigation menu. This is how you move between the different sections of your backend. Here is what each section does and when you would use it.
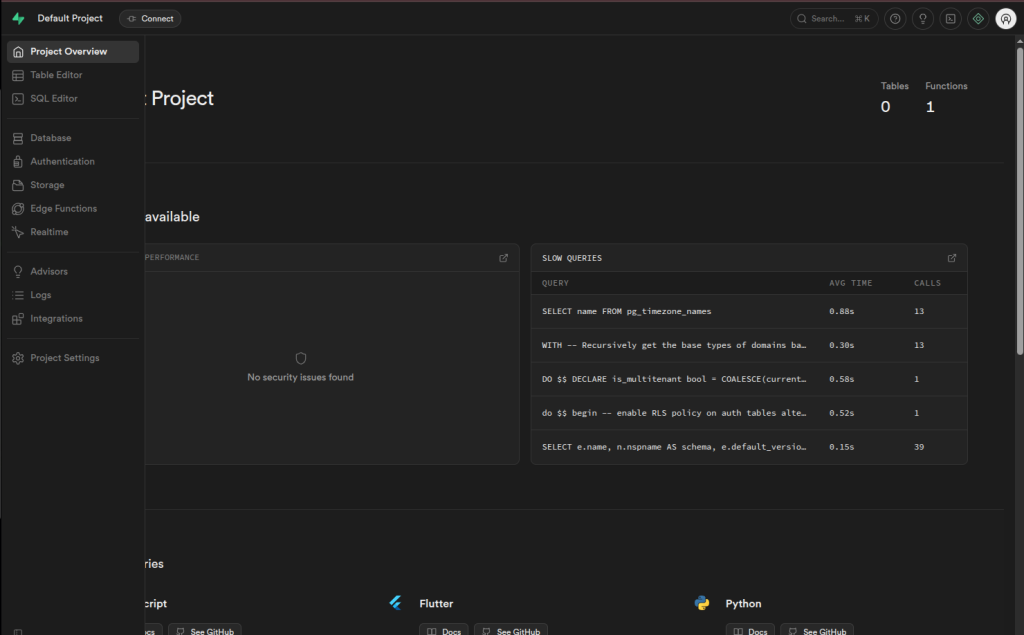
Supabase Studio main dashboard showing the left navigation sidebar
🗄️ Table Editor
The Table Editor is the most commonly used section — especially if you are new to databases. Think of it like a spreadsheet (similar to Excel or Google Sheets) but for your app’s data. You can:
- Create new tables to store your data (e.g. a table for users, products, or orders)
- Add columns to define what information each table stores
- Insert, edit, and delete rows of data directly — no coding or SQL required
- Filter and search through your data easily
This is the best place to start if you want to set up your database structure and add some initial data.
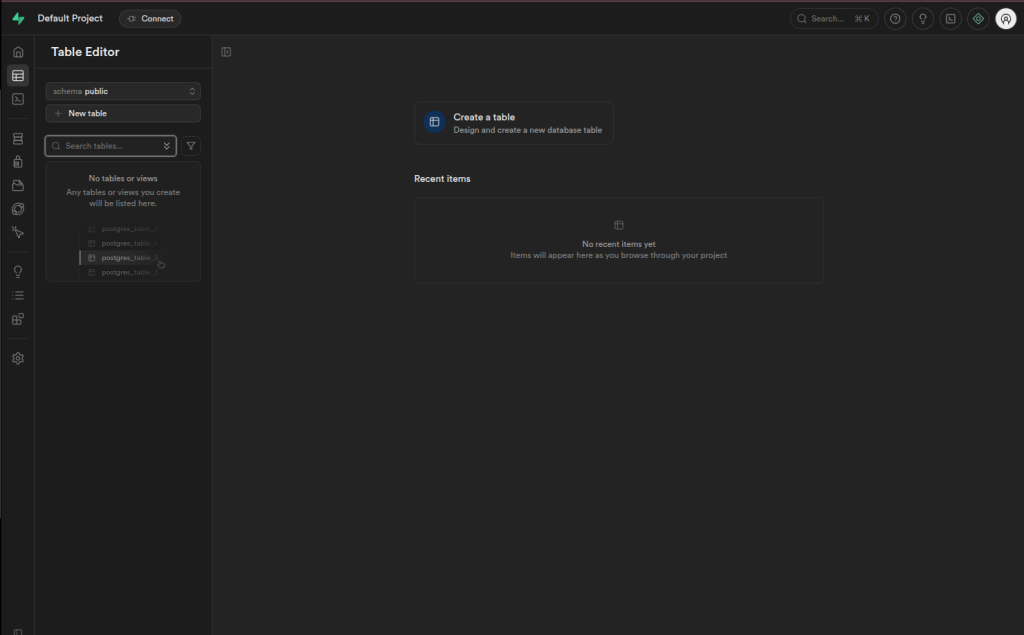
Supabase Studio Table Editor showing a table with columns and rows of data
⚡ SQL Editor
The SQL Editor is for users who are comfortable writing database queries. It gives you a direct window into your PostgreSQL database where you can write and run SQL commands. For example, you can use it to query specific data, create database functions, or make bulk changes. If you are not familiar with SQL, you can skip this section and use the Table Editor instead — both work with the same database.
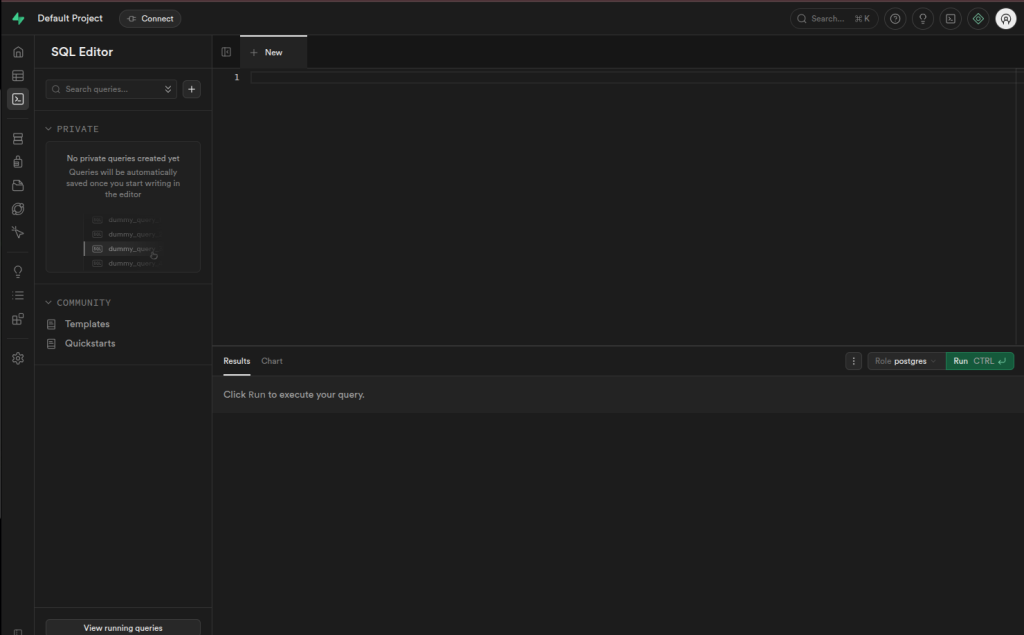
Supabase Studio SQL Editor with a sample query
🔐 Authentication
The Authentication section is where you manage your app’s users — the people who sign up and log in to your application (not the Studio itself). From here you can:
- View a list of all registered users and their sign-up details
- Enable or disable sign-up methods — for example allowing users to sign up with email and password, or with Google or GitHub
- Set security policies (called Row Level Security policies) that control which users can see or edit which data
- Manually add or delete users if needed
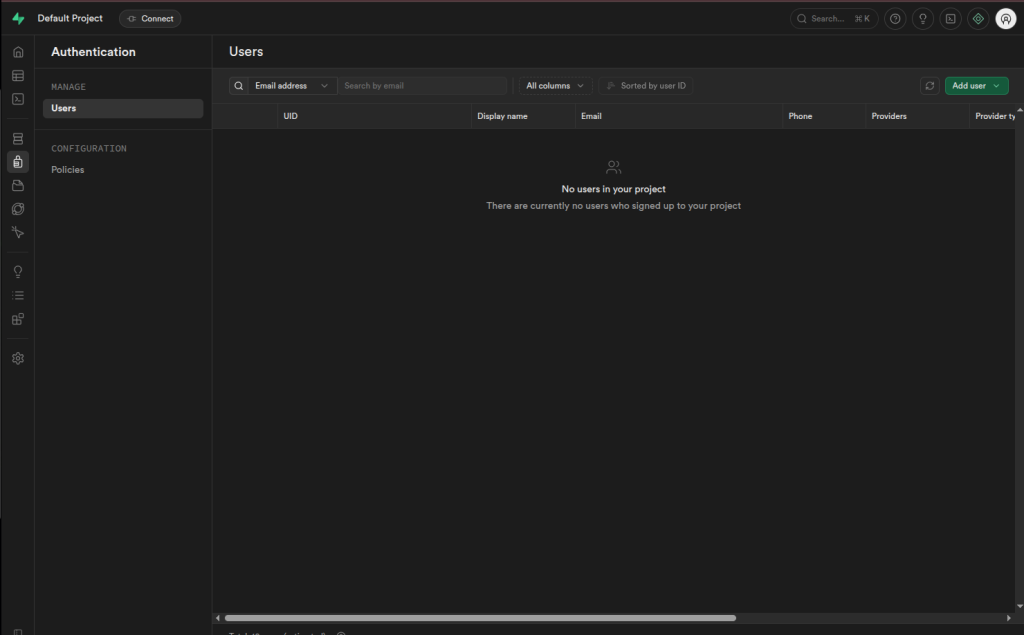
Supabase Studio Authentication section showing the list of app users
📁 Storage
The Storage section works like a file manager for your app. You can upload and manage files — such as images, documents, or videos — that your application needs to serve to users. Files are organised into buckets (think of these as folders). You can set each bucket to be public (accessible to anyone) or private (accessible only to authenticated users).
- Create buckets to organise your files by type or purpose
- Upload files directly from your browser
- Copy the public URL of a file to use it in your application
- Set access policies to control who can view or upload files
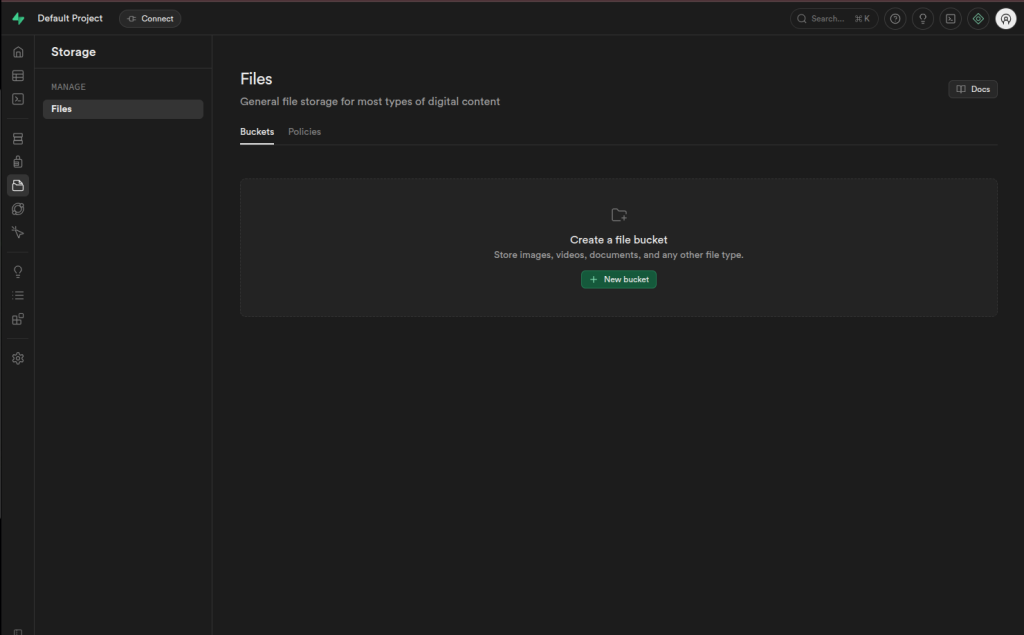
Supabase Studio Storage section showing buckets and uploaded files
7. Using the Supabase API
One of the most powerful features of Supabase is its auto-generated API. As soon as you create a table in Studio, Supabase automatically generates REST and GraphQL endpoints for it — no backend code required.
SDK Quick Start
To connect your application to your Supabase instance, install the Supabase JavaScript client and initialise it with your API URL and Anon Key from your welcome email:
npm install @supabase/supabase-jsimport { createClient } from '@supabase/supabase-js'
const supabase = createClient(
'https://supabase-abc123.truehost.biz', // your API URL
'your-anon-key-from-welcome-email' // your Anon Key
)Your API Keys Explained
| Key | Where to use it |
|---|---|
| Anon Key | Safe to use in frontend/client-side code. Respects your Row Level Security (RLS) policies. |
| Service Role Key | For backend/server-side use only. Bypasses RLS — never expose this in frontend code or public repositories. |
💡 Tip: Always enable Row Level Security (RLS) on your tables before going live. You can configure RLS policies in Studio under Authentication → Policies.
8. Your Domain and URL
Your Supabase instance is accessible via a unique subdomain created automatically during provisioning. The subdomain is randomly generated to give each customer a unique address.
Your Subdomain Format
Your URL will follow this format: https://supabase-abc123.truehost.biz — where abc123 is a unique 6-character identifier generated for your account.
SSL and Security
Your Supabase URL is always served over HTTPS. All traffic between your browser, your app, and your server is encrypted. The SSL certificate is issued by Let’s Encrypt and renews automatically — you do not need to manage this.
Using a Custom Domain (Optional)
If you would like to use your own domain name (e.g. db.yourcompany.com) instead of the default subdomain, raise a support ticket with your preferred domain and our team will assist you in pointing your DNS to your Supabase VPS.
9. SSH Access to Your Server
Your VPS comes with full root SSH access, giving you complete control over your server. This section is intended for advanced users who need to manage the server directly.
ℹ️ Note: SSH access is not required to use Supabase. Most clients will never need it. Supabase Studio is all you need for managing your database and backend.
How Supabase Runs on Your Server
Supabase runs as a collection of Docker containers managed by Docker Compose on your VPS. This includes the database (PostgreSQL), the API gateway (Kong), the Studio dashboard, authentication service, storage service, and more. All containers are configured to restart automatically if they ever stop unexpectedly.
Your data is stored in Docker volumes on the server, which persist independently of the containers — so your data is safe even if the containers are restarted.
Firewall
Your server has a firewall (UFW) configured automatically during provisioning. Only the following ports are open:
| Port | Name | Purpose |
|---|---|---|
22 | SSH | Remote server access |
80 | HTTP | Used during SSL certificate issuance |
443 | HTTPS | All Supabase traffic goes through this port |
Connecting via SSH
On macOS or Linux, open a Terminal and run:
ssh root@YOUR_VPS_IP_ADDRESSEnter the SSH password from your welcome email when prompted. On Windows, use PuTTY (putty.org) or the built-in Windows Terminal.
Useful Server Commands
| Task | Command |
|---|---|
| Check all container status | docker compose ps |
| Restart all Supabase services | docker compose restart |
| View logs | docker compose logs --tail 100 |
| Stop Supabase | docker compose down |
| Start Supabase | docker compose up -d |
| Check disk usage | df -h |
| Check memory usage | free -h |
| Check firewall rules | ufw status |
10. Reinstalling Supabase
If you ever need to reinstall Supabase from scratch — for example after accidentally breaking a configuration — you can trigger a reinstall from your TrueHost client area.
⚠️ Warning: A reinstall will permanently wipe all your Supabase data including your database tables, authentication users, storage files, and configuration. Make sure to back up your data before proceeding.
How to Reinstall
- Log in to your Truehost Cloud account and go to Services. Click Manage next to your Supabase VPS product.
- Find the Reinstall button on the management page and click it.
- Confirm the action when prompted. The reinstall process will run automatically.
- You will receive a new welcome email with fresh credentials when the reinstall is complete.
ℹ️ Prefer to let us handle it? If you would like Truehost Cloud to carry out the reinstall on your behalf, simply raise a support ticket at truehost.cloud → Support → Open Ticket and our team will sort it out for you.
11. Getting Help
Truehost Cloud Support
Our support team can help with anything related to your VPS or provisioning. This includes server issues, welcome email problems, custom domain setup, resource upgrades, and billing queries.
To raise a support ticket, log in at truehost.cloud and go to Support → Open Ticket. Include your service ID and a description of the issue.
Supabase Documentation
For help with using Supabase itself — building queries, configuring authentication, managing storage, or understanding features — the official Supabase documentation is the best place to start:
- supabase.com/docs — Official documentation
- GitHub Discussions — Community support
- discord.supabase.com — Supabase Discord community
12. Quick Reference Card
| Item | Details |
|---|---|
| My Supabase URL | Check your welcome email or WHMCS client area |
| Studio Login | Username and password in your welcome email |
| Anon Key | In your welcome email — safe for frontend use |
| Service Role Key | In your welcome email — backend/server use only, never expose publicly |
| API URL | Same as your Supabase URL |
| VPS IP Address | In your welcome email |
| SSH Username | root |
| SSH Password | In your welcome email |
| Provisioning Time | 10 – 15 minutes after order confirmation |
| SSL Certificate | Issued by Let’s Encrypt — renews automatically |
| Firewall | Ports 22, 80, 443 open — all others blocked |
| Restart Services | docker compose restart via SSH |
| Support | truehost.cloud → Support → Open Ticket |
| Supabase Docs | supabase.com/docs |
Truehost Cloud · truehost.cloud · 2026