n8n VPS Provisioning
Client Getting Started Guide
Everything you need to know — from placing your order to running your first automation
Version 1.0 · 2026 · Truehost Cloud
In This Article
- Welcome to Your n8n VPS
- The Ordering Process
- What Happens After You Order
- Your Welcome Email
- n8n First-Time Setup
- Accessing Your n8n Dashboard
- Your Domain and URL
- Getting Started with n8n
- SSH Access to Your Server
- Reinstalling n8n
- Getting Help
- Quick Reference Card
1. Welcome to Your n8n VPS
Thank you for choosing Truehost Cloud for your n8n automation hosting. This guide walks you through everything that happens after you place your order — what our systems do automatically, what you will receive, and how to log in and get started with n8n.
What is n8n?
n8n is a powerful, open-source workflow automation tool. It lets you connect apps, APIs, and services together using a visual drag-and-drop interface — no coding required. Think of it as your personal automation engine, hosted entirely on your own private server.
Your n8n instance runs on a dedicated Virtual Private Server (VPS) that belongs entirely to you. Unlike shared hosting, your server is not shared with other customers — which means better performance, full privacy, and no usage limits imposed by us.
2. The Ordering Process
Placing your order for an n8n VPS on Truehost Cloud takes just a few minutes. Here is a step-by-step walkthrough of what you will see.
Step 1 — Navigate to the Order Page
Log in to your Truehost Cloud account at truehost.cloud and find the n8n VPS product. Click Order Now to begin. You will be taken to the server configuration page.
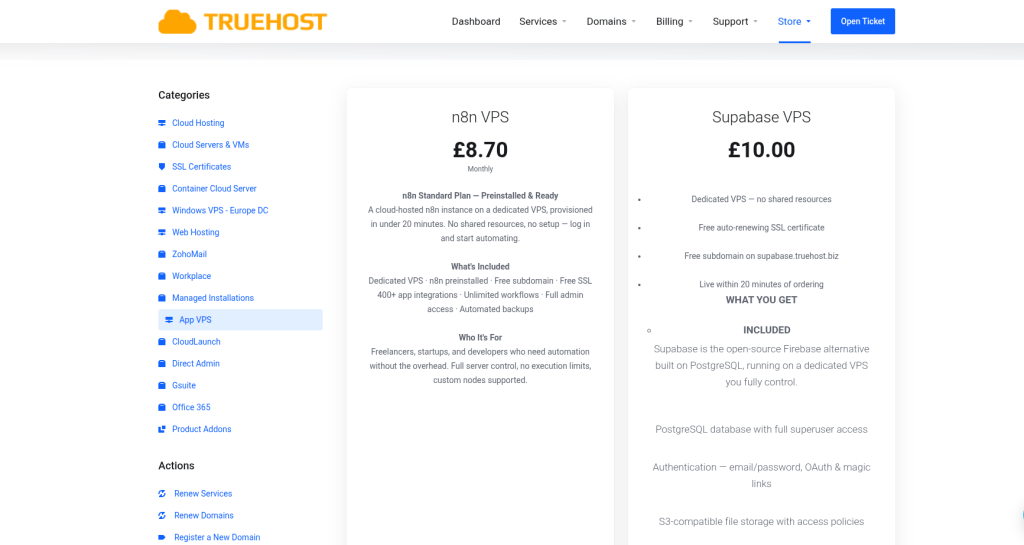
Truehost Cloud order page showing the n8n VPS product and Order Now button
Step 2 — Configure Your Server (Hostname & Root Password)
On the configuration page you will see two fields to fill in:
| Field | What to do |
|---|---|
| Hostname | Enter your preferred hostname for the server (e.g. my-n8n-server). This is an internal label for your VPS and does not affect your n8n URL. |
| Root Password | A secure root password is automatically generated for you. You can use the default or replace it with your own. Either way, save it — you will need it for SSH access. |
| Operating System | Select your preferred OS from the available options. Our n8n VPS packages currently support Ubuntu 22.04 .If you require a different operating system, you can raise a support ticket with Truehost Cloud and our team will assist you in applying an OS of your choice. |
💡 Tip: The root password is shown only once during the ordering process. Save it somewhere secure before proceeding. It will also be included in your welcome email.
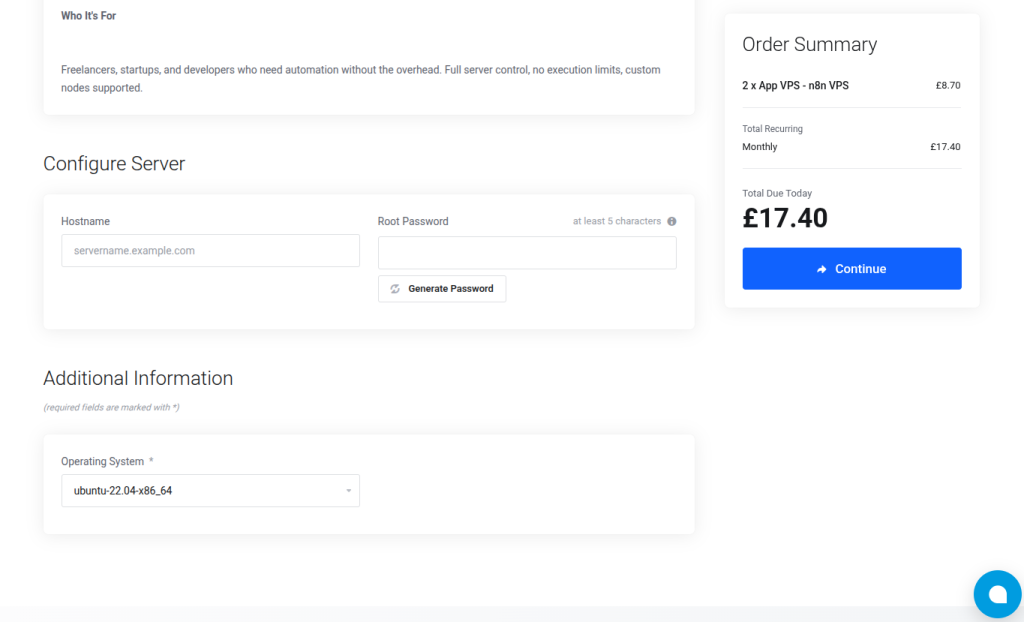
Configuration page showing the Hostname field and auto-generated Root Password
Step 3 — Review and Check Out
Click Continue to proceed to the checkout summary. Review your order details to confirm everything looks correct before completing payment.
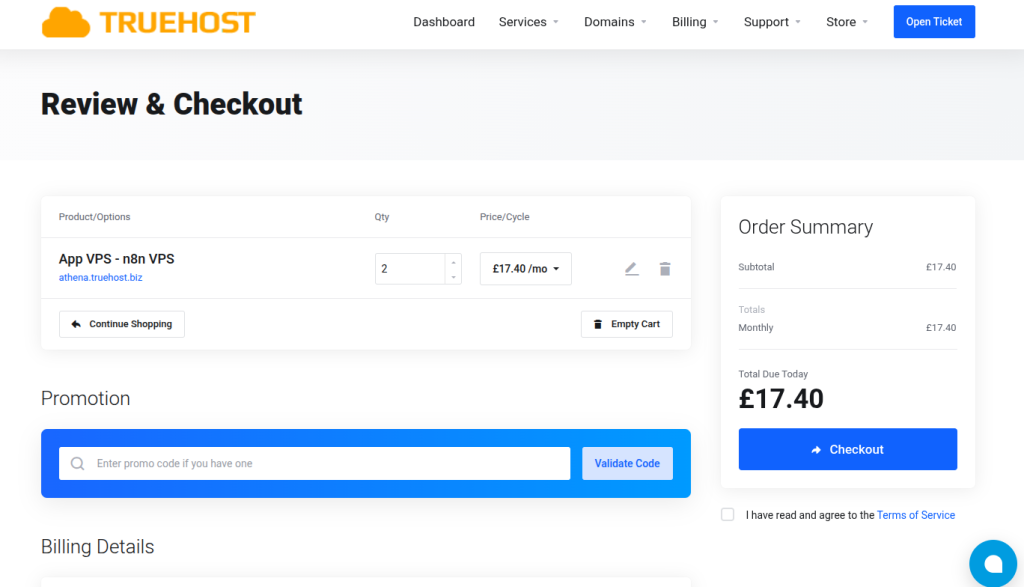
Order summary / checkout page showing plan details and total
Step 4 — Choose a Payment Method
Select your preferred payment method from the available options. Truehost Cloud supports multiple payment methods including card payments and mobile money. Complete the payment to confirm your order.
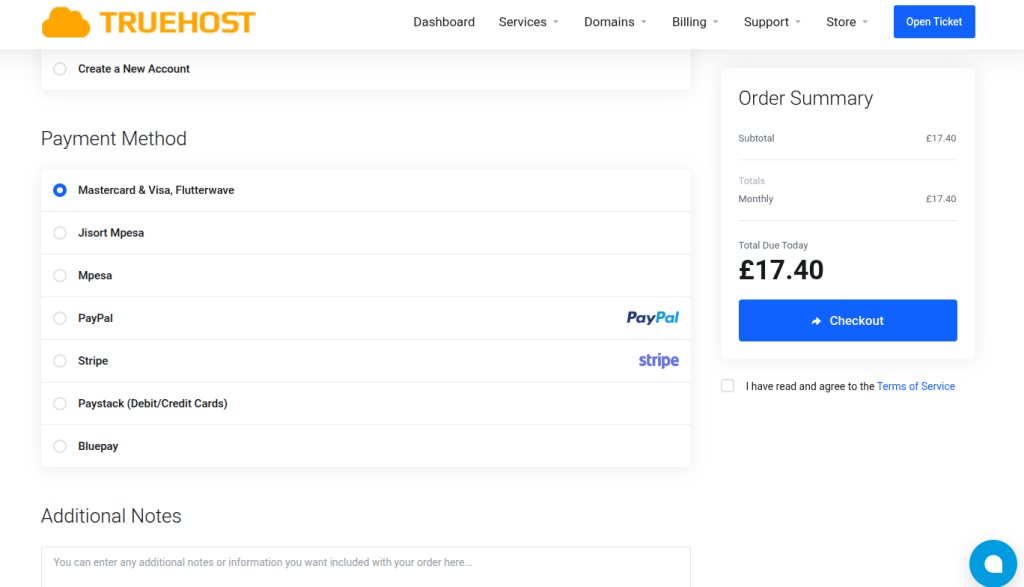
Payment method selection page
Step 5 — Order Confirmed
Once your payment is received your order is confirmed and provisioning begins automatically. You will see a confirmation screen and receive a confirmation email. No further action is needed — our system handles everything from here.
3. What Happens After You Order
Once your order is confirmed, our provisioning system takes over completely. You do not need to do anything — just wait for your welcome email. Here is a summary of the key stages:
| # | Stage | What is happening |
|---|---|---|
| 1 | Order Confirmed | Your payment is received and our billing system activates your service. |
| 2 | Domain Configured | A unique subdomain (e.g. n8n-abc123.truehost.biz) is created and pointed to your VPS automatically. |
| 3 | Welcome Email Sent | You receive an email with your n8n URL, login credentials, and SSH access details. |
⏱ How long does this take? The full provisioning process typically completes within 10 to 15 minutes of your order being confirmed. You will receive your welcome email as soon as everything is ready.
4. Your Welcome Email
When provisioning is complete, you will receive a welcome email from Truehost Cloud. This email contains everything you need to access your n8n instance. Keep it safe — it includes sensitive credentials.
| Item | Details |
|---|---|
| Your n8n URL | The full HTTPS web address to access your n8n dashboard (e.g. https://n8n-abc123.truehost.biz) |
| n8n Login Email | Your working email address — entered during the first-time setup wizard when you first open your n8n URL |
| n8n Password | Your auto-generated secure password (unique to your instance) |
| VPS IP Address | The public IP address of your server |
| SSH Username | root — used for direct server access if needed |
| SSH Password | Your server root password for command-line access |
5. n8n First-Time Setup
When you open your n8n URL for the very first time, you will see a setup wizard rather than the login page. This is a one-time process that creates your admin account — it only appears once.
Opening the Setup Page
Copy the n8n URL from your welcome email and paste it into your browser. You will be greeted by the n8n owner account setup screen.
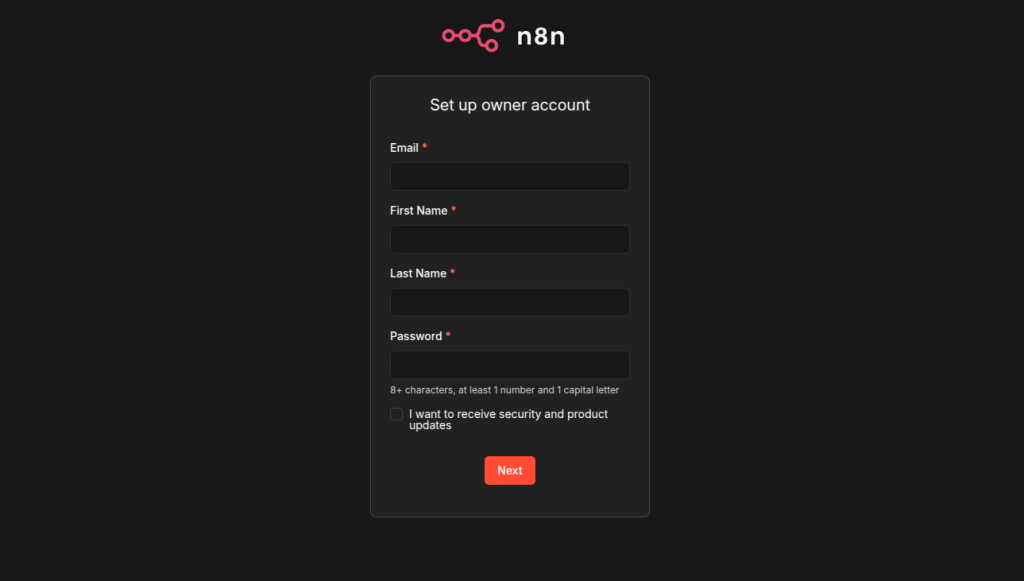
n8n first-time setup page showing the owner account creation form
Completing the Setup Form
Fill in the following fields and click Get Started:
| Field | What to enter |
|---|---|
| First Name | Your first name |
| Last Name | Your last name |
[email protected] or your preferred admin email | |
| Password | A strong password you will remember — this replaces the auto-generated one |
⚠️ Important: Once you complete this setup, the setup page will never appear again. If you forget your password after this point, you will need to reset it via SSH or contact Truehost support.
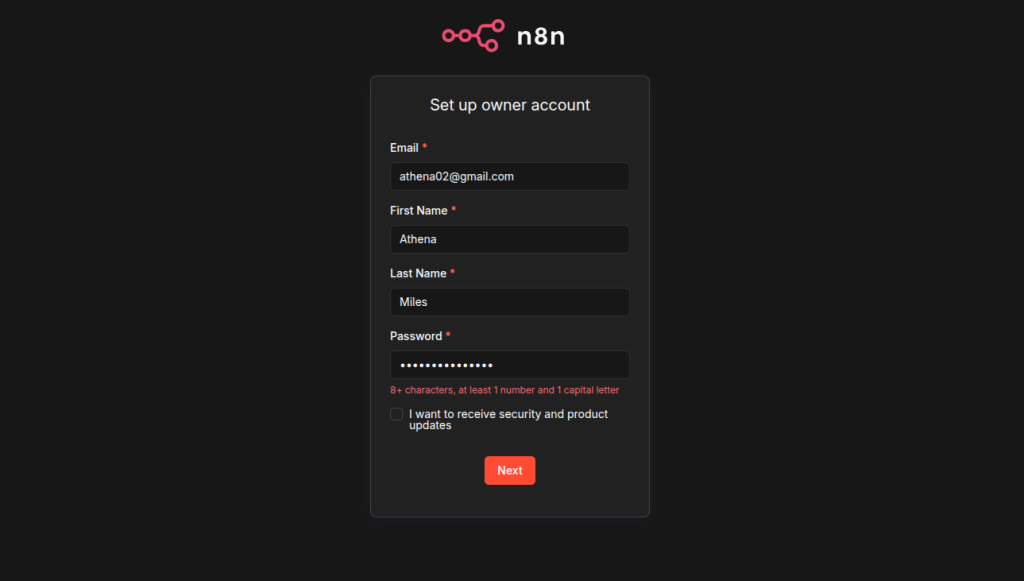
n8n setup form filled in and ready to submit
6. Accessing Your n8n Dashboard
Logging In for the First Time
- Open your welcome email and copy your n8n URL.
- Paste the URL into your web browser and press Enter.
- On the login screen, enter your email and the password from your welcome email.
- Click Sign In. You will land on the n8n dashboard.
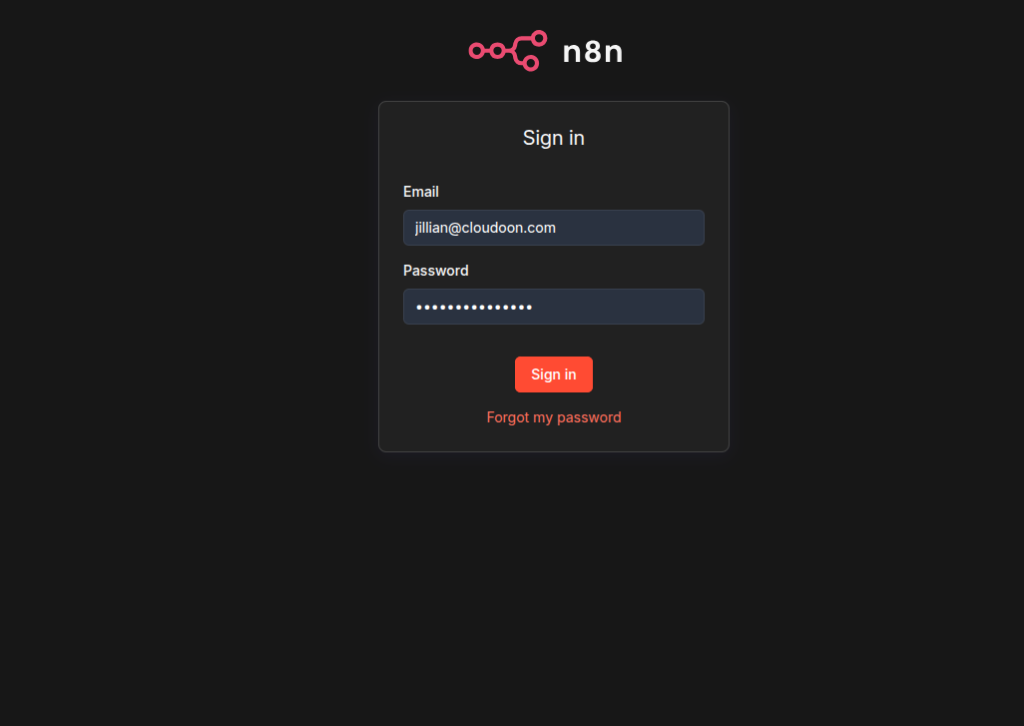
n8n login screen showing the email and password fields
⏳ URL not loading yet? After provisioning, DNS records can take up to 60 seconds to propagate. If your n8n URL is not reachable immediately after receiving your welcome email, wait 2 to 3 minutes and try again. This is normal.
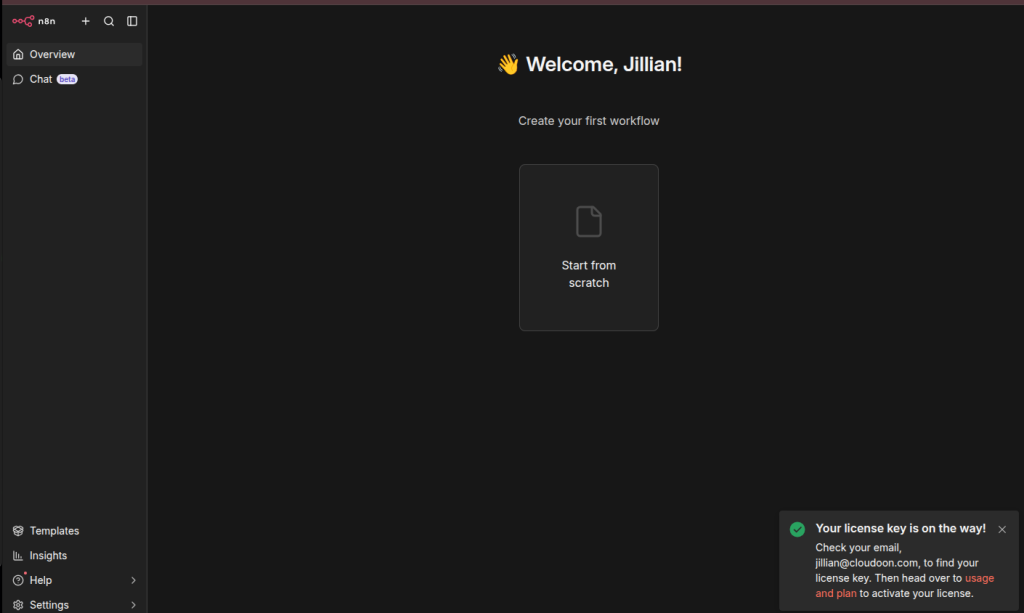
n8n main dashboard after successful login
Changing Your Password
- Navigate to the left side of your n8n dashboard ,Select Settings from the menu.
- Navigate to the Personal section and click Change Password.
- Enter your current password and your new password, then save.
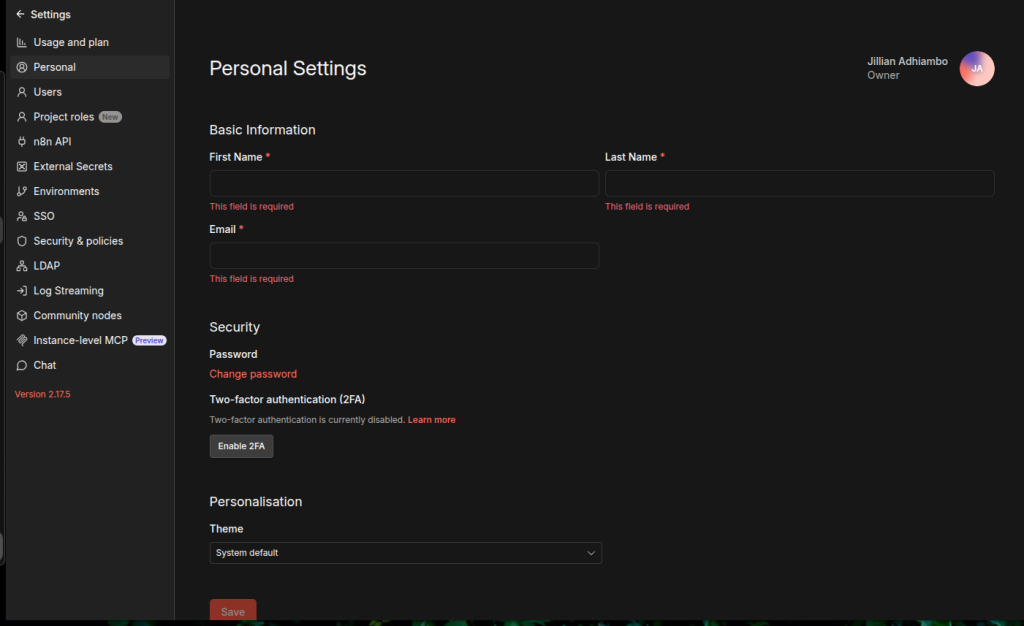
n8n Settings → Personal → Change Password screen
Accessing n8n from the TrueHost Client Area
- Log in to your Truehost Cloud account at truehost.cloud.
- Navigate to Services and find your n8n VPS product.
- Click Manage. Your n8n URL and provisioning status are shown on this page.
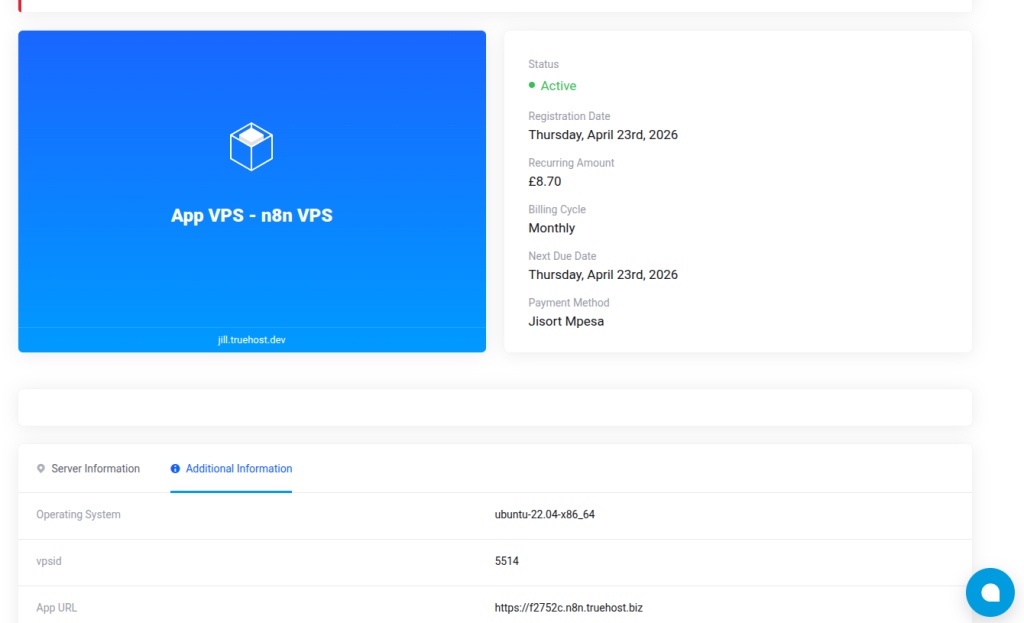
TrueHost client area showing the n8n VPS service management page
7. Your Domain and URL
Your n8n instance is accessible via a unique subdomain created automatically during provisioning. The subdomain is randomly generated to give each customer a unique address.
Your Subdomain Format
Your URL will follow this format: https://n8n-abc123.truehost.biz — where abc123 is a unique 6-character identifier generated for your account.
SSL and Security
Your n8n URL is always served over HTTPS, meaning all traffic between your browser and server is encrypted. The SSL certificate is issued by Let’s Encrypt and renews automatically — you do not need to manage this.
Webhook URL
When building workflows triggered by external services, your webhook base URL is the same as your n8n URL. For example: https://n8n-abc123.truehost.biz/webhook/. n8n generates the full webhook path when you add a Webhook node — copy it from there and paste it into your external service.
Using a Custom Domain (Optional)
If you would like to use your own domain name (e.g. automation.yourcompany.com) instead of the default subdomain, raise a support ticket with your preferred domain and our team will assist you.
8. Getting Started with n8n
n8n is built around a simple concept: you create workflows that connect different apps and services, allowing them to communicate automatically.
Key Concepts
| Term | What it means |
|---|---|
| Workflow | A series of connected steps that run automatically when triggered. |
| Node | A single step in a workflow — it can fetch data, transform it, or send it somewhere. |
| Trigger | The event that starts a workflow, such as a webhook, a schedule, or an incoming email. |
| Credential | A saved login or API key for a service (e.g. Gmail, Slack, HubSpot) that nodes can use. |
| Execution | One complete run of a workflow from start to finish. |
Creating Your First Workflow
- On the n8n dashboard, click the + button at the top left of the screen, then select Workflow from the menu that appears.
- Click the + button to add your first node. Choose a trigger such as Schedule Trigger or Webhook.
- Add more nodes to define what should happen when the trigger fires.
- Connect the nodes by dragging from one node’s output to the next node’s input.
- Click Execute Workflow to test it. Check each node’s output to verify it worked.
- When satisfied, click Activate to turn the workflow on.
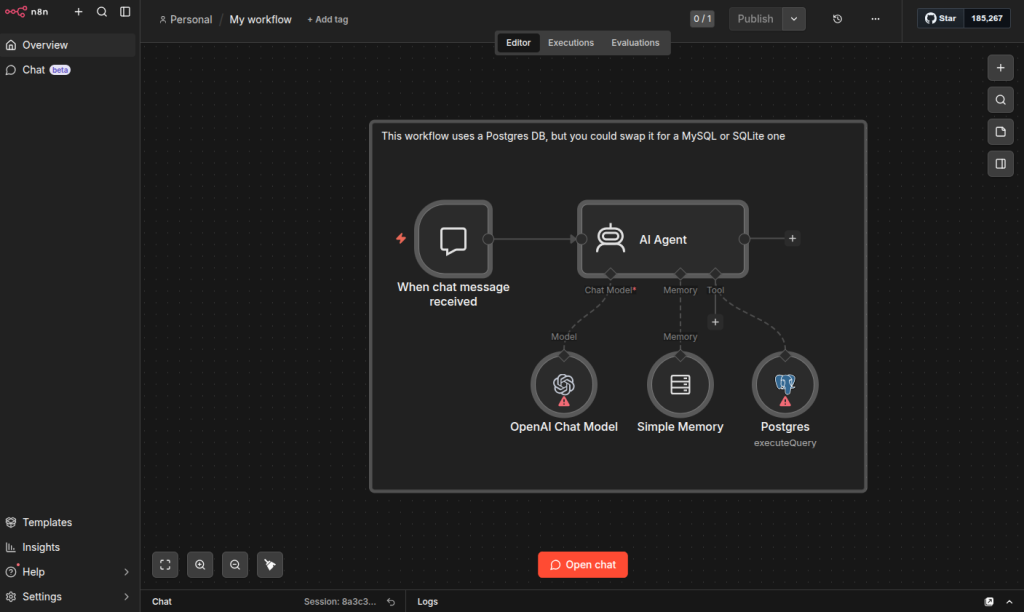
n8n canvas showing a simple workflow with connected nodes
Useful Resources
- Official n8n documentation: docs.n8n.io
- n8n community forum: community.n8n.io
- Video tutorials: youtube.com/n8n-io
- Pre-built workflow templates: n8n.io/workflows
9. SSH Access to Your Server
Your VPS comes with full root SSH access, giving you complete control over your server. This section is intended for advanced users who need to manage the server directly.
ℹ️ Note: SSH access is not required to use n8n. Most clients will never need it. The n8n dashboard is all you need for creating and managing automations.
How n8n Runs on Your Server
n8n runs inside a Docker container on your VPS. The container is configured to restart automatically if it ever stops unexpectedly. Your workflow data — all your automations, credentials, and execution history — is stored in a Docker volume named n8n_data, which persists independently of the container.
Firewall
Your server has a firewall (UFW) configured automatically during provisioning. Only the following ports are open:
| Port | Name | Purpose |
|---|---|---|
22 | SSH | Remote server access |
80 | HTTP | Used during SSL certificate issuance |
443 | HTTPS | All n8n traffic goes through this port |
Connecting via SSH
On macOS or Linux, open a Terminal and run:
ssh root@YOUR_VPS_IP_ADDRESSEnter the SSH password from your welcome email when prompted. On Windows, use PuTTY (putty.org) or the built-in Windows Terminal.(powershell)
Useful Server Commands
| Task | Command |
|---|---|
| Check n8n container status | docker ps | grep n8n |
| Restart n8n | docker restart n8n |
| View n8n logs | docker logs n8n --tail 100 |
| List Docker volumes | docker volume ls |
| Check disk usage | df -h |
| Check memory usage | free -h |
| Check firewall rules | ufw status |
10. Reinstalling n8n
If you ever need to reinstall n8n from scratch — for example after accidentally breaking a configuration — you can trigger a reinstall directly from your Truehost client area.
⚠️ Warning: A reinstall will permanently wipe all your n8n workflows, credentials, and execution history. Make sure to export your workflows from n8n before proceeding if you want to keep them.
How to Reinstall
- Log in to your Truehost Cloud account and go to Services. Click Manage next to your n8n VPS product.
- Find the Reinstall button on the management page and click it.
- Confirm the action when prompted. The reinstall process will run automatically.
- You will receive a new welcome email with fresh credentials when the reinstall is complete.
11. Getting Help
Truehost Cloud Support
Our support team can help with anything related to your VPS or provisioning. This includes server issues, welcome email problems, custom domain setup, resource upgrades, and billing queries.
To raise a support ticket, log in at truehost.cloud and go to Support → Open Ticket. Include your service ID and a description of the issue.
n8n Application Support
For help with using n8n itself — building workflows, connecting apps, or understanding features — the n8n community is the best place to start:
- docs.n8n.io — Official documentation
- community.n8n.io — Community forum
- Search n8n on YouTube for video tutorials
12. Quick Reference Card
| Item | Details |
|---|---|
| My n8n URL | Check your welcome email or WHMCS client area |
| n8n Login Email | Your working email address — set during the first-time setup wizard |
| n8n Login Password | In your welcome email — change it after first login |
| Webhook Base URL | Same as your n8n URL — copy the full path from the Webhook node |
| VPS IP Address | In your welcome email |
| SSH Username | root |
| SSH Password | In your welcome email |
| n8n Data Volume | n8n_data (Docker volume on your VPS) |
| Provisioning Time | 10 – 15 minutes after order confirmation |
| SSL Certificate | Issued by Let’s Encrypt — renews automatically |
| Firewall | Ports 22, 80, 443 open — all others blocked |
| Support | truehost.cloud → Support → Open Ticket |
| n8n Docs | docs.n8n.io |
Truehost Cloud · truehost.cloud · 2026