How to White Label the Truehost Reseller Panel Client Area and Admin
White-labelling is replacing the software’s name with your own on everything your customers see. Truehost Reseller Panel, that covers the public website, the client area; where customers log in to pay and manage services), invoices, emails, and your own admin area.
This guide is written for a reseller doing this for the first time. You don’t need any technical background for Steps 1 to 6. Step 7 needs a little help from your domain or hosting provider.
Requirements
| requirement | Details |
| Logo | PNG, JPG, SVG or WebP, max 2 MB. A wide logo with a transparent background works best |
| Favicon | The tiny icon shown in the browser tab. PNG, ICO or SVG, max 512 KB |
| Brand colours | The colours you want customers to see |
| Company details | Company name, address, city and, if you have them, registered name and registration details |
| Support email | The address customers should contact, for example [email protected] |
| Your website address | Your main site, for the footer link |
Use a separate, private browser window whenever the guide says “check the result”. It shows what customers see, not what you see while logged in.
Step 1: Add Your Company Details
These appear on invoices, emails and legal pages, so fill them in carefully.
i). Go to Setup → General Settings → Company Information.
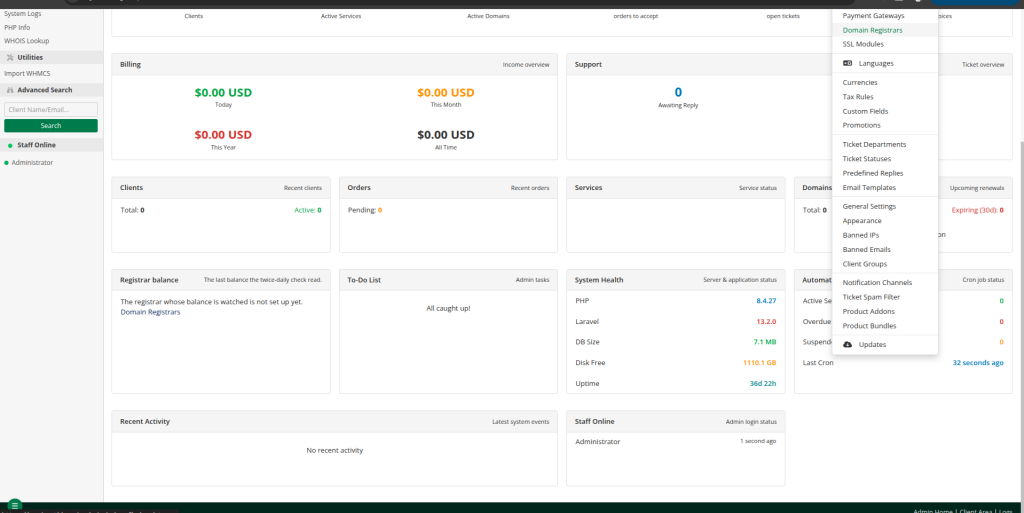
ii). Fill in Company Name, Company Address, city and the other fields.
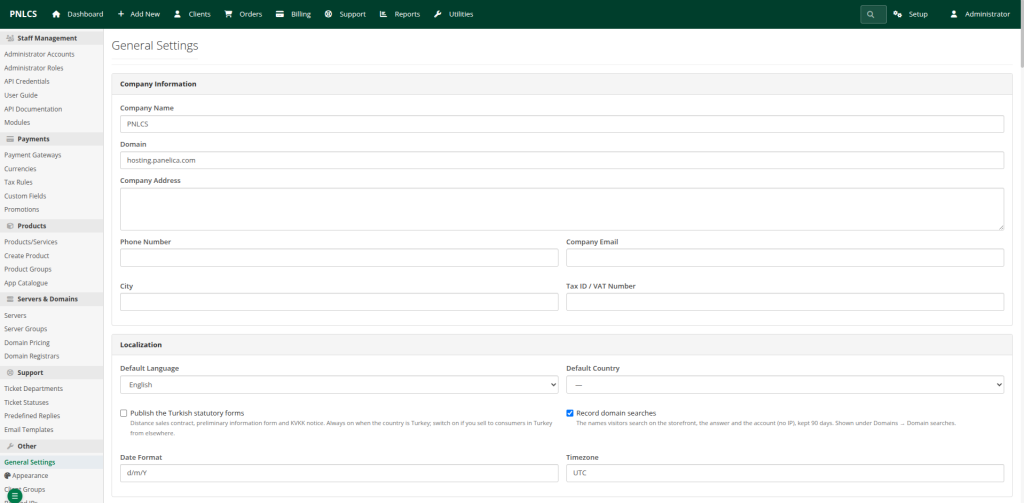
iii). Under Legal identity, you can add your Registered company name and registration details. These are used on invoices.
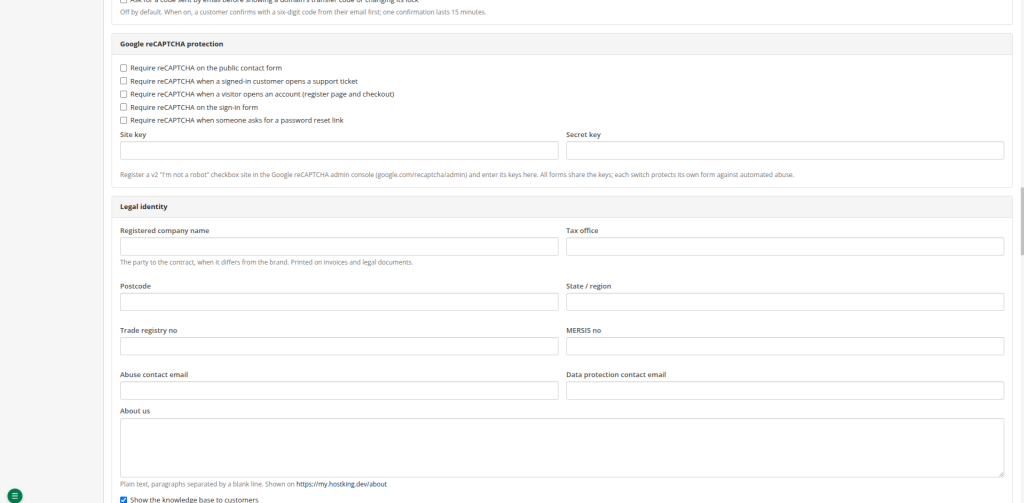
Click “Save settings”.
Step 2: Upload Your Logo and Favicon
i). Go to Setup → Appearance → Themes.
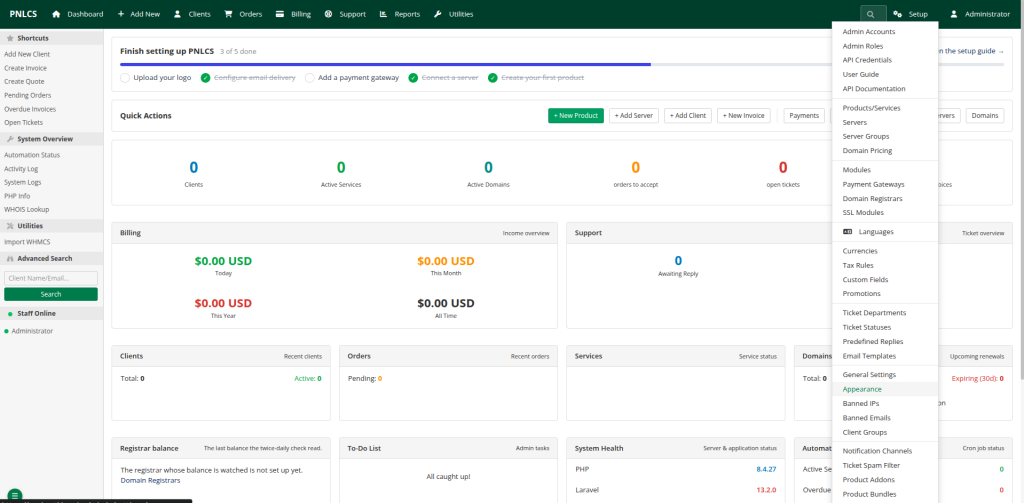
ii). Upload your Logo (PNG, JPG, SVG or WebP, max 2 MB).
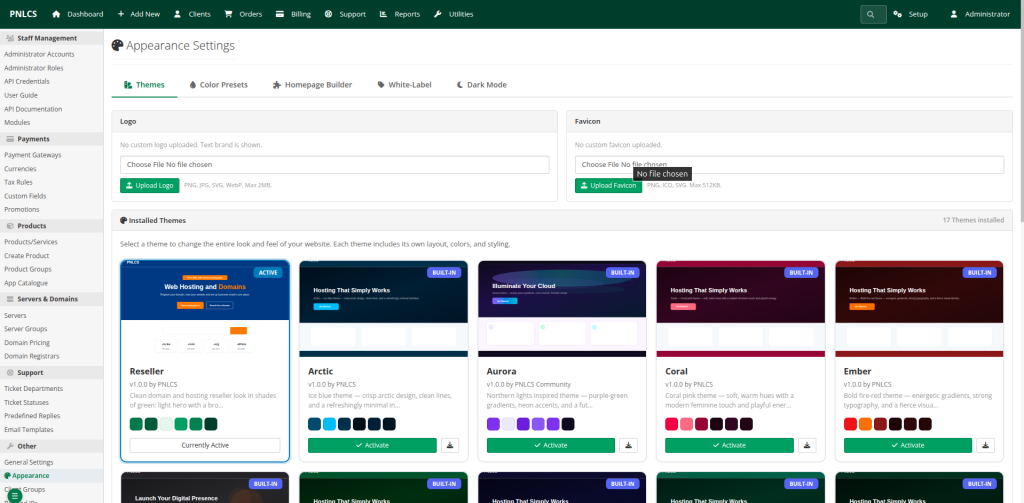
iii). Upload your Favicon (PNG, ICO or SVG, max 512 KB).
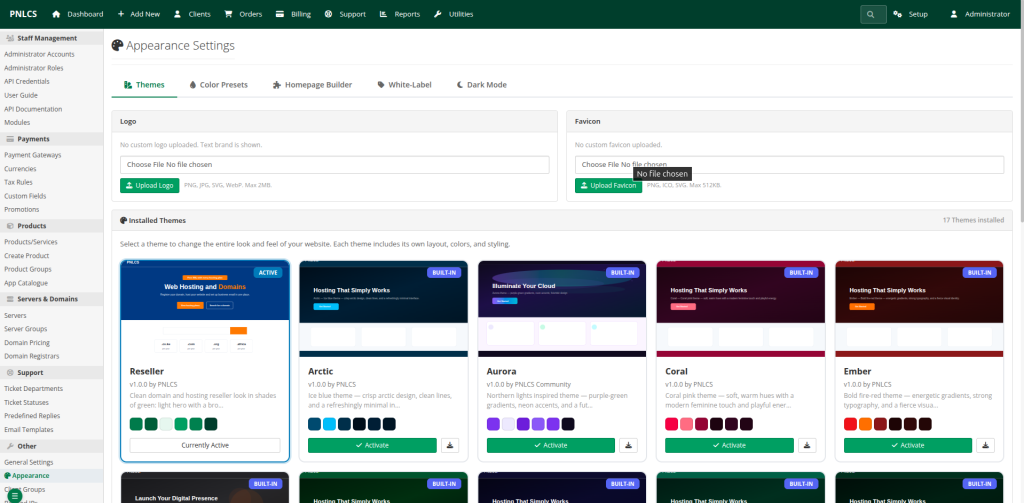
Your logo replaces the product name in the website header, the client area, and the admin area.
If the logo looks squashed later, replace it with a wide version that has a transparent background and is about 30 px tall.
Step 3: Set the White-Label Options
Go to Setup → Appearance → White-Label and fill in:
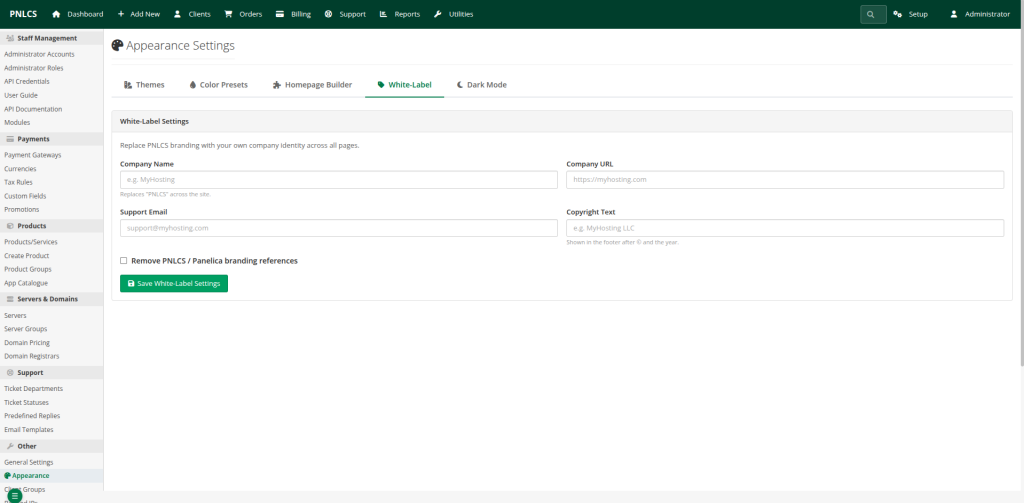
| Field | What it does | Example |
| Company Name | The name shown in page titles, the site header, footer and admin area, in place of the software’s name | MyHosting |
| Company URL | Your main website, linked from the footer | https://www.myhosting.com |
| Support Email | Shown to customers as the contact address | [email protected] |
| Copyright Text | The footer line. Entering “MyHosting Ltd” gives “© 2026 MyHosting Ltd. All rights reserved.” | MyHosting Ltd |
| Remove Truehost Reseller / Panelica branding references | Hides the remaining credits to the software, such as the GitHub link in the website footer and the “Billing & Support System” credit in the admin footer | Tick the box |
Click Save.
Why two company names? You entered a company name in Step 1 and another here (White-Label). If both are set, the White-Label name wins on screen. Keep them the same to avoid confusion.
Step 4: Choose a Theme and Colours
- Go to Setup → Appearance → Themes and pick a theme. You can switch at any time without losing your settings.
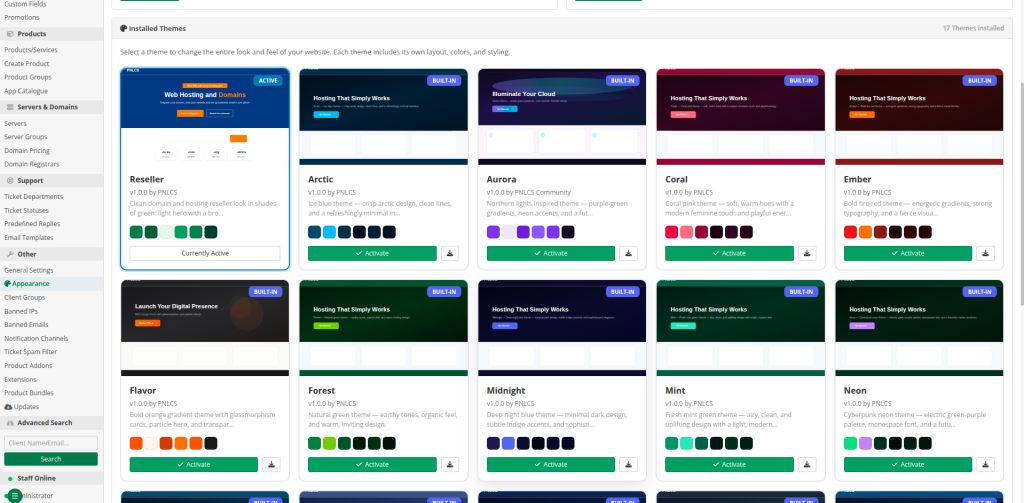
- Under Color Presets, choose a preset, or set your own brand colours.
- Turn on Dark Mode if you want visitors to be able to switch between light and dark.
Step 5: Brand Your Homepage
The Homepage Builder controls your public homepage. Go to Setup → Appearance → Homepage Builder.
- Switch sections on or off and drag them into the order you want. Sections include the hero (top banner), domain search, hosting plans, testimonials, FAQ and call-to-action.
- Click Edit on a section to change its wording, buttons, and links.
- In the hero section, set your own picture with an Image URL, or leave it empty to show the built-in animation. Clear a text field to hide that line.
Step 6: Send Emails in Your Name
Customers see your emails as much as your website, so this step matters.
- Go to Setup → General Settings → Mail Configuration.
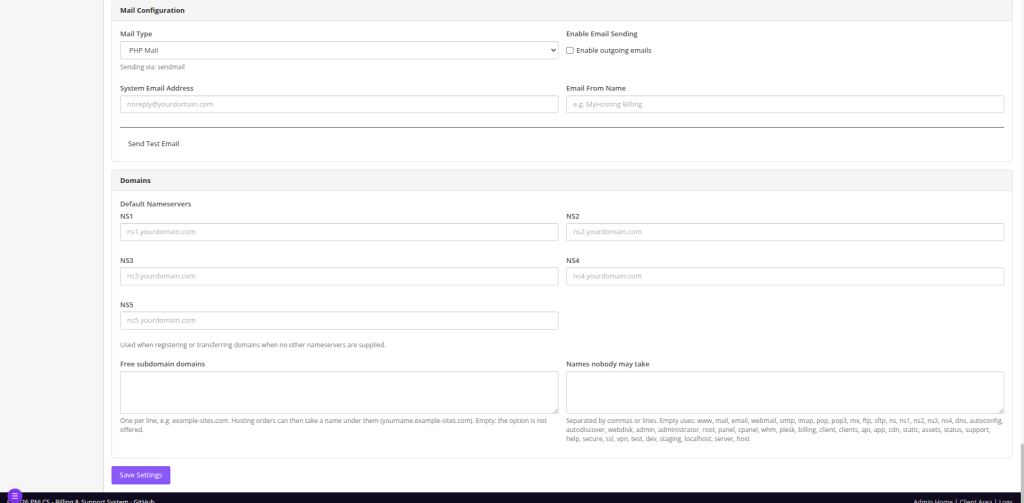
- Set the System Email Address, for example, [email protected].
- Set the Email From Name to your brand name.
- Enter your SMTP details (the mail server settings your email provider gives you).
- Send a test email to yourself.
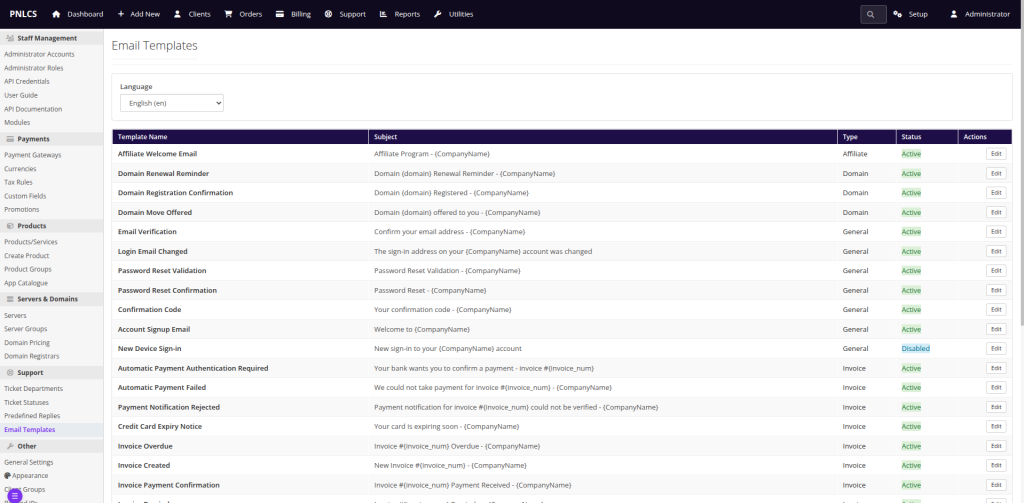
Go to Setup → Email Templates to adjust the wording of invoices, welcome emails and reminders.
Send from an address on your own domain, and make sure your email provider’s SPF and DKIM records are set up for it. These are DNS records that prove your emails are genuine. Without them, invoices often land in spam.
Step 7: Use Your Own Web Address
Customers should reach the panel at your domain, for example billing.yourbrand.com, not at a default address.
- In your domain’s DNS settings, add an A record for billing that points to the panel server’s IP address. (An A record connects a name to a server’s address.)
- Ask your technical contact or hosting provider to set it as the panel’s address (the setting is called APP_URL) and to issue an SSL certificate for it. The certificate gives you the padlock and https://.
If you’re not technical, send your provider these two requests as written. This is the one step most beginners hand off.
Troubleshooting
| Problem | What to do |
| The old name still shows somewhere | Check both Appearance → White-Label → Company Name and General Settings → Company Name. The White-Label name wins when both are set |
| Logo looks squashed | Use a wide logo with a transparent background, about 30 px tall |
| Emails show the wrong sender | Check General Settings → Mail Configuration → Email From Name |
| Invoices land in spam | Send from your own domain and set up SPF and DKIM with your email provider |
| A change doesn’t appear | Reload in a private window; your normal browser may be showing an old copy |
Frequently Asked Questions
What does white-labelling change?
It replaces the software’s name with yours on the public website, client area, invoices, emails, and admin area.
Do I need a developer?
Not for Steps 1 to 6. Step 7usually needs your domain or hosting provider.
Why do I enter the company name twice?
Once under General Settings (used on invoices and emails) and once under White-Label used in page titles, header, footer and admin. Keep both the same.
Can I change my theme later?
Yes. You can switch themes at any time.
What does the “Remove … branding references” box do?
It hides remaining credits to the software, such as the GitHub link in the website footer and the “Billing & Support System” credit in the admin footer.
How do I see what customers see?
Open your panel in a private browser window without logging in.
Conclusion
White-labelling is a handful of settings: company details, logo, the White-Label tab, colours, homepage, emails, and your own address. Work through them in order, check the result in a private window, and your customers will see only your brand.