Domain RegistrationFind and register the perfect domain for your website.
 .COM DomainChoose a widely recognized domain to build global credibility.
 Domain TransferSeamless domain transfers with zero downtime and complete control.
 All TLDsFind and register your perfect domain. Choose from local and global extensions.
 SSL CertificatesKeep your website safe with reliable SSL Certificates that protect customer data and build trust.
 whoisCheck domain ownership details, expiration dates, and registrar information.
 US DomainRegister a .US domain and build trust in the USA.
 Web HostingEverything your website needs to run smoothly
 WordPress HostingWordPress hosting that just works
 Windows HostingReliable hosting for Windows environments
 Reseller HostingTurn hosting into your business
 Email HostingEmail that looks professional and works anywhere
 cPanel HostingFull control of your hosting with cPanel
 Affiliate ProgramJoin as a partner and earn commissions on every referral you send our way.
 Vps HostingScalable virtual servers that expand as you need.
 Dedicated ServersGet complete access and full control over your dedicated physical server.
 Managed vpsNot tech-savvy? We will take care of everything with our fully managed VPS hosting for you.
 AI Website BuilderCreate stunning websites in seconds with AI.
 Online ShopSet up a professional online store. No coding required.
 Web design serviceGet a tailored website designed to match your brand and support your goals.
 BlogFind helpful guides on web hosting, online selling, digital marketing, and more.
 Contact USYou can reach us anytime, day or night, through chat or email.
 SupportBrowse helpful guides and answers for all of our services.
Setting up OpenClaw on Ubuntu takes about twenty minutes if you follow the right order of steps and a lot less if your server already has everything preloaded.
The challenge is that many installation guides leave out important details. One assumes you already have the correct version of Node.js, another skips system preparation, and before long you’re troubleshooting errors instead of getting your AI assistant online.
So we made sure to go through every necessary step in the right order with detailed explanations to solve that.
This guide walks you through the complete deployment process, from connecting to your Ubuntu VPS to accessing the OpenClaw dashboard securely.
Along the way, you’ll also see where a pre-configured OpenClaw VPS can save time by removing several manual setup steps.
Now, before getting started, make sure you have the following:
- An Ubuntu VPS running Ubuntu 20.04, 22.04, or 24.04 with root SSH access
- An AI API key from OpenAI, OpenRouter, or another supported provider
- A Telegram bot token if you plan to message OpenClaw through Telegram
With these ready, let’s begin the deployment.
Steps to Deploy OpenClaw on an Ubuntu VPS
Step 1: Choose the Right Ubuntu VPS for OpenClaw
Your VPS is the foundation of your OpenClaw deployment, so it’s worth choosing one that meets the recommended requirements from the start.
At a minimum, you’ll need an Ubuntu VPS running Ubuntu 20.04, 22.04, or 24.04 with root SSH access so you can install software and configure system services.
On the hardware side, OpenClaw’s gateway and background daemon need breathing room. A 1 vCPU, 2 GB RAM minimum is the practical floor, and anything below that and you risk the Node.js install timing out or the daemon restarting itself mid-conversation.
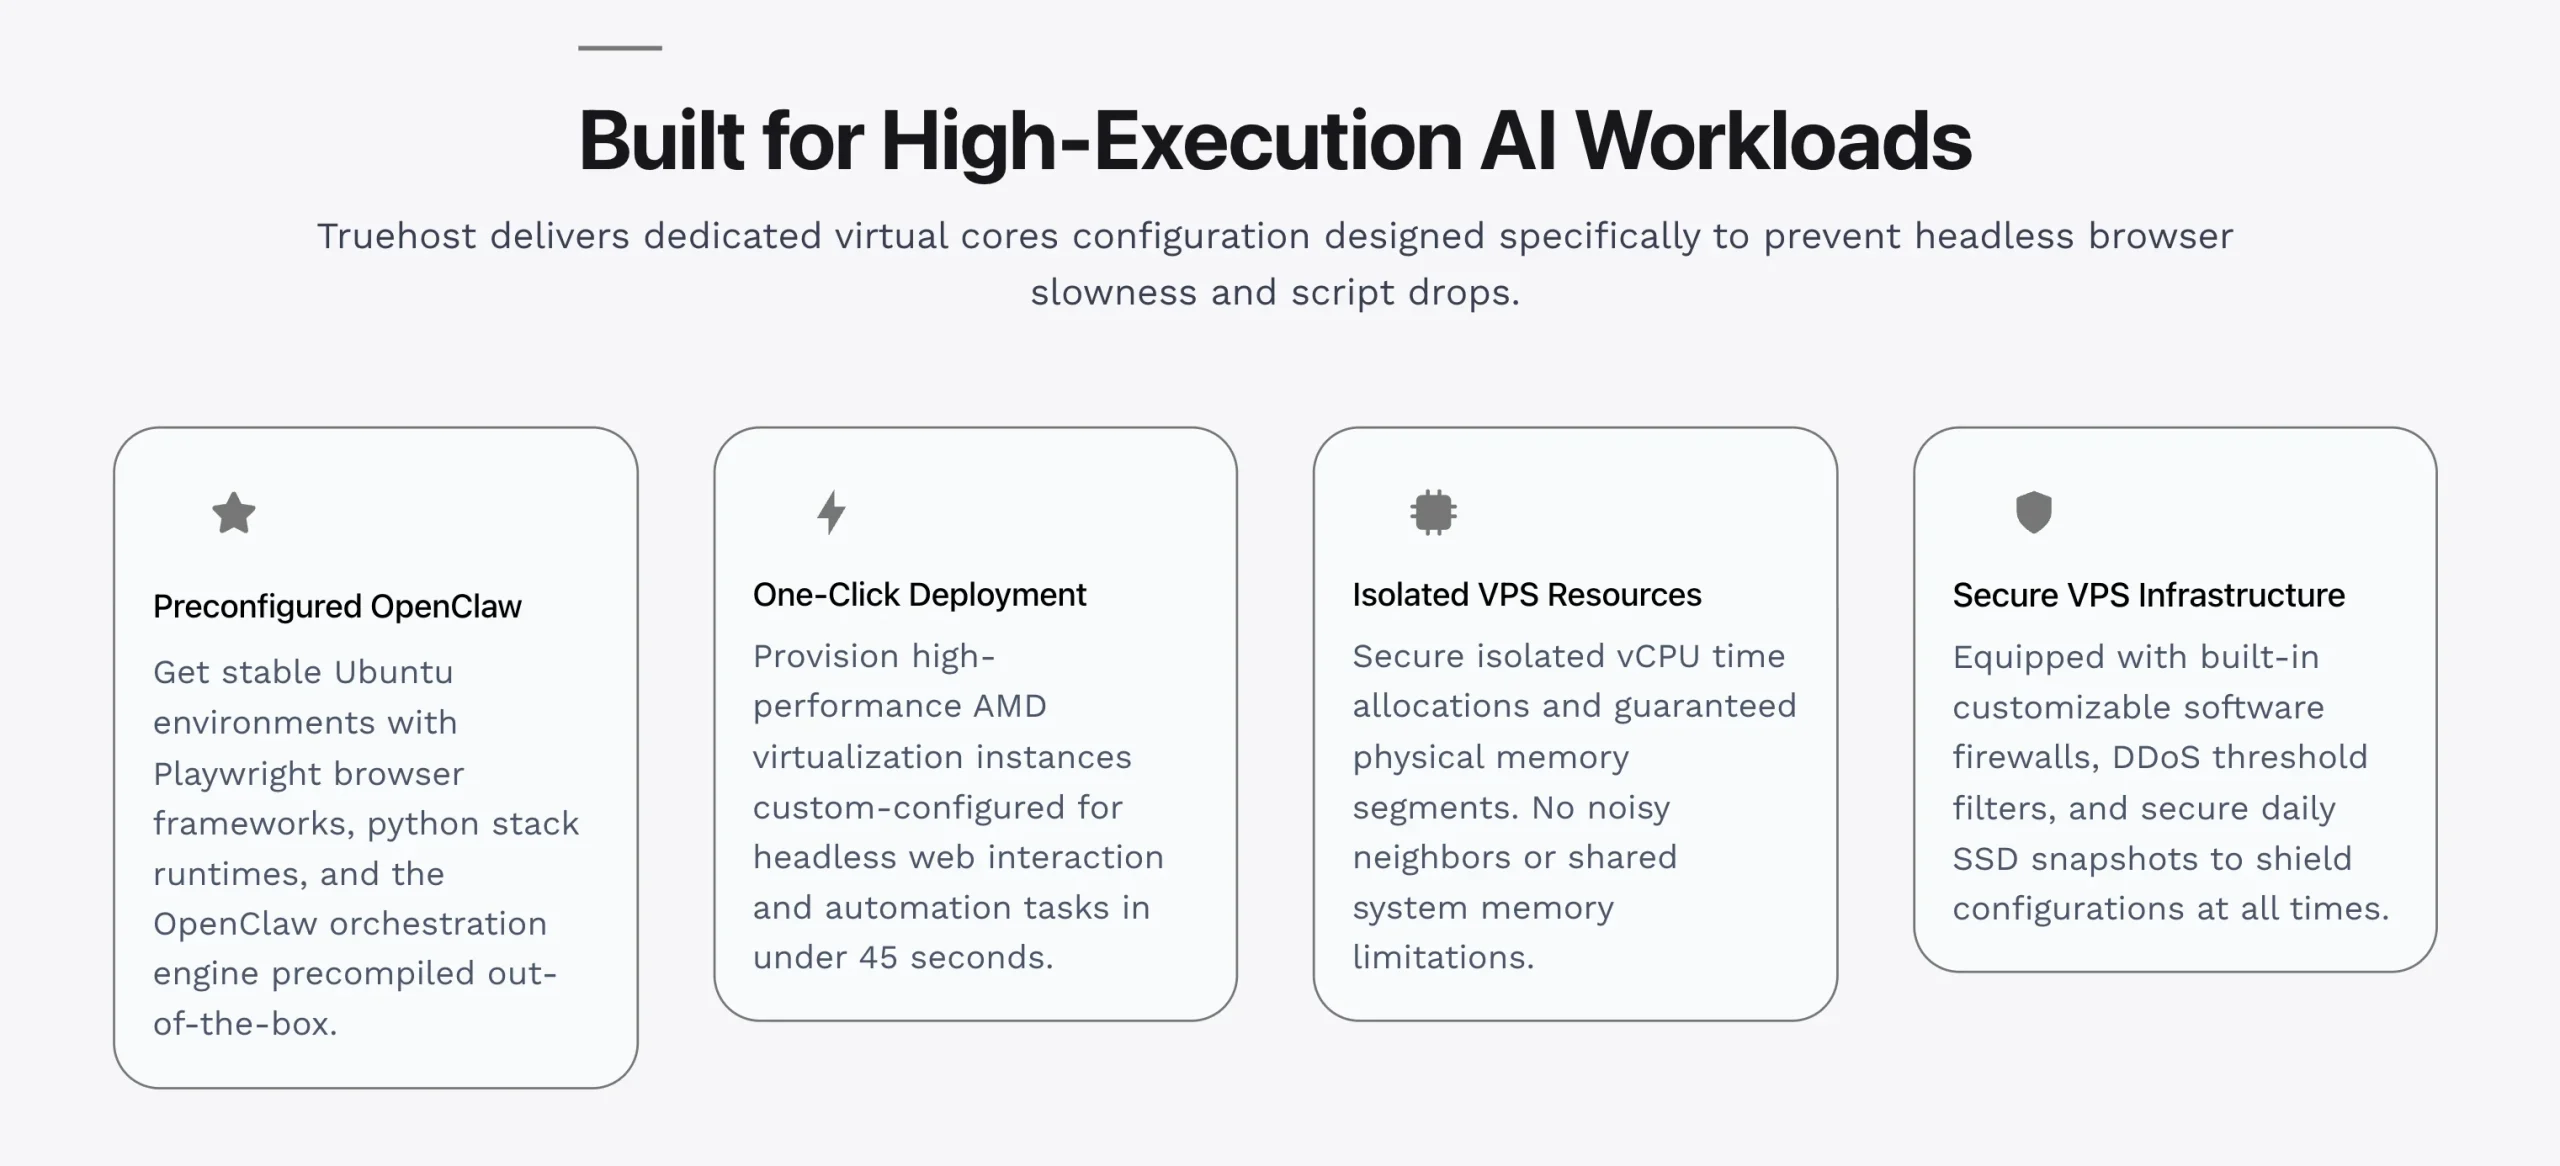
If you are deploying through Truehost, our OpenClaw VPS plans start at that spec, with full root access from first login.
Better still, if you choose our pre-configured OpenClaw instance, Steps 2 and 3 below are already done for you. The server ships with Ubuntu, Node.js, and OpenClaw already installed, so you go straight to onboarding.
Step 2: Connect and Prepare Your Ubuntu VPS
Once your Ubuntu VPS is ready, log into your server as root:
ssh root@your-server-ipAfter logging in, update your system packages before installing anything else. Running OpenClaw on top of outdated system libraries is an easy way to introduce silent dependency conflicts:
apt update && apt upgrade -yThen install the prerequisites OpenClaw and Node.js will need during setup:
apt install -y curl git build-essentialHere’s what each package is used for:
curldownloads the official OpenClaw installer.gitsupports repositories and development tools that OpenClaw may use.build-essentialprovides the compiler and build tools required by some Node.js packages.
Once these commands finish, your Ubuntu VPS is ready for the OpenClaw installation.
If you’re using a pre-configured Truehost OpenClaw VPS, this step has already been completed for you. The server is provisioned with the required system packages, so you can move directly to installing OpenClaw.
Step 3: Install OpenClaw on Your Ubuntu VPS
The easiest way to install OpenClaw is by using the official installer script.
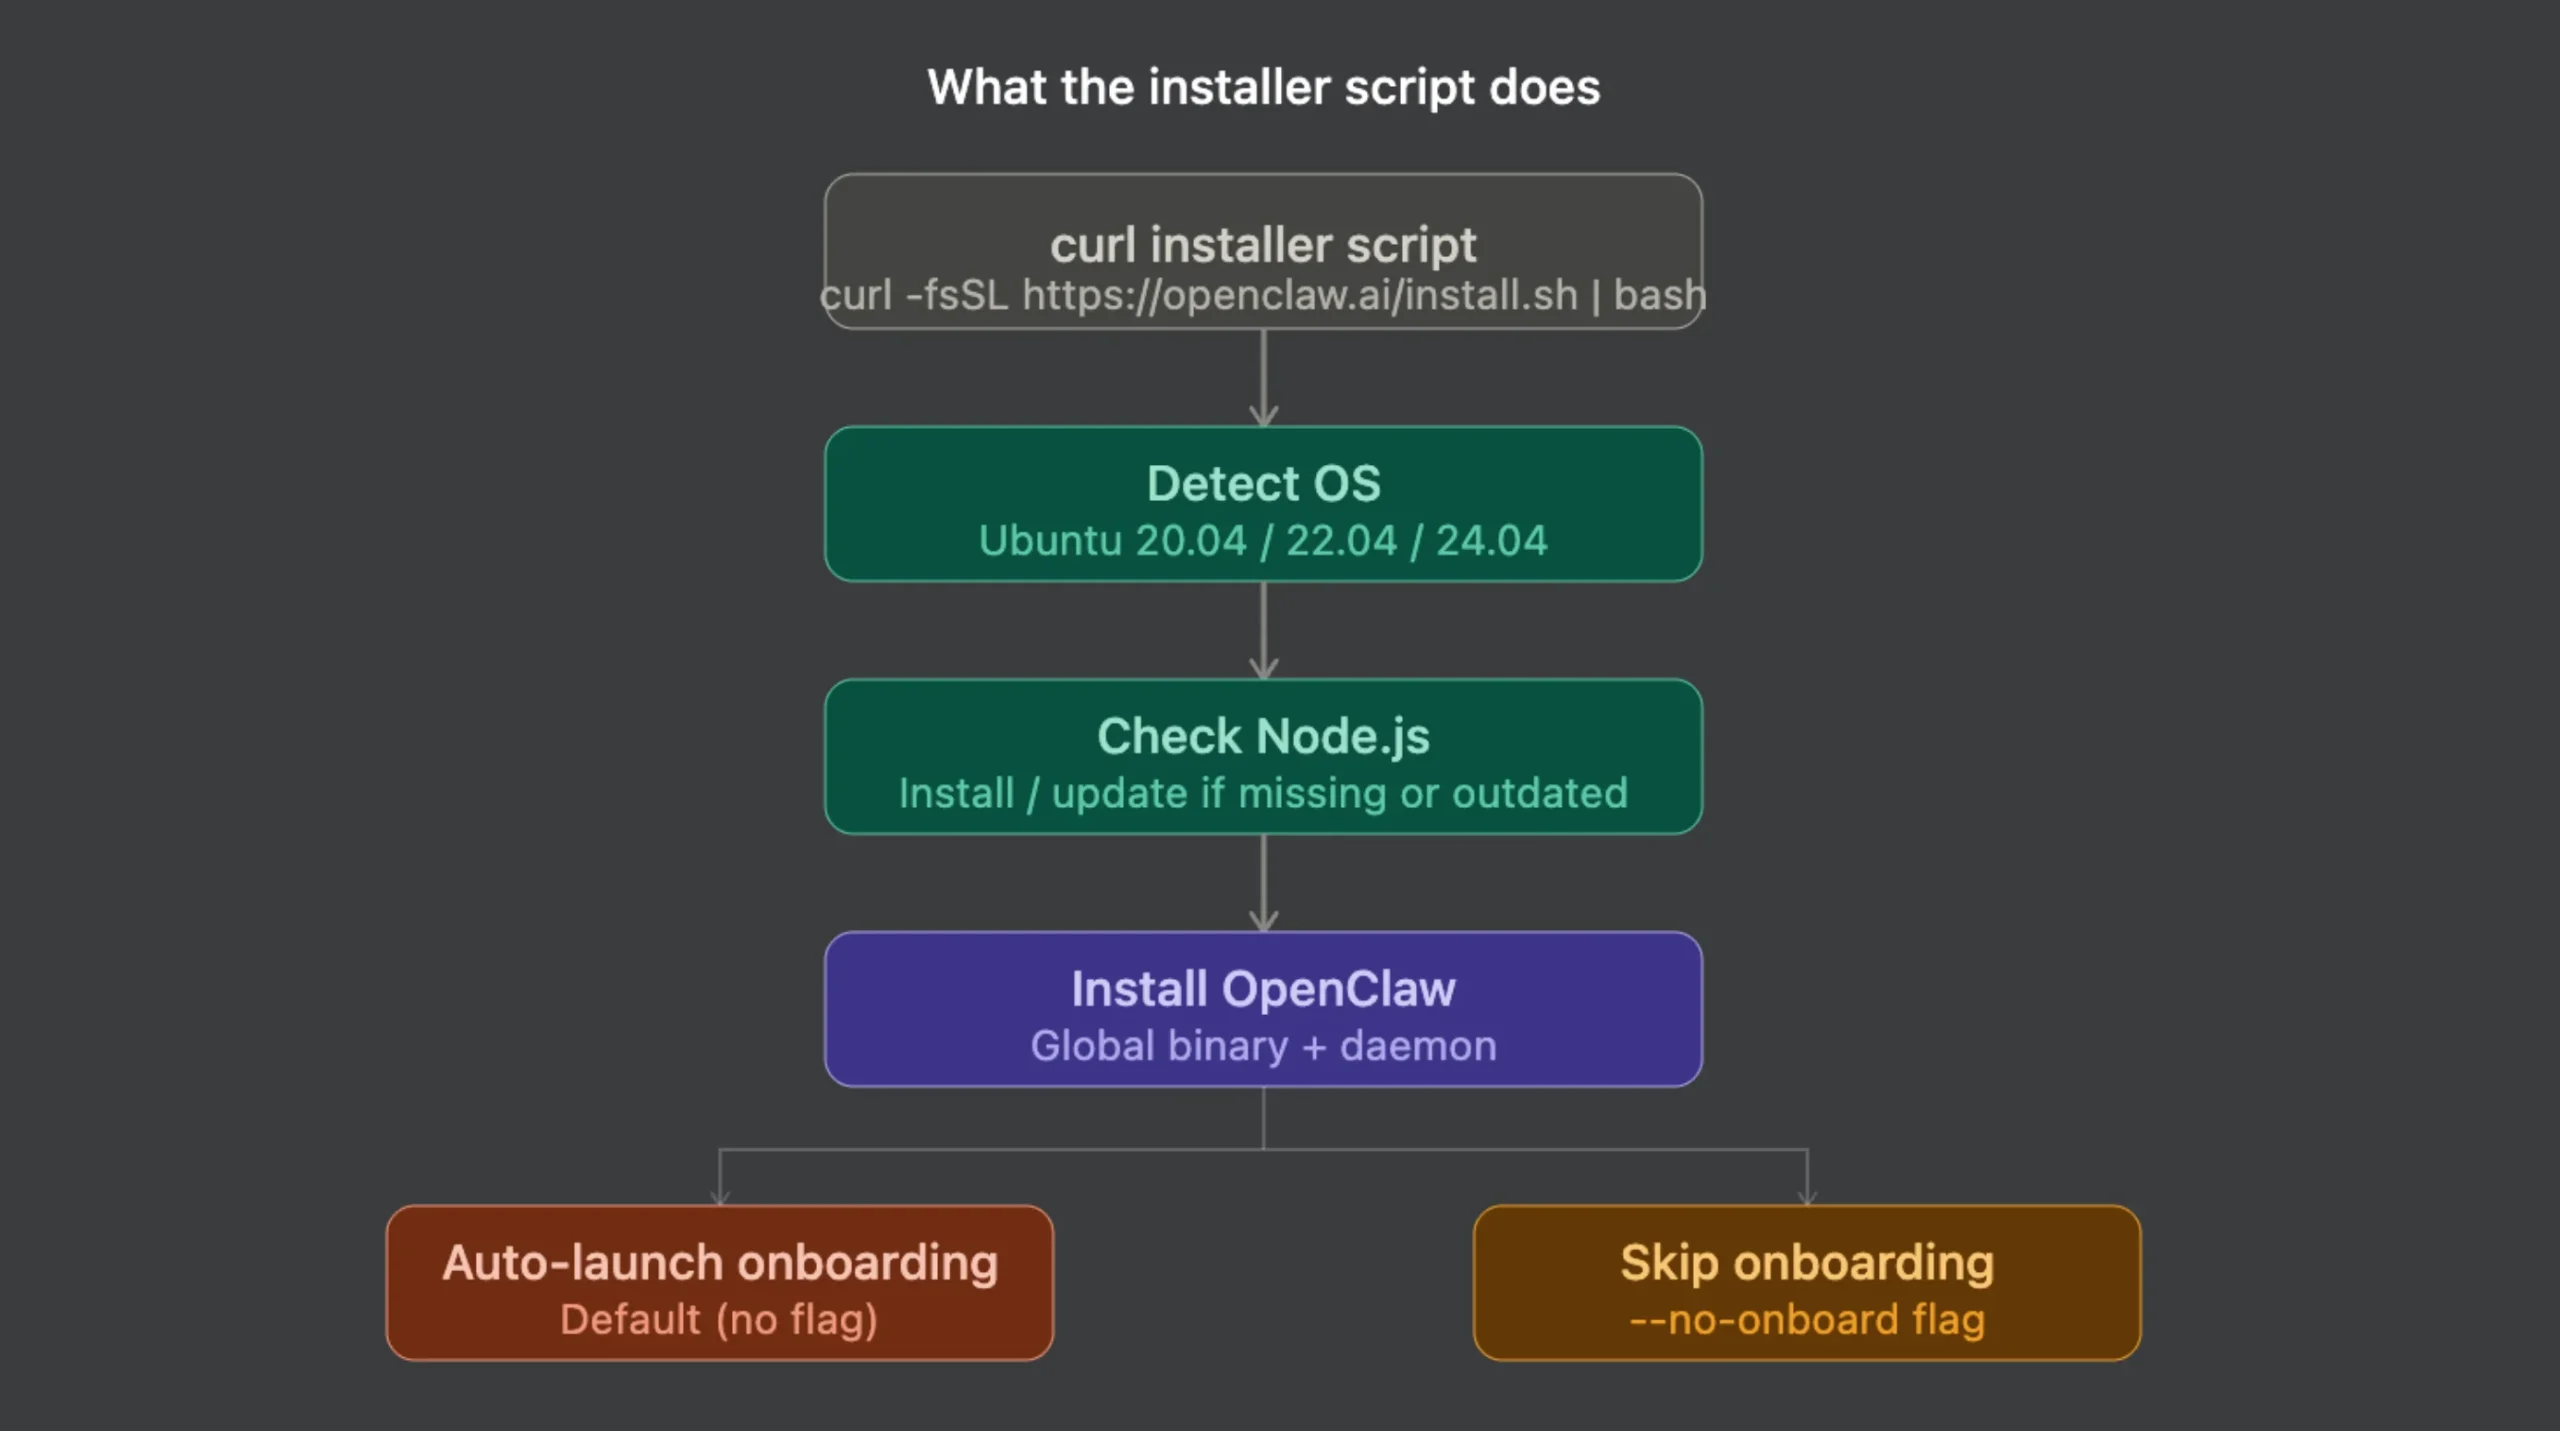
It automatically detects your operating system, installs a compatible version of Node.js if needed, installs OpenClaw, and then launches the onboarding wizard, all from a single command:
curl -fsSL https://openclaw.ai/install.sh | bashIf you prefer to install first and run onboarding separately, add the --no-onboard flag:
curl -fsSL https://openclaw.ai/install.sh | bash -s -- --no-onboardAfter the installation completes, verify that everything is working correctly:
openclaw --version
openclaw doctor
The first command confirms that OpenClaw was installed successfully, while the second checks your environment for any missing dependencies or configuration issues.
If you already manage your own Node.js installation and prefer not to use the installer script, you can install OpenClaw manually with npm:
sudo npm install -g openclaw@latestEither path ends at the same place: OpenClaw installed on your Ubuntu VPS and ready for onboarding.
Step 4: Run the OpenClaw Onboarding Wizard
If you ran the installer script without the --no-onboard option, the onboarding wizard starts automatically after the installation finishes. You can simply follow the prompts and continue with the setup.
If you used the --no-onboard flag or installed OpenClaw manually with npm, start the onboarding wizard yourself.
openclaw onboard --install-daemonThis command does more than configure OpenClaw. It also installs the OpenClaw gateway as a systemd user service, allowing it to continue running in the background after the setup is complete.
During onboarding, you’ll be guided through a series of prompts to configure your deployment:
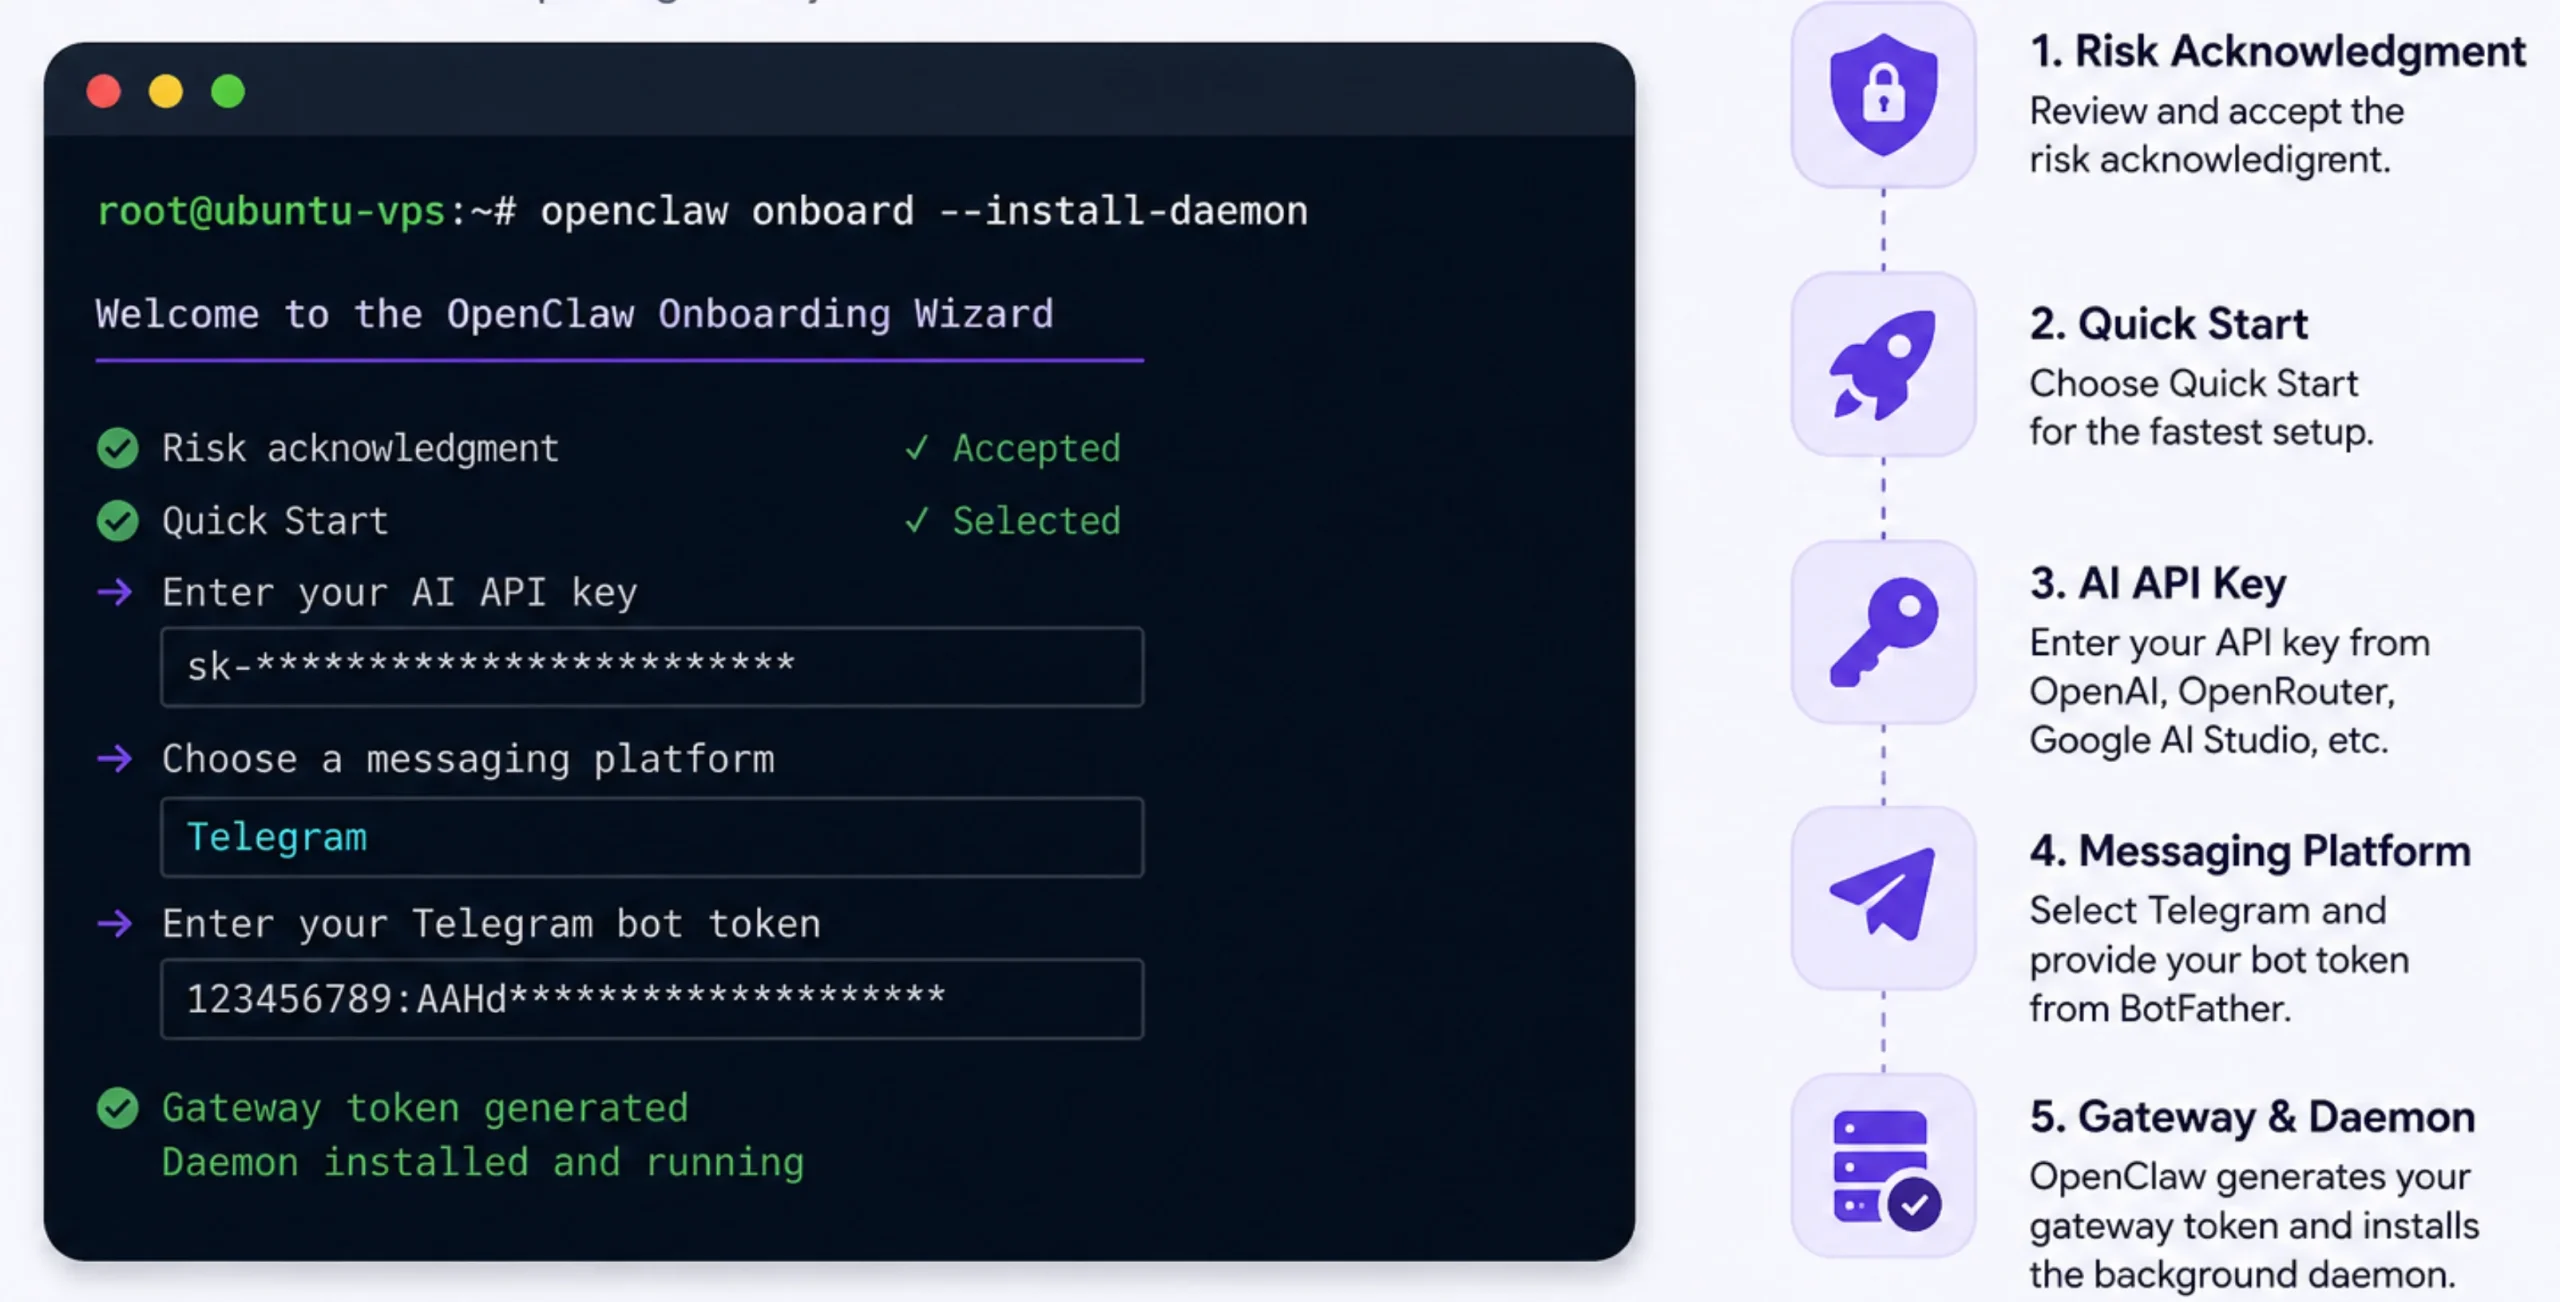
- Review the risk acknowledgment and confirm that you want to continue.
- Select the Quick Start option for the fastest setup.
- Enter your AI API key from OpenAI, Google AI Studio, OpenRouter, or another supported provider.
- Choose a messaging platform if you want to control OpenClaw remotely.
If you select Telegram, the wizard will ask for your bot token. You can create one by chatting with BotFather on Telegram and following the prompts to generate a new bot.
Once you receive the token, paste it into the onboarding wizard to complete the connection.
After those four steps are complete, OpenClaw is configured and linked to both your AI provider and your messaging channel.
Step 5: Run OpenClaw as a Background Service
An AI agent that stops when your SSH session closes is not particularly useful. To keep OpenClaw running after you log out, enable lingering for your user account. This tells Ubuntu to keep your background services alive without an active session:
loginctl enable-linger $USERNext, confirm that the OpenClaw gateway is running:
openclaw gateway statusYou should see that the gateway service is active. If you ever need to troubleshoot your deployment or monitor activity in real time, view the service logs with the following:
journalctl --user -u openclaw -fThese logs are especially useful for diagnosing connection issues, checking gateway activity, or confirming that OpenClaw has started successfully after a reboot.
This is also where hosting quality becomes directly relevant to how your agent actually performs.
Since OpenClaw is designed to run continuously, a stable hosting environment helps keep your gateway online and responsive.
Features such as reliable infrastructure, isolated resources, and regular backups can help reduce unexpected downtime and keep your AI assistant available around the clock.
Our Truehost OpenClaw plans include isolated vCPU allocation, daily SSD snapshots, and built-in firewall protection by default.
Step 6: Access the OpenClaw Dashboard Securely
Once OpenClaw is running, you can access its web dashboard to monitor your deployment, check the gateway status, and manage your AI assistant.
Start the dashboard on your Ubuntu VPS by running:
openclaw dashboardFor security, the dashboard listens only on localhost by default. This means it isn’t exposed directly to the internet, helping protect your deployment from unauthorized access.
To open the dashboard on your own computer, create an SSH tunnel from your local machine:
ssh -N -L 18789:localhost:18789 username@your-server-ipLeave that terminal running, then open your browser and go to:
http://localhost:18789Your dashboard loads locally, while the actual process runs on your VPS. The tunnel keeps the connection encrypted without exposing any port to the public internet.
From the dashboard, you can verify that your AI provider, gateway, and messaging platform are connected correctly.
OpenClaw on Ubuntu VPS FAQs
What are the minimum VPS specs for OpenClaw?
For a basic deployment, OpenClaw runs well on a VPS with 1 vCPU and 2 GB of RAM. If you plan to run browser automation, multiple integrations, or several AI agents, consider upgrading to a plan with additional CPU and memory for better performance.
How do I update OpenClaw later?
You can update your installation at any time by running: openclaw update. If you’re using the official installer, you can also rerun the installation script to install the latest release.
Can I switch messaging platforms after setup?
Yes. If you decide to move from Telegram to another supported messaging platform later, simply rerun the onboarding wizard and choose a different integration. You won’t need to reinstall OpenClaw.
Which Linux distribution is best for OpenClaw?
OpenClaw supports several Linux distributions, but Ubuntu is one of the most popular choices because of its long-term support releases, extensive documentation, and broad compatibility with server software. Ubuntu 22.04 LTS and Ubuntu 24.04 LTS are excellent options for new deployments.
The Faster Way: Deploying OpenClaw on a Pre-Configured Ubuntu VPS
Everything in this guide works, and knowing the manual process is worth your time if you want full visibility into your own stack.
That said, if the goal is simply to have OpenClaw running today, Truehost’s OpenClaw VPS hosting removes the setup overhead entirely. Our plans deploy with Ubuntu, Node.js, and the OpenClaw orchestration engine already installed and configured, and Playwright is included.
You still get full root SSH access from the first login. Nothing about control or flexibility changes, just that you skip the parts that usually eat up an afternoon.
Plan options:
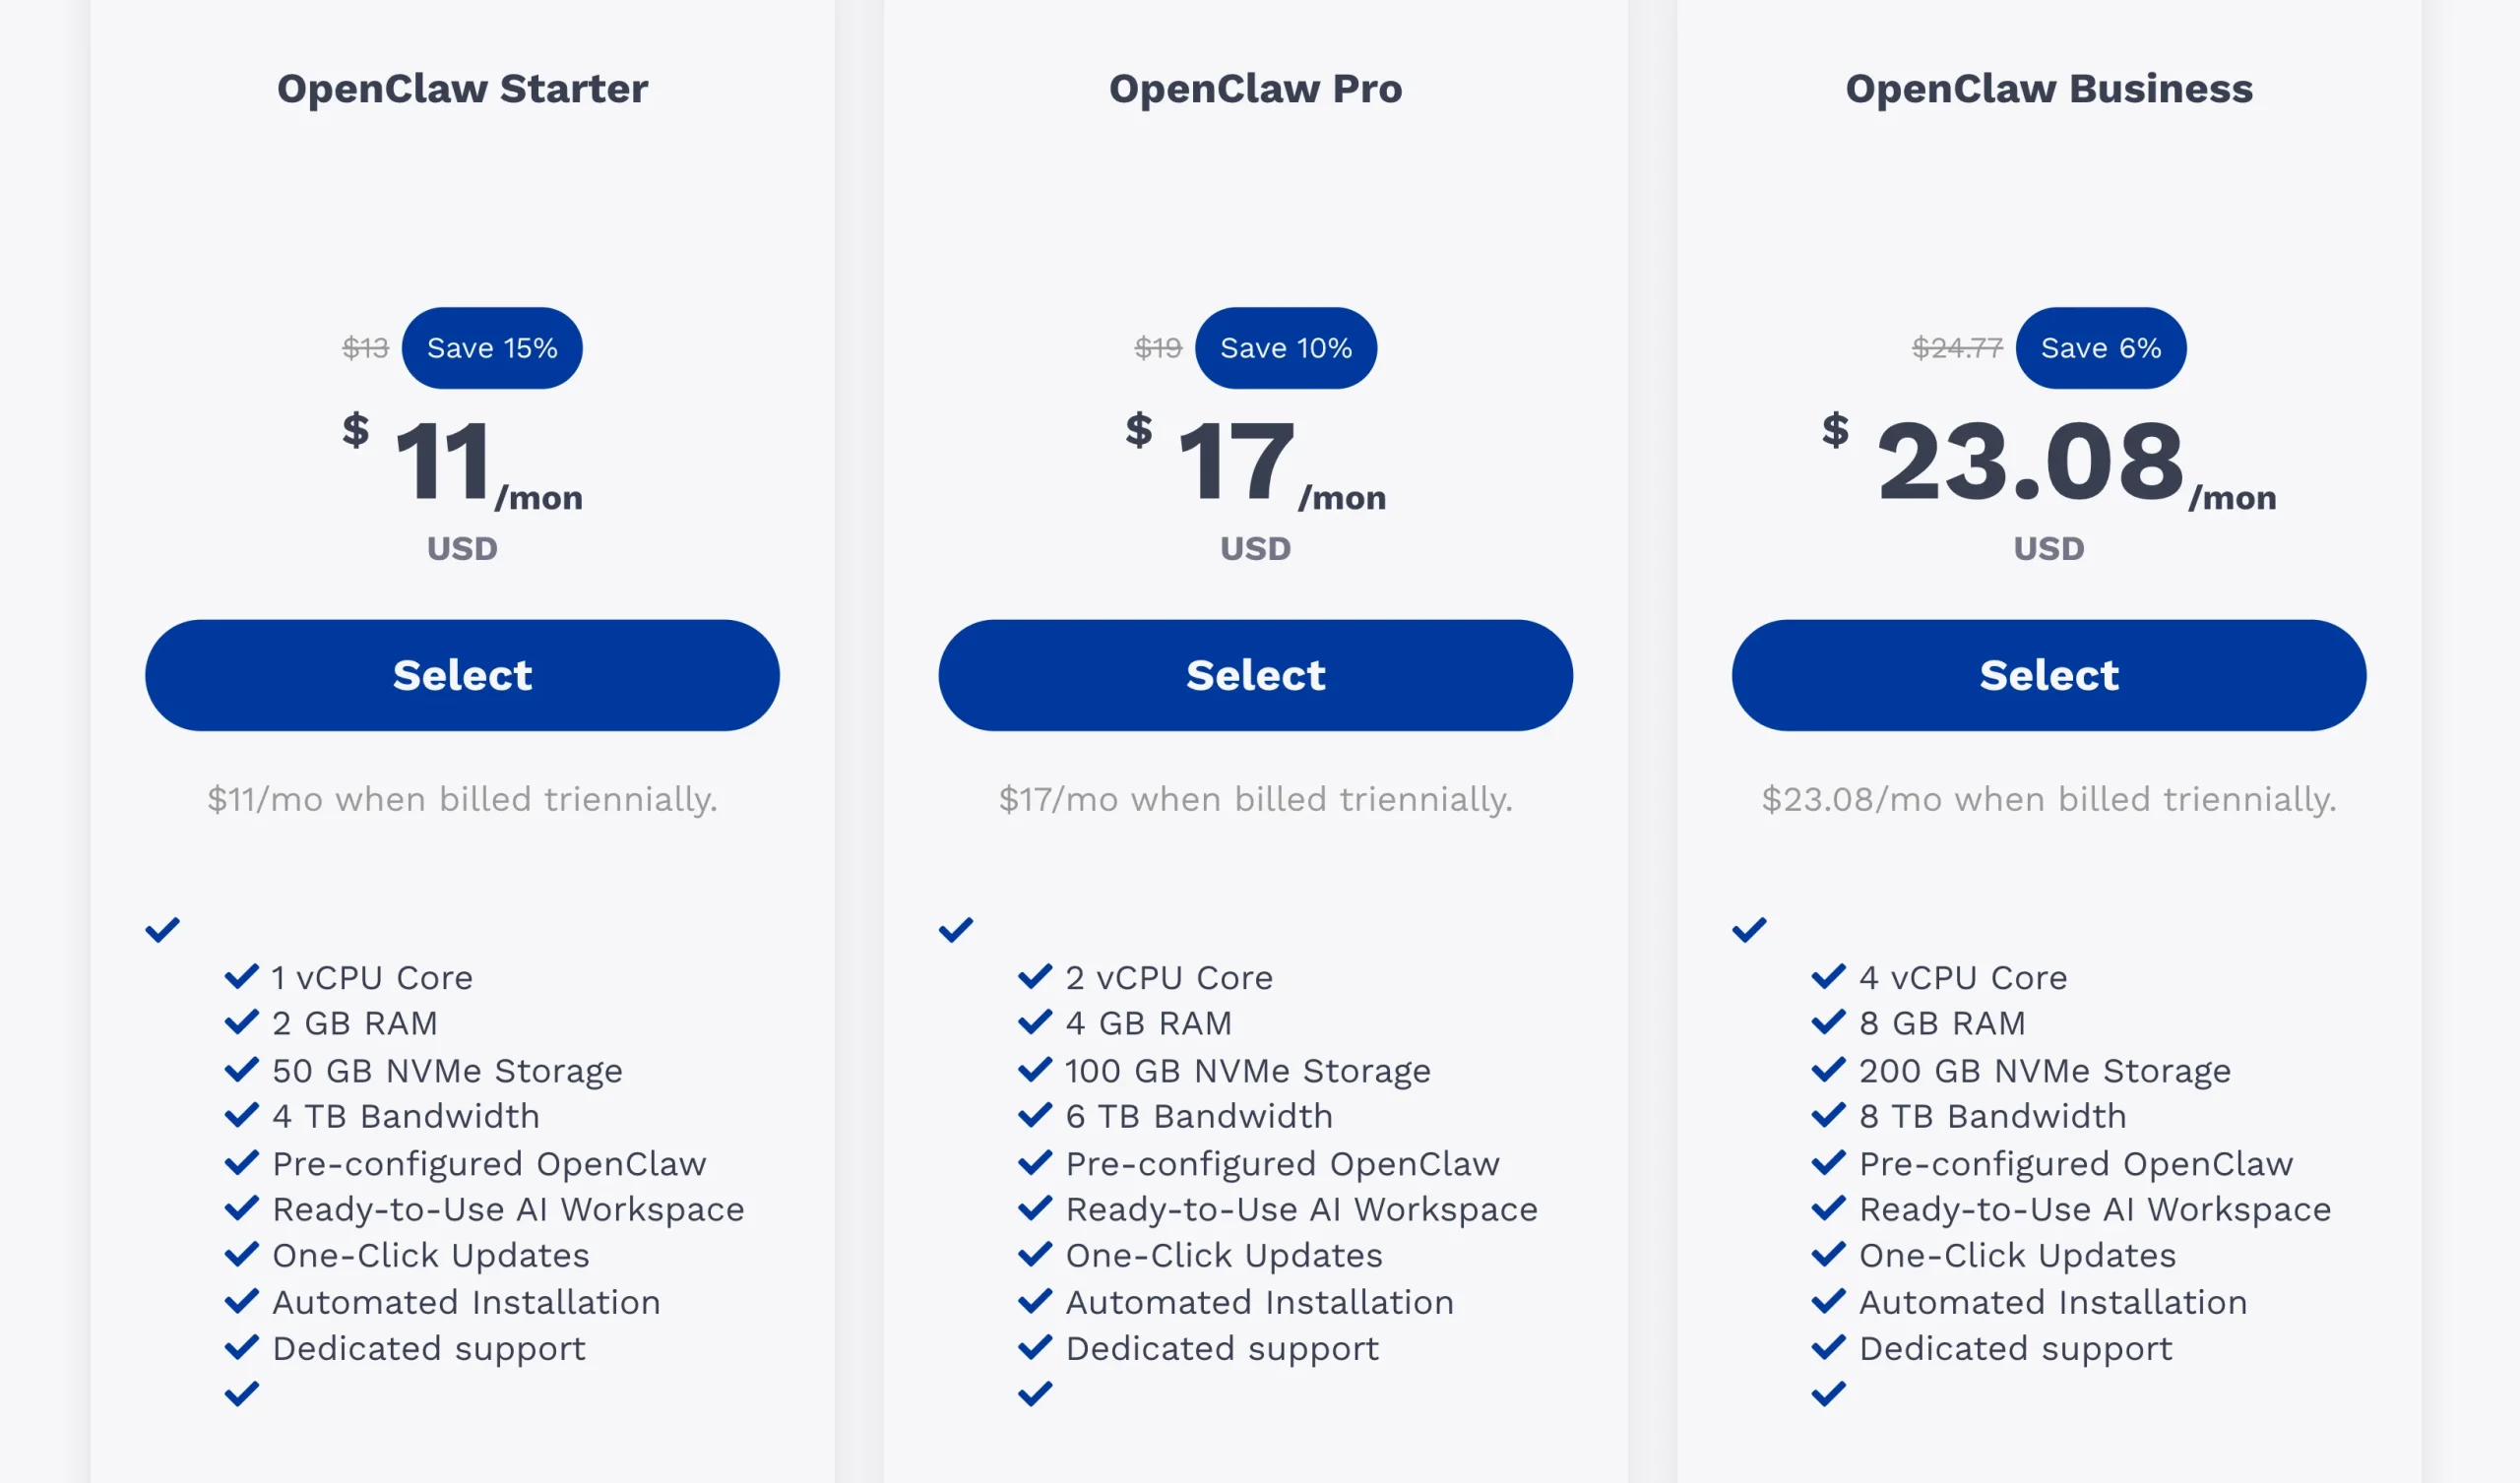
- OpenClaw Starter: 1 vCPU, 2 GB RAM, 50 GB NVMe storage. Suitable for a single agent with standard workloads.
- OpenClaw Pro: 2 vCPUs, 4 GB RAM, 100 GB NVMe storage. Better for heavier browser automation.
- OpenClaw Business: 4 vCPUs, 8 GB RAM, 200 GB NVMe storage. Great for multiple connected channels.
All our plans include root access, daily backups, isolated resources, and firewall protection. Storage, RAM, and vCPU can be scaled later from your dashboard without downtime, so you are not locked into your initial spec as your agent’s workload grows.
Now, if you’re ready to start your deployment journey, get your Truehost Openclaw VPS hosting now and begin right away.