 Domain RegistrationFind and register the perfect domain for your website.
 .COM DomainChoose a widely recognized domain to build global credibility.
 Domain TransferSeamless domain transfers with zero downtime and complete control.
 All TLDsFind and register your perfect domain. Choose from local and global extensions.
 SSL CertificatesKeep your website safe with reliable SSL Certificates that protect customer data and build trust.
 whoisCheck domain ownership details, expiration dates, and registrar information.
 US DomainRegister a .US domain and build trust in the USA.
 Web HostingEverything your website needs to run smoothly
 WordPress HostingWordPress hosting that just works
 Windows HostingReliable hosting for Windows environments
 Reseller HostingTurn hosting into your business
 Email HostingEmail that looks professional and works anywhere
 cPanel HostingFull control of your hosting with cPanel
 Affiliate ProgramJoin as a partner and earn commissions on every referral you send our way.
 Vps HostingScalable virtual servers that expand as you need.
 Dedicated ServersGet complete access and full control over your dedicated physical server.
 Managed vpsNot tech-savvy? We will take care of everything with our fully managed VPS hosting for you.
 AI Website BuilderCreate stunning websites in seconds with AI.
 Online ShopSet up a professional online store. No coding required.
 Web design serviceGet a tailored website designed to match your brand and support your goals.
 BlogFind helpful guides on web hosting, online selling, digital marketing, and more.
 Contact USYou can reach us anytime, day or night, through chat or email.
 SupportBrowse helpful guides and answers for all of our services.

You log in to your VPS over SSH. The prompt reads root@vps, and nothing listens on port 80. Your server is online, yet it serves no pages.
Here is the short answer. Add the official LiteSpeed repository, install the openlitespeed package, and set a WebAdmin password. Then install LSPHP and load the test page.
This guide walks through each step with copy-ready commands. It covers Ubuntu, Debian, AlmaLinux, and Rocky Linux. By the end, you will have a working server and a verified test page.
What You Need Before You Install OpenLiteSpeed
The official docs support current, non-end-of-life releases. That means Ubuntu 22, 24, and 26; Debian 11, 12, and 13; and CentOS family 8, 9, and 10. AlmaLinux and Rocky Linux belong to that last family.
Check your release before you go further:
cat /etc/os-releaseIf your VPS runs an end-of-life release, rebuild it first. Otherwise, the repository install can fail halfway through.
Confirm you have the following:
- A 64-bit Linux VPS on a supported release
- SSH access and a user with sudo rights
- At least 1 GB of RAM and one CPU core (use 2 GB or more for WordPress)
- Ports
80,443,7080, and8088free on the server - A provider firewall or security group that allows the same ports
OpenLiteSpeed cannot use port 80 when Apache or Nginx is already using it. Therefore, stop and disable any old web server now. Run only the line that matches what you installed.
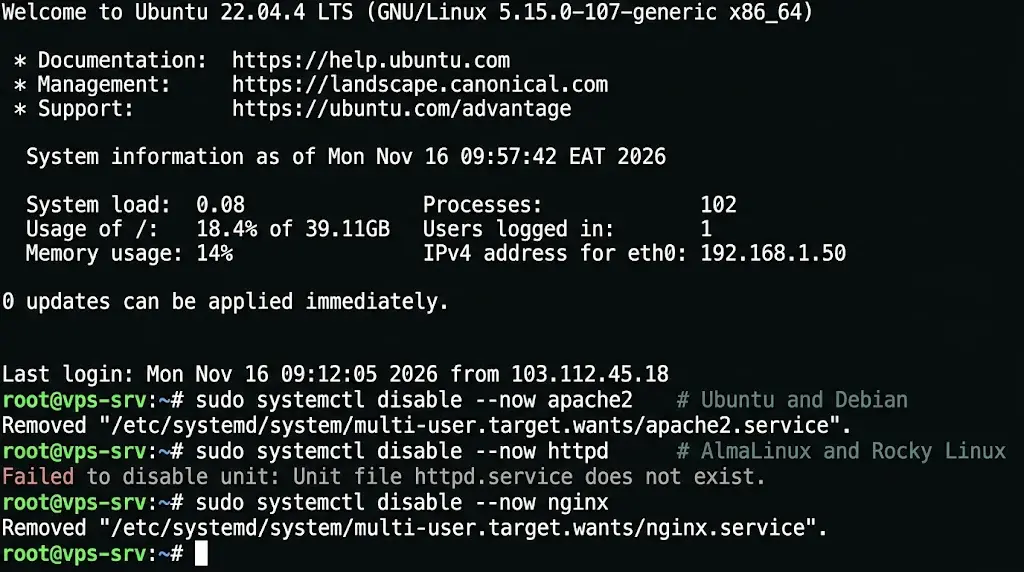
sudo systemctl disable --now apache2   # Ubuntu and Debian

sudo systemctl disable --now httpd     # AlmaLinux and Rocky Linux

sudo systemctl disable --now nginx
Next, check that the four ports are free. Empty output means they are.
sudo ss -tulpn | grep -E ':(80|443|7080|8088)\b'Which Ports OpenLiteSpeed Uses
OpenLiteSpeed listens on four ports. Each one has a clear job.
| Port | Purpose | Open it when |
|---|---|---|
7080 | WebAdmin console | You manage the server from a browser |
8088 | Example test site | You run your first test (close it afterward) |
80 | HTTP | You publish a site |
443 | HTTPS | You publish a site with SSL |
On Ubuntu or Debian, open the ports with UFW. Allow SSH first, or you will lock yourself out.
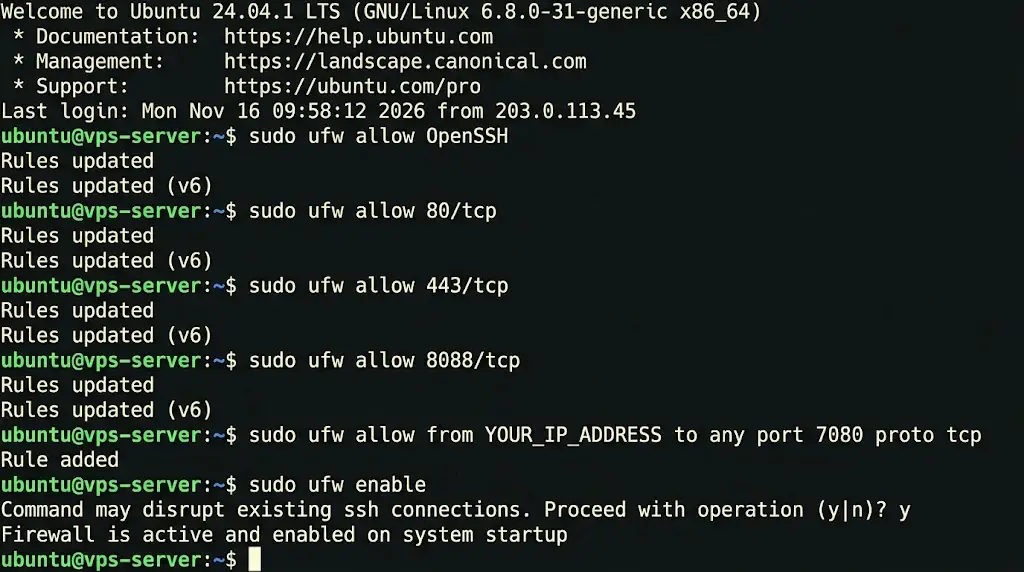
sudo ufw allow OpenSSH

sudo ufw allow 80/tcp

sudo ufw allow 443/tcp

sudo ufw allow 8088/tcp

sudo ufw allow from YOUR_IP_ADDRESS to any port 7080 proto tcp

sudo ufw enable
On AlmaLinux or Rocky Linux, use firewalld instead.
sudo firewall-cmd --permanent --add-port={80,443,8088}/tcp

sudo firewall-cmd --permanent --add-rich-rule='rule family="ipv4" source address="YOUR_IP_ADDRESS" port port="7080" protocol="tcp" accept'

sudo firewall-cmd --reload
Both examples limit port 7080 to your own IP address. That keeps the admin console out of reach of random scanners. Also open the same ports in your VPS provider’s firewall panel if it has one.
Choose an OpenLiteSpeed Installation Method
You can install OpenLiteSpeed three ways. The right pick depends on your system and how much you want automated.
| Method | Best for | Trade-off |
|---|---|---|
| Official repository | Most VPS installs, with updates through apt or yum | Needs a supported release |
One-click script (ols1clk) | OpenLiteSpeed plus MariaDB or WordPress in one run | Changes more on your server |
| Precompiled binary or source build | Unsupported systems and custom builds | You handle every update by hand |
This guide uses the repository. It places the same files on disk as the other methods. Your package manager then handles future updates.
The one-click script suits a full stack in a single run. It installs OpenLiteSpeed with default settings and a random WebAdmin password. Read the script before you run it, since it changes your server.
bash <(curl -fsSL https://raw.githubusercontent.com/litespeedtech/ols1clk/master/ols1clk.sh)Source builds and binaries take longer. They make sense only when no package exists for your system.
Step 1: Install OpenLiteSpeed from the Official Repository
Both paths below start with the same repository script. It detects your system and adds the right LiteSpeed repository. Install wget first if your system does not have it.
1) Install on Ubuntu and Debian
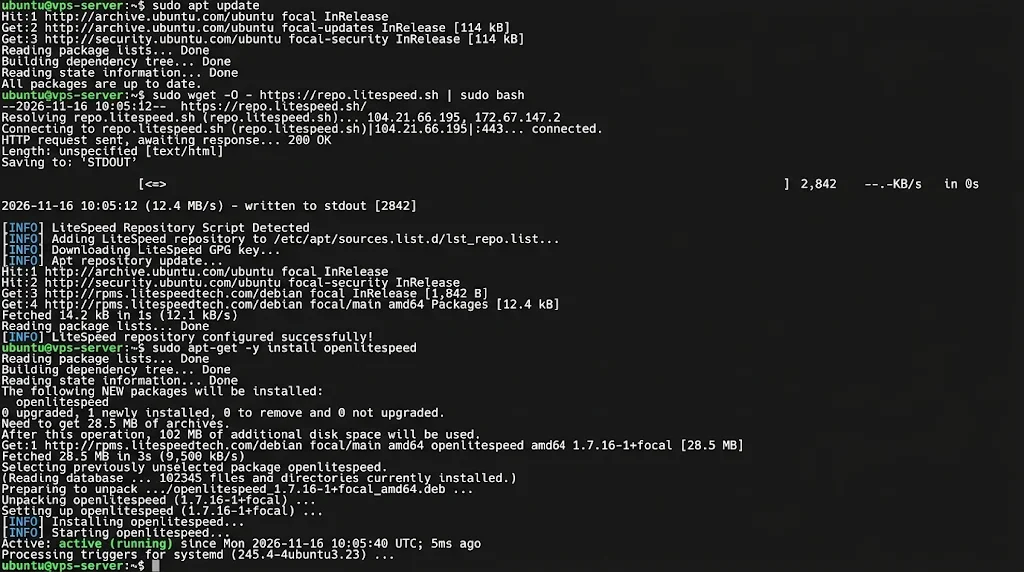
sudo apt update

sudo wget -O - https://repo.litespeed.sh | sudo bash

sudo apt-get -y install openlitespeed
The install should finish without errors. It creates the /usr/local/lsws directory. If apt cannot find the package on a newer release, jump to the troubleshooting section.
2) Install on AlmaLinux, Rocky Linux, and Other CentOS-Family Systems
sudo wget -O - https://repo.litespeed.sh | sudo bash

sudo yum install openlitespeed -y
On these systems, yum and dnf run the same command. Fedora has no dedicated packages, so it uses the CentOS repository instead.
3) Start OpenLiteSpeed and Enable It at Boot
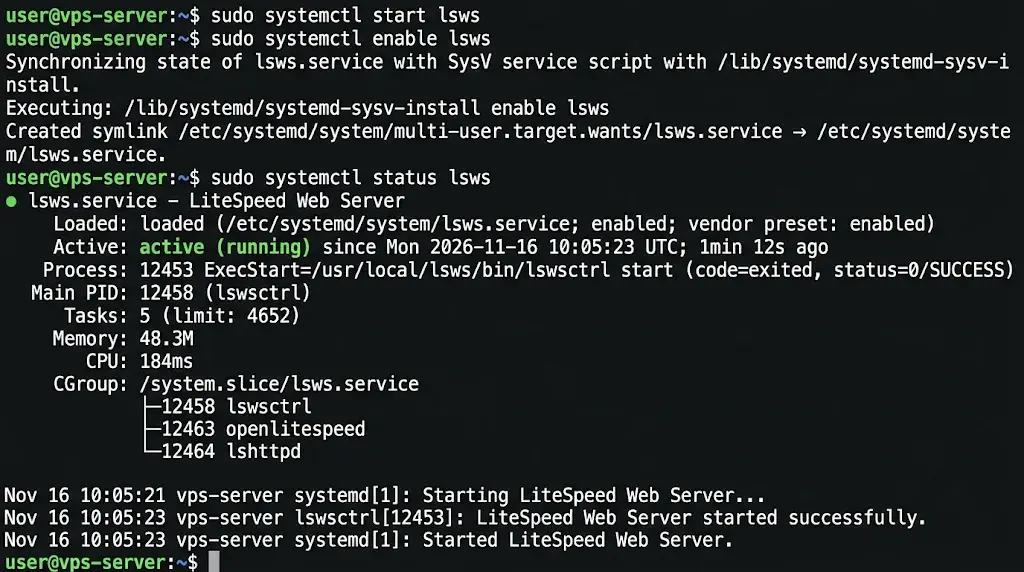
sudo systemctl start lsws

sudo systemctl enable lsws

sudo systemctl status lsws
Look for active (running) in the output. If the service fails, check the troubleshooting section for port conflicts. The lswsctrl script in /usr/local/lsws/bin offers the same controls.
Step 2: Set the Admin Password and Open the WebAdmin Console
The installer creates a random WebAdmin password. It saves the password to /usr/local/lsws/adminpasswd. Set your own instead:
sudo /usr/local/lsws/admin/misc/admpass.shThe script asks for a username and a password. Press Enter to keep the default username, admin. Run the same script again to reset a forgotten password.
Now open the console in your browser:
https://YOUR_SERVER_IP:7080Your browser will warn you about the certificate. The server generated that certificate itself, so the browser does not recognize it. Accept the warning, then log in.
Step 3: Install LSPHP for OpenLiteSpeed
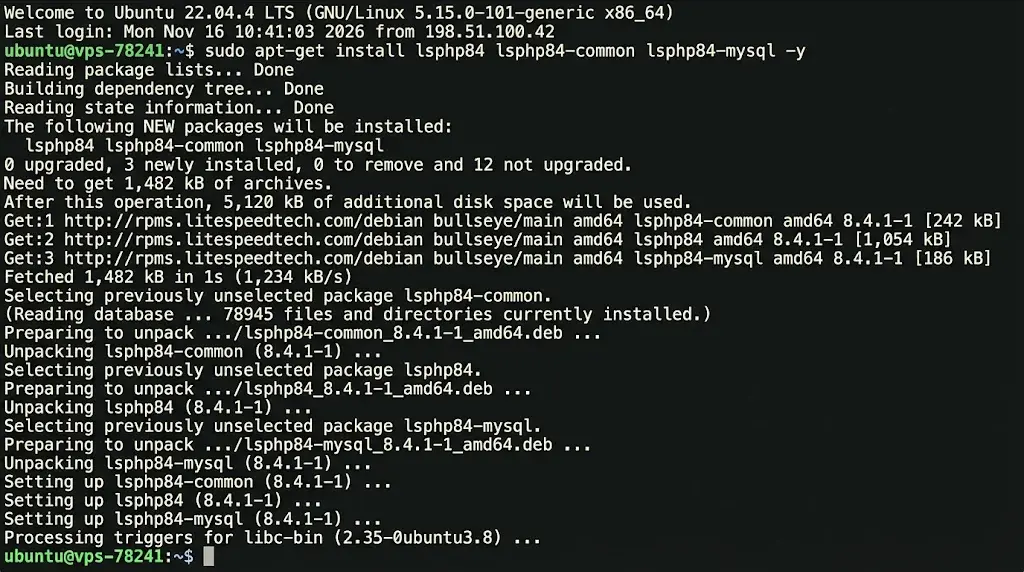
OpenLiteSpeed runs PHP through LSPHP, which talks to the server over the LSAPI protocol. The LiteSpeed repository ships ready-made LSPHP packages. Install PHP 8.4 with MySQL support:
# Ubuntu and Debian
sudo apt-get install lsphp84 lsphp84-common lsphp84-mysql -y# AlmaLinux and Rocky Linux
sudo yum install lsphp84 lsphp84-common lsphp84-mysqlnd -yYour app may need more extensions. Search the repository for them with apt-cache search lsphp84 or yum search lsphp84. Then install what you need.
Confirm the install worked:
/usr/local/lsws/lsphp84/bin/php -vThe output should show PHP 8.4 with LiteSpeed in the SAPI label.
Point OpenLiteSpeed to the Right LSPHP Binary
The default handler can point to an older PHP version. Update it in WebAdmin:
- Go to Server Configuration, then External App.
- Edit the
lsphpentry. - Set the Command field to
/usr/local/lsws/lsphp84/bin/lsphp. - Save, then click Graceful Restart.
Check Script Handler while you are there. It should map the php suffix to LiteSpeed SAPI with the lsphp handler. If your app requires a different PHP version, update both the package name and the path.
Step 4: Verify That OpenLiteSpeed Works
Open the example site in your browser:
http://YOUR_SERVER_IP:8088You should see the OpenLiteSpeed example page. If the page does not load, recheck your firewall rules on both the server and the provider panel.
Next, check the service status and the error log:
sudo systemctl status lsws

sudo tail -n 50 /usr/local/lsws/logs/error.log
Then confirm PHP works. Create a test file in the example site:
echo '<?php phpinfo();' | sudo tee /usr/local/lsws/Example/html/info.phpLoad http://YOUR_SERVER_IP:8088/info.php. You should see the PHP information page. Delete the file right away, since it exposes server details.
sudo rm /usr/local/lsws/Example/html/info.phpIf the browser downloads the file or shows raw code, the PHP handler is not mapped. Go back to the LSPHP section and recheck it.
Change the Default Listener from Port 8088 to Port 80
Visitors expect your site on port 80. Change the listener in WebAdmin:
- Open Listeners in WebAdmin.
- Click View on the Default listener.
- Edit the address settings and change the port from
8088to80. - Save, then click Graceful Restart.
Now load http://YOUR_SERVER_IP with no port. If the restart fails, another web server is still listening on port 80. Stop it, then restart OpenLiteSpeed.
Fix Common OpenLiteSpeed Installation Errors
Check /usr/local/lsws/logs/error.log first. It usually names the cause. Most failures fall into the cases below.
| Symptom | Likely cause | Fix |
|---|---|---|
| Service will not start | Another server holds port 80 or 8088 | Run the ss command from earlier, then stop that service |
WebAdmin does not load on port 7080 | Server or provider firewall blocks it | Open the port in both places and use https:// |
apt cannot find openlitespeed | The repo script failed, or the repo file lacks your release name | Rerun the repo script, then check the repo file |
| Package missing on an old release | The system is unsupported or end-of-life | Rebuild the VPS on a supported release |
| Browser shows PHP source code | The PHP handler is not mapped | Recheck the LSPHP section |
On Debian-based systems, the repo file lives at /etc/apt/sources.list.d/lst_debian_repo.list. On Ubuntu 24.04, the line should end with the release name:
deb http://rpms.litespeedtech.com/debian/ noble mainFix the file, then run sudo apt update, then reinstall.
Add Your First Website to OpenLiteSpeed
Your server now runs, so it can host a site. Keep this section as a short map. Each step has its own guide.
- Create a virtual host in WebAdmin with your domain name and document root.
- Map that virtual host to the listener, using your domain.
- Point your domain’s A record at the VPS IP address.
- Issue a free Let’s Encrypt certificate with Certbot, then attach it to a port
443listener.
OpenLiteSpeed Installation FAQs
How do I start, stop, and restart OpenLiteSpeed?
Use systemctl for everyday control:
sudo systemctl start lsws

sudo systemctl stop lsws

sudo systemctl restart lsws

sudo systemctl status lsws
The lswsctrl script offers the same controls. For example, run sudo /usr/local/lsws/bin/lswsctrl restart. After a config change, use Graceful Restart in WebAdmin. It keeps live connections open.
Where does OpenLiteSpeed store its files?
Everything lives under /usr/local/lsws. You will use these folders most:
lsphp84 holds the PHP binary you installed.
conf holds httpd_config.conf and the virtual host settings.
logs holds error.log and access.log.
admin holds the WebAdmin files and the password script.
Example holds the default test site.
How do I uninstall OpenLiteSpeed?
Back up your sites and configs first. Then stop the service and remove the package:
sudo systemctl stop lsws# Ubuntu and Debian
sudo apt-get remove --purge openlitespeed -y# AlmaLinux and Rocky Linux
sudo yum remove openlitespeed -yLSPHP packages stay on the server until you remove them. On Ubuntu or Debian, run sudo apt-get remove --purge 'lsphp*' -y.
If you installed with the one-click script, run ./ols1clk.sh --uninstall instead. Avoid the --purgeall flag unless you want to wipe MySQL data too.
Finally, check whether /usr/local/lsws still exists, and delete it once your backup is safe.
Run OpenLiteSpeed on a Truehost VPS
Your server now answers on port 80 and runs PHP through LSPHP. The next move is your first virtual host with SSL.
Start from a clean install for the best result. Deploy a Linux VPS from Truehost, then run the commands in this guide from the first step.
You will have a working OpenLiteSpeed server before your first site goes live.