Domain RegistrationFind and register the perfect domain for your website.
 .COM DomainChoose a widely recognized domain to build global credibility.
 Domain TransferSeamless domain transfers with zero downtime and complete control.
 All TLDsFind and register your perfect domain. Choose from local and global extensions.
 SSL CertificatesKeep your website safe with reliable SSL Certificates that protect customer data and build trust.
 whoisCheck domain ownership details, expiration dates, and registrar information.
 US DomainRegister a .US domain and build trust in the USA.
 Web HostingEverything your website needs to run smoothly
 WordPress HostingWordPress hosting that just works
 Windows HostingReliable hosting for Windows environments
 Reseller HostingTurn hosting into your business
 Email HostingEmail that looks professional and works anywhere
 cPanel HostingFull control of your hosting with cPanel
 Affiliate ProgramJoin as a partner and earn commissions on every referral you send our way.
 Vps HostingScalable virtual servers that expand as you need.
 Dedicated ServersGet complete access and full control over your dedicated physical server.
 Managed vpsNot tech-savvy? We will take care of everything with our fully managed VPS hosting for you.
 AI Website BuilderCreate stunning websites in seconds with AI.
 Online ShopSet up a professional online store. No coding required.
 Web design serviceGet a tailored website designed to match your brand and support your goals.
 BlogFind helpful guides on web hosting, online selling, digital marketing, and more.
 Contact USYou can reach us anytime, day or night, through chat or email.
 SupportBrowse helpful guides and answers for all of our services.
You just spun up a fresh VPS. The terminal is open. The cursor is blinking. Now what?
That blank moment is where most first-time server owners freeze. Your VPS doesn’t have a web server installed yet, so it can’t display anything to visitors.
Nginx fixes that. This guide walks through every command you need, from a clean server to a live site secured with HTTPS.
What You Need Before You Start
A few things need to be in place first. Skipping these tends to confuse later, so check them off now.
- A VPS with at least 1 CPU core and 1GB of RAM. Nginx runs fine on modest specs.
- SSH access to the server, along with the root password or a key file.
- A non-root user with
sudoprivileges. Running everything as root works, but it raises the risk of mistakes. - A domain name with an
A recordpointed at your server’s IP address. This step is optional if you only need the server’s IP for now. - This guide covers Ubuntu 22.04, Ubuntu 24.04, and Debian. The commands below apply to all three unless noted otherwise.
Step 1: Connect to Your VPS and Update the System
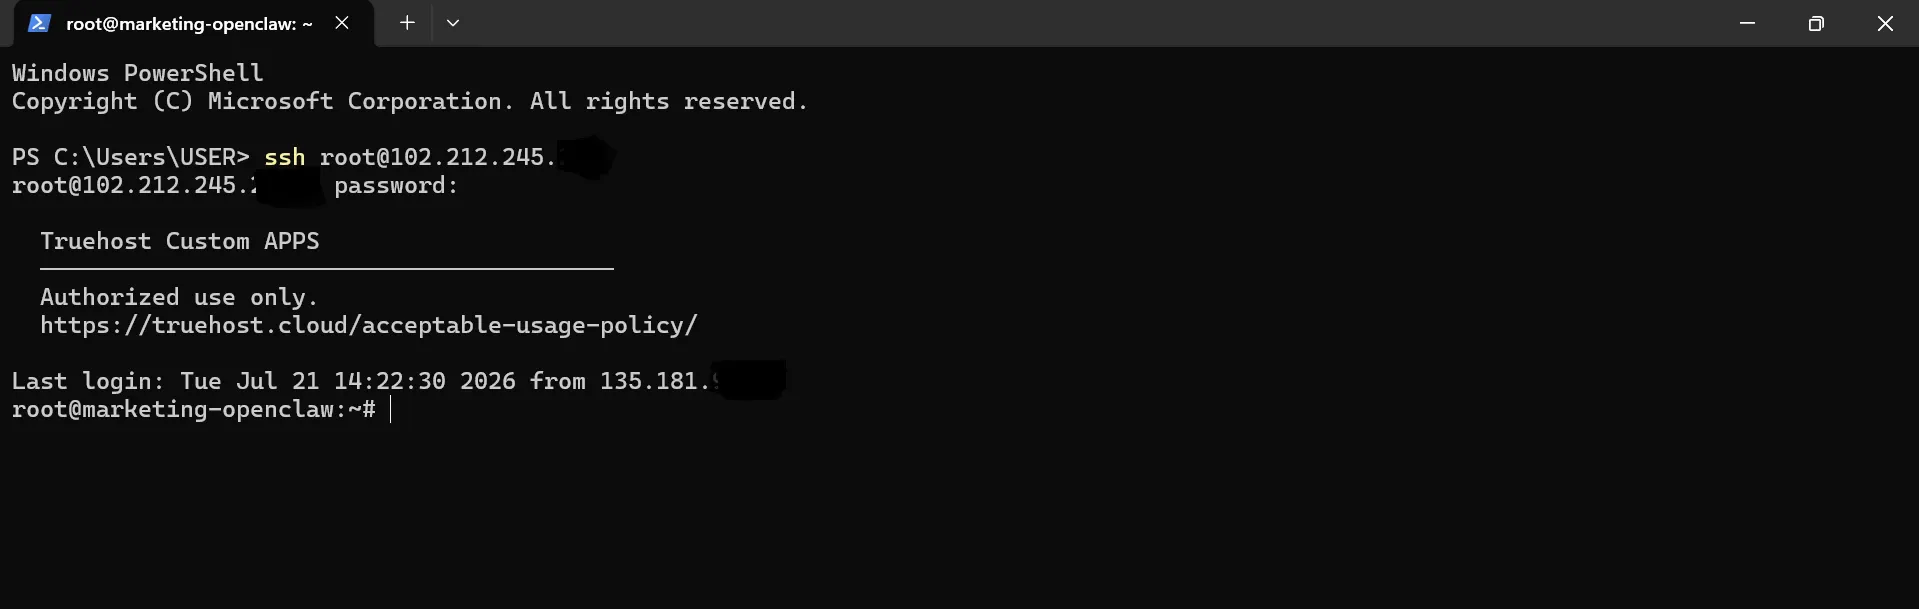
Open a terminal and connect over SSH:
ssh your_username@your_server_ipOnce you’re in, update the package index and upgrade any outdated software:
sudo apt update

sudo apt upgrade -y
Skipping this step can lead to package conflicts once you install nginx. Old libraries sometimes clash with newer packages, turning a five-minute install into a longer troubleshooting session.
If the upgrade touches the kernel, a reboot may be requested. Restart with sudo reboot, wait a minute, and reconnect over SSH.
Step 2: Install Nginx
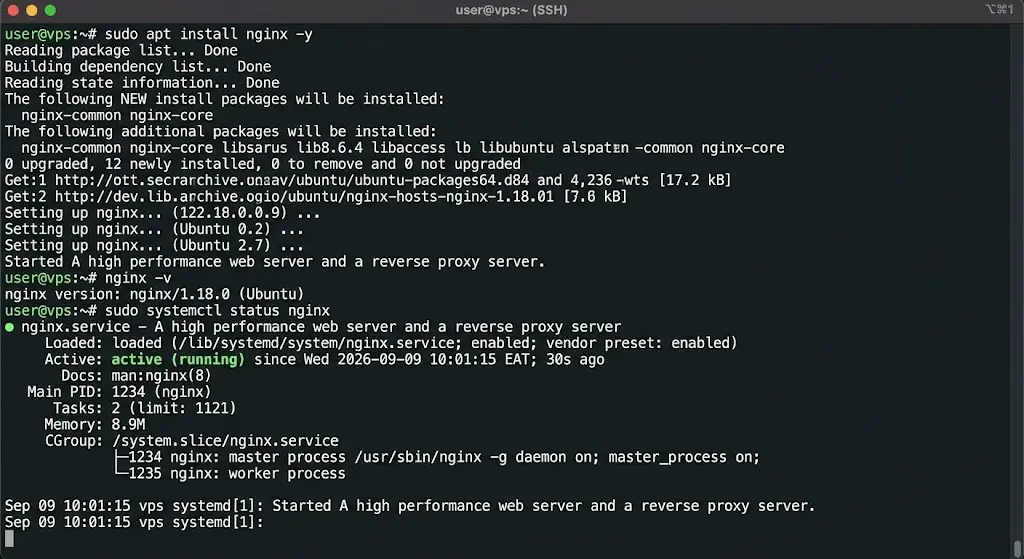
Nginx sits in Ubuntu’s default repositories, so no extra setup is needed to grab it:
sudo apt install nginx -yOnce the install finishes, confirm the version:
nginx -vNext, check that the service actually started:
sudo systemctl status nginxYou should see “active (running)” in green. If nginx started properly, it also serves a default welcome page at your server’s IP address.
Open a browser, type in the IP, and look for the “Welcome to nginx!” message. Those default files live at /var/www/html, and you’ll replace them soon with your own content.
Step 3: Configure the Firewall
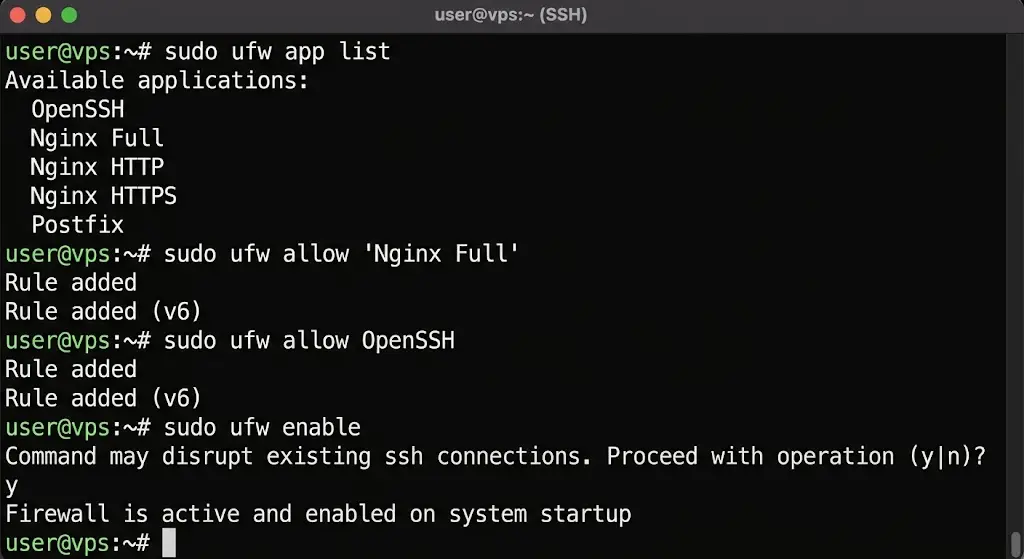
An open server without a firewall is a risk you don’t need to take. UFW (Uncomplicated Firewall) handles this on Ubuntu with a few short commands.
First, check which application profiles nginx registered:
sudo ufw app listYou’ll see options like “Nginx HTTP,” “Nginx HTTPS,” and “Nginx Full.” Allow the full profile so both ports 80 and 443 stay open:
sudo ufw allow 'Nginx Full'Before turning the firewall on, allow SSH too. Forgetting this step locks you out of your own server:
sudo ufw allow OpenSSH

sudo ufw enable
Confirm the rules applied correctly:
sudo ufw statusYou should see OpenSSH and Nginx Full listed as allowed. If SSH isn’t there, add it before you do anything else.
Step 4: Understand the Nginx File Structure
A little context here saves a lot of guesswork later. Nginx predictably organizes its files.
/etc/nginx/nginx.confis the main configuration file. Most of the time, you won’t touch this directly./etc/nginx/sites-available/contains configuration files for each site, whether active or not./etc/nginx/sites-enabled/holds symbolic links to the sites you actually want live. Nginx only reads what’s linked here./var/log/nginx/access.logrecords every request that hits your server./var/log/nginx/error.logrecords anything that goes wrong, and it’s the first place to look during troubleshooting.
Editing the default configuration file directly works for quick tests, but it doesn’t scale once you add more sites. Server blocks give you a cleaner setup, and that’s what the next step covers.
Step 5: Create a Server Block for Your Domain
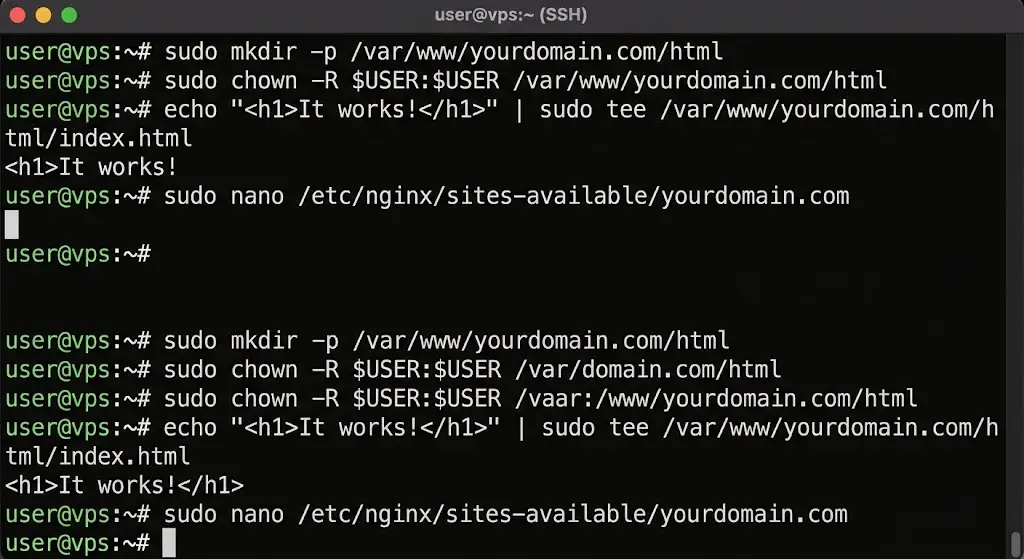
A server block tells nginx which files belong to which domain. Start by making a directory for your site:
sudo mkdir -p /var/www/yourdomain.com/html

sudo chown -R $USER:$USER /var/www/yourdomain.com/html
Drop a basic index file in place, so you have something to test with:
echo "<h1>It works!</h1>" | sudo tee /var/www/yourdomain.com/html/index.htmlNow create the server block configuration:
sudo nano /etc/nginx/sites-available/yourdomain.comPaste in a basic setup like this:
server {

    listen 80;

    listen [::]:80;

    root /var/www/yourdomain.com/html;

    index index.html;

    server_name yourdomain.com www.yourdomain.com;

    location / {

        try_files $uri $uri/ =404;

    }

}
That try_files line does more work than it appears to. It tells nginx to check for the exact file first. If that fails, it falls back to the directory, then returns a clean 404.
Enable the site by linking it into sites-enabled:
sudo ln -s /etc/nginx/sites-available/yourdomain.com /etc/nginx/sites-enabled/Then remove the default server block so it doesn’t compete with yours:
sudo rm /etc/nginx/sites-enabled/defaultStep 6: Test and Reload Nginx
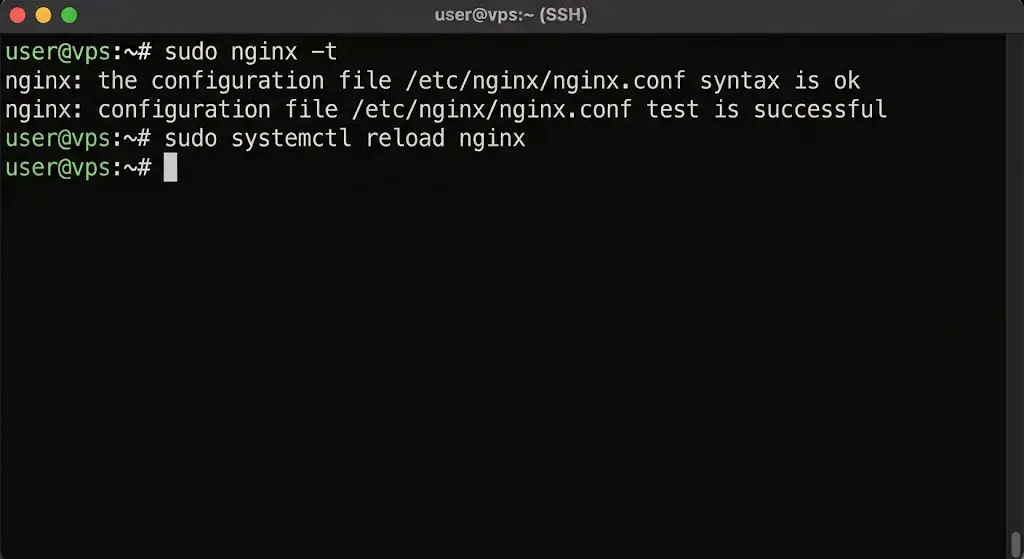
Before applying any change, run a syntax check:
sudo nginx -tThis catches typos and missing semicolons before they take your site offline. If the test passes, apply the change:
sudo systemctl reload nginxReload keeps active connections alive while it applies the new config. Restart drops all connections instead, so use reload whenever you can.
Visit your domain or your server’s IP in a browser. You should see the index page you created earlier.
If nothing loads, jump to the troubleshooting section below before changing anything else.
Step 7: Secure Your Site With SSL
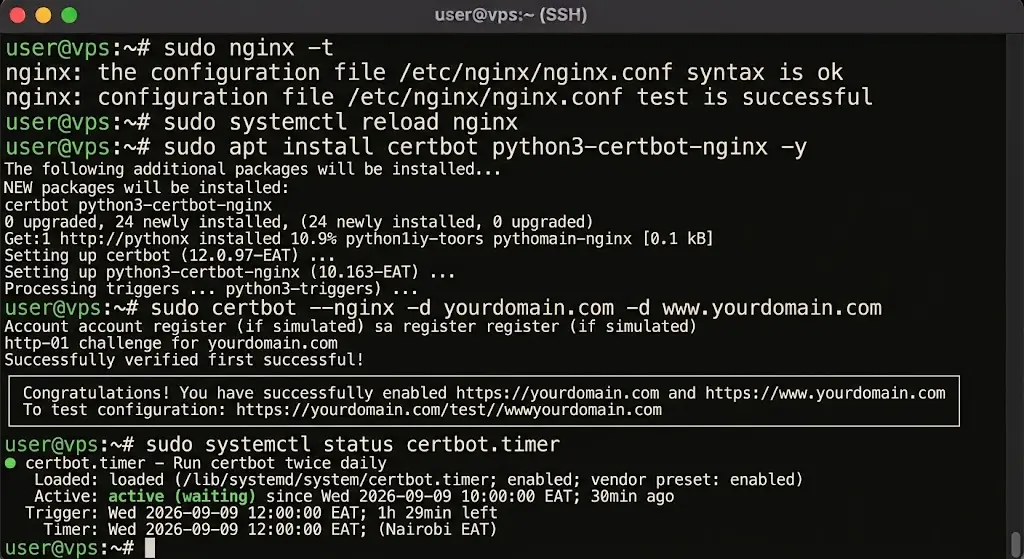
A site without HTTPS shows a warning in most browsers today, so this step isn’t optional for anything public. Certbot handles the certificate process automatically.
Install Certbot along with the nginx plugin:
sudo apt install certbot python3-certbot-nginx -yRequest a certificate for your domain:
sudo certbot --nginx -d yourdomain.com -d www.yourdomain.comCertbot asks a few short questions, then edits your nginx configuration on its own. It adds the certificate paths and redirects HTTP traffic to HTTPS.
Confirm renewal is scheduled automatically:
sudo systemctl status certbot.timerCertificates from Let’s Encrypt expire every 90 days, so this timer handles renewal without any manual work on your part. Test it with a dry run:
sudo certbot renew --dry-runVisit your site again over https:// and check for the padlock icon. If HTTP still loads without redirecting, revisit the certbot output for any errors it flagged.
Troubleshooting Common Nginx Setup Problems
Something will eventually break, and that’s normal on any server. Here’s how to read the signs and fix the common ones.
Nginx Won’t Start
Run the syntax check first, since most startup failures come from a bad server block rather than nginx itself:
sudo nginx -tIf that passes but nginx still refuses to start, check the system logs for the real reason:
sudo systemctl status nginx

sudo journalctl -u nginx
The log output usually names the exact line causing trouble.
“Address Already in Use” Errors
This message means another process already holds port 80 or443. Find out what’s using it:
sudo lsof -i :80or
sudo ss -tlnp | grep:80Apache is the most common culprit on a fresh VPS, especially if it came pre-installed. Stop it and stop it from restarting on reboot:
sudo systemctl stop apache2

sudo systemctl disable apache2
If the error only reappears after a reboot, check whether Apache is still enabled even though you stopped it manually:
systemctl is-enabled apache2A service can be stopped today and still set to launch automatically tomorrow.
403 Forbidden Errors
A 403 means nginx found the request but refused to serve it. The error log almost always names the reason:
sudo tail -f /var/log/nginx/error.logReload the page while watching that log, and look for one of these lines:
- “Directory index is forbidden” means no index file exists in that folder, or the index directive doesn’t list its name. Add the missing file or update the index line in your server block.
- Permission issues are the second most common cause. Nginx needs execute permission on every folder along the path, not just read access on the file itself. Fix folder permissions to
755and file permissions to644:
sudo chmod -R 755 /var/www/yourdomain.com

sudo chmod -R 644 /var/www/yourdomain.com/html/*- SELinux, on distros where it’s active, can block access even when permissions look correct. Check for denials with:
sudo ausearch -m avc -ts recent502 Bad Gateway (Once Nginx Proxies an App)
A 502 response appears once nginx starts forwarding requests to a backend app, such as Node.js or PHP-FPM. It means nginx reached out and got nothing usable back.
Check the error log for the specific phrase, since each one points to a different fix:
- “connect() failed” usually means the backend app isn’t running. Start it and confirm it’s listening on the port or socket your config expects.
- A permission denied message on a socket path means the nginx user, usually www-data, can’t reach that socket. Check the socket’s ownership and adjust it if needed.
- “Upstream sent too big header” means the backend’s response headers exceeded nginx’s buffer size, and the buffer size needs to be increased in your config.
Site Not Loading Despite Nginx Running Fine
If nginx reports as active but the site still won’t load, work through these checks in order:
- Confirm your domain actually resolves to the server’s IP:
dig yourdomain.comDNS changes can take time to spread, so a recent update might not have taken effect everywhere yet.
- Confirm the firewall allows the right ports:
sudo ufw status- Confirm that the correct server block is linked in sites-enabled and that the default block isn’t still catching requests before yours.
FAQs
Can I run Nginx and Apache on the same VPS?
Yes, but they can’t both listen on port 80 or 443 at the same time. Most people run one as a reverse proxy in front of the other, or assign each one a different port.
How much RAM does Nginx need on a VPS?
Nginx itself runs comfortably on 512MB of RAM for a small site. Add more RAM as your traffic grows or once you run a database and application server alongside it.
What is the difference between Nginx and a reverse proxy setup?
Nginx is the software. A reverse proxy is a role nginx can play. It sits in front of an app like Node.js or PHP-FPM and forwards requests to it. Nginx can serve static files directly or act purely as a proxy.
How do I host multiple domains on one VPS with Nginx?
Create a separate server block for each domain, each with its own server_name and root directory. Nginx checks the request header and routes it to the matching block automatically.
Set Up Nginx on a Vps Today
Nginx is now installed, configured, and serving your site over HTTPS. You’ve covered the install, the firewall, server blocks, and SSL. You’ve also seen the fixes for the errors most new server owners run into.
From here, the next real decision is how much server maintenance you want to handle yourself.
Maybe you’d rather skip the ongoing patching, monitoring, and renewal checks. A managed VPS plan or fully managed hosting option takes that off your plate. You still keep the control you built here.