 Domain RegistrationFind and register the perfect domain for your website.
 .COM DomainChoose a widely recognized domain to build global credibility.
 Domain TransferSeamless domain transfers with zero downtime and complete control.
 All TLDsFind and register your perfect domain. Choose from local and global extensions.
 SSL CertificatesKeep your website safe with reliable SSL Certificates that protect customer data and build trust.
 whoisCheck domain ownership details, expiration dates, and registrar information.
 US DomainRegister a .US domain and build trust in the USA.
 Web HostingEverything your website needs to run smoothly
 WordPress HostingWordPress hosting that just works
 Windows HostingReliable hosting for Windows environments
 Reseller HostingTurn hosting into your business
 Email HostingEmail that looks professional and works anywhere
 cPanel HostingFull control of your hosting with cPanel
 Affiliate ProgramJoin as a partner and earn commissions on every referral you send our way.
 Vps HostingScalable virtual servers that expand as you need.
 Dedicated ServersGet complete access and full control over your dedicated physical server.
 Managed vpsNot tech-savvy? We will take care of everything with our fully managed VPS hosting for you.
 AI Website BuilderCreate stunning websites in seconds with AI.
 Online ShopSet up a professional online store. No coding required.
 Web design serviceGet a tailored website designed to match your brand and support your goals.
 BlogFind helpful guides on web hosting, online selling, digital marketing, and more.
 Contact USYou can reach us anytime, day or night, through chat or email.
 SupportBrowse helpful guides and answers for all of our services.

When you force HTTPS on WordPress, every visitor who types or clicks an old HTTP address lands on the secure version of your site instead.
That small change affects how visitors experience your website, because it decides whether their connection is protected or exposed.
HTTP sends website data without the encryption that HTTPS provides.
HTTPS uses TLS encryption to protect the data traveling between the visitor’s browser and your website, which covers login details, form entries and the pages themselves.
Browsers also flag unencrypted sites as Not secure, which can make visitors hesitate before they read or buy anything.
To force HTTPS on WordPress, you set up a redirect from http://example.com to https://example.com.
A good redirect also preserves the requested page path, so a visitor who opens an old link reaches the matching secure page rather than the homepage.
Here is how that looks in practice:
| Before | After |
| http://example.com | https://example.com |
| http://example.com/about | https://example.com/about |
| http://www.example.com/contact | https://www.example.com/contact |
Keep one limit in mind.
HTTPS protects the connection, but it does not automatically make a WordPress website safe from malware, weak passwords or vulnerable plugins.
You still need strong passwords, updated software and regular backups.
This guide covers four ways to force HTTPS on WordPress: cPanel, WordPress settings, a plugin and the .htaccess file.
What You Need Before Forcing HTTPS on WordPress
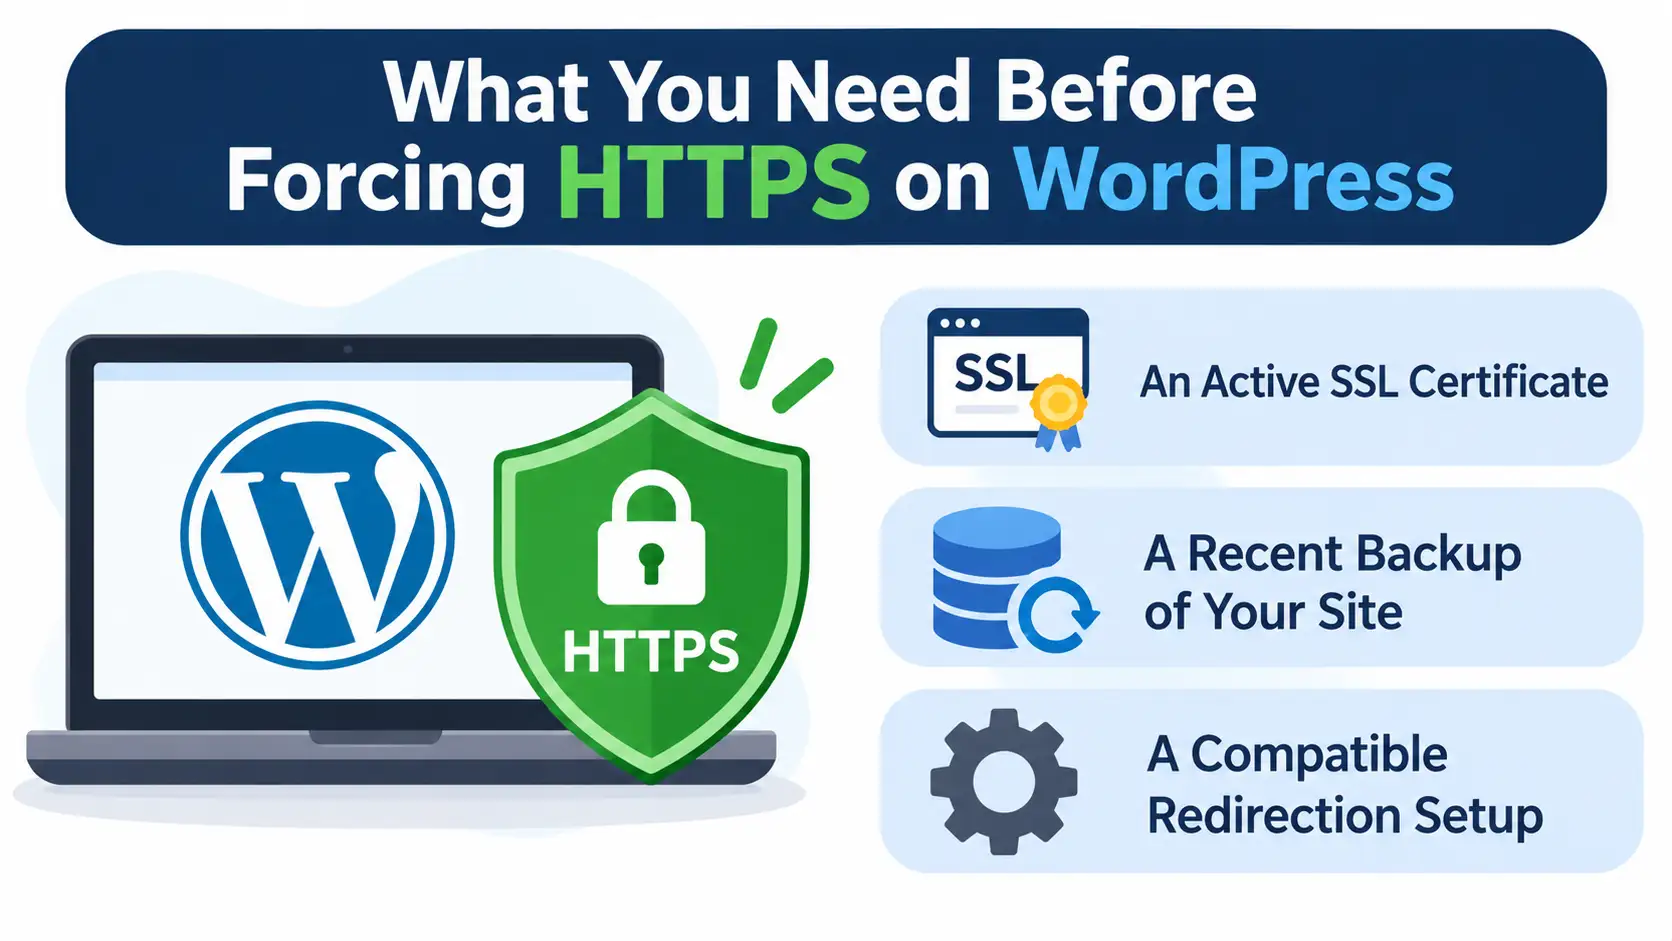
Check these items before you change any settings:
- A domain name connected to your hosting account. The domain must already point to the server that runs your WordPress site.
- A valid SSL/TLS certificate installed for the domain. Without one, a redirect has nothing secure to send visitors to.
- Access to the WordPress dashboard. You need an administrator login.
- Access to the hosting control panel or website files, if you plan to use server-level redirects.
- A recent backup of the website. A backup lets you recover quickly if a setting locks you out.
The SSL certificate must cover the hostname visitors actually use.
If your website uses www, the certificate has to include www.example.com as well as example.com.
A certificate issued for only one version will trigger warnings on the other.
Important: Do not enable redirects before confirming that HTTPS loads correctly. Open https://example.com in your browser first. If it shows a certificate warning or a broken page, fix the certificate before you force HTTPS on WordPress. Otherwise, visitors may encounter SSL errors or redirect problems.
Method 1: Force HTTPS on WordPress Through cPanel
This method is recommended for Truehost cPanel users.
cPanel includes a built-in Force HTTPS Redirect option for domains that have a valid SSL certificate.
And it works at the server level, so it applies to the whole domain without any file editing.
Step 1: Log In to cPanel

- Sign in to your hosting account’s cPanel.
- Locate the Domains section.
- Open the Domains interface.
Step 2: Enable Force HTTPS Redirect
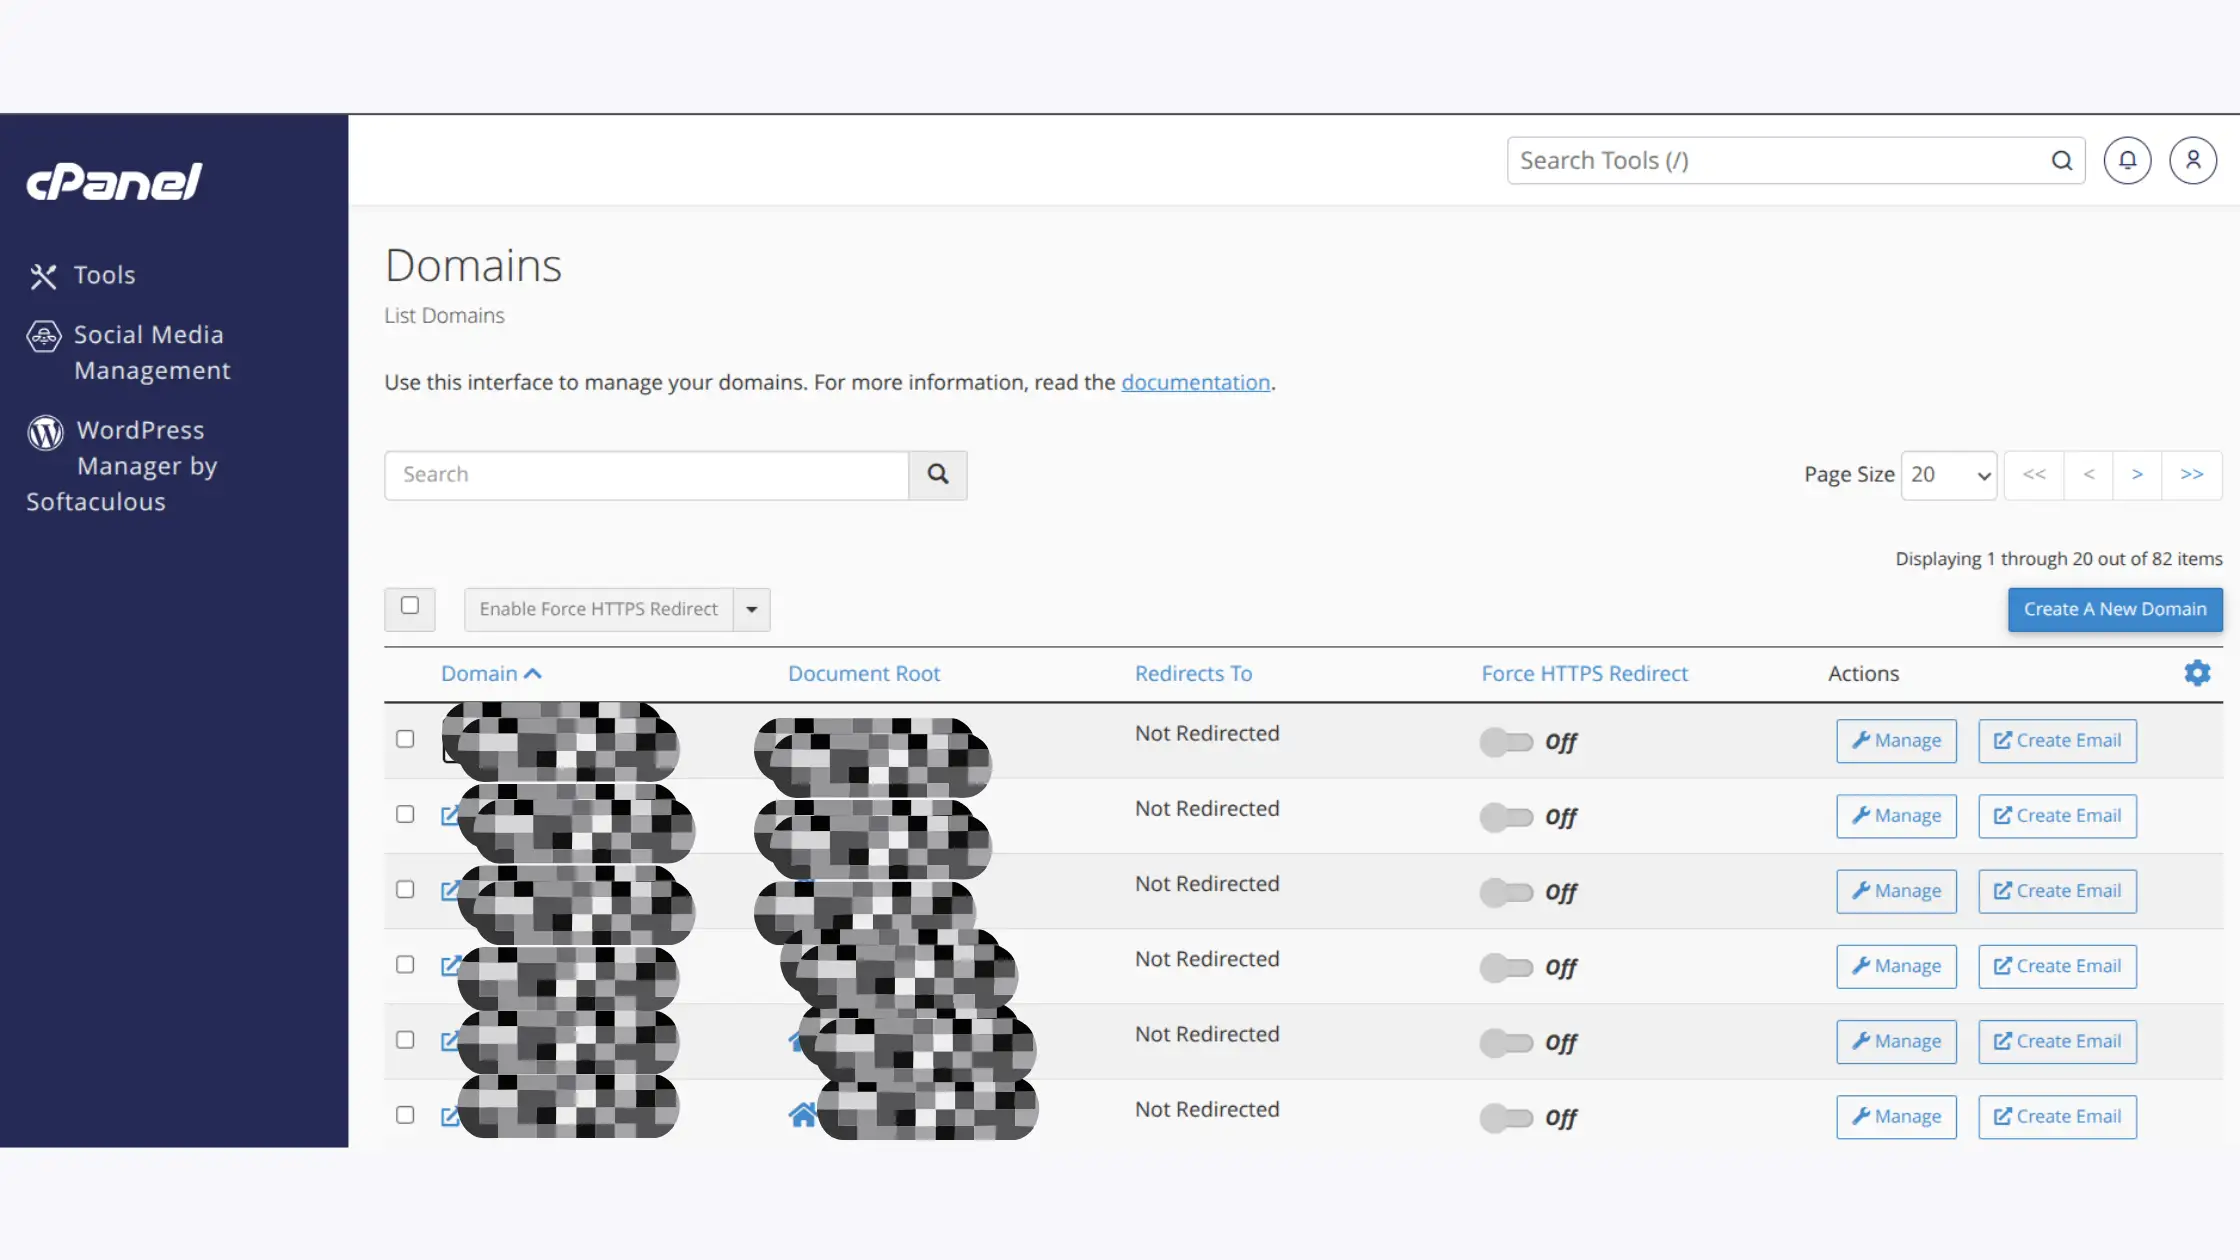
- Find the domain you want to secure in the list.
- Locate the Force HTTPS Redirect toggle beside it.
- Switch it on, provided the domain has a valid SSL certificate.
- Save or confirm the setting if cPanel prompts you.
Step 3: Test the Redirect
- Open a private browser window, which avoids cached redirects.
- Enter the HTTP version of your domain.
- Confirm that the browser loads the HTTPS version.
- Visit a few internal pages and check that their paths are preserved.
The cPanel option may not appear if the domain does not have a valid SSL certificate.
In that case, install or renew the certificate first.
Addon domains may also require you to enable the setting on their associated subdomains, depending on your cPanel configuration.
Method 2: Force HTTPS Through WordPress Settings
You can also update your website URLs directly from the WordPress dashboard.
This tells WordPress to build every link with HTTPS.
Step 1: Open WordPress General Settings
- Log in to the WordPress dashboard.
- Navigate to Settings → General.
Step 2: Update the WordPress URLs
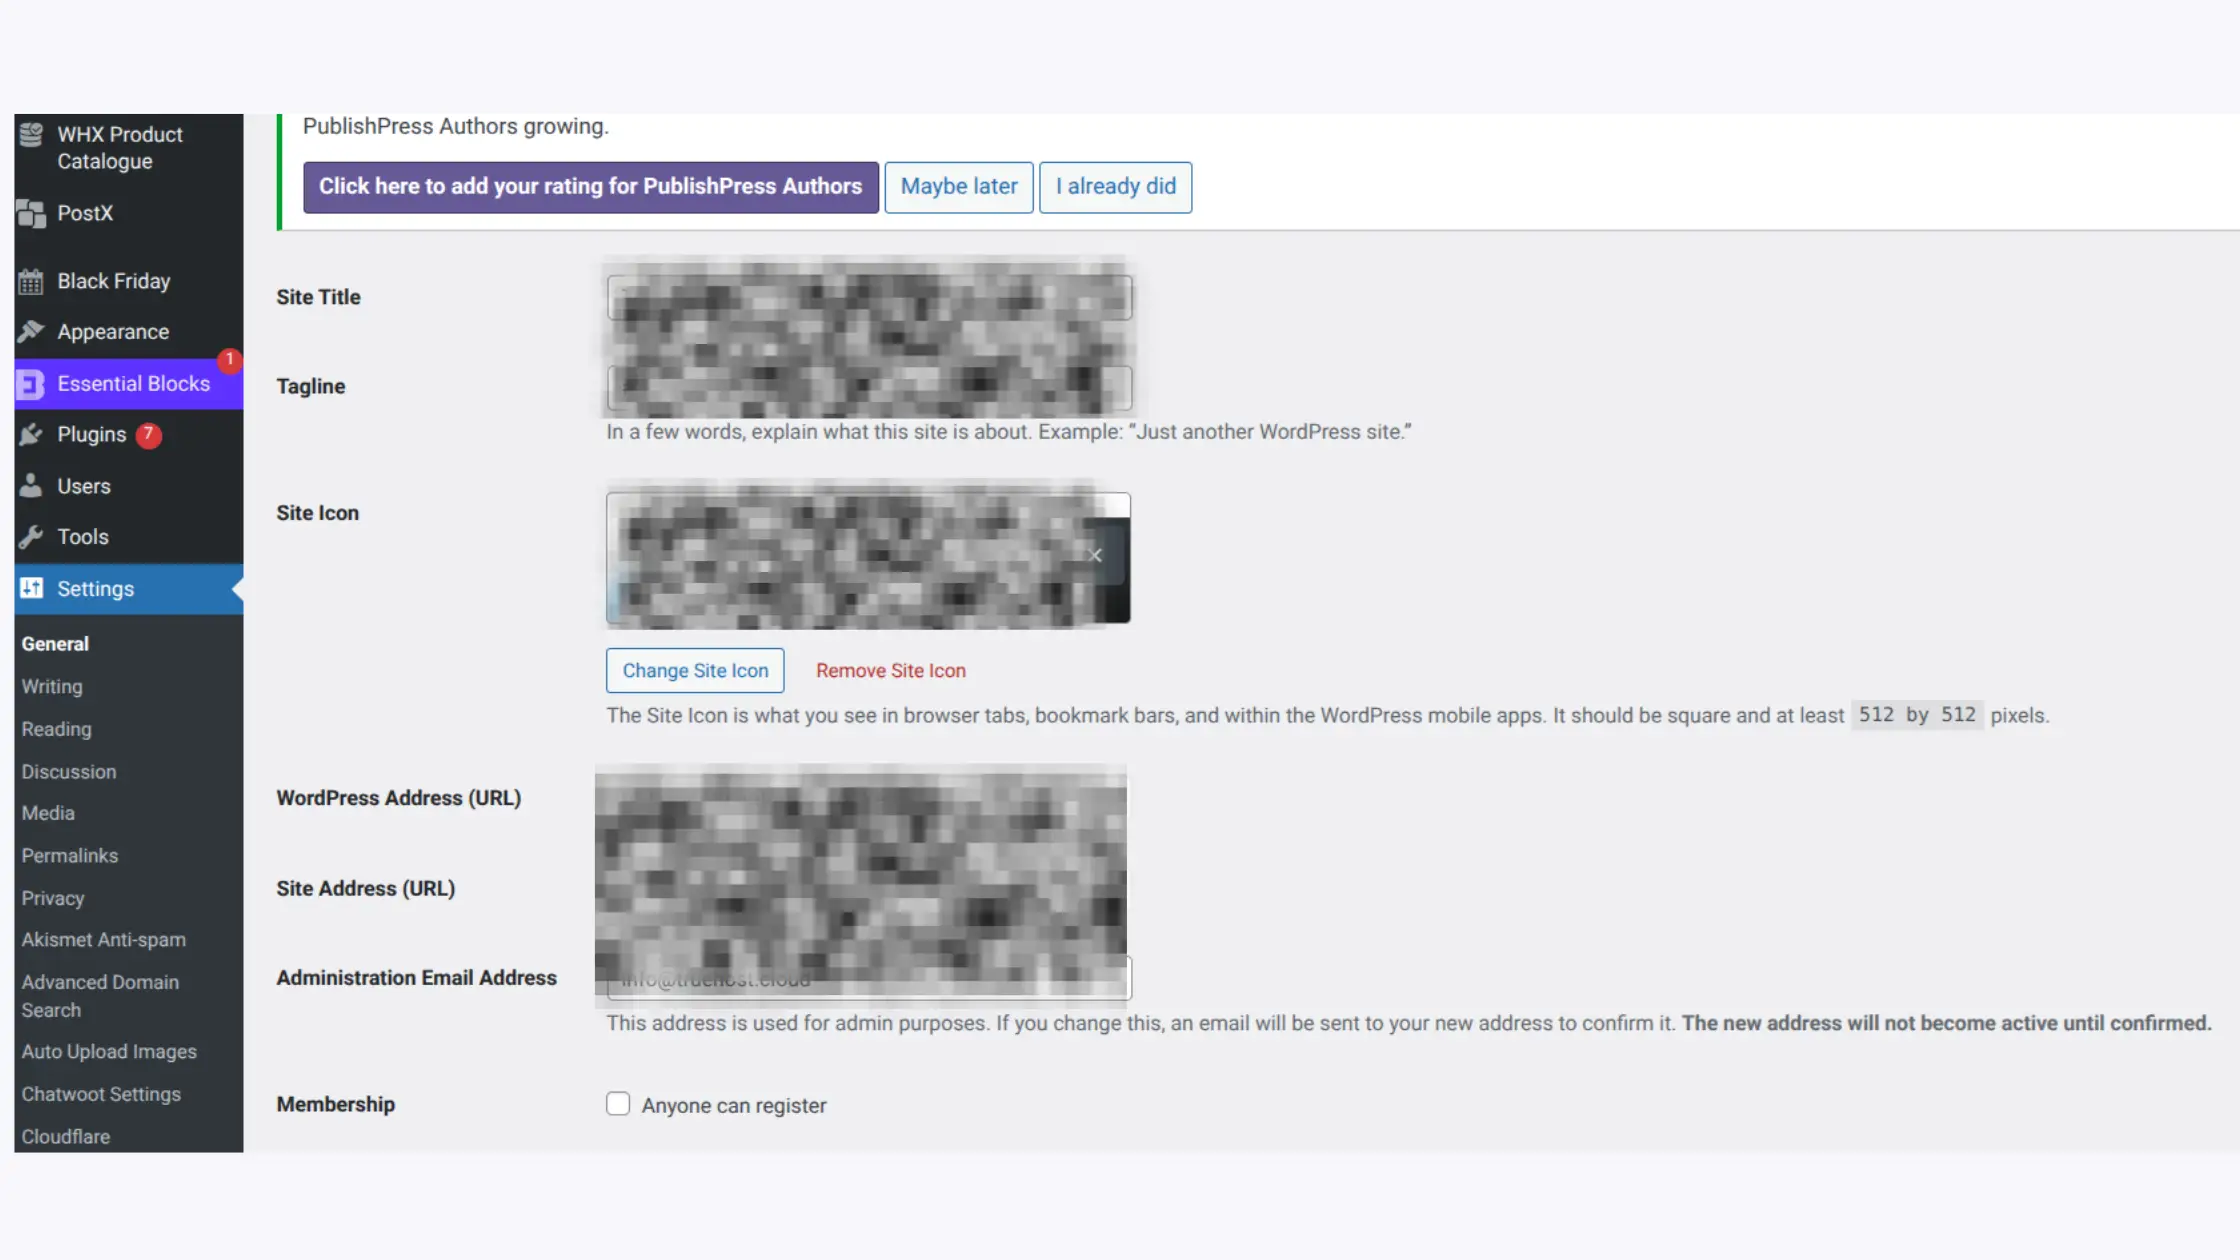
Change both address fields to use HTTPS:
| Setting | Before | After |
| WordPress Address (URL) | http://example.com | https://example.com |
| Site Address (URL) | http://example.com | https://example.com |
The two settings do different jobs.
The WordPress Address specifies where your WordPress core files are located.
The Site Address specifies the URL visitors use to reach your website. For most sites both should carry the same HTTPS address.
Step 3: Save Changes and Test
- Save the updated settings.
- Log in again if WordPress asks you to.
- Open the website using its HTTP address.
- Confirm that the HTTPS version loads.
Changing these two settings alone does not guarantee that every HTTP request will redirect to HTTPS.
The hosting server must also be configured to redirect HTTP traffic.
Treat this method as one half of the job, and pair it with the cPanel option above or one of the methods below to force HTTPS on WordPress completely.
Method 3: Force HTTPS Using a WordPress Plugin
A plugin is useful when you would rather not edit website files.
It handles the configuration from inside the dashboard, which suits site owners who are not comfortable with server settings.
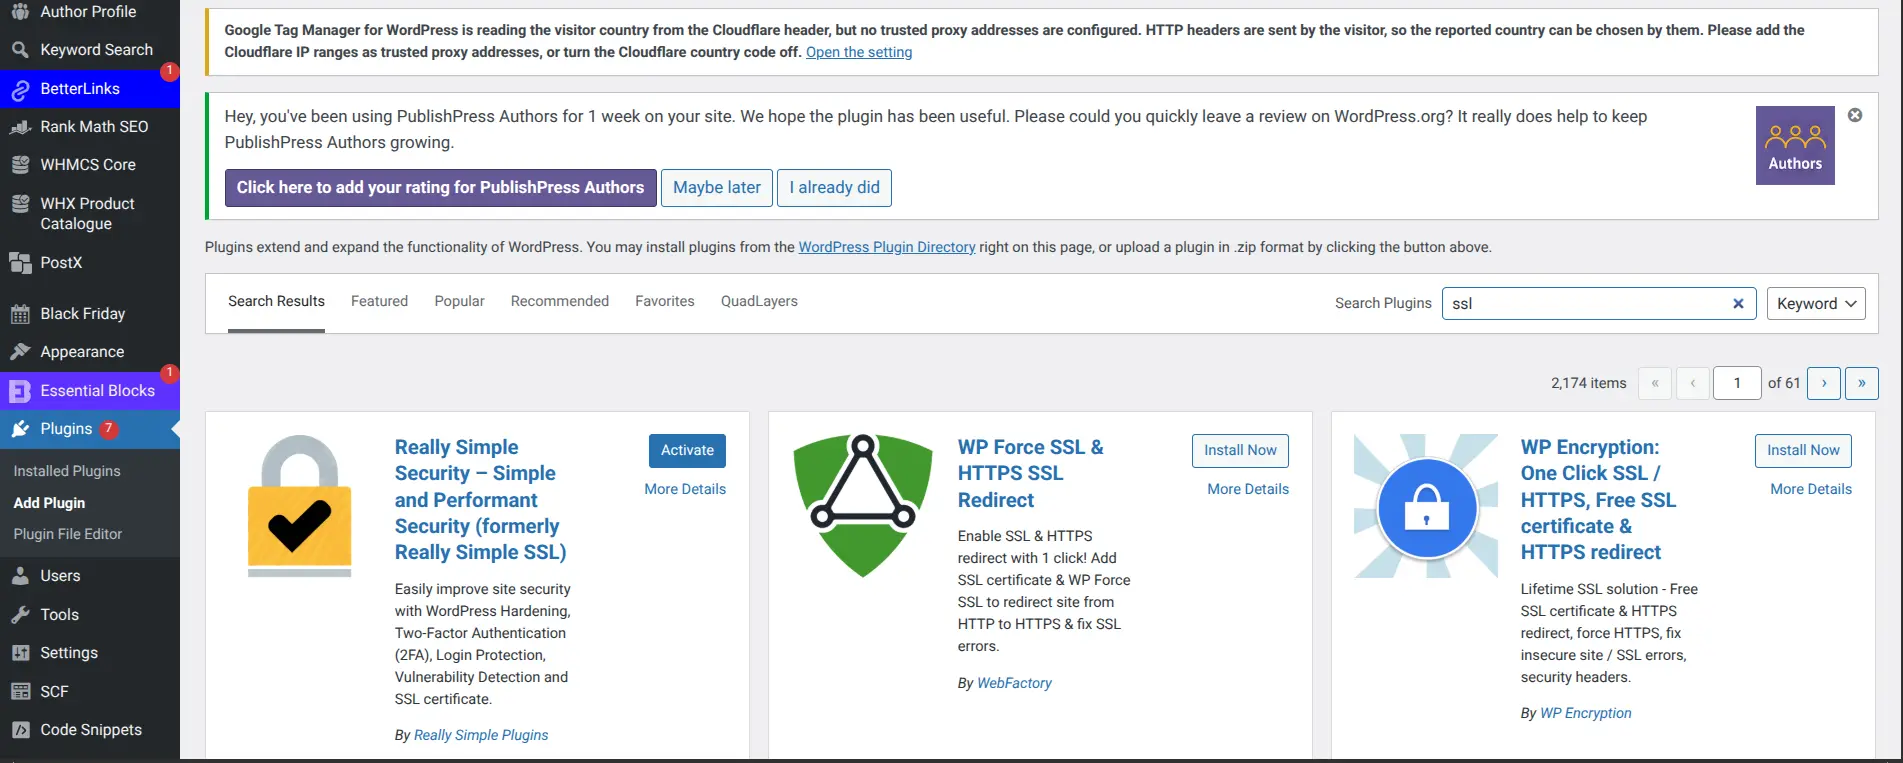
Step 1: Choose an SSL Plugin
Really Simple Security is one plugin you can consider.
Plugin features and requirements change over time, so open the plugin’s directory page and confirm that its current version still includes HTTPS redirection before you rely on it.
Step 2: Install and Configure the Plugin
- Open Plugins → Add New Plugin.
- Search for your chosen SSL plugin.
- Install and activate it.
- Follow its setup instructions.
- Enable HTTPS redirection, if the current version supports it.
Step 3: Test Your Website
- Open the HTTP version of the website.
- Confirm that it redirects to HTTPS.
- Check the WordPress dashboard and important pages.
- Look for mixed-content warnings, which appear when a secure page still loads some files over HTTP.
A plugin is not a substitute for installing a valid SSL certificate.
It can redirect traffic, but it cannot create the certificate your browser checks.
Confirm the certificate first, then use the plugin to force HTTPS on WordPress.
Method 4: Force HTTPS Using the .htaccess File
This method suits websites running on Apache servers that support .htaccess rules.
It gives you direct control over the redirect, but a typing mistake can take a site offline, so work carefully.
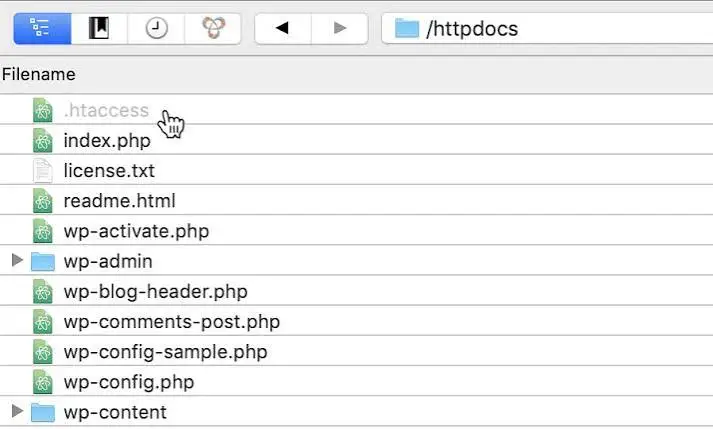
Step 1: Open Your Website Files
- Log in to cPanel.
- Open File Manager.
- Navigate to the WordPress installation directory, commonly public_html.
- Enable hidden files if .htaccess is not visible.
Step 2: Back Up the .htaccess File
Download or copy the original .htaccess file before you edit it.
If the new rule causes an error, you can restore the copy and bring the site back within a minute.
Skipping this step is the most common reason a small edit turns into an outage.
Step 3: Add the HTTPS Redirect Rule
Add this example near the top of the file:
RewriteEngine On
RewriteCond %{HTTPS} off
RewriteRule ^(.*)$ https://%{HTTP_HOST}%{REQUEST_URI} [L,R=301]
Each line has a job:
RewriteEngine Onenables URL rewriting.RewriteCond %{HTTPS} offchecks whether the request is not using HTTPS.RewriteRuleredirects the requested URL to its HTTPS equivalent, keeping the host name and the page path.R=301indicates a permanent redirect, and L stops processing further rules.
Keep any existing .htaccess rules in place, including the block WordPress writes for its permalinks.
The position of the redirect can affect how other rules behave, which is why placing it above the WordPress block is the usual choice.
Step 4: Save and Test the Redirect
- Save the updated file.
- Open the HTTP version of the website.
- Check that the HTTPS version loads.
- Test internal pages and any existing redirects.
Important: Do not combine multiple independent redirectrules without checking how they interact. cPanel, plugins and .htaccess can conflict if several methods are configured at the same time. Pick one primary method to force HTTPS on WordPress, and test after every change.
How to Check Whether HTTPS Is Working on WordPress
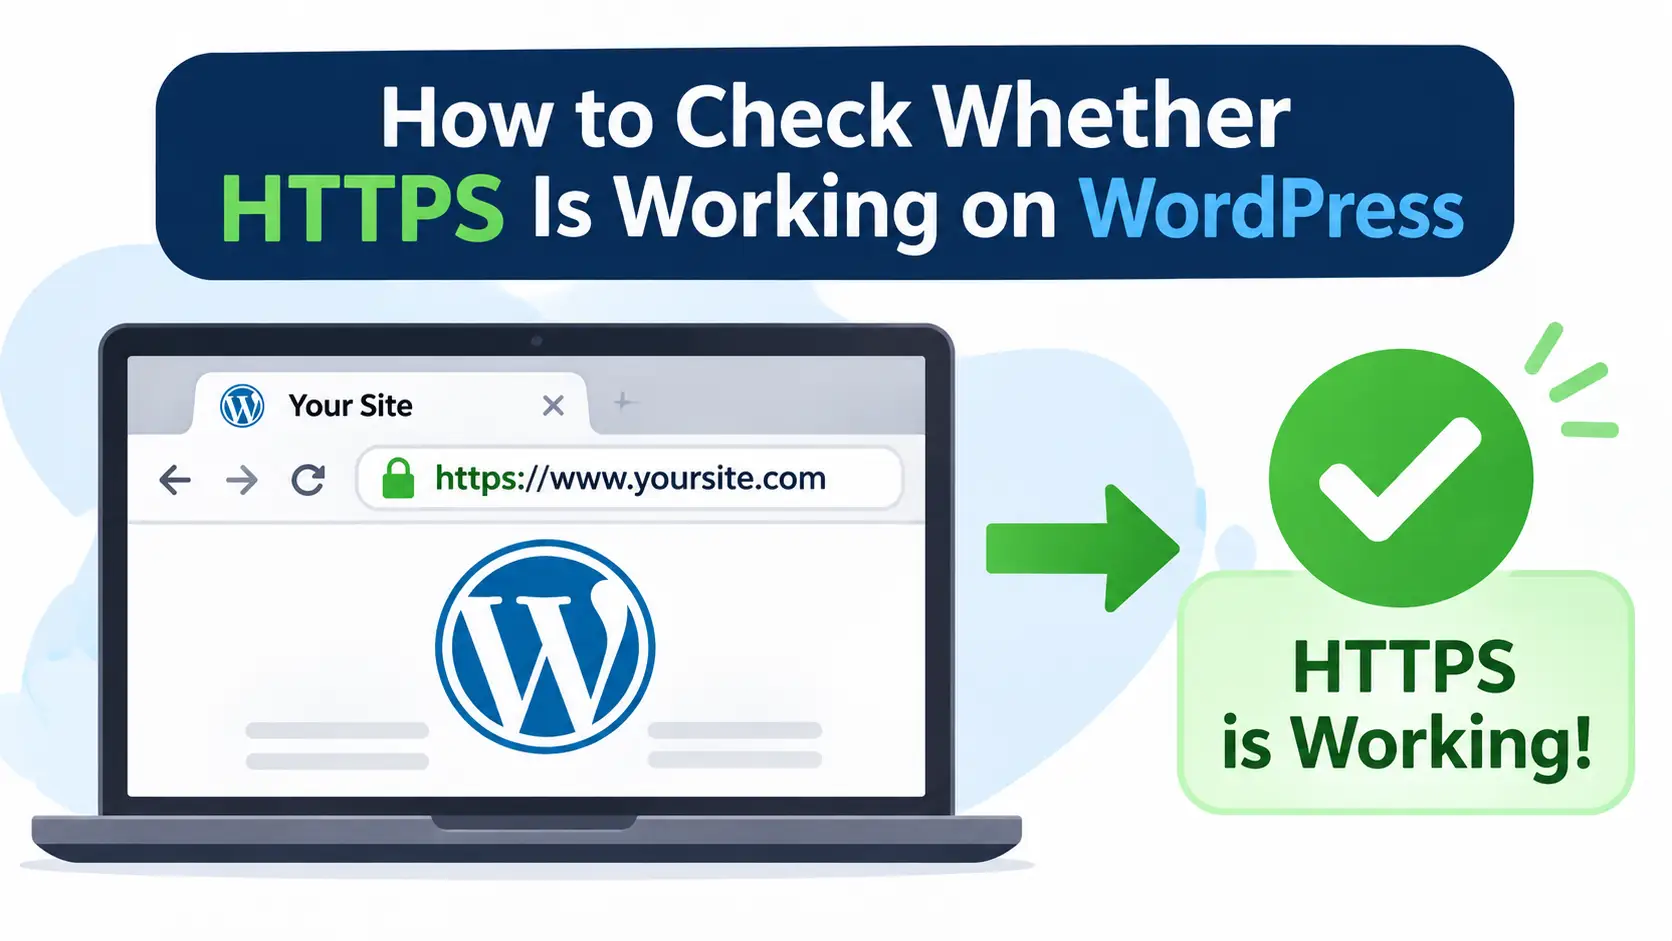
Once you force HTTPS on WordPress, confirm that the configuration works from the visitor’s side:
- Enter the HTTP version of the domain and check whether it redirects.
- Confirm that the final URL begins with https://.
- Test the homepage and several internal pages.
- Check that the browser does not show certificate warnings.
- Use an SSL checker to verify that the certificate is valid.
- Inspect important pages for mixed-content warnings.
Use this short table as a checklist:
| Test | Expected result |
| HTTP homepage | Redirects to HTTPS |
| HTTP internal page | Redirects to matching HTTPS page |
| SSL certificate | Valid and not expired |
| Browser security indicator | No certificate warning |
| Images and scripts | Load over HTTPS |
Common Problems When Forcing HTTPS on WordPress
| Problem | Possible cause | What to check |
| Too many redirects | Conflicting redirect rules | Check cPanel, plugin and .htaccess settings |
| SSL certificate error | Certificate missing, expired or issued for another hostname | Check certificate installation and domain coverage |
| Mixed content warnings | Images, scripts or styles still load over HTTP | Update old HTTP resource URLs |
| WordPress dashboard inaccessible | Incorrect WordPress or Site Address URL | Restore the correct URLs |
| Force HTTPS toggle unavailable | SSL is not installed or valid | Install or renew the certificate |
| Website still loads over HTTP | Redirect rule is missing or not applied | Check server-level redirect configuration |
Most of these problems trace back to a missing certificate or to two methods fighting each other.
If you see a redirect loop, disable all but one method, clear your browser cache and test again.
Enable HTTPS on Your WordPress Website With Truehost
A valid SSL certificate and correctly configured redirects are both needed to serve a WordPress website over HTTPS.
The certificate secures the connection, and the redirect makes sure every visitor uses it.
Truehost WordPress hosting is an option for anyone who wants to run a self-managed WordPress website.
Before you buy, review the current US plan details to confirm which features each plan includes, such as automated SSL, cPanel access and WordPress installation options.
Those tools make it simpler to force HTTPS on WordPress without extra software.
Explore our WordPress hosting plans and get the hosting tools you need to set up your website with HTTPS.