Domain RegistrationFind and register the perfect domain for your website.
 .COM DomainChoose a widely recognized domain to build global credibility.
 All TLDsFind and register your perfect domain. Choose from local and global extensions.
 whoisCheck domain ownership details, expiration dates, and registrar information.
 US DomainRegister a .US domain and build trust in the USA.
 Web HostingEverything your website needs to run smoothly
 WordPress HostingWordPress hosting that just works
 Windows HostingReliable hosting for Windows environments
 Reseller HostingTurn hosting into your business
 Email HostingEmail that looks professional and works anywhere
 cPanel HostingFull control of your hosting with cPanel
 Affiliate ProgramJoin as a partner and earn commissions on every referral you send our way.
 Vps HostingScalable virtual servers that expand as you need.
 Dedicated ServersGet complete access and full control over your dedicated physical server.
 Managed vpsNot tech-savvy? We will take care of everything with our fully managed VPS hosting for you.
Do you publish posts and pages but still struggle to attract traffic?
You put in the work. You write. You hit publish. But if Google cannot find your pages, that effort goes nowhere.
This is where a WordPress sitemap comes in. It is a simple list you give to Google that says, “Here are my important pages; go check them.” Without it, Google has to navigate your site on its own, like walking through a building without a map. It may find some pages, but it will miss others.
And those missed pages stay invisible. They do not rank. They get no traffic.
The good news? You can set up a sitemap in minutes. No coding needed.
Around 15% of sites still skip this, and 17% use broken ones. Fixing this alone puts you ahead fast.
So how do you create a WordPress sitemap and get Google to find you? Let’s find out.
The article will cover;
- Check if your site already has a sitemap
- Install a plugin (best method)
- Turn on the sitemap
- Get your sitemap link
- Remove pages you don’t want
- Add sitemap to robots.txt
- Submit to Google
- Submit to Bing
- Check if it works
- Keep it up to date
- Get better results with Truehost
Step 1: Check if your site already has a sitemap
Before you install anything, it is worth checking whether WordPress has already built a basic sitemap for you. WordPress has included a default sitemap feature since version 5.5, so there is a good chance your site already has one.
Here is how to check:
- Open your web browser
- Type your domain followed by /wp-sitemap.xml (for example: yourdomain.com/wp-sitemap.xml)
- If a page loads showing a list of URLs, you already have a basic WordPress sitemap
If it does load, that is a great starting point. But the default WordPress sitemap is quite basic and offers little control over what gets included.
That is why you need to add a dedicated SEO plugin to get a smarter, more customizable version. We will cover that in the next step.
Step 2: Install a plugin (best method)
The best way to manage your WordPress sitemap is through an SEO plugin. These plugins;
- Give you full control over which pages get included
- Automatically update your sitemap when you publish new content
- Connect directly with Google Search Console to make submission easy.
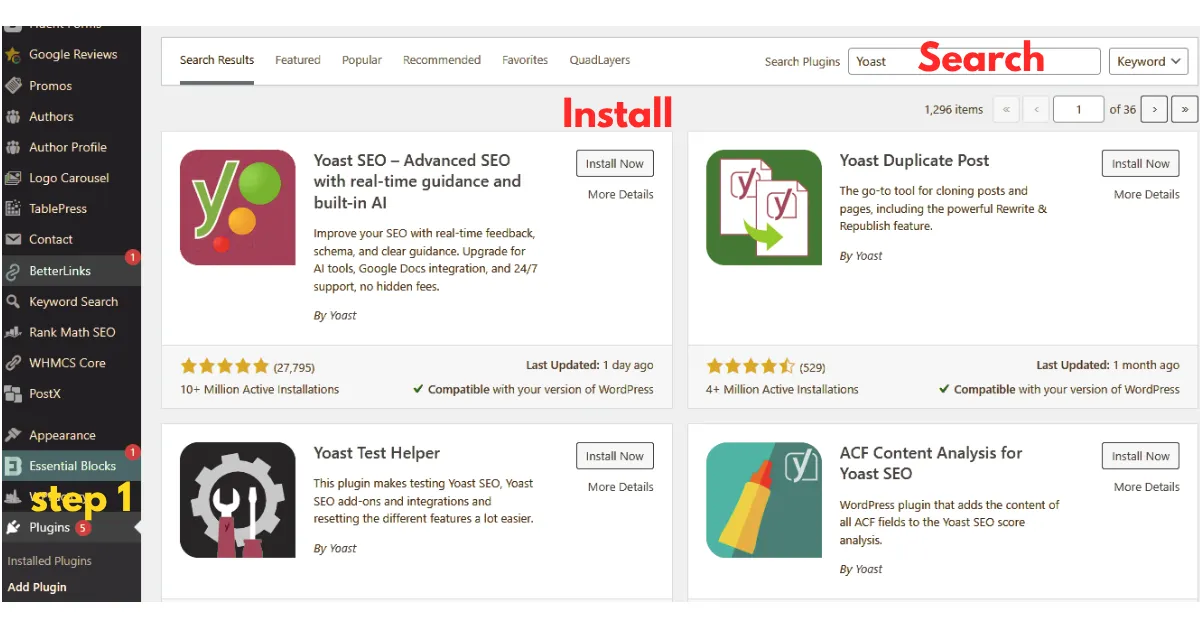
To install one:
- Log in to your WordPress dashboard
- Click on Plugins in the left menu, then click Add New
- In the search bar, type Yoast SEO or Rank Math
- Click Install Now on the plugin you want, then click Activate
Both Yoast SEO and Rank Math are trusted, widely used SEO plugins with strong sitemap features built right in.
Yoast SEO has been downloaded over 450 million times and remains the most installed SEO plugin in WordPress history.
Step 3: Turn on the sitemap
Once your plugin is installed, make sure the sitemap feature is enabled. It usually is by default, but it is worth confirming.
If you are using Yoast SEO:
- Go to Yoast SEO in the left menu, then click Settings
- Click on General, then go to the Features tab
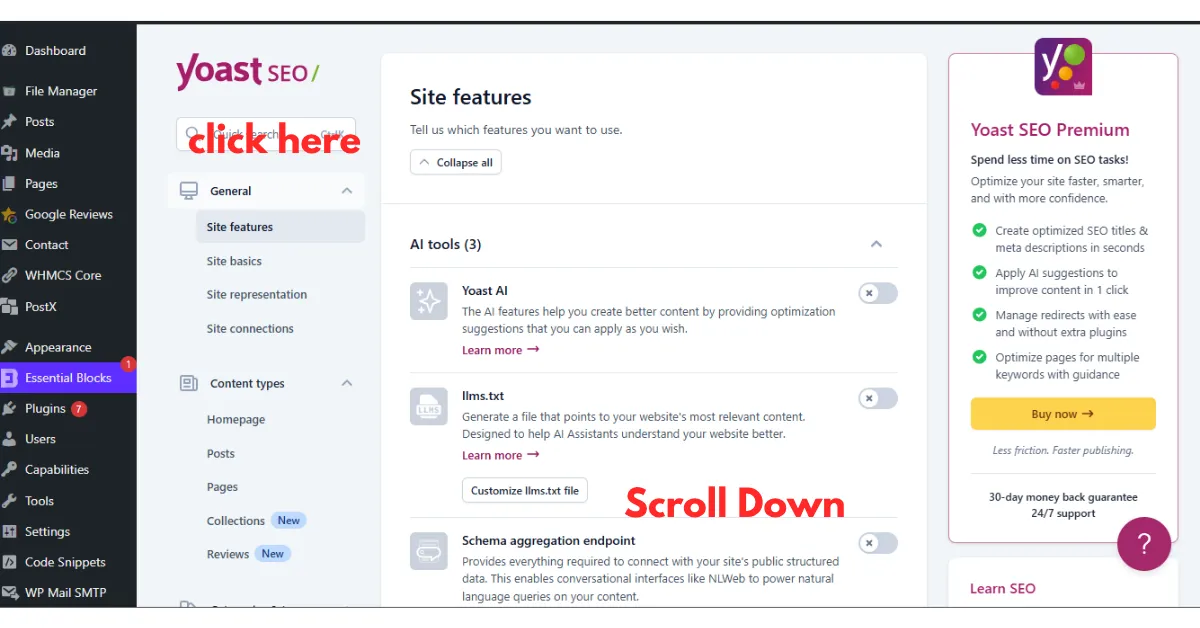
- Find XML Sitemaps and make sure the toggle is turned ON
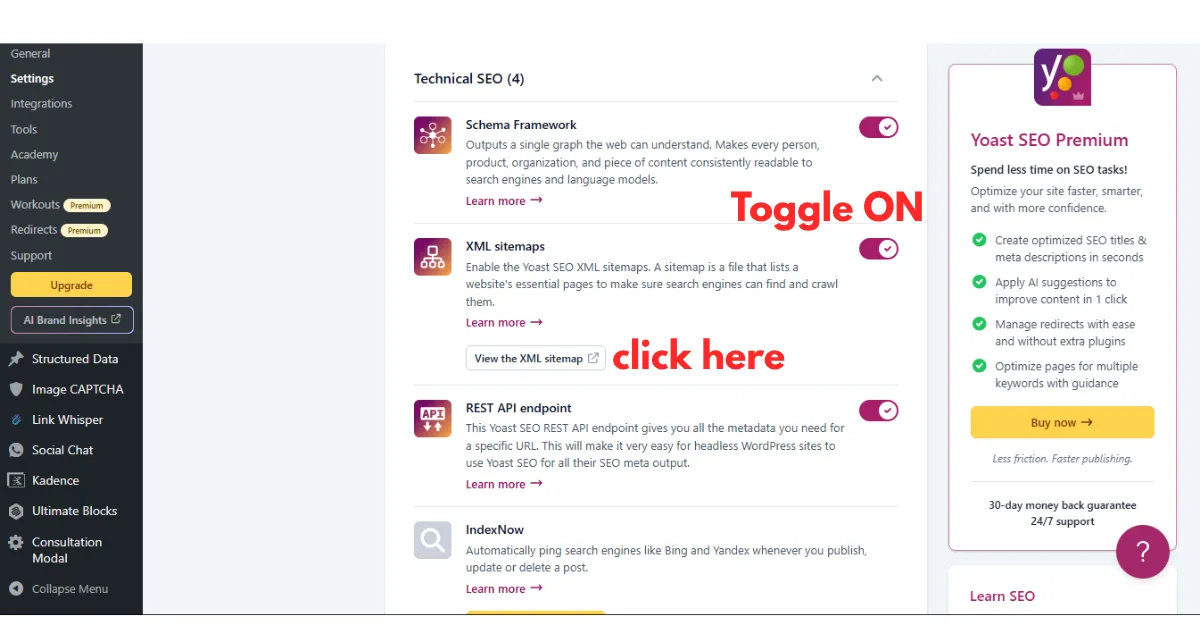
- Click the small question mark icon next to it to see the link to your sitemap
If you are using Rank Math:
- Go to Rank Math in the left menu
- Click Sitemap Settings and confirm that Sitemaps is set to Enabled
Once it is turned on, your WordPress sitemap is live and ready to use. The next step is to find the exact link so you can submit it to search engines.
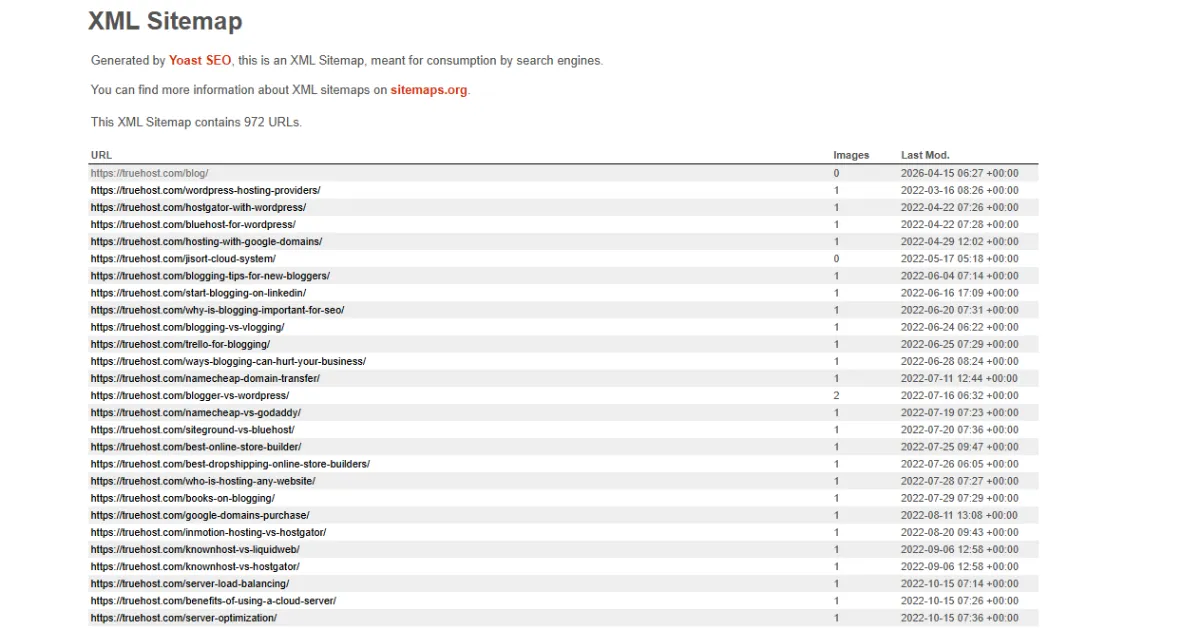
Step 4: Get your sitemap link
Your WordPress sitemap will be accessible at one of two URLs, depending on how it was created:
- yourdomain.com/sitemap_index.xml (this is the one created by Yoast SEO or Rank Math)
- yourdomain.com/wp-sitemap.xml (this is WordPress’s built-in default version)
Type your version into your browser and make sure it loads. You should see a structured list of links broken down by content type, such as posts, pages, and categories. If it loads correctly, your WordPress sitemap is working.
Copy that URL because you will need it in the next few steps.
Step 5: Remove pages you don’t want
This is the step most people skip, and it is one of the most important. Your WordPress sitemap should only contain pages that are genuinely worth Google’s attention. If you include weak, thin, or irrelevant pages, you are wasting Google’s crawl budget.
Crawl budget is the limited time Google is willing to spend on your site per day. Spend it wisely.
If you are using Yoast SEO:
- Go to Yoast SEO, then Settings, then Content Types
- Find the sections for Tags, Author pages, and Empty Categories
- Toggle these OFF so they no longer appear in your sitemap
If you are using Rank Math:
- Go to Rank Math, then Sitemap Settings
- Disable any sections you do not want included
Removing these unnecessary sections keeps your WordPress sitemap tight and focused. Consequently, Google spends more time on your real content and less time on pages that offer nothing of value.
Step 6: Add sitemap to robots.txt
Your robots.txt file tells search engines what they can and cannot access on your site. Adding your WordPress sitemap URL to this file helps ensure that Google and other search engines find it automatically on their first visit.
Here is how to do it:
- Open your site in a browser and enter yourdomain.com/robots.txt to see what is already there
- Add this line at the bottom: Sitemap: https://yourdomain.com/sitemap_index.xml
Many SEO plugins let you edit your robots.txt directly from the WordPress dashboard without manually editing any files. In Yoast SEO, go to Tools> File Editor to make this edit safely.
Step 7: Submit to Google
Now that your WordPress sitemap is live and cleaned up, it is time to tell Google about it directly. You do this through Google Search Console, a free tool that lets you see how your site appears in search results and fix any issues.
Here is how to submit:
- Go to search.google.com/search-console and sign in
- Select your website from the list
- Click Sitemaps in the left menu
- Paste the end part of your sitemap URL, such as sitemap_index.xml
- Click Submit
That is it. You have just told Google exactly where to find your WordPress sitemap. This accelerates the indexing process because Google no longer has to discover your pages by chance.
Step 8: Submit to Bing
Google is the biggest search engine, but Bing is the second largest and worth submitting to as well. Many people forget this step, but Bing also sends real, valuable traffic to websites.
Here is how to do it:
- Go to bing.com/webmasters and sign in with a Microsoft account
- Add your website if you have not already done so
- Go to Sitemaps and submit the same sitemap URL you used for Google
Additionally, submitting to Bing Webmaster Tools also feeds your sitemap data to other search engines in the Microsoft network. So one submission covers multiple bases.
Step 9: Check if it works
After submitting, return to Google Search Console to check the status of your WordPress sitemap. It should show as Success within a day or two. This indicates that Google has read your sitemap and begun processing the pages it contains.
In the Sitemaps section of Google Search Console, you will also see how many URLs were submitted and how many have been indexed. Indexed means Google has added them to its database, and they can now appear in search results.
If the numbers seem low compared with what you submitted, check for errors listed below the status message and address them one by one.
Most pages from a clean WordPress sitemap start getting indexed within a few days. Some may take a week or two. That is completely normal, so be patient and keep monitoring the report.
Step 10: Keep it up to date
The great thing about using a plugin for your WordPress sitemap is that it updates itself. Every time you publish a new blog post, add a new page, or make a significant change to existing content, the plugin automatically updates the sitemap file. You do not have to do a single thing.
That said, it is worth doing a quick check every month or so.
- Open Google Search Console, check your sitemap report, and see if any errors have appeared.
- Remove pages that consistently fail to get indexed.
- Keep the sitemap lean and valuable.
Over time, a clean, well-maintained WordPress sitemap becomes one of the most reliable tools in your entire SEO setup.
Furthermore, if you ever delete old posts or redirect pages, your plugin will automatically remove those URLs from the sitemap. You need to make sure your plugin is always kept up to date so it continues to work correctly with the latest version of WordPress.
Get Better Results With Truehost

Your WordPress sitemap tells Google where your pages are. But if your hosting is slow or unreliable, Google may visit and leave without indexing anything.
Search engines prioritize sites that load quickly and stay online consistently. A poorly hosted site, no matter how clean its sitemap is, will always struggle to rank.
Truehost gives you;
- Fast servers that load your pages quickly when Google’s bots arrive
- Reliable uptime so your site is always accessible for crawling
- An environment built for WordPress performance from the ground up
When your hosting and your sitemap work together, pages are indexed faster, and rankings improve steadily.
You have done the work of setting up your WordPress sitemap. Now give it the hosting foundation it deserves.