Domain RegistrationFind and register the perfect domain for your website.
 .COM DomainChoose a widely recognized domain to build global credibility.
 Domain TransferSeamless domain transfers with zero downtime and complete control.
 All TLDsFind and register your perfect domain. Choose from local and global extensions.
 SSL CertificatesKeep your website safe with reliable SSL Certificates that protect customer data and build trust.
 whoisCheck domain ownership details, expiration dates, and registrar information.
 US DomainRegister a .US domain and build trust in the USA.
 Web HostingEverything your website needs to run smoothly
 WordPress HostingWordPress hosting that just works
 Windows HostingReliable hosting for Windows environments
 Reseller HostingTurn hosting into your business
 Email HostingEmail that looks professional and works anywhere
 cPanel HostingFull control of your hosting with cPanel
 Affiliate ProgramJoin as a partner and earn commissions on every referral you send our way.
 Vps HostingScalable virtual servers that expand as you need.
 Dedicated ServersGet complete access and full control over your dedicated physical server.
 Managed vpsNot tech-savvy? We will take care of everything with our fully managed VPS hosting for you.
 AI Website BuilderCreate stunning websites in seconds with AI.
 Online ShopSet up a professional online store. No coding required.
 Web design serviceGet a tailored website designed to match your brand and support your goals.
 BlogFind helpful guides on web hosting, online selling, digital marketing, and more.
 Contact USYou can reach us anytime, day or night, through chat or email.
 SupportBrowse helpful guides and answers for all of our services.
Your old host still serves every visitor. Meanwhile, the new VPS already holds a full copy of your site. Only one DNS record separates the two.
Flip that record too early, and visitors land on a broken page. Flip it at the right moment, and nobody notices. The difference comes down to sequence.
This guide shows you how to migrate WordPress to VPS hosting in the right order. You will copy the site first, test it privately, and switch DNS last.
Each step includes commands you can paste. You also get a rollback plan in case something breaks.
Pre-Migration Checklist: What to Do Before You Touch the Server
A smooth move starts days before the actual transfer. Spend an hour on this checklist first. It prevents most surprises later.
1) Record your current setup.
Write down the details of the old host. You will match them on the new server.
- PHP version and extensions. Find both under Tools> Site Health> Info in your WordPress dashboard.
- Database version and collation. Check them in phpMyAdmin.
- Plugins, cron jobs, and custom rules. Note anything special in .htaccess too.
PHP version mismatches cause plenty of post-migration errors. Therefore, match the old version first. Upgrade PHP later, once the site runs cleanly.
2) Back up everything
Download a full copy of your files and database. Store it away from both servers. Then open the SQL file in a text editor. Confirm it contains your tables and posts. A backup you never checked is only a hope.
3) Lower your DNS TTL
TTL tells resolvers how long to cache your DNS answer. Set it to 300 seconds on your A and AAAA records. Do this 24 to 48 hours before the move.
A lowered TTL only applies to the old one; it doesn’t affect the new one. As a result, changing it on migration day does nothing for resolvers that already cached the old value.
4) Note where your email lives.
Find your MX records and check which server hosts your mailboxes. Also, copy your SPF and DKIM records. You will need them during cutover.
5) Pick your window
Choose a low-traffic window. For WooCommerce, membership, or comment-heavy sites, plan a short content freeze. Otherwise, orders and signups made mid-move can vanish.
Step 1: Set Up Your VPS for WordPress (LAMP or LEMP Stack)
Your new VPS arrives empty. Build the server first. Move nothing until it is ready.
I) Start with a safe base.
Use a current Ubuntu LTS image. Log in as root once, then create a regular user.
adduser deploy
usermod -aG sudo deployNext, copy your SSH public key to the new user. Open a second terminal and confirm the key login works. Only then disable password login by setting PasswordAuthentication no in /etc/ssh/sshd_config.
II) Install the stack
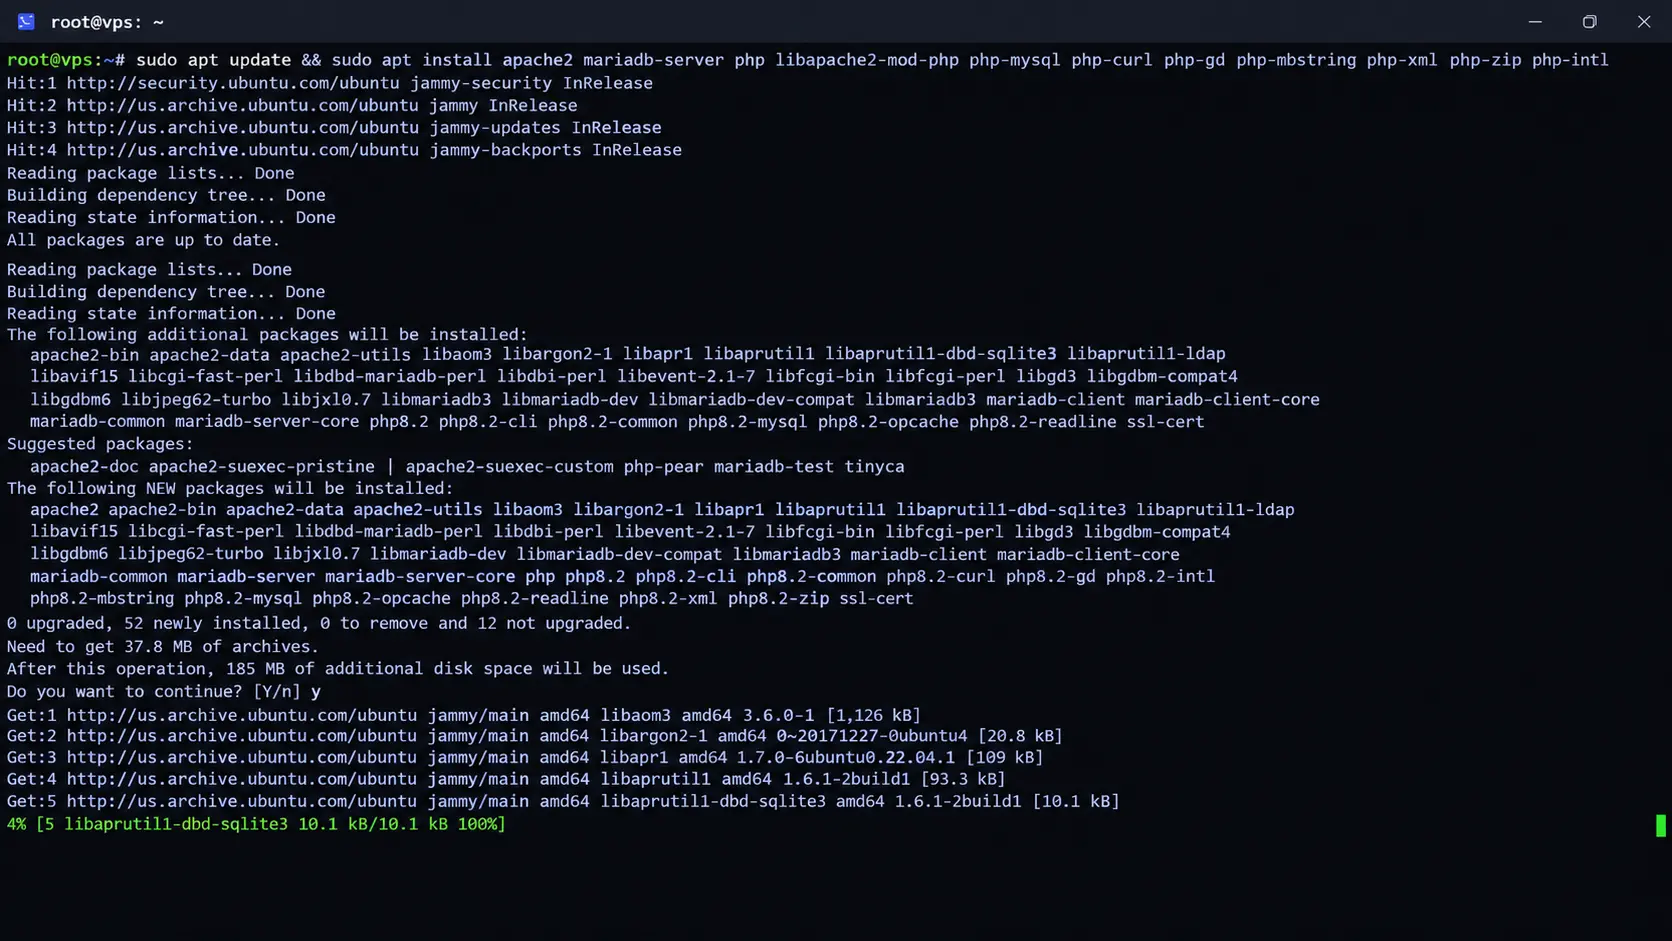
Log in as the new user and install Apache, MariaDB, and PHP with the extensions WordPress needs.
sudo apt update

sudo apt update && sudo apt install apache2 mariadb-server php libapache2-mod-php php-mysql php-curl php-gd php-mbstring php-xml php-zip php-intl
Ubuntu installs one PHP version by default. Compare it with the version you recorded earlier. If they differ, install the matching version before you continue.
Prefer Nginx? Swap Apache for Nginx and PHP-FPM. The rest of this guide still applies, apart from the web server config.
Now turn on the firewall. Allow SSH first, so you do not lock yourself out.
sudo ufw allow OpenSSH

sudo ufw allow 'Apache Full'

sudo ufw enable
III) Create the database
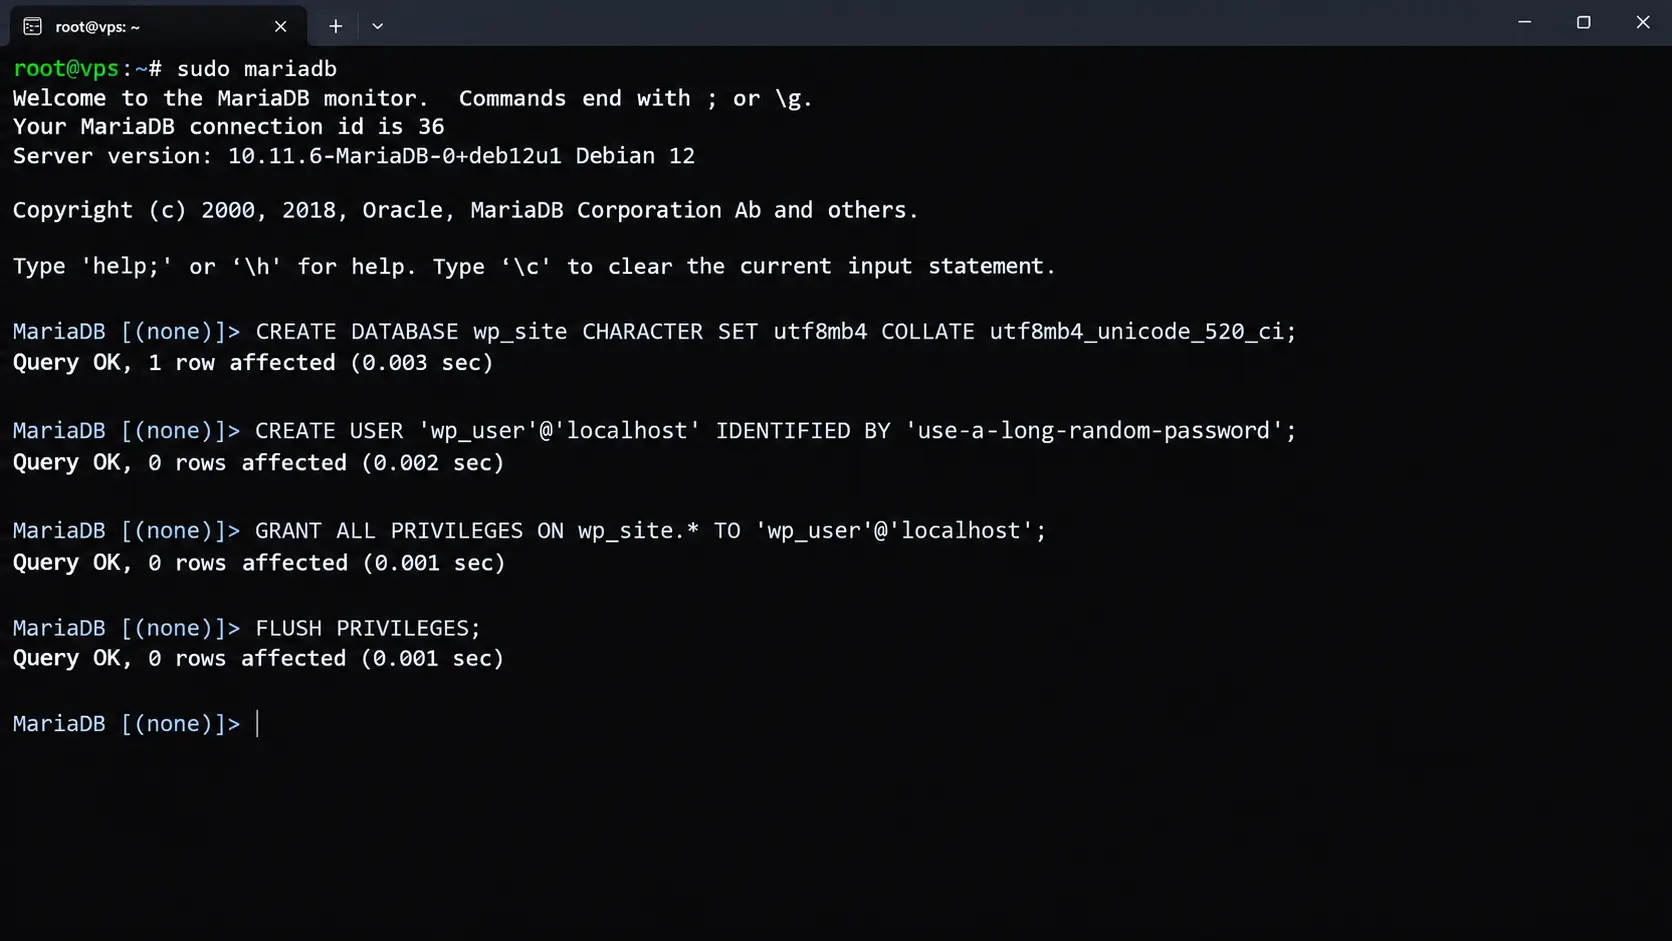
sudo mariadb

CREATE DATABASE wp_site CHARACTER SET utf8mb4 COLLATE utf8mb4_unicode_520_ci;

CREATE USER 'wp_user'@'localhost' IDENTIFIED BY 'use-a-long-random-password';

GRANT ALL PRIVILEGES ON wp_site.* TO 'wp_user'@'localhost';

FLUSH PRIVILEGES;

EXIT;
Swap in the collation your old database uses. A mismatch triggers import errors.
IV) Add a virtual host
Create /etc/apache2/sites-available/example.com.conf with this content:
<VirtualHost *:80>

    ServerName example.com

    ServerAlias www.example.com

    DocumentRoot /var/www/example.com

    <Directory /var/www/example.com>

        AllowOverride All

        Require all granted

    </Directory>

</VirtualHost>
Then create the web root and enable the site.
sudo mkdir -p /var/www/example.com

sudo chown deploy:deploy /var/www/example.com

sudo a2enmod rewrite

sudo a2ensite example.com.conf

sudo systemctl reload apache2
V) Tune PHP basics
Open /etc/php/<version>/apache2/php.ini and raise a few limits.
memory_limit = 256M

upload_max_filesize = 64M

post_max_size = 64M
Ubuntu enables OPcache by default, so that you can leave it alone. Restart Apache after saving.
VI) Control panel or bare server
You can run WordPress with no control panel at all. If you want a dashboard, Virtualmin and cPanel both work. The FAQ below compares them.
Step 2: Choose Your Migration Method: Plugin, Manual, or rsync and WP-CLI
Pick a method before you start. Each one moves the same two things: your files and your database.
| Method | Best for | Site size | Speed | Main risk |
|---|---|---|---|---|
| Plugin (All-in-One WP Migration, Duplicator) | Small sites, first-timers | Under 1 GB | Quick setup | Upload limits and timeouts |
| Manual (SFTP plus phpMyAdmin or mysqldump) | Mid-size sites | 1 to 5 GB | Moderate | Typos in config files |
| rsync, mysqldump, WP-CLI | Large or busy sites | Any size | Quickest cutover | Needs SSH on the old host |
Sizes are rough guides, not hard limits.
Plugins package everything into one archive. They work well for small sites. However, free versions often cap upload size, and large archives can time out.
The manual route gives you full control. You move files over SFTP and the database through phpMyAdmin or mysqldump. It suits mid-size sites and shows you what moves where.
The rsync route suits large or busy sites. After the bulk copy, a second sync moves only recent changes. As a result, the final cutover takes minutes.
If you choose the plugin route, the steps are short:
- Install the plugin on the old site and export a full archive.
- Install a fresh copy of WordPress on the VPS.
- Install the same plugin there and import the archive.
- Save your permalinks again under Settings, then Permalinks.
- Skip ahead to the testing section.
This guide follows the manual route with rsync, since it covers both small and large sites.
Step 3: How to Migrate WordPress to a VPS Manually
I) Export the database
On the old host, run mysqldump over SSH:
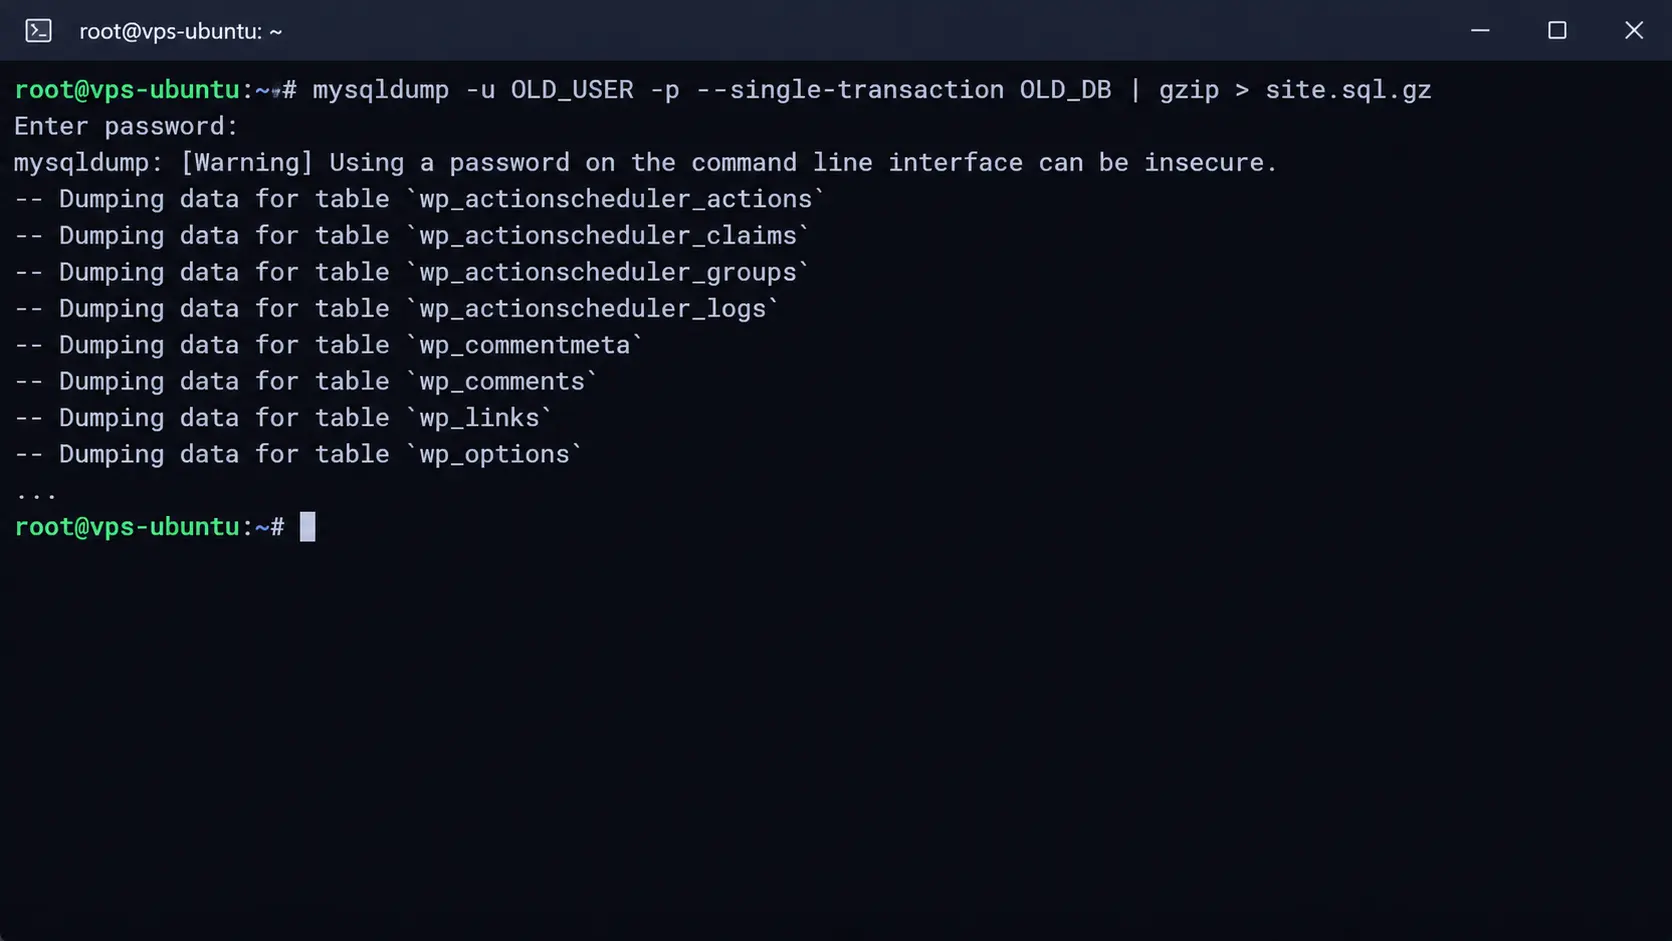
mysqldump -u OLD_USER -p --single-transaction OLD_DB | gzip > site.sql.gzNo SSH access? Use phpMyAdmin instead. Select your database, open the Export tab, and choose the Quick method in SQL format.
Next, check the collation inside the dump.
zcat site.sql.gz | grep -m3 COLLATEYou can also trim the dump before you export it. Run wp transient delete --expired on the old site to clear dead transients.
II) Copy the files
From the VPS, pull the site straight from the old host with rsync:
rsync -avz -e ssh \

  --exclude 'wp-content/cache' --exclude '*.zip' \

  USER@OLD_HOST:/home/USER/public_html/ /var/www/example.com/
No SSH on the old host? Compress the site into one archive first. Then download it over SFTP with FileZilla or WinSCP and upload it to the VPS. One archive moves much quicker than thousands of small files.
Focus on wp-content first. It holds your themes, plugins, and uploads. Also, copy wp-config.php and any custom files in the site root. Skip cache folders and old backup archives.
III) Import the database and update wp-config.php
Copy the dump to the VPS if it is not there yet, then import it.
scp site.sql.gz deploy@VPS_IP:~/

gunzip < site.sql.gz | mysql -u wp_user -p wp_site

mysql -u wp_user -p -e "SHOW TABLES;" wp_site
The last command should list your WordPress tables. Next, open wp-config.php and update the database details.
define( 'DB_NAME', 'wp_site' );

define( 'DB_USER', 'wp_user' );

define( 'DB_PASSWORD', 'use-a-long-random-password' );

define( 'DB_HOST', 'localhost' );
Check that $table_prefix matches the prefix on your imported tables. Replace the security salts too if you want to log everyone out.
IV) Fix ownership and permissions.
Hand the files to the web server user and set standard permissions.
sudo chown -R www-data:www-data /var/www/example.com

sudo find /var/www/example.com -type d -exec chmod 755 {} \;

sudo find /var/www/example.com -type f -exec chmod 644 {} \;
Wrong ownership breaks media uploads and plugin updates. Fix it now, and you avoid a confusing error later.
V) Search-replace only if your URL changes.
You need this step in two cases. Either your domain changes, or you move from HTTP to HTTPS during the migration. Otherwise, skip it.
Run a dry run first:
wp search-replace 'http://old-domain.com' 'https://example.com' \

  --skip-columns=guid --dry-run
If the counts look right, run the same command without --dry-run. If you keep the same domain and test through your hosts file, you can skip this step entirely.
Step 4: Test Your Migrated Site Before You Change DNS
Right now, every visitor still sees the old server. That gives you time to test the VPS under your real domain. A host file entry makes this possible.
I) Point only your computer at the VPS
Open your hosts file as an administrator.
- Windows: C:\Windows\System32\drivers\etc\hosts
- macOS and Linux: /etc/hosts
Add one line with your VPS IP address:
203.0.113.10 example.com www.example.comThen flush your local DNS cache. On Windows, run ipconfig /flushdns. On macOS, run sudo dscacheutil -flushcache. Reload your site in the browser.
This method beats a temporary domain. You skip URL rewrites, and the site behaves exactly as it will after launch.
II) Get your SSL certificate ready first.
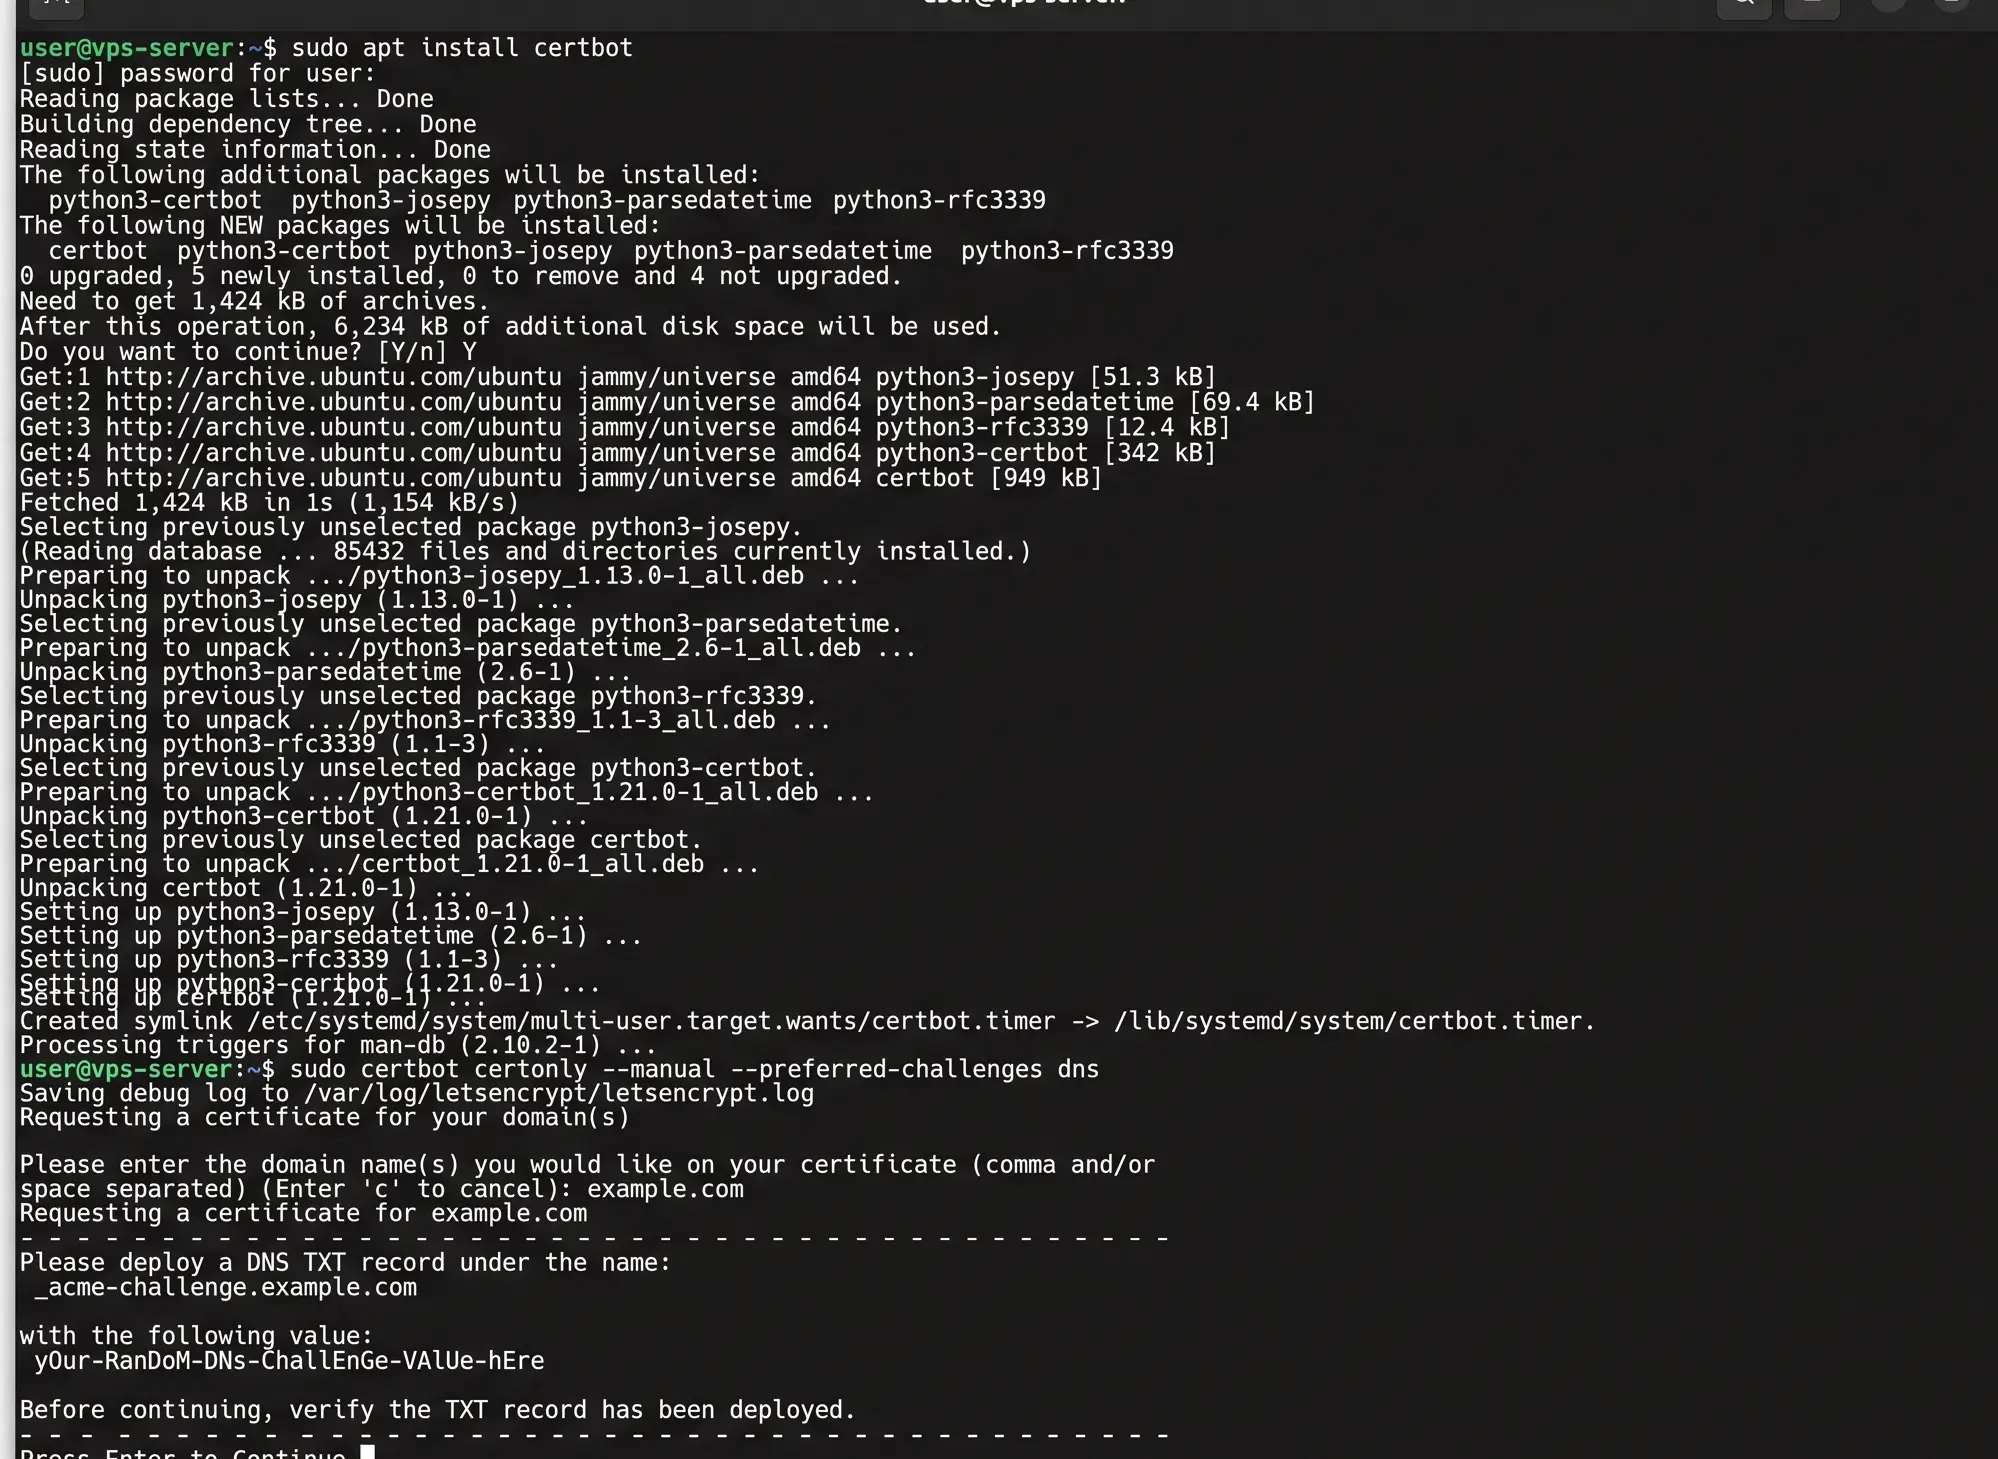
Browsers warn visitors about a missing certificate. Therefore, issue one before cutover. The free Certbot authority cannot yet use its usual file check. Your domain still points to the old host. Use the DNS challenge instead.
sudo apt install certbot

sudo certbot certonly --manual --preferred-challenges dns \

  -d example.com -d www.example.com
Certbot asks you to add a TXT record at your DNS host. Add it, then continue. Next, enable SSL in Apache and add a second virtual host.
sudo a2enmod ssl

<VirtualHost *:443>

    ServerName example.com

    ServerAlias www.example.com

    DocumentRoot /var/www/example.com

    SSLEngine on

    SSLCertificateFile /etc/letsencrypt/live/example.com/fullchain.pem

    SSLCertificateKeyFile /etc/letsencrypt/live/example.com/privkey.pem

    <Directory /var/www/example.com>

        AllowOverride All

        Require all granted

    </Directory>

</VirtualHost>
Reload Apache after saving. Certificates from the manual DNS method do not renew automatically. After cutover, you will replace it with an automatic one.
III) Run your test checklist.
Click through the site as a visitor, then as an admin.
- Log in to the dashboard and edit a post.
- Open your homepage, a post, and a category page.
- Save your permalinks again, then reload a few inner pages.
- Check images, galleries, and downloads.
- Submit every contact form.
- Run through checkout with your payment gateway in test mode.
- Review scheduled tasks with
wp cronevent list.
When everything passes, remove the host’s entry. You will then see what real visitors see.
Step 5: Switch DNS With Minimal Downtime
Now comes the moment from the opening. You prepared well, so it takes only a few minutes.
- Run a final sync. Repeat the same rsync command. It copies only files changed since your first pass.
- Refresh the database on busy sites. Activate maintenance mode on the old site, re-dump the database, and import it on the VPS. Rsync also copies the .maintenance file, so run wp maintenance-mode deactivate on the VPS after the import. Skip this step on low-traffic sites.
- Remove your host’s entry. Your browser should follow the public DNS again.
- Update your DNS records. Change the A records for the root domain and www to the VPS IP address. Delete any AAAA record unless the VPS has IPv6.
- Verify the switch. Run
dig +short example.com @8.8.8.8anddig +short example.com @1.1.1.1. Both should return the VPS IP. Also, check from your phone on mobile data. - Raise your TTL. A day or two later, set it back to 3600 or higher.
Edit the record directly rather than changing nameservers. Your lowered TTL applies to record edits. A nameserver change can take a day or more to settle.
After the switch, replace the manual certificate with an automatic one:
sudo certbot --apache -d example.com -d www.example.comChoose to renew and replace the existing certificate when prompted. Then run sudo certbot renew –dry-run to confirm renewal works.
I) Keep email working through the switch.
A DNS change can break email in one careless move. Protect it with these rules.
- Change only the root and www records. Leave MX records, the mail host A record, SPF, and DKIM untouched.
- If your mailboxes live on the old host, keep that account active. Or move the mailboxes to a dedicated email provider before you cancel.
- If the VPS sends WordPress mail, add its IP to your SPF record. A better choice is an SMTP plugin connected to a transactional email service.
- Send a test message to a Gmail address and confirm it arrives in the inbox.
II) Your rollback plan
Keep the old hosting account for 7 to 14 days after cutover. Rollback then takes one step: point the A record back to the old IP. Your low TTL makes that change quick.
One warning applies. Orders and comments created on the VPS after cutover will not exist on the old server. Export them before you roll back.
Set a decision rule in advance. If login, checkout, or contact forms stay broken and no fix appears within 30 minutes, roll back. Otherwise, fix forward. Adjust that window to match how much revenue your site handles.
Step 6: Post-Migration Checks That Protect Your SEO
Search engines care about uptime, URLs, and redirects. Verify all three in the first week.
- Crawl the site. Run a crawler such as Screaming Frog. Look for 404 errors, redirect chains, and mixed-content warnings.
- Check indexing settings. Under Settings> Reading, confirm that “Discourage search engines” is off. Then open /robots.txt and your XML sitemap to confirm both load.
- Port your redirects. Nginx ignores
.htaccess. If you switched web servers, rewrite those rules in the Nginx config. On Apache, they carry over as they are. - Compare response time. Measure before and after with the command below. Lower is better.
curl -o /dev/null -s -w ‘%{time_starttransfer}\n’ https://example.com
- Watch Search Console. Check Page Indexing and Crawl Stats daily for the first week. After that, check weekly for two more weeks. Skim
/var/log/apache2/error.logfor repeated errors too.
Step 7: Secure and Maintain Your New VPS
On shared hosting, your provider handles this work. On a VPS, it is yours. Keep this section short and finish it within a day.
- Lock down access. Keep UFW on. Install Fail2ban to block repeated login attempts and enable automatic security updates.
sudo apt install fail2ban unattended-upgrades
- Automate backups. Schedule file and database backups to storage away from the VPS. Then test a restore once a month. An untested backup may fail when you need it.
- Add caching. Install a page cache plugin. For object caching, install Redis with
sudo apt install redis-server php-redis, then connect to it via a Redis plugin. - Monitor the server. Set up uptime checks. Add alerts for CPU, memory, and disk space.
- Tune PHP to your RAM. Review memory limits and worker counts after a week of real traffic.
Common WordPress VPS Migration Errors and How to Fix Them
- “Error establishing a database connection.” Recheck the credentials and
DB_HOSTinwp-config.php. Then test the login directly withmysql -u wp_user -p wp_site. Also, confirm the user has privileges on that database. - White screen or 500 error. Turn on
WP_DEBUG_LOGinwp-config.php. Readwp-content/debug.logand/var/log/apache2/error.log. The usual causes are a PHP version mismatch, a low memory limit, or a missing extension. - Redirect loops or mixed content. Run wp option get siteurl and wp option get home. Both should use HTTPS. If you use Cloudflare, set its SSL mode to Full, since Flexible mode often causes loops.
- Permalink 404 errors. On Apache, run
sudo a2enmod rewriteand confirmAllowOverride Allin your virtual host. On Nginx, addtry_files $uri $uri/ /index.php?$args;to the main location block. - Upload and update failures. Ownership is usually wrong. Run the chown command from the permissions step again.
FAQs
Will migrating WordPress to a VPS hurt my SEO?
No, as long as your URLs, redirects, and uptime stay intact. Search engines watch those three signals, not your hosting type.
The real risks are downtime, broken redirects, and a leftover noindex setting. The SEO checks above cover all three. Meanwhile, a well-tuned VPS can improve server response time.
How long does a WordPress VPS migration take?
Hands-on time runs from about 30 minutes for a small plugin-based move to a few hours for a manual one. Large sites take longer because transfer time increases with size.
DNS changes settle in minutes when you lower the TTL ahead of time. Plan a day or two for that prep step alone.
Do I need cPanel to run WordPress on a VPS?
No. You can run WordPress on a bare stack with no panel. That route costs nothing extra, but it needs some comfort with the command line.
Virtualmin is free and adds a web dashboard. cPanel is the most familiar panel, though it adds a licence fee. Choose the bare stack if you like the terminal. Choose a panel if you prefer point-and-click management.
Can I migrate WooCommerce or a large site the same way?
Yes, use the rsync route. Do the bulk copy days ahead. Then run a final sync at cutover to move only recent changes.
Orders placed during the move need protection. Put the old store in maintenance mode, run the final sync, and re-import the database. Also test your payment gateway in sandbox mode on the VPS before you switch DNS.
Your Next Step
Lower your DNS TTL today. It costs nothing, and it makes your cutover quick whenever you choose to go.
Then run the pre-migration checklist this week. Block out a low-traffic window. Keep your old host active for two weeks after the switch.
Ready to move? Choose your VPS plan and build the server before you touch a single file. Prefer to skip the terminal? Ask our team to migrate your WordPress site for you.