Domain RegistrationFind and register the perfect domain for your website.
 .COM DomainChoose a widely recognized domain to build global credibility.
 All TLDsFind and register your perfect domain. Choose from local and global extensions.
 whoisCheck domain ownership details, expiration dates, and registrar information.
 US DomainRegister a .US domain and build trust in the USA.
 Web HostingEverything your website needs to run smoothly
 WordPress HostingWordPress hosting that just works
 Windows HostingReliable hosting for Windows environments
 Reseller HostingTurn hosting into your business
 Email HostingEmail that looks professional and works anywhere
 cPanel HostingFull control of your hosting with cPanel
 Affiliate ProgramJoin as a partner and earn commissions on every referral you send our way.
 Vps HostingScalable virtual servers that expand as you need.
 Dedicated ServersGet complete access and full control over your dedicated physical server.
 Managed vpsNot tech-savvy? We will take care of everything with our fully managed VPS hosting for you.
Want to keep your Minecraft world safe from griefers, hackers, and DDoS attacks? Of course you do! Nobody wants to spend hours building their digital empire only to have some script kiddie tear it down in minutes.
We’re going to cover 7 hardcore tactics to lock down your Minecraft server like Fort Knox.
Why VPS Security Matters
Think of your VPS like your digital home.
You wouldn’t leave the front door wide open, would you?
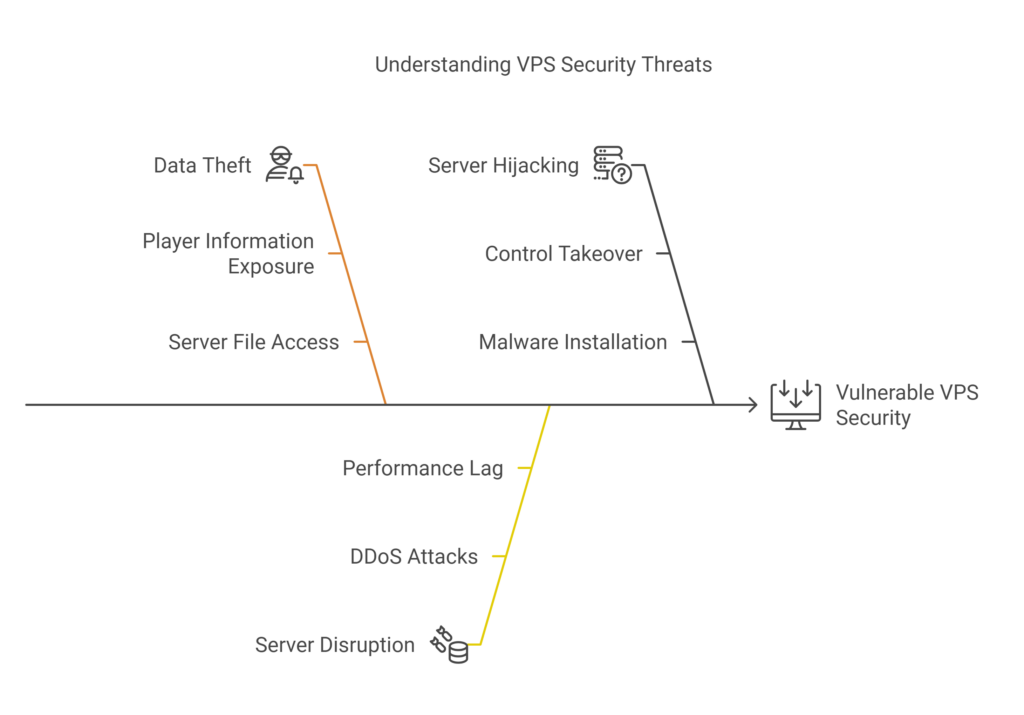
A vulnerable VPS is an open invitation for troublemakers to:
- Steal your data: They could grab player info, server files, even your own personal data if you’re not careful.
- Disrupt your server: Imagine lag so bad nobody can play. That’s a DDoS attack, and it’s designed to take you offline.
- Hijack your server: Worst case scenario, they take complete control. They can kick you out, install malware, and basically hold your server hostage.
Not a pretty picture, right? So let’s get to work and fortify your defenses.
How To Secure Your Minecraft Server on a VPS
1. Choose a Secure VPS Provider (Your Foundation)
This is where it all starts.
Your VPS provider is the bedrock of your server’s security.
Don’t cheap out!
A few bucks a month isn’t worth the risk.
Look for these features:
- DDoS Protection: Essential for absorbing attacks that try to flood your server.
- Firewalls: A first line of defense against unauthorized access.
- Regular Security Updates: They should be constantly patching vulnerabilities.
- Strong Reputation: Read reviews, see what other users say about their security.
Top VPS Providers for Minecraft:
- Truehost: Known for affordable plans with decent DDoS protection.
- Vultr: Powerful servers and a good range of security features.
- Linode: Reliable and trusted, with a focus on performance and security.
Don’t just take my word for it.
Do your own research!
Find a provider that fits your needs and budget.
2. Update and Upgrade (Patch Those Holes!)
Imagine your server software like a castle wall.
Hackers are constantly looking for cracks and weaknesses.
Updates are like patching those holes before they can exploit them.
Here’s the drill:
- Update your operating system: Whether it’s Linux or Windows, keep it current!
- Update your Minecraft server software: New versions often include security fixes.
- Update any plugins or mods: These can also have vulnerabilities.
Pro Tip: Set up automatic updates whenever possible. It’s one less thing to worry about.
3. Strong Passwords and Two-Factor Authentication (Lock the Gate)
This one seems obvious, but you’d be surprised how many people use weak passwords.
Don’t be that person!
Password best practices:
- Use a strong, unique password: Mix upper and lowercase letters, numbers, and symbols.
- Don’t reuse passwords: If one account gets hacked, they all get hacked.
- Change passwords regularly: Every few months is a good rule of thumb.
Two-Factor Authentication (2FA):
This adds an extra layer of security.
Even if someone gets your password, they still need a second form of verification (usually a code sent to your phone).
Enable 2FA wherever possible!
Recommended Tools:
- Password managers: LastPass, 1Password, Bitwarden. These help you generate and store strong passwords.
- Authenticator apps: Google Authenticator, Authy. These are used for 2FA.
4. Configure Your Firewall
A firewall is like a gatekeeper for your server.
It controls what traffic is allowed in and out.
Properly configuring your firewall is essential for blocking unwanted connections.
Key Firewall Rules:
- Allow only necessary ports: Minecraft typically uses port 25565. Block everything else.
- Limit access by IP address: If only you and your friends are playing, restrict access to your IP addresses.
- Monitor firewall logs: Keep an eye out for suspicious activity.
Firewall Tools:
- iptables (Linux): A powerful command-line firewall.
- UFW (Linux): A user-friendly interface for iptables.
- Windows Firewall: Built-in firewall for Windows servers.
5. Use a VPN or Proxy (Become Invisible)
A VPN or proxy server acts as an intermediary between your server and the internet. This can help to:
- Mask your server’s IP address: Making it harder for attackers to target you.
- Protect against DDoS attacks: By absorbing some of the traffic.
VPN/Proxy Options:
- TCPShield: A popular choice for Minecraft servers.
- Cloudflare: Offers a free plan with basic DDoS protection.
6. Install Security Plugins
Minecraft plugins can add extra layers of protection to your server.
Essential Security Plugins:
- NoCheatPlus: Detects and prevents cheating.
- GriefPrevention: Protects player builds from griefing.
- WorldGuard: Allows you to define regions and set permissions.
Pro Tip: Don’t go overboard with plugins. Too many can slow down your server and even create new vulnerabilities.
7. Regular Backups
Even with all these precautions, things can still go wrong. Regular backups are your insurance policy.
Backup Strategies:
- Automated backups: Set up a schedule to automatically back up your server files.
- Offsite backups: Store backups in a separate location (e.g., cloud storage).
- Test your backups: Make sure you can actually restore your server from a backup.
Backup Tools:
- Automated scripts: Can be used to automate backups.
- Cloud storage: AWS, Google Cloud, Dropbox.
Fail2ban: What You Need To Know
Ever run a server and feel like you’re playing whack-a-mole with hackers?
You block one IP, another pops up.
It’s exhausting.
That’s where Fail2ban comes in.
Think of it as an automated bouncer for your server, tossing out troublemakers before they can even cause a scene.
What Exactly is Fail2ban?
Fail2ban is a free, open-source intrusion prevention software.
It scans log files (like those from your web server, SSH, or Minecraft server) and automatically bans IP addresses that show suspicious activity.
Here’s how it works:
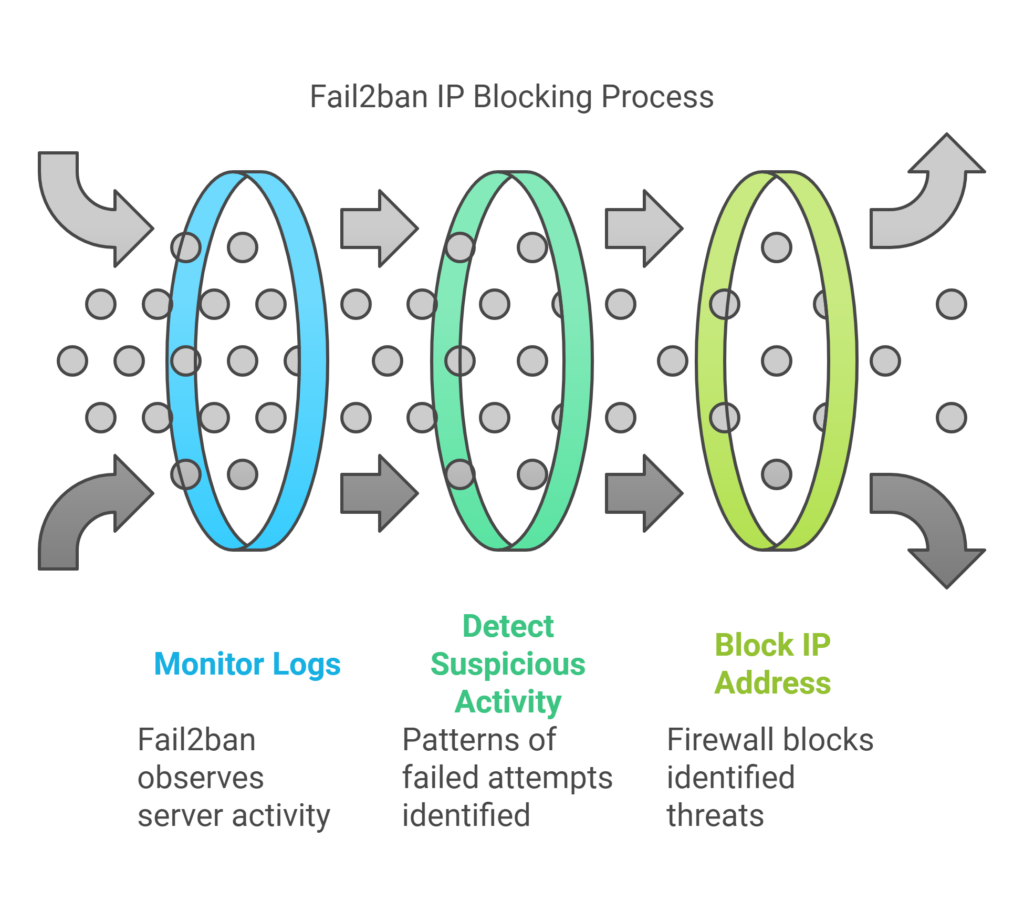
- Monitoring: Fail2ban keeps an eye on your server logs, looking for patterns like failed login attempts, seeking exploits, or other malicious behavior.
- Detection: When it sees too many failed attempts from a single IP address, it flags that IP as suspicious.
- Action: Fail2ban then automatically blocks the IP address using your firewall. This prevents the attacker from further access.
Why You Need Fail2ban
- Protection from brute-force attacks: These attacks try to guess your passwords by repeatedly trying different combinations. Fail2ban shuts them down.
- Defense against denial-of-service (DoS) attacks: Certain types of DoS attacks can be mitigated by blocking the offending IP addresses.
- Stops automated exploits: Hackers use automated tools to scan for vulnerabilities. Fail2ban can block these tools before they find a weakness.
Setting Up Fail2ban (Don’t Worry, It’s Easier Than You Think)
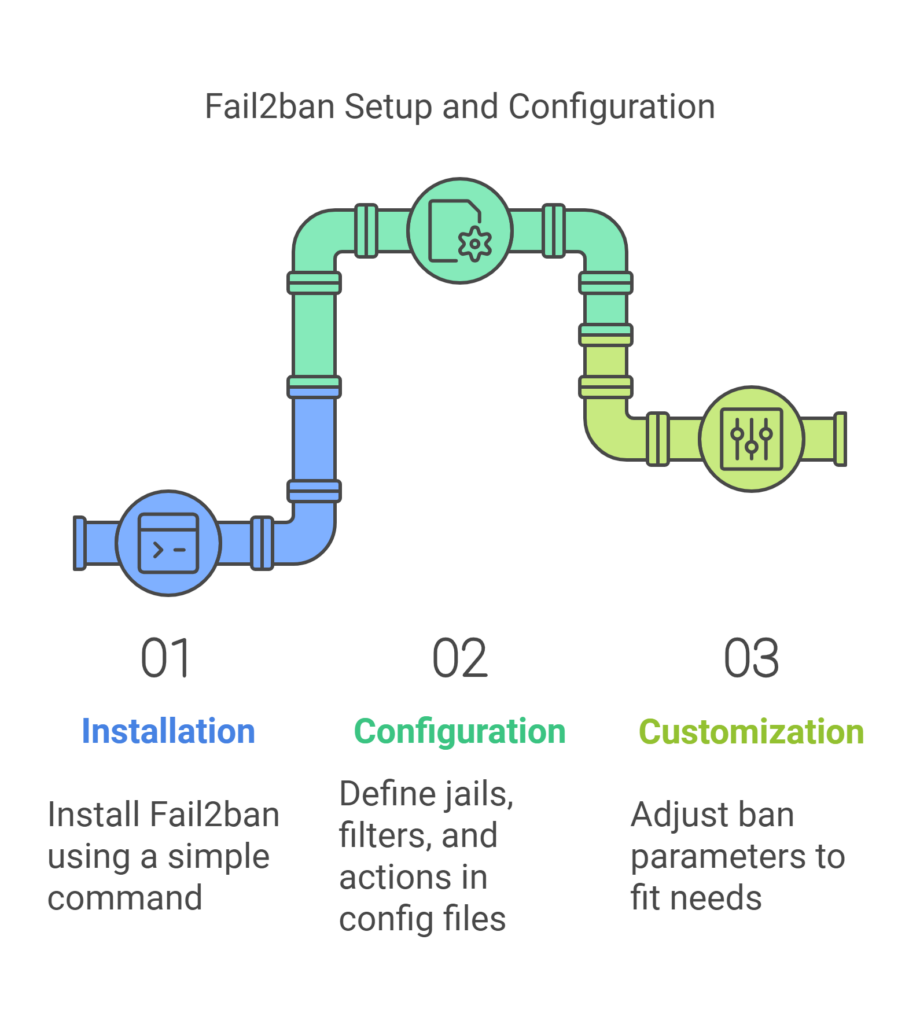
- Installation: Fail2ban is available for most Linux distributions. You can usually install it with a simple command (e.g.,
sudo apt-get install fail2banon Debian/Ubuntu). - Configuration: Fail2ban uses configuration files (
.conffiles) where you define:- Jails: These are sets of rules for specific services (SSH, Apache, Minecraft, etc.).
- Filters: These define what patterns to look for in the logs (e.g., failed login attempts).
- Actions: These specify what to do when a filter is triggered (e.g., ban the IP address).
- Customization: You can fine-tune Fail2ban to match your specific needs. You can adjust the number of failed attempts before a ban, the duration of the ban, and more.
Example Fail2ban Configuration (For SSH)
[ssh]
enabled  = true
port     = ssh
filter   = sshd
logpath  = /var/log/auth.log
maxretry = 3
bantime  = 3600
This configuration tells Fail2ban to:
- Monitor the SSH service.
- Use the
sshdfilter to detect failed login attempts. - Check the
/var/log/auth.logfile for these attempts. - Ban an IP address after 3 failed logins.
- Ban the IP for 3600 seconds (1 hour).
Fail2ban and Minecraft
Fail2ban can be especially useful for protecting your Minecraft server. It can help prevent:
- Unauthorized access: Blocking brute-force attacks on your server console.
- Griefing and hacking: By detecting and banning players who try to exploit vulnerabilities or use cheats.
Pro Tip: Combine Fail2ban with other security measures like strong passwords, firewalls, and security plugins for maximum protection.
Fail2ban Isn’t a Silver Bullet
While Fail2ban is a powerful tool, it’s not a magic solution.
Determined attackers can still find ways to bypass it. But it’s a crucial first line of defense that can significantly improve your server security.
Conclusion
Securing your Minecraft server on a VPS is an ongoing process. It’s not a one-time thing. Stay vigilant, keep your software updated, and use the tools and techniques outlined in this guide.
Create a safe and enjoyable environment for yourself and your players.
Read also: