Domain RegistrationFind and register the perfect domain for your website.
 .COM DomainChoose a widely recognized domain to build global credibility.
 All TLDsFind and register your perfect domain. Choose from local and global extensions.
 whoisCheck domain ownership details, expiration dates, and registrar information.
 US DomainRegister a .US domain and build trust in the USA.
 Web HostingEverything your website needs to run smoothly
 WordPress HostingWordPress hosting that just works
 Windows HostingReliable hosting for Windows environments
 Reseller HostingTurn hosting into your business
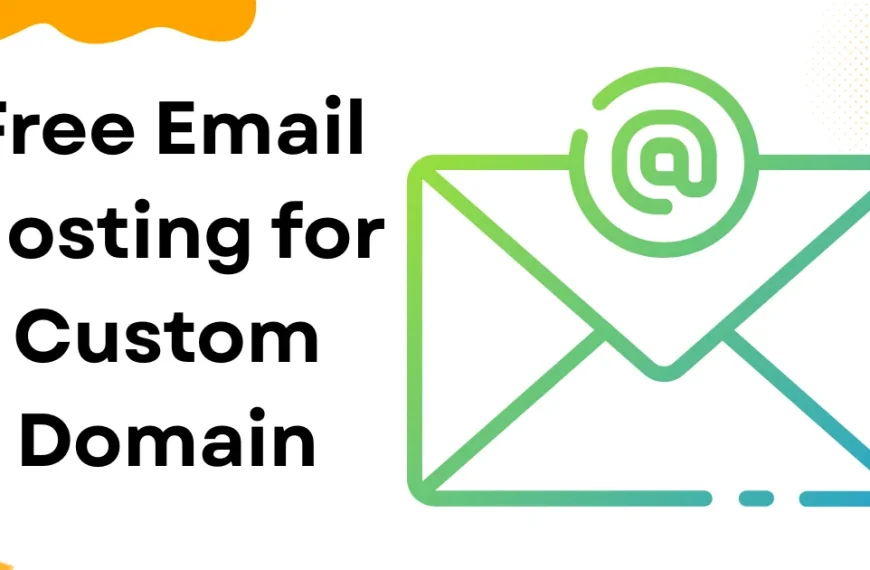
 Email HostingEmail that looks professional and works anywhere
 cPanel HostingFull control of your hosting with cPanel
 Affiliate ProgramJoin as a partner and earn commissions on every referral you send our way.
 Vps HostingScalable virtual servers that expand as you need.
 Dedicated ServersGet complete access and full control over your dedicated physical server.
 Managed vpsNot tech-savvy? We will take care of everything with our fully managed VPS hosting for you.
Hostinger mail account login is an important step to stay connected and manage your professional communications.
The best web hosting and email service provider, Hostinger, makes it simple to use branded custom email domains that increase the professionalism of your brand.
Being able to log in means that you can quickly read your inbox, edit configuration settings, and make the best use of the features offered by Hostinger.
Moreover, it can protect your messages and maintain an uninterrupted workflow.
What Is Mail Hostinger?
Let’s talk about Mail Hostinger!
It is an email hosting service that is ideal for people and businesses wanting to be professional, but not having to spend a fortune.
At $0.99 a month, it is a low cost option to obtain a personalized email address, than re-using generic addresses such as Gmail or Yahoo.
Personalized emails such as the following increase your brands’ credibility and it appears more trustworthy to clients and customers.
Key Features and Benefits
Now, let’s dive into what makes Mail Hostinger stand out:
1. Easy-to-Use Interface
It is not necessary to be tech savvy to use Mail Hostinger.
It is supplied with a very intuitive webmail platform with a good user experience on every device, so that your emails will be managed with no effort.
2. Strong Security
Keeping your emails safe is a priority here.
You’ll get features like two-factor authentication (2FA), SSL/TLS encryption, and top-notch spam protection to ensure your communications stay private and secure.
3. Plenty of Storage
Depending on your plan, you’ll have between 10 GB to 50 GB of storage for emails and attachments.
No need to be scared of running out of space anytime soon!
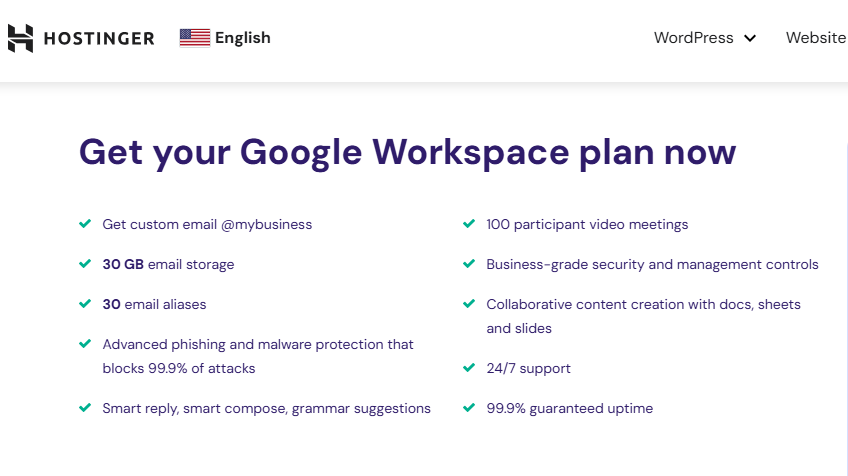
4. Google Workspace Integration
Need more tools for collaboration?
Mail Hostinger is integrated perfectly with Google Workspace to grant you access to Google Docs and Google Drive apps with no unnecessary disruption and resulting productivity boost.
5. Advanced Email Tools
Manage your emails like a pro!
Features like autoresponders, email forwarding, and custom filter rules help you organize your inbox and automate tasks effortlessly.
With all these perks, Mail Hostinger is an excellent choice for anyone looking to set up a professional, secure, and reliable email hosting service.
Prerequisites for Login: What You Need Before Signing In
Before you get started with Mail Hostinger, make sure that you are prepared.
A smooth login experience starts with a few essentials.
1. Your Hostinger Account Credentials
First things first, you’ll need your Hostinger account details.
Hence, it is the email address used to register as well as the password used to register.
Your password should be powerful—at least a combination of letters, numbers, and symbol type characters.
This keeps your account safe and secure!
Forgot your password?
No big deal.
Just go to the Hostinger login page, and click “Forgot password” link, and follow the steps to reset it.
Easy peasy!
2. Internet Access and a Compatible Device
Next up, make sure you’re connected to the internet and using a device that can handle the login process.
This might be your laptop computer, tablet, or smart phone—whatever is convenient for you.
Just ensure your device supports modern web browsers to avoid any hiccups.
Next, go to mail.hostinger.com or locate the login page on the Hostinger homepage.
After completing these fundamentals, you’re good to go and can login to starts managing your emails like the boss.
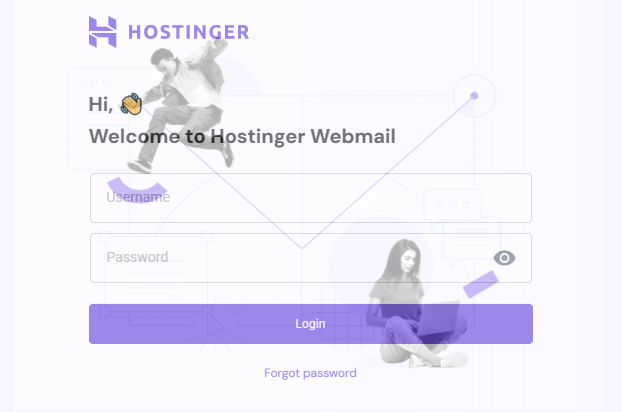
How to Log In to Hostinger Mail
Logging in to your Hostinger Mail account is straightforward and fast.
Whether you’re checking emails or sending important messages, getting started takes just a few simple steps.
Let’s walk through the process together.
Guide to Access Hostinger Mail
1. Open Your Browser
Start by opening a browser on your device—any modern browser like Chrome, Firefox, or Safari will work.
2. Go to the Login Page
In the address bar, type mail.hostinger.com and hit enter.
Here, it just directs you to the Hostinger Mail login page.
3. Enter Your Email and Password
In the email section, type in the email address that is associated with your Hostinger account.
Next, type your password.
Make sure that you paste it exactly, because passwords are case sensitive.
4. Click “Login”
Once you’ve entered your details, click the Login button.
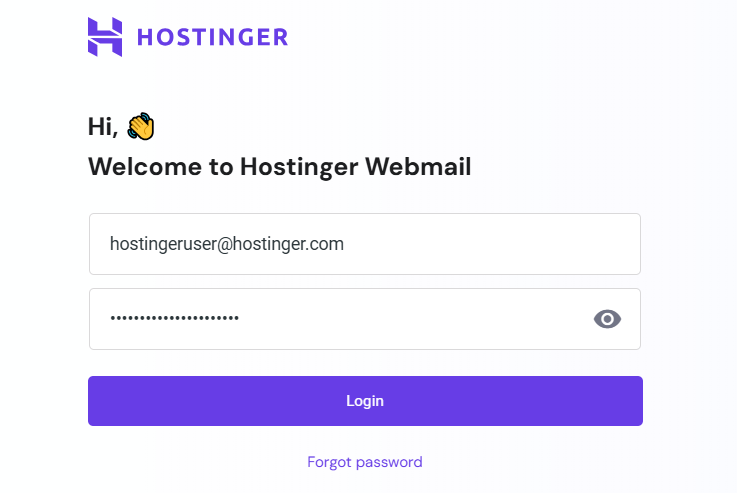
5. Access Your Inbox
After logging in, you’ll land in your inbox, where you can read emails, compose new messages, and explore all the features Hostinger Mail offers.
What to Do If You Can’t Log In
Sometimes things don’t go as planned. If you have login problems, here are some easy solutions:
Double-check Your Details
Make sure your email address and password are correct.
If you’ve forgotten your password, click the “Forgot password? link to reset it.
Check Your Internet Connection
A stable internet connection is essential.
If your connection is poor, please try refreshing your browser whenever the connection stabilizes.
Clear Your Browser Cache
Old data in your browser can cause glitches.
Clear your cache and cookies, attempt to log in again.
Two-Factor Authentication Issues
In the case of two-factor authentication and if you are unable to get the code, you need to temporarily disable it through assistance of Hostinger’s support crew.
Check for Service Outages
Sometimes, the issue isn’t on your end.
Check Hostinger’s status page or contact their support team to see if there is a service interruption.
Using Hostinger Email with Third-Party Clients
Having dreamed of being able to admin your Hostinger email in the comfort of Gmail or Outlook?
Well, you’re in luck!
Linking your Hostinger email to various popular email services is a game-changer.
It makes handling emails easier and lets you enjoy the advanced features of Gmail or Outlook while keeping your professional email address.
Let’s see how to set up!
Setting Up Hostinger Email on Webmail
Here’s how to activate your Hostinger email:
1. Log into Your Hostinger Account
Begin by logging into your Hostinger account and go to the email section.
2. Manage Your Email Accounts
Locate the email account which you would like to create and click “Manage” in that area.
3. Grab the Configuration Details
Take note of the key settings, like the incoming (IMAP) and outgoing (SMTP) server details.
You’ll need these when connecting to third-party clients.
Integrating Hostinger Email with Gmail
So now, to check your Hostinger emails in Gmail, here’s how:
1. Open Gmail Settings
Open the gear icon in Gmail and choose “See all settings”.
2. Go to the Accounts and Import Tab
Locate the “Check mail from other accounts” section, and then click it.
3. Add a Mail Account
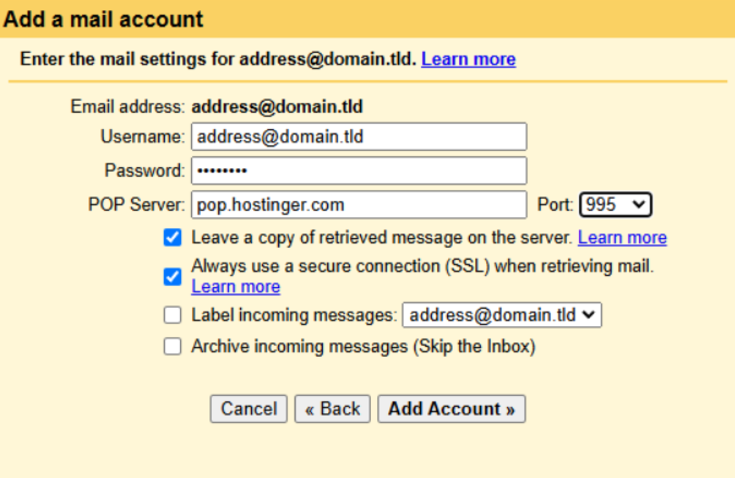
Just click on the “Add a mail account” link, type in your Hostinger email and complete the rest of the steps.
You’ll need to enter the SMTP server details during this step.
4. Confirm the Setup
Gmail will send a confirmation email to your Hostinger inbox.
Open it, click the confirmation link, and voilà—you’re all set!
Integrating Hostinger Email with Outlook
Prefer Microsoft Outlook? Setting it up is just as easy:
1. Open Outlook Settings
Open Outlook, and then have a look at “File,” and then click on “Add Account.
2. Enter Your Email Address
Type in your Hostinger email and select “Advanced options” to set it up manually.
3. Input IMAP/SMTP Details
Incoming Server (IMAP): imap.hostinger.com, Port 993
Outgoing Server (SMTP): smtp.hostinger.com, Port 465
4. Finish the Setup
Enter your email password, click “Connect,” and you’re good to go!
When you link your Hostinger email to Gmail or Outlook, you can manage all your messages in one place.
It’s convenient, organized, and makes your workflow smoother—whether you’re on your laptop or phone.
Why not just set it up today and find out for yourself?
Security Tips for Hostinger Mail Login
Let’s talk about keeping your Hostinger Mail account and login credentials safe.
Email protection is of vital importance in the current digital era.
A couple of smart moves can help to protect your account from hackers or unauthorized access, no doubt.
Strong Passwords Matter
The first and most important rule of online security is having a strong password.
A strong password is like a closed door, preventing trespassers in.
Make sure yours is unique and hard to guess.
Use a mix of uppercase and lowercase letters, numbers, and symbols.
Don’t think about things that are obvious to guess, such as your date of birth or obvious words.
Also, don’t forget to change your password regularly—every two or three months is a good habit.
That way, even if a person somehow “guesses” your old password, they’ll be no good when your password’s changed.
Add Extra Security with Two-Factor Authentication (2FA)
A good password is always good, however adding two-factor authentication (2FA) is even better.
It’s like having two locks on your door instead of one.
With 2FA, you’ll need to provide an extra piece of information—like a code from your phone—along with your password.
Just follow the instructions below to configure it in your Hostinger Mail account:
1. Log in to Your Hostinger Account: Head over to your account dashboard.
2. Go to Security Settings: Click your account icon and find the “Security” section.
3. Pick a 2FA Method: Choose either an authenticator app (like Google Authenticator) or email verification.
4. Complete the Setup: Follow the instructions to verify your choice.
Remember some backup codes that Hostinger is offering to you, just in case.
By doing this, even if someone gets hold of your password, they’ll still need the second step to access your account.
Pretty cool, right?
Wrapping It Up
It should now be easy for you to login your Mail Hostinger account after you have learned these steps.
Hostinger offers a great email hosting service that’s perfect for handling your emails professionally and securely.
It has a good amount of storage, solid security features and the ability to be integrated with email readers, such as Gmail and Outlook.
By sticking to our login guide, you can keep your Hostinger mail account safe and running smoothly.
With today’s digital landscape, keeping current on email security and management is not only beneficial, but a necessity.
With Mail Hostinger, you’re in good hands for a reliable and professional email experience while keeping your data protected.
So, why wait? Take control of your emails today!