Domain RegistrationFind and register the perfect domain for your website.
 .COM DomainChoose a widely recognized domain to build global credibility.
 All TLDsFind and register your perfect domain. Choose from local and global extensions.
 whoisCheck domain ownership details, expiration dates, and registrar information.
 US DomainRegister a .US domain and build trust in the USA.
 Web HostingEverything your website needs to run smoothly
 WordPress HostingWordPress hosting that just works
 Windows HostingReliable hosting for Windows environments
 Reseller HostingTurn hosting into your business
 Email HostingEmail that looks professional and works anywhere
 cPanel HostingFull control of your hosting with cPanel
 Affiliate ProgramJoin as a partner and earn commissions on every referral you send our way.
 Vps HostingScalable virtual servers that expand as you need.
 Dedicated ServersGet complete access and full control over your dedicated physical server.
 Managed vpsNot tech-savvy? We will take care of everything with our fully managed VPS hosting for you.
You have seen your competitor’s or friend’s site, and now you’re thinking that building such a website takes forever and requires skills you don’t have?
It doesn’t.
Neither does it mean months of work, thousands of dollars, or knowing how to code? So stop putting it off, week after week, missing out on opportunities, and letting your ideas sit on the back burner.
Here’s the problem.
Without a website, potential customers can’t find you online. You lose credibility. People Google your business and find nothing, making them wonder if you’re even real. Your competitors with websites scoop up customers who should be yours.
Meanwhile, you’re stuck explaining your business verbally instead of just saying, “Check out my website.”
Maybe the delay is piled up for these different reasons.
- Maybe you feel overwhelmed by all the technical stuff, domains, hosting, DNS, and SSL certificates.
- Perhaps you’re worried about the cost or convinced you need to hire an expensive web developer.
- Or you simply don’t know where to start, so you keep researching forever without taking action.
Today, we change that.
The steps to launch your website don’t require coding skills, design degrees, or deep pockets. Just follow a clear path, one simple step at a time, and you’ll have a professional-looking website live before dinner.
Ready to stop planning and start building? Let’s go.
Step 1: Grab Your Domain Name and Hosting

Your domain name is your website’s address on the internet. Like yourname.com or yourbusiness.co.ke. Think of it as your digital street address. People type it into their browser, and boom, they’re at your site.
Picking the right domain name is easier than you think.
Keep it short, simple, and related to what you do. If you sell handmade jewelry, something like sparklejewelry.com works great. Avoid complicated spellings that people might get wrong. If someone hears your domain name once, they should be able to type it correctly.
Here are quick tips for choosing domains.
Go for .com if possible.
.com is what most people expect. However, country domains like .us work perfectly fine for local businesses in the USA. Avoid numbers and hyphens because they confuse people. Make it memorable so customers can recall it easily.
Where do you buy domains?
At Truehost, we sell domains for around $10-15 per year. That’s less than two pizzas!
Search for your desired name on their websites. If it’s taken, try slight variations or different extensions.
Now let’s talk about hosting.
Web hosting is the service that stores your website files and makes them available to visitors 24/7. Think of it like renting space on a super-powerful computer that never turns off.
For beginners, following these steps to launch your website today, shared hosting works perfectly. It’s affordable (usually $3-10 per month) and includes everything you need. Companies like Truehost, Bluehost, and SiteGround offer beginner-friendly hosting packages.
Here’s a smart move.
Many hosting companies bundle domain registration with hosting plans. You get both for one low price and manage everything in one place. This simplifies the setup and often saves money.
The registration process is straightforward.
Choose your hosting plan, add domain registration, fill in your contact details, and pay. Within minutes, you’ll receive login credentials to your hosting control panel. This panel (usually called cPanel) is where you’ll manage everything.
One important thing gets handled automatically nowadays: SSL certificates. These encrypt data between your website and visitors, showing that padlock icon in browsers. Most hosting providers include free SSL certificates, making your site secure from day one.
Step 2: Pick Your Website Building Platform
Now comes the fun part: choosing how you’ll build your site.
Forget everything you’ve heard about needing to learn HTML, CSS, or programming. Modern website builders let you create professional sites by clicking and dragging elements around, like playing with digital building blocks.
Let’s explore the easiest options.
WordPress
WordPress powers over 43% of all websites on the internet. It’s free, super flexible, and has thousands of templates. Most hosting companies offer one-click WordPress installation. You literally click one button, and WordPress installs itself in under a minute. This makes WordPress perfect for the steps to launch your website quickly.
There are two versions of WordPress. WordPress.com is hosted for you, but has limitations. WordPress.org (the one we’re talking about) installs on your hosting and gives you complete control. Always choose WordPress.org when using your own hosting.
Wix
Wix is another excellent choice for complete beginners. It’s a drag-and-drop builder that feels like playing a video game. You see exactly what you’re building in real-time. No surprises. Wix costs a monthly fee but eliminates most technical headaches. Great if you want the absolute simplest experience.
Squarespace
Squarespace offers gorgeous templates that look professionally designed. It’s slightly more expensive but worth it if visual appearance is your top priority. Artists, photographers, and creatives love Squarespace.
Shopify
If you’re selling products, Shopify is your best friend. It’s built specifically for online stores and includes shopping carts, payment processing, and inventory management. The steps to launch your website as an online store become much simpler with Shopify.
For this guide, we’ll focus on WordPress because it hits the sweet spot between ease of use, flexibility, and cost. Plus, most hosting providers, including Truehost, make installing WordPress ridiculously easy.
With Truehost, here you do it.
- Log in to your hosting control panel. Look for an icon or section called “WordPress,” “Softaculous,” or “Website.”
- Click the WordPress installer.
- Choose your domain name from the dropdown menu.
- Create a username and password (write these down!).
- Click “Install.”
Wait about 60 seconds while WordPress installs.
You’ll get a confirmation message with a link to your WordPress dashboard. Click that link, enter your username and password, and you’re inside your new website’s control center. That’s it. WordPress is ready to go.
Step 3: Choose and Customize Your Template
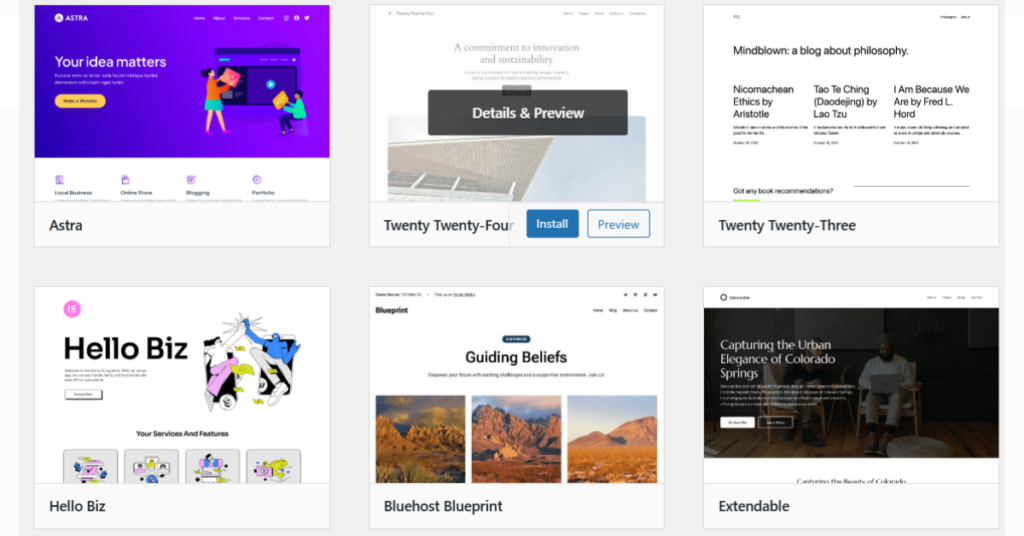
Templates (also called themes in WordPress) are pre-designed website layouts. They handle all the complicated design work for you. Instead of building every page from scratch, you start with a beautiful template and customize it to fit your needs.
WordPress has thousands of free templates.
- From your WordPress dashboard, click “Appearance” then “Themes.”
- Browse through options by clicking “Add New.”
- Use the filter to find templates for your industry, business, blog, portfolio, restaurant, whatever you need.
Look for templates marked “responsive” or “mobile-friendly.”
Over 58% of web traffic comes from mobile phones in 2026. Your site must look great on small screens, not just computers. Responsive templates automatically adjust to any device size.
When evaluating templates, check these things.
- Preview how it looks with demo content.
- Does the layout feel clean and organized? Can you easily imagine your content fitting in?
- Read reviews from other users. High ratings mean fewer problems.
- Check when it was last updated. Recent updates mean the developer still supports it.
Found one you love? Click “Install” then “Activate.” Your website now uses that template’s design.
Now let’s make it yours.
The customization options depend on your template, but most include similar features. From your dashboard, go to “Appearance” then “Customize.” This opens a live preview where changes appear instantly.
Start with colors.
Most templates let you pick primary and secondary colors. Choose colors that match your business or personal brand. Stick to 2-3 colors maximum. Too many colors look messy.
Upload your logo if you have one.
No logo yet? No problem. Just use your business name as text for now. You can always add a logo later.
Adjust fonts carefully.
Headlines and body text should be easy to read. Avoid fancy script fonts that look cool but confuse people. Simple, clean fonts win every time.
The template comes with sample sections you might not need.
Remove extra sections by clicking the X or trash icon in the customizer. Add new sections by clicking the + button. Most modern templates use drag-and-drop builders where you move elements around by clicking and dragging.
Customize your header (the top section with your logo and menu).
Add your tagline. A short sentence explaining what you do. Customize your footer (the bottom section) with copyright information and important links.
Save your changes frequently. Nothing worse than losing 30 minutes of work because you forgot to save.
Step 4: Create Your Essential Pages
Every website needs certain pages. Let’s create the most important ones now. These pages form the foundation of your online presence and help visitors find what they need.
In WordPress, click “Pages” then “Add New” to create each page.
Your homepage is the first thing visitors see.
It needs to grab attention immediately and explain what you offer. Include these elements:
- A clear headline stating what you do.
- A subheadline explaining how you help people.
- A hero image or photo that represents your business.
- A call-to-action button like “Get Started” or “Shop Now.”
- Three to four sections highlighting your benefits or services.
Keep homepage content focused.
Don’t overwhelm visitors with walls of text. Use short paragraphs, bullet points, and images to break up information.
The About page tells your story. People do business with people they trust, and this page builds that trust. Share:
Who you are and why you started your business. What makes you different from competitors? Your mission or values. Photos of you or your team. Real photos beat stock images every time.
Write like you’re talking to a friend.
Skip the corporate jargon and be human. Share a bit of personality. People connect with authenticity.
Your Services or Products page describes what you offer.
Organize this clearly:
List each service or product with a descriptive headline.
Explain the benefits (not just features) of each one. Include pricing if you’re comfortable sharing it publicly. Add clear calls-to-action like “Book Now” or “Buy Here.”
The Contact page is crucial.
Make contacting you super easy. Include:
A contact form (we’ll set this up in the next step). Your email address. Phone number. Physical address, if you have one. Business hours. Links to social media profiles.
Research shows that 44% of website visitors will leave immediately if there’s no contact information. Don’t be that site.
Also, create a Privacy Policy page. This explains how you handle visitor data. It’s legally required in many places and builds trust. Use free privacy policy generators online. Search “privacy policy generator” and fill in your details.
When writing content for these pages, remember that the steps to launch your website include making everything readable. Write short sentences. Break text into small paragraphs. Use bullet points for lists. Add images to make pages visually interesting.
Where do you find images? Unsplash, Pexels, and Pixabay offer thousands of free high-quality photos. Download images related to your business, then upload them to WordPress through the media library.
Before uploading images, resize them. Giant photos slow down your website. Use free tools like TinyPNG to compress images to reasonable sizes—usually under 200KB per image works great.
Set up your navigation menu so visitors can find these pages. In WordPress, go to “Appearance” then “Menus.” Create a new menu, add your pages to it, arrange them in logical order, then assign it as your primary menu. Now visitors can click between pages easily.
Step 5: Add Essential Features
Basic pages are done, but your website needs a few more features to work properly. These additions take your site from “just pages” to a fully functional online presence.
Contact forms let visitors send you messages without leaving your website. For WordPress, install a plugin called Contact Form 7 or WPForms. Both are free and easy to use.
Here’s how to add a contact form.
- From your dashboard, go to “Plugins” then “Add New.”
- Search for “Contact Form 7” and click “Install Now.”
- After installation, click “Activate.”
- Go to “Contact” in your sidebar menu.
- Copy the shortcode (it looks like
Error: Contact form not found.
). - Edit your Contact page and paste that shortcode where you want the form to appear.
The form includes fields for name, email, subject, and message. Test it by submitting a message yourself. Check that you receive the email notification. If not, check your spam folder or adjust the notification settings.
Want to show your location?
Add a Google Map to your Contact page. Search “Google Maps embed generator” and follow the simple instructions. You’ll get a code snippet to paste into your page.
Social media links help visitors find you on Facebook, Instagram, Twitter, or LinkedIn. Most templates include a section for social media icons in the header or footer. Just enter your profile URLs in the customizer.
Setting up Google Analytics takes five minutes and provides valuable data about your visitors. Sign up for a free Google Analytics account, get your tracking code, and install it using a plugin like “Insert Headers and Footers.” This plugin lets you paste the tracking code without touching any technical files.
Your SSL certificate should already be active from your hosting setup, but verify it. Visit your website using “https://” at the beginning. You should see a padlock icon. If not, contact your hosting support—they’ll activate it for you.
Install a backup plugin to save copies of your website automatically. UpdraftPlus is free and reliable. Configure it to back up your site weekly and store backups in Google Drive or Dropbox. These steps to launch your website include safety measures so you never lose your work.
Add a cookie consent banner if you’re collecting any visitor data. Many countries require this. Plugins like “Cookie Notice” add a simple banner that complies with privacy laws.
If you’re selling products or services, set up your payment gateway now. Stripe and PayPal integrate easily with WordPress through plugins. Follow their setup wizards to connect your bank account and start accepting payments.
Step 6: Optimize for Search Engines

Search engine optimization (SEO) helps Google and other search engines find and rank your website. Without basic SEO, you’re invisible in search results. The good news? Basic SEO is simple.
Install an SEO plugin.
Yoast SEO and Rank Math are both excellent and free. These plugins guide you through optimizing each page with easy-to-follow checklists.
After installing your SEO plugin, configure it by following the setup wizard. It’ll ask basic questions about your business and automatically create important files like your sitemap.
For each page on your site, optimize these elements:
Page title.
This appears in search results. Include your main keyword near the beginning. Keep it under 60 characters. Make it compelling so people want to click.
Meta description.
This is the preview text in search results. Summarize what the page offers in 155 characters or fewer. Include your keyword naturally.
URL structure
Keep URLs short and descriptive. yoursite.com/about beats yoursite.com/page-id-47. Your SEO plugin helps you edit URLs.
Use keywords naturally in your content.
Don’t force them or repeat them awkwardly. Just write naturally about your topic, and keywords will appear organically. The steps to launch your website should include mentioning your main services and topics throughout your pages.
Add alt text to every image.
Alt text describes images for people using screen readers and helps search engines understand your images. Keep descriptions clear and include relevant keywords when appropriate.
Use heading tags properly.
Your page title should be an H1 tag (usually automatic). Main sections use H2 tags. Subsections use H3 tags. This hierarchy helps search engines understand your content structure.
Create an XML sitemap.
Your SEO plugin does this automatically. Then submit it to Google Search Console. This free Google tool lets you tell Google about your website directly. Sign up, verify your ownership, and submit your sitemap URL.
Check your website speed using Google PageSpeed Insights. Enter your URL and see how fast your pages load. 47% of people expect websites to load in 2 seconds or less. If yours is slower, the tool suggests specific improvements.
Common speed fixes include;
Install a caching plugin like WP Super Cache.
Compressing images before uploading. Choosing a quality hosting provider. Removing unused plugins.
Make sure your site works perfectly on mobile devices.
Use Google’s Mobile-Friendly Test tool to check. If it fails, switch to a different template. Most modern templates are mobile-responsive by default.
Internal linking helps too.
Link from one page to another when relevant. For example, mention your Services page from your About page. This helps visitors navigate and helps search engines crawl your site.
Step 7: Test Everything Thoroughly
Before showing your website to the world, test every single thing. This prevents embarrassing mistakes and ensures everything works smoothly.
Start by clicking every link on your website.
Visit each page and click all navigation menu items, footer links, and buttons. Make sure nothing leads to error pages or broken links.
Submit your contact form with a test message.
Verify you receive the email. Check if the confirmation message displays correctly to the person submitting the form.
Test your website on different devices.
Open it on your phone, tablet, and computer. Does everything display correctly on all screen sizes? Can you read text easily? Do images scale properly?
Try different web browsers.
View your site in Chrome, Safari, Firefox, and Edge if possible. Sometimes websites display differently across browsers. Fix any issues you spot.
Run through the entire user journey.
Pretend you’re a new visitor. Can you easily understand what the website offers? Is finding contact information simple? If you have a store, try completing a purchase from start to finish.
Check the loading speed again.
Visit each page and note how fast it loads. Anything taking over 3 seconds needs optimization.
Proofread all your content carefully.
Read every word on every page. Look for typos, grammatical errors, and awkward phrasing. Better yet, ask a friend to read through everything—fresh eyes catch mistakes you miss.
Verify all your contact information is correct.
Double-check phone numbers, email addresses, and physical addresses. One wrong digit in your phone number means lost customers.
Test your payment processing if you’re selling anything.
Process a test order using a test credit card (your payment processor provides test card numbers). Make sure the payment goes through, and you receive confirmation.
If you added social media links, click each one to confirm they lead to the correct profiles.
Check how your website appears in search results.
Search for site:yourdomain.com in Google. This shows how Google currently sees your site. The title and description should match what you set in your SEO plugin.
Review your website’s appearance in social media previews.
Use Facebook’s Sharing Debugger tool to see how links to your site will appear when shared. Adjust your page images and descriptions if needed.
Ask friends or family members to visit your site and give honest feedback.
Do they understand what you offer? Can they easily find what they need? Is anything confusing? Real user feedback is invaluable.
These thorough steps to launch your website prevent problems before they happen. Fixing issues now saves you from complaints later.
Step 8: Launch and Share With the World
Everything’s tested and working. Time to make your website public!
If you had your site in “coming soon” or “maintenance mode,” turn that off now. In WordPress, deactivate any coming soon plugins. Your site is now live and accessible to everyone.
Announce your launch on social media.
Post on Facebook, Instagram, Twitter, and LinkedIn. Wherever your audience hangs out. Share your website URL and invite people to check it out. Use an engaging image from your homepage in your posts.
Send an email announcement to your contacts.
Let people know your new website is live. Include your URL and maybe highlight one or two cool features or special offers. Keep the email short and friendly.
Update your email signature to include your website URL. Every email you send becomes a little advertisement.
Add your website to your business cards if you print them. Update your existing cards with a sticker if needed until you reprint.
Claim your Google My Business listing if you’re a local business. This free listing appears in Google Maps and local search results. Connect it to your new website for maximum visibility.
Submit your website to online directories relevant to your industry. These backlinks help with SEO and make you more discoverable.
Update all your social media profiles to include your website URL in the bio sections.
Consider starting a simple blog on your site.
Regular content improves SEO and gives visitors reasons to return. Even one article per month makes a difference. Write about topics your customers care about, answer common questions, or share industry news.
You Did It!
Look at what you accomplished today!
This morning, you had no website. Now you have a professional online presence that’s live and working. You followed all the steps to launch your website in just one day. Something most people delay for months or years.
Your website handles the basics: it looks good, loads fast, works on mobile devices, lets people contact you, and shows up in search engines. That’s everything you need to start attracting customers online.
Remember, your website will grow and evolve. The version you launched today is just the beginning. As you learn more about your audience and what they need, you’ll improve pages, add features, and refine your message.
The important part? You took action. While others are still thinking about maybe building a website someday, you already have yours live and working. That’s powerful.
Ready to take your website to the next level with reliable hosting and expert support?
At Truehost, we offer affordable hosting packages perfect for new websites, with free SSL certificates and one-click WordPress installation to make these steps even easier.