Domain RegistrationFind and register the perfect domain for your website.
 .COM DomainChoose a widely recognized domain to build global credibility.
 Domain TransferSeamless domain transfers with zero downtime and complete control.
 All TLDsFind and register your perfect domain. Choose from local and global extensions.
 SSL CertificatesKeep your website safe with reliable SSL Certificates that protect customer data and build trust.
 whoisCheck domain ownership details, expiration dates, and registrar information.
 US DomainRegister a .US domain and build trust in the USA.
 Web HostingEverything your website needs to run smoothly
 WordPress HostingWordPress hosting that just works
 Windows HostingReliable hosting for Windows environments
 Reseller HostingTurn hosting into your business
 Email HostingEmail that looks professional and works anywhere
 cPanel HostingFull control of your hosting with cPanel
 Affiliate ProgramJoin as a partner and earn commissions on every referral you send our way.
 Vps HostingScalable virtual servers that expand as you need.
 Dedicated ServersGet complete access and full control over your dedicated physical server.
 Managed vpsNot tech-savvy? We will take care of everything with our fully managed VPS hosting for you.
 AI Website BuilderCreate stunning websites in seconds with AI.
 Online ShopSet up a professional online store. No coding required.
 Web design serviceGet a tailored website designed to match your brand and support your goals.
 BlogFind helpful guides on web hosting, online selling, digital marketing, and more.
 Contact USYou can reach us anytime, day or night, through chat or email.
 SupportBrowse helpful guides and answers for all of our services.
Say you’ve got example.com and you want a separate address like blog.example.com, shop.example.com, or support.example.com, somewhere to run a blog, a store, or a help centre without touching your main site.
That’s exactly what a subdomain does.
It lets you create a separate section, or genuinely separate website, under your existing domain without registering a whole new one.
cPanel is where this actually happens.
It’s the control panel where you create the subdomain and connect it to a directory on your hosting account, and the process itself is straightforward once you know where to look.
One thing worth knowing upfront: current cPanel versions generally handle this through Domains → Create a New Domain, rather than the older standalone “Subdomains” menu some guides still reference.
If you’ve used cPanel before but it’s been a while, this is probably the single biggest change you’ll notice, the old menu hasn’t vanished from every provider’s setup entirely.
But the modern Jupiter theme folds subdomains, addon domains, and parked domains into one unified screen.
Before diving in, here’s what you’ll need to have ready first.
What You Need Before Creating a Subdomain in cPanel
Before creating a subdomain in cPanel, make sure you have the following:
- An Active Domain Connected to Your cPanel Account
A subdomain must be attached to an existing domain.
For example, blog.example.com is created under example.com, so the main domain needs to be connected to your hosting account first.
- Access to cPanel
You need your cPanel login details and the cPanel URL provided by your hosting provider.
Without access to the control panel, you won’t be able to create or manage the subdomain from cPanel.
- A Hosting Plan That Allows Subdomains
Check that your hosting plan supports subdomains.
Most shared hosting plans allow them, but some basic or restricted packages may place limits on the number you can create.
- A Clear Purpose for the Subdomain
Know what you plan to use the subdomain for before creating it.
It could be for a blog, online store, staging site, testing environment, or another separate section of your website.
This helps you choose the right subdomain name and setup.
- Access to DNS Management if Your Domain Uses External DNS
If your domain uses DNS servers outside your hosting provider, you may need to manage the relevant DNS records separately.
cPanel may provide a Zone Editor for DNS management, but some DNS changes need to be handled through your hosting provider or the service managing your domain’s DNS.
How to Create a Subdomain in cPanel
1) Log In to cPanel
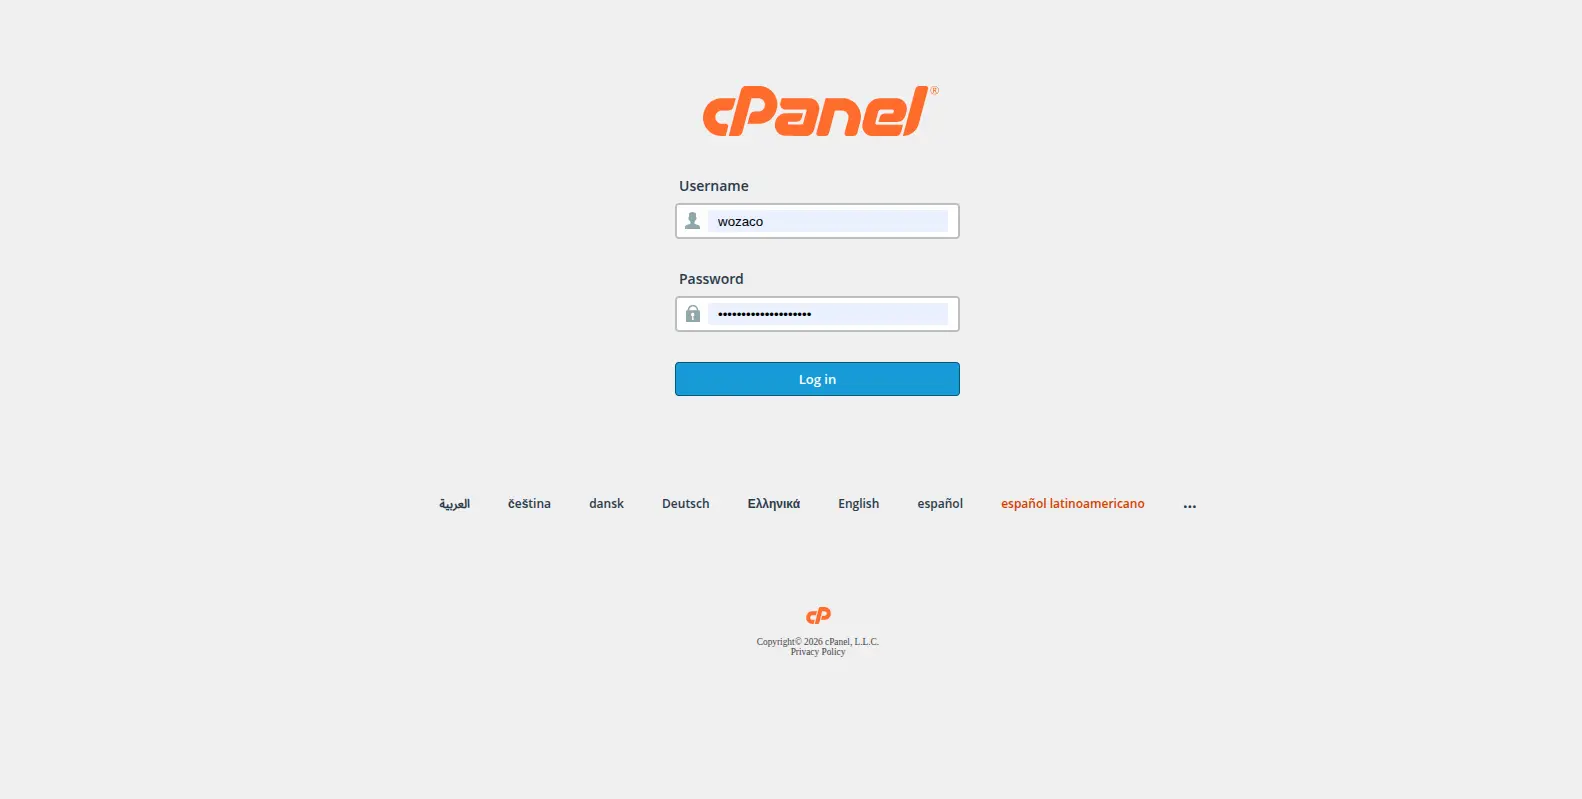
Open your hosting provider’s cPanel login, typically something like yourdomain.com/cpanel, or a direct link your host emailed you after signup.
Enter your username and password, then once you’re in, locate the Domains section on the dashboard.
It’s usually visible without much scrolling on most modern cPanel themes.
2) Click “Domains”
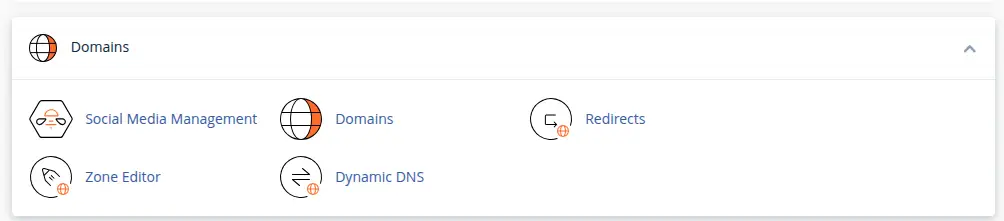
The exact layout can vary a little depending on your hosting provider and which cPanel theme they’re running, but the Domains section itself is consistently where this process starts.
On the current Jupiter-style interface, which most hosts including Truehost now run, you’ll head to Domains, then look for the option to create a new one from there.
3) Click “Create a New Domain”
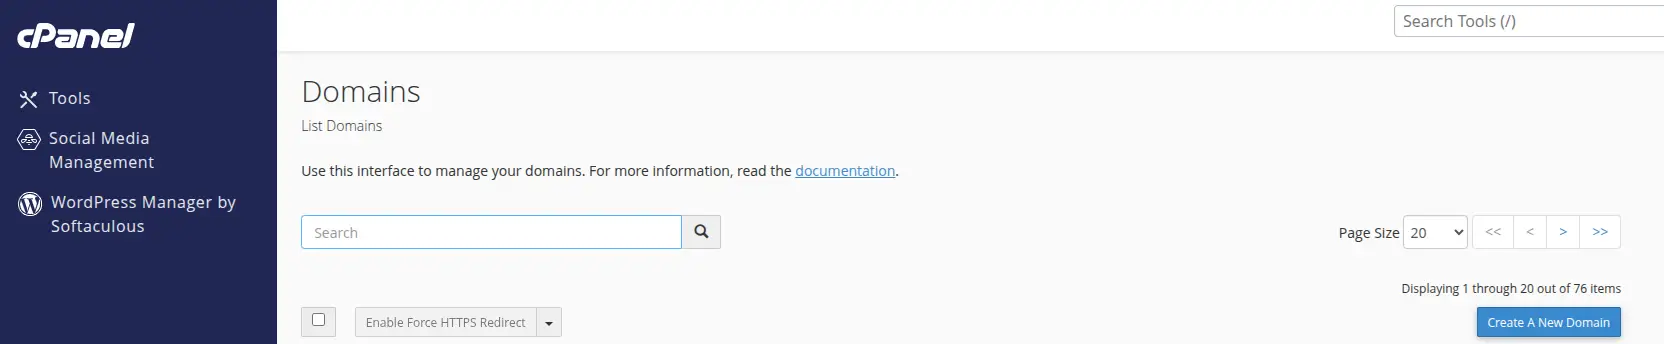
This button is what actually opens the form for adding a subdomain, an addon domain, or a parked domain, all from the same screen in the newer cPanel interface.
It’s worth saying clearly: don’t go hunting for a separate “Subdomains” menu as your main method here.
That older, standalone menu has largely been folded into this unified Domains tool on current cPanel versions, so looking for it separately will mostly just waste time.
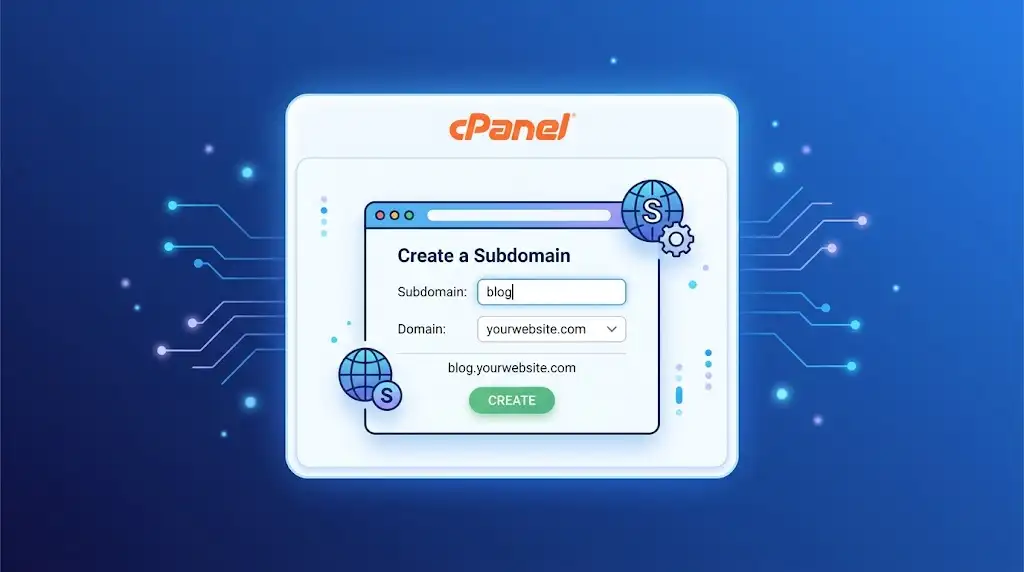
4) Enter Your Subdomain
In the domain field, type the complete subdomain, for example blog.example.com rather than just blog on its own.
Here, blog is the subdomain itself and example.com is the parent domain it’s attached to.
cPanel’s current documentation specifically asks for the full subdomain written out this way, subdomain.example.com, rather than entering the prefix and domain in separate fields the way some older interfaces did.
5) Set the Document Root
The document root is simply the folder on your server where the subdomain’s website files will actually live.
This counts for a lot because it determines exactly where you’ll upload content for this specific subdomain, separate from your main site’s files.
You’ll see a “Share document root” option during this step.
If your goal is to run separate, independent content on the subdomain, something like its own blog or store rather than a mirrored copy of your main site, leave this unchecked.
Keeping the document root separate is what actually lets the subdomain hold its own distinct content rather than automatically pulling in whatever’s already on your main domain.
6) Submit the Subdomain
Click Submit, and cPanel creates the subdomain along with its underlying configuration.
This part is genuinely quick.
Most hosting environments, Truehost’s included, generally have the subdomain created within about a minute, so there’s no need to sit around waiting for ages at this particular step.
How to Add a Website to Your New Subdomain
1) Open File Manager
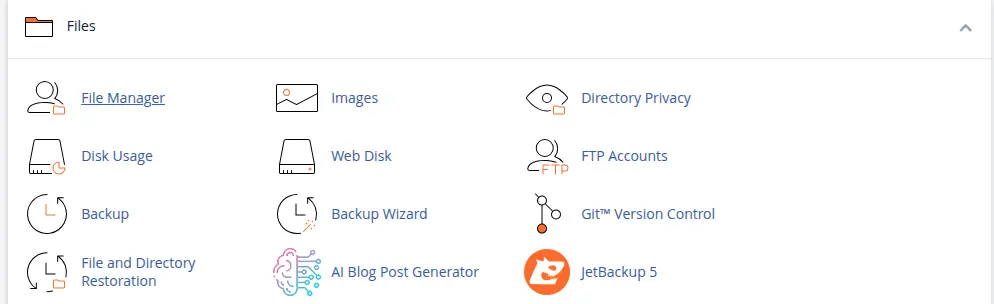
Navigate specifically to the subdomain’s document root, the folder you set or confirmed back in step 5.
This is worth being precise about, since uploading files to your main domain’s directory instead simply won’t make them appear on the subdomain.
Each one needs its own files sitting in its own folder.
2) Upload Your Website Files
Upload your HTML, CSS, and JavaScript files directly, or upload a ZIP archive if that’s easier and extract it once it’s there.
File Manager handles both approaches without needing a separate FTP client, though FTP remains available too if that’s your preferred way of working.
3) Check the Index File
Confirm that index.html or index.php is actually sitting in the correct document root folder, since this is the file your subdomain will load by default.
Once it’s in place, visit the subdomain directly in your browser to check it’s actually loading as expected.
How to Install WordPress on a Subdomain
Running a separate WordPress installation on something like blog.example.com is a common reason people set up a subdomain in the first place.
It keeps a blog cleanly separated from a main business site built on something else entirely, or just keeps two WordPress installs from tangling with each other.
To do this, open your cPanel’s application installer, Softaculous is the most common one.
And when prompted for the installation location, select your new subdomain rather than the main domain.
From there, complete the WordPress installation as you normally would, choosing a site title, admin username, and password just like any fresh install.
It’s worth knowing the exact installer can differ depending on your specific hosting provider.
Though the overall process of picking the subdomain as the install target stays broadly the same across most of them.
One thing worth double-checking afterward: make sure the WordPress site URL settings inside the dashboard actually reflect the subdomain, not the main domain.
Since an incorrect site URL is a surprisingly common cause of broken links and redirect loops right after installation.
This is usually set automatically during installation, but it’s a quick, worthwhile check if anything looks off once the site is live.
How to Enable HTTPS on a Subdomain
A subdomain needs HTTPS just as much as your main website does, it shouldn’t be treated as an afterthought just because it’s a secondary address.
Check whether your hosting provider automatically provisions SSL for new subdomains, many modern cPanel environments do this through AutoSSL without requiring any extra steps from you.
Where automatic provisioning is enabled, the subdomain should pick up a valid SSL certificate shortly after creation.
If it doesn’t appear to be working, most cPanel environments let you manually force HTTPS or reissue the certificate directly from the Domains tool.
Once it’s in place, test the subdomain specifically using https:// in the address bar to confirm the secure connection actually loads without a warning.
How Long Does It Take for a New Subdomain to Work?
There’s a real difference between the subdomain being created inside cPanel and that subdomain actually becoming reachable everywhere on the internet.
The cPanel side of things is fast, the subdomain itself is typically created in the hosting account almost immediately, generally within about a minute.
DNS is the part that can take longer, since DNS changes have to propagate out to nameservers around the world, and that process can sometimes take up to 48 hours in less common cases.
That said, don’t assume every subdomain needs a full 48-hour wait by default. If your domain is already using your host’s nameservers.
As is typically the case when a subdomain is created directly inside an existing cPanel account, it often becomes reachable far faster than that, sometimes within minutes.
The 48-hour figure tends to apply more to situations involving external DNS, where a domain’s nameservers point somewhere other than the hosting provider itself.
And a new DNS record has to be manually added and then wait for resolvers everywhere to pick it up.
For the far more common scenario of creating a subdomain directly within an existing, already-active cPanel account, there’s rarely a reason to expect anything close to that upper limit.
Common Subdomain Problems in cPanel
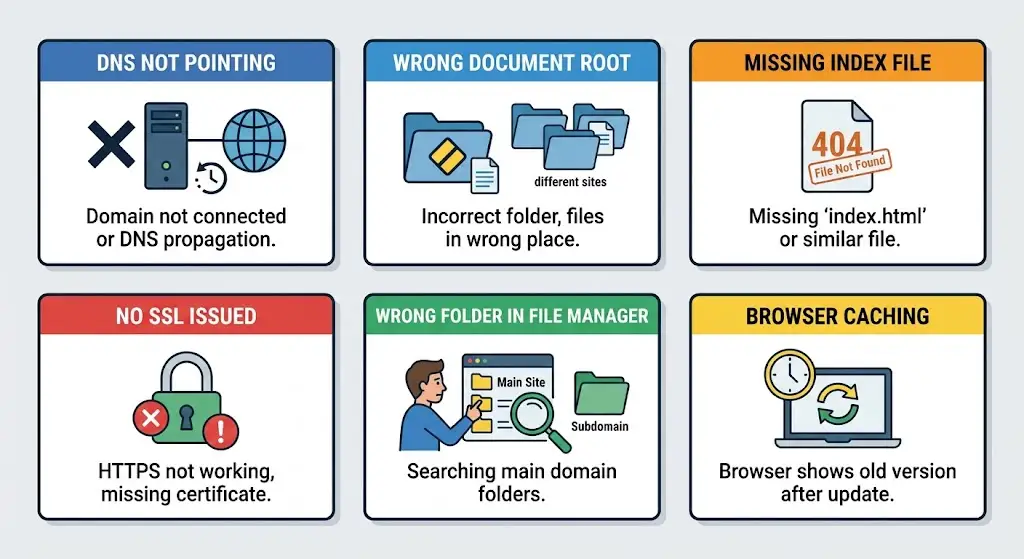
Most subdomain issues trace back to one of a small handful of causes, so troubleshooting is generally a process of checking these in order rather than guessing randomly.
- The subdomain doesn’t open.
This usually comes down to DNS not pointing correctly.
The domain not being properly connected to the hosting account in the first place, or DNS propagation simply still being in progress.
- The subdomain shows the wrong website.
Generally caused by an incorrect document root, files that were accidentally uploaded to the wrong directory.
Or the Share document root option being left checked when the intention was actually to run separate, independent content.
- The subdomain shows a 404 error.
Typically means there’s a missing index file in the document root.
An application that isn’t configured correctly, or the document root itself pointing somewhere unexpected.
- HTTPS isn’t working.
Usually traces back to SSL simply not having been issued yet, DNS not pointing correctly.
Or AutoSSL not having completed its automatic provisioning cycle for that specific subdomain.
- The subdomain was created but doesn’t appear in File Manager where expected.
This often happens when someone navigates to the main domain’s folder structure out of habit rather than specifically opening the new subdomain’s own document root.
Worth double-checking the exact folder path shown in the Domains list if content seems to have vanished.
- Changes made to the subdomain aren’t showing up.
Browser caching can make a freshly updated subdomain look unchanged for a few minutes.
A hard refresh or checking in a private browser window usually clears this up without needing to touch any server-side settings at all.
Create a Subdomain With Truehost cPanel Hosting
Truehost’s cPanel hosting gives customers direct access to domain and subdomain management through cPanel, using the same unified process covered throughout this guide.
The current Truehost instructions specifically point users toward the newer Domains → Create a New Domain workflow.
Matching the updated Jupiter-style interface running across its hosting environment rather than the older, now-retired standalone Subdomains menu some outdated guides still describe.
It’s worth knowing that the exact options available, and how quickly a subdomain goes live with SSL attached.
Can depend somewhat on your specific hosting plan and cPanel configuration.
That said, the core workflow covered throughout this guide, Domains, Create a New Domain, setting the document root, and confirming SSL, stays consistent across Truehost’s hosting lineup.
Which makes it a reasonably predictable process whether you’re setting up your first subdomain or your fifth.
If you’re setting up a website, a blog, or a store on a subdomain and want a hosting environment where creating one is genuinely this straightforward.
Truehost’s cPanel hosting plans are worth exploring, with the domain, subdomain, and SSL management covered throughout this guide included as standard.
Frequently Asked Questions
Do I need to buy a new domain to create a subdomain?
No, a subdomain uses your existing domain. You’re not registering anything new, simply creating an additional address that sits in front of your current domain name.
Can I create more than one subdomain on the same domain?
Yes, there’s generally no meaningful limit to how many subdomains you can create under one domain, provided your hosting plan’s overall resource limits can support them.
Will a subdomain affect my main website?
No, provided the document root is kept separate as covered in this guide. A properly configured subdomain runs independently from your main site’s files and content.
Can I use a subdomain for a completely different type of website than my main domain?
Yes, that’s actually one of the more common reasons people use them. A WordPress blog on a subdomain alongside a custom-built main site, for instance, works perfectly well since each lives in its own separate directory.
Does a subdomain need its own SSL certificate?
Yes, HTTPS needs to be enabled specifically for the subdomain. It isn’t automatically covered by your main domain’s certificate unless your host is specifically issuing a wildcard certificate that covers all subdomains together.