Domain RegistrationFind and register the perfect domain for your website.
 .COM DomainChoose a widely recognized domain to build global credibility.
 Domain TransferSeamless domain transfers with zero downtime and complete control.
 All TLDsFind and register your perfect domain. Choose from local and global extensions.
 SSL CertificatesKeep your website safe with reliable SSL Certificates that protect customer data and build trust.
 whoisCheck domain ownership details, expiration dates, and registrar information.
 US DomainRegister a .US domain and build trust in the USA.
 Web HostingEverything your website needs to run smoothly
 WordPress HostingWordPress hosting that just works
 Windows HostingReliable hosting for Windows environments
 Reseller HostingTurn hosting into your business
 Email HostingEmail that looks professional and works anywhere
 cPanel HostingFull control of your hosting with cPanel
 Affiliate ProgramJoin as a partner and earn commissions on every referral you send our way.
 Vps HostingScalable virtual servers that expand as you need.
 Dedicated ServersGet complete access and full control over your dedicated physical server.
 Managed vpsNot tech-savvy? We will take care of everything with our fully managed VPS hosting for you.
 AI Website BuilderCreate stunning websites in seconds with AI.
 Online ShopSet up a professional online store. No coding required.
 Web design serviceGet a tailored website designed to match your brand and support your goals.
 BlogFind helpful guides on web hosting, online selling, digital marketing, and more.
 Contact USYou can reach us anytime, day or night, through chat or email.
 SupportBrowse helpful guides and answers for all of our services.
Online stores often lose sales because customers do not get quick answers. Someone may ask about sizing late at night, check if a product is in stock, or want to know the shipping time. If no one responds quickly, they may leave without buying.
An AI shopping assistant can fill these gaps. Built with OpenClaw, an open-source, self-hosted AI agent platform, it can answer product questions, check stock, recommend products, and help customers place orders through WhatsApp or Telegram, 24/7.
This guide shows you how to deploy OpenClaw using Truehost’s managed OpenClaw VPS hosting.
Unlike a regular cloud VPS, you do not need to manually install Docker, Node.js, Playwright, or SSL. These are already set up, so you can have your AI shopping assistant running in minutes instead of spending hours on server configuration.
Prerequisites
Before you start, gather the following:
- An active Truehost OpenClaw hosting subscription, with the root SSH credentials and dashboard access details from your welcome email.
- An SSH client; Terminal (Mac/Linux), PuTTY (Windows), or a browser-based console.
- A Telegram bot token or a WhatsApp Business account, depending on which channel you plan to launch on first.
- An AI provider API key. Anthropic’s Claude models are a solid default for shopping conversations because they follow structured instructions (return policies, escalation rules) reliably, but OpenAI, Google Gemini, Groq, and others work too.
- Optional: a custom domain, if you’d rather point customers and your dashboard at a clean URL instead of a bare IP address.
Step 1: Log In and Explore the Dashboard
First connection
Connect to your instance using root SSH, either through Terminal, PuTTY, or Truehost’s browser-based console, with the credentials from your welcome email. On first boot, OpenClaw prints a welcome message containing the dashboard URL and a temporary access token. Copy both immediately: the token is single-use, and losing it means starting the pairing process over.
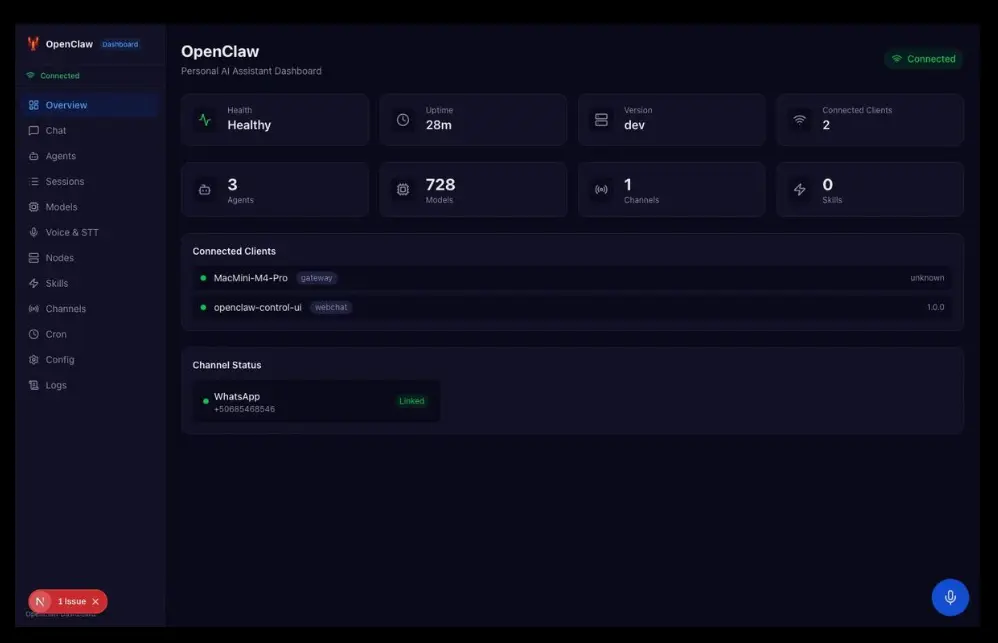
Dashboard overview
Once you’re in, take a moment to look around. Five sections matter most:
- AI Providers: connect and manage the models powering the assistant (Anthropic, OpenAI, Gemini, Ollama, and others).
- Devices: see and manage which browsers have access to the instance.
- Channels: link messaging platforms like WhatsApp and Telegram.
- Activity & Logs: monitor live conversations and debug issues as they happen.
- Settings: customize security options, access tokens, and the assistant’s own instructions.
Step 2: Pair Your Browser Securely
- Open the dashboard URL in your browser.
- Enter the temporary token to start pairing.
- Switch back to the SSH terminal and approve the device: press y, then a.
Ongoing device management
Pairing your browser once isn’t the end of this task; treat it as ongoing hygiene:
- Approve every new administrator browser the same way, one at a time.
- Review connected devices regularly and remove any you no longer use.
- Rotate access tokens periodically, and immediately if you suspect one has leaked.
- Never share a token with anyone outside your team. Anyone holding a valid token can control the instance, including its connected messaging channels and product data.
Step 3: Connect Your AI Model
Truehost’s OpenClaw plans don’t lock you into one AI provider. Head to the AI Providers section of the dashboard and paste in your key.
- Anthropic / OpenAI / Gemini / Groq: paste your API key, and OpenClaw detects available models automatically. Send a test prompt from the dashboard to confirm the connection works before moving on.
- Ollama (local models): runs entirely on your own VPS for complete data privacy, with no per-token fees. It needs more RAM and CPU headroom than a cloud model, so it’s a better fit for Truehost’s higher-tier plans than the entry-level one.
The trade-off: cloud providers give you stronger, more consistent model quality with zero local compute burden, but you pay per API call, and your conversation data leaves the server. Ollama keeps everything private and eliminates per-token costs, at the cost of needing a beefier instance and generally trailing frontier cloud models in output quality.
Step 4: Customize the Shopping Assistant
Personality and rules
This is where a generic chatbot becomes your shopping assistant:
- Define its role explicitly: a helpful shopping guide that recommends only products from your store, not a general-purpose assistant that will happily answer anything.
- Set a tone that matches your brand, whether that’s friendly and casual or precise and professional.
- Feed it the specifics that keep answers accurate: return policy, shipping timelines, warranty terms, and clear rules for when it should hand a conversation off to a human (refunds, complaints, anything outside a straightforward shopping question).
Connect your product catalog
- WooCommerce: connect via the REST API for live product, price, and stock data.
- Shopify: use the Storefront API for read-only catalog browsing, or the Admin API if the assistant also needs to see order and inventory details.
- CSV or JSON: a direct import or a live feed endpoint, a reasonable option for smaller or simpler catalogs.
Set the sync frequency to match how often your catalog actually changes. A fast-moving inventory on a slow sync schedule is one of the most common causes of an assistant confidently telling a customer that a sold-out item is available.
Enable shopping capabilities
Install or activate the tools your assistant needs:
- Product search and recommendations
- Real-time stock and price checks
- Product comparisons
- Order tracking
- Checkout assistance
- Upselling and cross-selling
None of these ship active by default; each is a capability you turn on deliberately, which also keeps the assistant scoped to shopping tasks rather than open-ended actions.
Step 5: Connect Messaging Channels
Telegram
- Create a bot through @BotFather and copy the token it gives you.
- Add that token in OpenClaw’s Channels section.
- Whitelist the specific user IDs or groups allowed to interact with the assistant.
- Send a test message and confirm it shows up correctly in the Activity & Logs section.
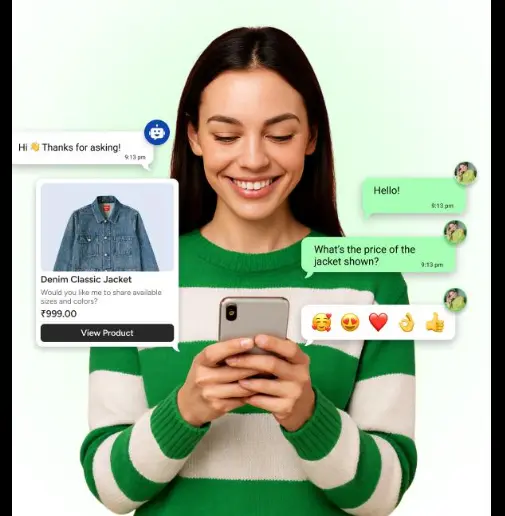
- Link a WhatsApp Business account.
- Scan the QR code OpenClaw generates, using WhatsApp’s Linked Devices menu.
- Approve the connection inside the OpenClaw dashboard.
- Test thoroughly. WhatsApp’s device-linking model is more prone to dropped or duplicate messages than Telegram’s token-based API, so it’s worth watching closely before relying on it for live customers.
Multi-channel testing
Send the same set of questions through every channel you’ve connected and confirm the assistant gives consistent, coherent answers on each, and that it keeps track of a customer’s conversation across multiple messages rather than losing context.
Step 6: Thorough Testing
Before pointing real customer traffic at the assistant, run it through a complete end-to-end test covering:
- Product search and recommendations
- Stock availability checks
- Product comparisons
- Order tracking
- Shipping and policy questions
- A full sample purchase journey, from initial inquiry to checkout guidance
If any step breaks or gives an inconsistent answer, fix it here rather than after a customer hits it live.
Step 7: Secure and Maintain Your Deployment
Backups
Truehost’s OpenClaw plans include automated daily backups by default. On top of that:
- Create manual snapshots before any major configuration change, so a bad edit is a one-click rollback rather than a rebuild.
- Confirm your backup schedule under the dashboard’s Settings section.
Security best practices
- Store API keys securely and never share them outside your team.
- Confirm HTTPS/SSL is active; Truehost provisions this automatically on OpenClaw plans.
- Keep OpenClaw updated to the latest version. Older releases have had vulnerabilities that could expose API tokens or let an attacker take over the gateway.
- Monitor connected devices and activity logs on a regular schedule, not just when something looks wrong.
- Restrict SSH access where possible and avoid relying on password-only authentication.
- Be mindful of prompt injection: customer messages and product pages can contain text crafted to manipulate an AI agent. Keeping the assistant’s tools scoped narrowly to shopping tasks (Step 4) limits what a malicious message could actually make it do.
Common fixes
| Issue | Fix |
| Browser pairing fails after IP change | Rotate the token and re-pair |
| No AI responses | Verify your API key is valid and correctly pasted in AI Providers |
| WhatsApp drops | Update the channel and re-scan the QR code |
| Tools not working | Adjust security settings and restart the gateway |
| SSL issues | Confirm your domain’s DNS points to the server, then wait for auto-issuance |
| Dashboard unreachable | Check the firewall allows the dashboard port, and confirm the server is running |
Why Truehost Over a General-Purpose Cloud VPS
- No manual setup. OpenClaw, Docker, and SSL come pre-installed, so there’s no dependency wrangling before you can start configuring your actual assistant.
- Dedicated resources. vCPU and RAM are dedicated rather than shared, so a busy neighbor on the same physical machine won’t slow your assistant down during a traffic spike.
- Built-in security. Custom firewalls, DDoS filtering, and daily backups come standard on every plan.
- 24/7 local support. Help is available around the clock, which counts more once the assistant is customer-facing and any downtime is visible to shoppers, not just to you.
Ready to Launch Your OpenClaw Shopping Assistant?
Everything above is a one-time setup cost. Once your instance is running, your AI model is connected, and your channels are paired, you’ve got an assistant that answers product questions, checks stock, and moves customers toward checkout at 2 a.m. as reliably as at 2 p.m. Get three things right: a scoped set of enabled tools, a live (not stale) product feed, and a clear human hand-off path, and everything after that is routine maintenance.
The part most guides gloss over is the server it all runs on. Skip the Docker install, the SSL wrangling, and the dependency chasing:deploy on a Truehost OpenClaw VPS and have your shopping assistant live in minutes.
OpenClaw Shopping Assistant FAQ
How secure is OpenClaw?
Security depends heavily on how it’s configured. OpenClaw itself supports token-based device pairing, scoped tool permissions, and HTTPS, and Truehost layers firewalls, DDoS filtering, and daily backups on top at the hosting level. The biggest real-world risks are operational: leaked API tokens, an assistant granted more tool access than it needs, and outdated versions with known vulnerabilities. Keeping OpenClaw updated, restricting SSH access, rotating tokens, and limiting the assistant’s tools to shopping-related tasks addresses most of that risk.
What are the hardware requirements for OpenClaw on Truehost?
For light use, such as basic Telegram interactions or a single agent handling simple prompt chains, 1–2 vCPUs and 2–4 GB of RAM is workable. Production shopping assistants handling real customer traffic, especially with browser-based tools like Playwright, do better with at least 4 vCPUs and 8 GB of RAM and 100 GB or more of NVMe storage. If you plan to run models locally through Ollama instead of a cloud provider, budget for significantly more RAM on top of that.
How much does running OpenClaw on Truehost cost?
Truehost’s OpenClaw-specific VPS plans are tiered by resources, roughly: an entry-level plan (1 vCPU, 2 GB RAM, 50 GB NVMe) suited to testing and light workloads, a mid-tier plan (2 vCPUs, 4 GB RAM, 100 GB NVMe) for steady production use, and a higher-tier plan (4 vCPUs, 8 GB RAM, 200 GB NVMe) for heavier, multi-agent, or browser-automation-heavy workloads. Exact pricing varies by region and billing term (monthly plans cost more per month than plans paid upfront for one to three years), so check current pricing on Truehost’s OpenClaw hosting page for your country before committing. On top of hosting, budget for per-token AI provider costs unless you’re running fully local models through Ollama.
Do I need technical skills to deploy OpenClaw?
Basic comfort with SSH and following command-line instructions is enough for Truehost’s one-click OpenClaw hosting, since Docker, Node.js, Playwright, and SSL are already installed and most of the remaining work happens through the web dashboard. A fully manual install on a generic VPS, wiring together Docker, a reverse proxy, and SSL yourself, calls for more hands-on Linux administration experience.
How do I connect my store catalog (WooCommerce/Shopify)?
For WooCommerce, connect through its REST API to pull live product, price, and stock data. For Shopify, use the Storefront API for read-only catalog access, or the Admin API if the assistant also needs order and inventory visibility; Shopify custom apps let you scope API access down to only the permissions the assistant actually needs (read-only product and order data, for example, rather than full store control). Smaller or simpler catalogs can also be imported directly as CSV or JSON, or synced from a live feed endpoint. Whichever method you choose, set a sync interval that matches how quickly your inventory actually changes, so the assistant isn’t quoting stock levels from an hours-old snapshot.