Domain RegistrationFind and register the perfect domain for your website.
 .COM DomainChoose a widely recognized domain to build global credibility.
 Domain TransferSeamless domain transfers with zero downtime and complete control.
 All TLDsFind and register your perfect domain. Choose from local and global extensions.
 SSL CertificatesKeep your website safe with reliable SSL Certificates that protect customer data and build trust.
 whoisCheck domain ownership details, expiration dates, and registrar information.
 US DomainRegister a .US domain and build trust in the USA.
 Web HostingEverything your website needs to run smoothly
 WordPress HostingWordPress hosting that just works
 Windows HostingReliable hosting for Windows environments
 Reseller HostingTurn hosting into your business
 Email HostingEmail that looks professional and works anywhere
 cPanel HostingFull control of your hosting with cPanel
 Affiliate ProgramJoin as a partner and earn commissions on every referral you send our way.
 Vps HostingScalable virtual servers that expand as you need.
 Dedicated ServersGet complete access and full control over your dedicated physical server.
 Managed vpsNot tech-savvy? We will take care of everything with our fully managed VPS hosting for you.
 AI Website BuilderCreate stunning websites in seconds with AI.
 Online ShopSet up a professional online store. No coding required.
 Web design serviceGet a tailored website designed to match your brand and support your goals.
 BlogFind helpful guides on web hosting, online selling, digital marketing, and more.
 Contact USYou can reach us anytime, day or night, through chat or email.
 SupportBrowse helpful guides and answers for all of our services.
Most people who want to sell online get stuck between five different guides. One covers hosting. Another covers the plugin. A third covers payments. A fourth covers taxes. None of them agrees on the order.
That fragmented approach wastes hours. Stores end up half-configured, with tax settings skipped or payment gateways left in test mode long after launch day.
This guide walks through the entire setup in a single sequence. You’ll go from choosing a hosting plan to running a live store that can legally collect payments and taxes, in the order it actually needs to happen.
What You Need Before You Start
A few things need to be in place before you touch the WooCommerce plugin. Getting these ready first saves time later.
- A domain name registered and pointed to an active DNS
- A hosting plan that meets WooCommerce’s minimum specs: PHP 8.0 or higher, MySQL 5.7 or newer, and a WordPress memory limit of at least 256MB
- An SSL certificate active on the domain before checkout goes live
- Business basics ready to go: an EIN or SSN for tax setup, plus a US bank account or a Stripe or PayPal business account
Once these pieces are in place, the rest of the setup moves a lot faster.
Step 1: Choose Hosting Built for WooCommerce
Hosting is the first real decision, and it shapes everything that follows. Shared hosting can handle a small catalog, but it quickly bottlenecks once a store has a few hundred products or hits a traffic spike.
- Look at server resources that actually affect speed: CPU allocation, RAM, and NVMe storage for the database-heavy queries WooCommerce runs constantly.
- Compare managed WordPress hosting against a VPS, and pick a VPS once traffic or catalog size outgrows a shared plan.
- Check whether the hosting plan includes a one-click WooCommerce install, which saves setup time later.
- Confirm the plan supports the PHP and MySQL versions WooCommerce needs to run without errors.
A store built on the wrong hosting tier tends to show slow load times right when sales pick up. Choosing well here avoids that problem before it starts.
Step 2: Install WordPress and the WooCommerce Plugin
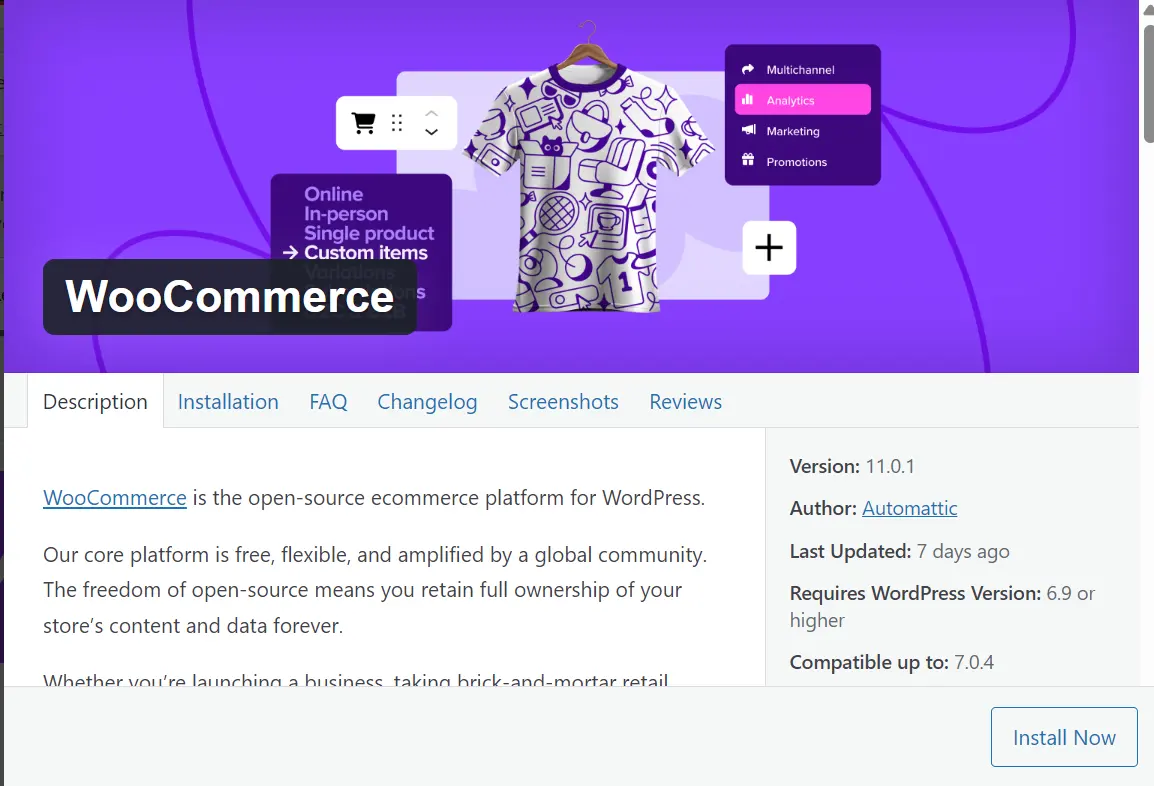
With hosting sorted, the next step is getting WordPress and WooCommerce running on the domain.
- Install WordPress first if the hosting account doesn’t already have it active.
- Add WooCommerce through the official WordPress plugin repository, not a third-party zip file from another site.
- Activate the plugin, which automatically triggers the built-in setup wizard.
- Confirm that the WooCommerce version is compatible with the current WordPress version before proceeding.
This step usually takes 10 minutes on a WordPress-optimized hosting plan. If it drags on longer, the hosting environment needs a closer look.
Step 3: Complete the WooCommerce Setup Wizard
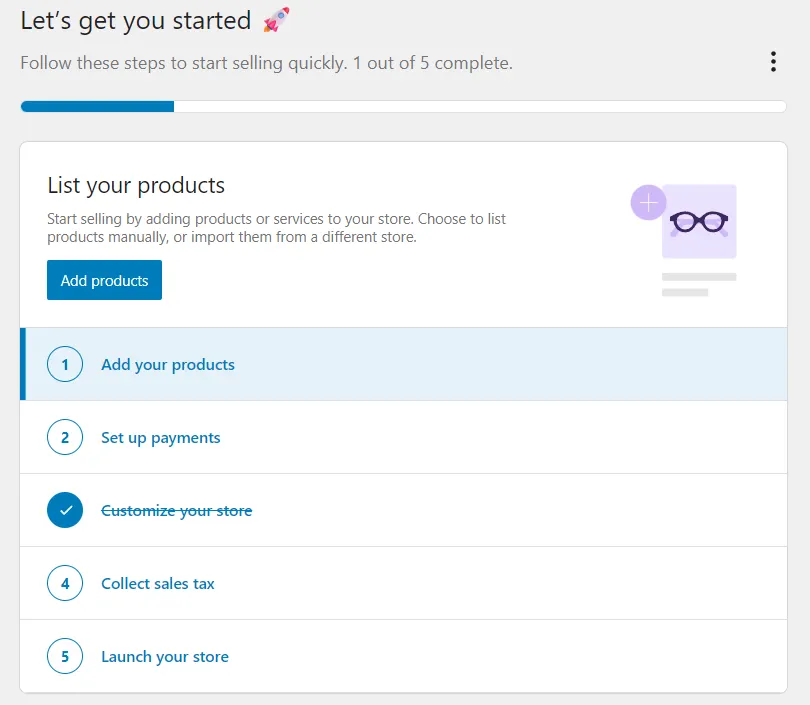
The setup wizard collects the core details that the store runs on. Filling it out carefully now avoids the need to fix mismatched settings later.
- Enter store details like business address, industry type, and store currency (USD for a US-based store)
- Choose the product types the store will sell: physical, digital, or both, since this choice changes shipping settings down the line.
- Add business details that generate correct tax IDs for reporting
- Skip the optional theme prompts here and handle design as its own step later
The wizard moves fast, so slow down on the currency and product type screens. Those two choices affect several later steps.
Step 4: Configure Payment Gateways
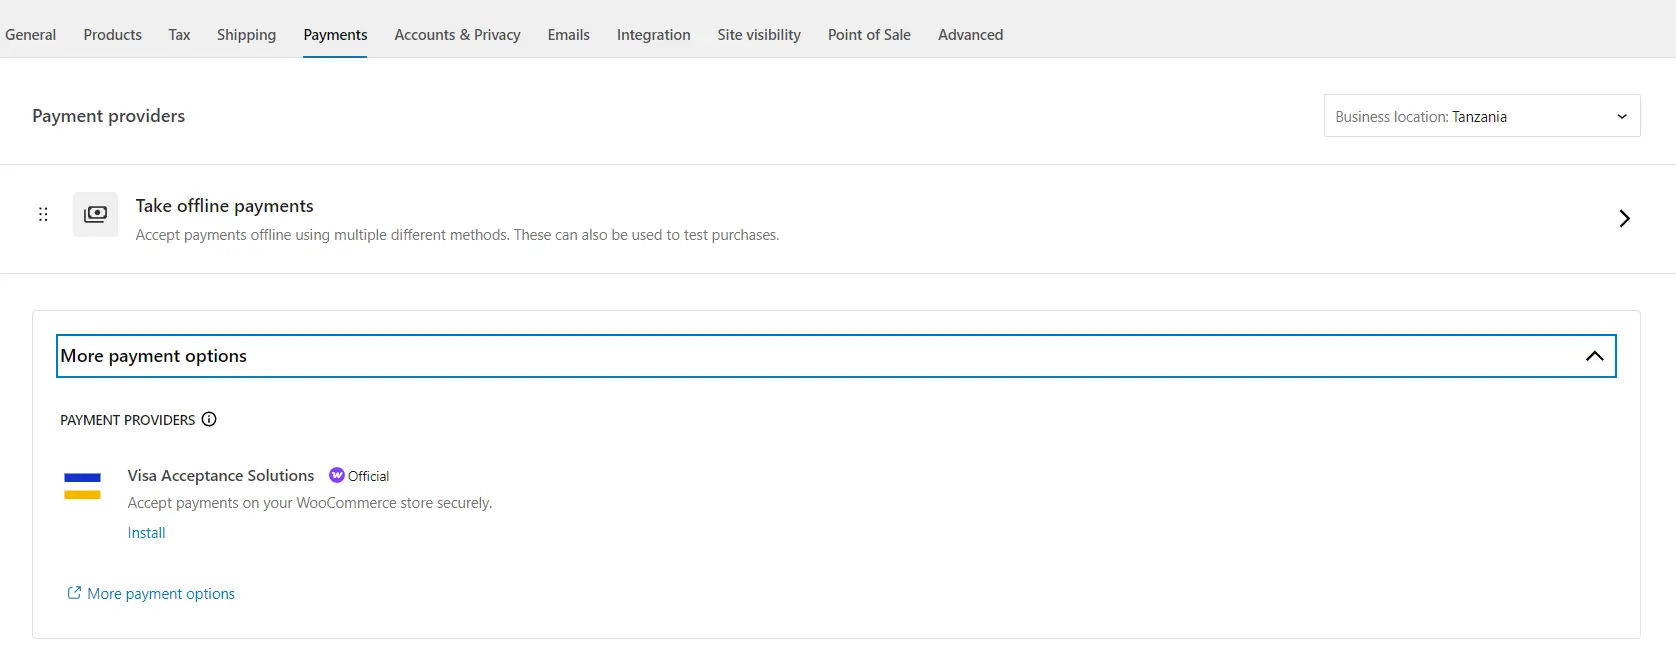
A store without working payment gateways can’t sell anything, so this step comes before products or design.
- Set up Stripe to accept credit cards, Apple Pay, and Google Pay with a single integration.
- Add PayPal as a second checkout option, which lowers cart abandonment for shoppers who prefer it.
- Switch every gateway out of test mode before launch, a step many guides skip mentioning entirely.
- Check the per-transaction fee for each gateway so pricing reflects the actual margin left after fees.
Test each gateway with a real card before launch. A gateway that looks connected can still fail silently at checkout.
Step 5: Set Up Sales Tax Collection
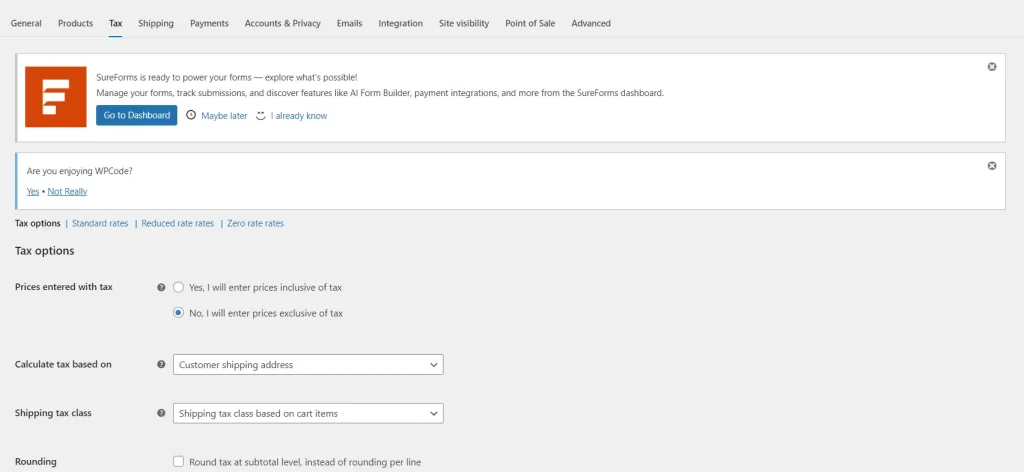
Sales tax setup is skipped more often than any other step, which creates real problems once a store starts selling in multiple states.
- Turn on tax rates and calculations under WooCommerce, then Settings, then Tax
- Learn how the economic nexus works: a store must collect tax in a state once sales volume crosses that state’s threshold, even without a physical office there.
- Compare automated tools like Stripe Tax or WooCommerce Tax against manual rate entry, which works fine for a store selling in one or two states.
- Set the tax display and shipping tax class correctly so checkout totals match each state’s rules.
Get this step right before launch. Fixing tax settings after a store has processed hundreds of orders takes far longer.
Step 6: Add Products and Organize the Catalog
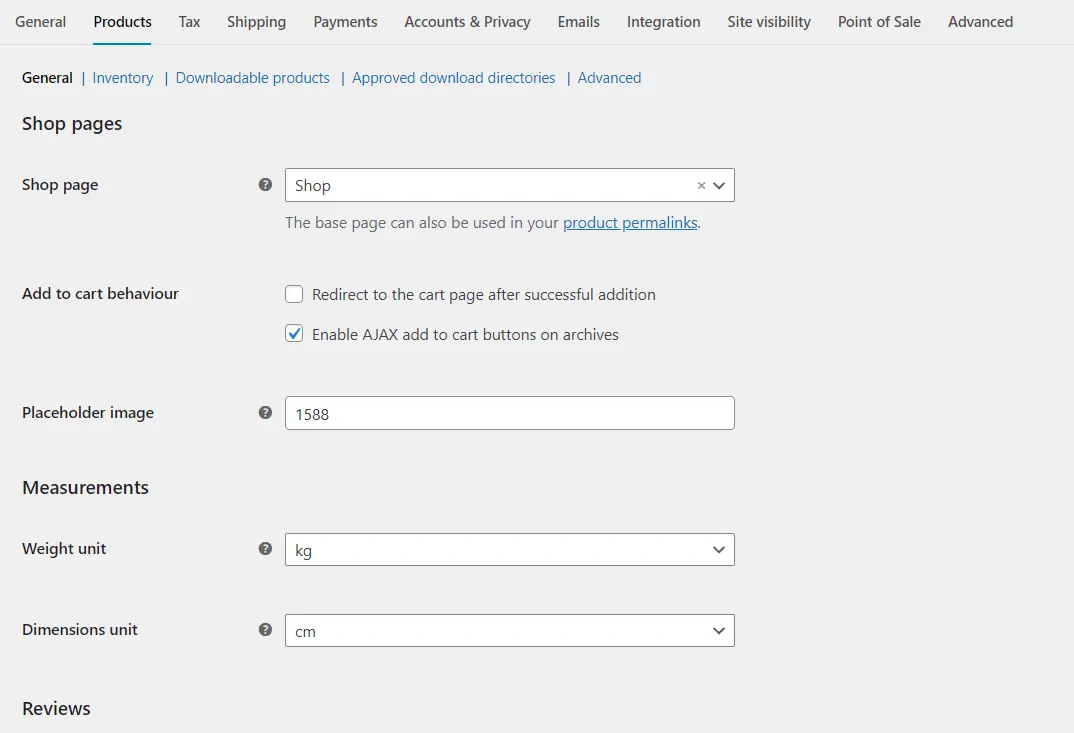
With payments and taxes in place, the store is ready for actual products.
- Create simple products for single items and variable products for anything with options like size or color.
- Write product titles and descriptions that support search rankings while still reading naturally to a shopper.
- Upload images sized to match the active theme’s product grid, since mismatched sizes distort the layout.t
- Turn on inventory tracking and set stock thresholds so the store never sells something it doesn’t have
A clean, well-organized catalog makes the store easier to browse and easier to manage as it grows.
Step 7: Configure Shipping
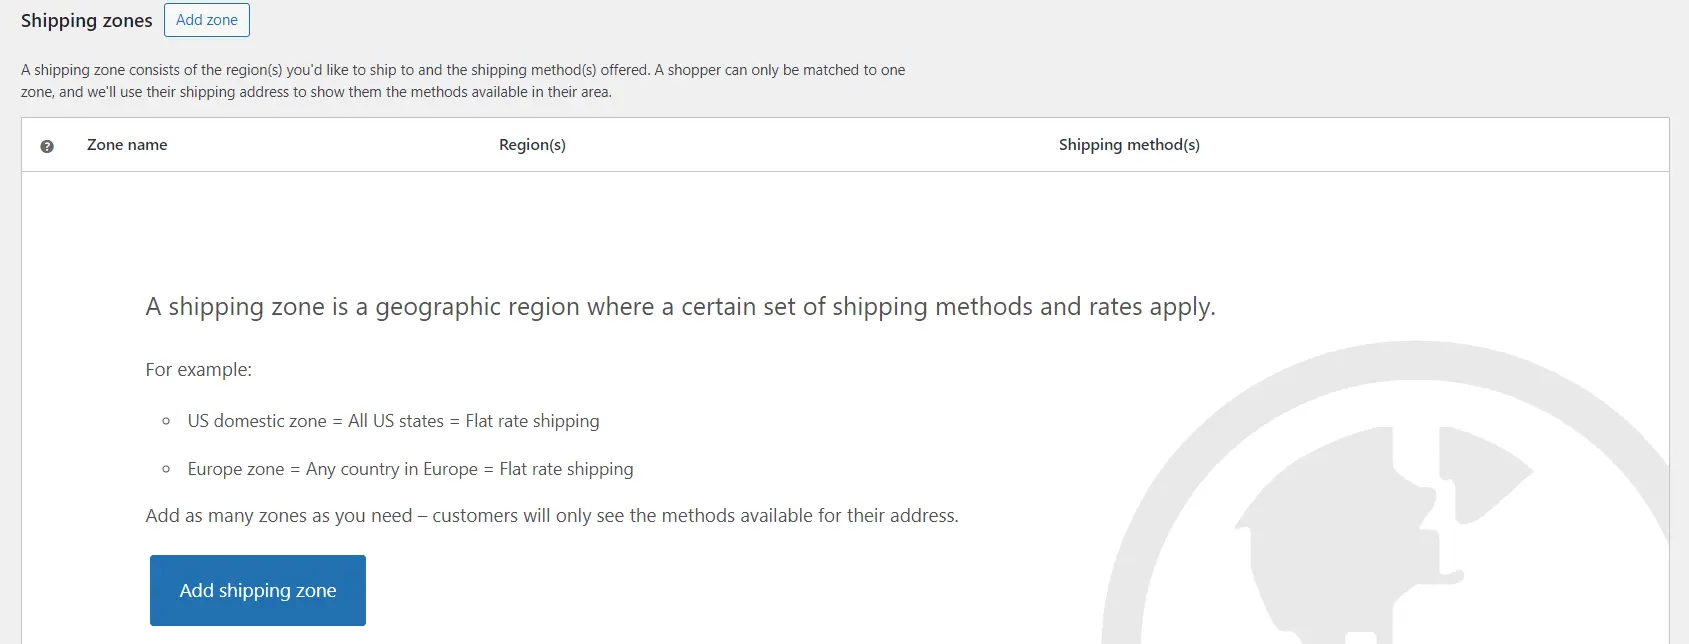
Shipping settings determine what a customer sees at checkout, so get this right before testing the full order flow.
- Build shipping zones based on where the store actually ships, not a generic default.
- Choose between flat-rate shipping, free shipping on orders above a set amount, or real-time carrier rates.
- Fill in accurate package dimensions and weight for every product, since missing data breaks the rate calculation.
- Run a test order to check that shipping costs match what a real customer would pay.
Shipping mistakes show up fast once real orders start coming in, so this step deserves a careful test run.
Step 8: Choose and Customize a Theme
Design comes after the store’s core functions work, not before.
- Compare free options like Storefront against premium themes built specifically for conversion.
- Check mobile responsiveness, page speed impact, and WooCommerce compatibility before committing to any theme.
- Customize the shop page, homepage, and checkout flow to match the store’s branding.
- Avoid heavy page builders that slow down checkout load times, since speed directly affects conversion.
A theme that looks great but loads slowly costs more sales than a plain theme that loads fast.
Step 9: Secure the Store Before Launch
Security gets treated as an afterthought in most setup guides. It belongs in the main flow instead.
- Turn on two-factor authentication for every admin account on the site
- Install a backup plugin that runs automated daily or weekly snapshots
- Confirm SSL runs across the entire site, not just the checkout page
- Add a spam filter to contact forms and product reviews to block bot signups
These four steps take less than an hour and prevent problems that are far harder to fix after launch.
Step 10: Test and Launch
Before the store goes live, run through the full customer experience one more time.
- Place a full test order through each payment gateway to confirm that everyone processes correctly.
- Check that the tax is calculated correctly for at least two different customer states.
- Test the mobile checkout flow on a real phone, not in a resized browser window.
- Turn off maintenance mode and submit the sitemap to Google Search Console.
Once these checks pass, the store is ready for real customers.
Common Setup Problems and How to Fix Them
Even a careful setup runs into snags. Here are the problems that come up most often, and how to fix each one.
I) Checkout Page Won’t Load or Gets Stuck Loading
- Switch to the default Storefront theme and disable every plugin except WooCommerce to isolate the conflict, since theme or plugin conflicts most often cause this.
- Open the browser console on the checkout page and look for JavaScript errors, which point to a script blocking the AJAX calls that load payment methods and totals.
- Exclude the checkout and cart pages from any caching plugin or CDN, since a cached checkout page breaks the live session.
- Turn plugins back on one at a time, testing checkout after each, until the conflicting plugin shows up.
II) White Screen or Fatal Error After Activating WooCommerce
- Check WooCommerce, then Status, for the current WP Memory Limit, since a limit under 256MB triggers this crash most of the time
- Raise the PHP memory limit through the hosting control panel or by editing wp-config.php, then try activation again
- Confirm the hosting PHP version meets WooCommerce’s minimum requirement, since plugins built for PHP 8.0 and above fail silently on older servers
- Turn on
WP_DEBUGfor a short time to capture the exact file and line number behind the crash if the memory fix doesn’t work
III) Shipping Rates Don’t Appear at Checkout
- Confirm the test address falls within an active shipping zone in WooCommerce: go to Settings > Shipping, since an address outside any zone shows no rates at all.
- Check that at least one shipping method is turned on and assigned within that zone, not just created and left inactive.
- Verify product weight and dimensions are filled in, since missing shipping data can quietly exclude a product from rate calculation.
- Clear any caching layer on the cart and checkout pages if rates show up but never update
IV) Order Confirmation Emails Aren’t Sending
- Know that WordPress relies on the basic
wp_mail()function by default, and many hosts block it or flag it as spam. - Install an SMTP plugin and connect it to a dedicated email service instead of the server’s default mail function.n
- Send a test email through the SMTP plugin’s built-in tester to confirm delivery works before launch.
- Manually move a test order from Pending to Processing to confirm WooCommerce’s own email trigger fires correctly.
V) Product Pages Return a 404 Error
- Go to Settings> Permalinks, then click Save without changing anything, which forces WordPress to regenerate the permalink structure.
- Confirm the permalink structure is set to Post Name rather than Plain, since Plain permalinks often break WooCommerce product URLs
- Check that the Shop Base and Product Category Base settings don’t overlap, as a shared base path can cause a silent conflict.
- Verify each product’s slug has no special characters or duplicate names
VI) Tax Isn’t Calculating Correctly at Checkout
- Confirm that tax rates and calculations are enabled under WooCommerce> Settings> General before checking anything else.
- Check that “Calculate tax based on” is set to the customer’s shipping address, since billing or store address settings produce different totals.
- Verify that each product has the correct tax class, since an unassigned product defaults to no tax.
- Test checkout with two different state addresses to confirm the rate actually changes based on location
FAQs
Is WooCommerce Free to Use?
The core WooCommerce plugin is free to download and install. Running a full store still costs money for hosting, a domain, and optional premium themes or extensions.
How Much Does It Actually Cost to Run a WooCommerce Store?
Hosting typically runs $10 to $30 per month for a small- to mid-sized store on a WooCommerce-built plan.
Add a domain, an SSL certificate (if not included for free), and any premium theme or plugin the store needs.
Most new stores launch for under $300 in their first year, excluding marketing spend.
Can I Use WooCommerce Without WordPress?
No. WooCommerce is a plugin built specifically for WordPress and requires an active WordPress installation to run.
Does WooCommerce Charge Transaction Fees on Top of Gateway Fees?
WooCommerce itself doesn’t charge a transaction fee. Payment gateways like Stripe and PayPal charge their own processing fee, usually around 2.9% plus 30 cents per transaction in the US.
How Long Does the Full Setup Take?
A store with a small catalog and standard settings can go live in two to three hours. Stores with complex shipping rules, large catalogs, or multi-state tax needs usually take longer.
Is WooCommerce a Good Choice for Beginners Compared to Shopify?
WooCommerce gives more control over design and features, but it needs more hands-on setup than Shopify. Shopify handles hosting and updates automatically, while WooCommerce leaves those choices to the store owner.
Beginners who want full control over customization often prefer WooCommerce. Beginners who want the fastest path to launch often prefer Shopify.
Set Up Your Online Shop With WooCommerce
A working WooCommerce store comes down to eleven sequenced steps, not eleven separate guides scattered across different sites.
Hosting, installation, payments, taxes, products, shipping, design, security, testing, and troubleshooting all connect in a specific order.
Skipping the order or skipping a step entirely leads to a store that looks finished but breaks the first time a real customer tries to check out.
The one decision from Step 1 that shapes every step after it is hosting. A store built on hosting sized correctly for WooCommerce avoids most of the slowdowns and crashes covered in the troubleshooting section above.
Look at a WooCommerce-optimized hosting plan from Truehost sized to match your product catalog, so the store you just built has the infrastructure actually to run on.