---
title: Setting Up a LAMP Stack (Linux, Apache, MySQL, PHP) on Ubuntu
description: The LAMP stack (Linux, Apache, MySQL, PHP) is a collection of software used to serve dynamic web pages and PHP applications. It consists of a Linux operating system, the Apache web server, a MySQL database for data storage, and PHP…
url: "https://truehost.com/support/knowledge-base/setting-up-a-lamp-stack-linux-apache-mysql-php-on-ubuntu/"
updated: "2024-11-01"
category: Cloud servers in Kenya
---
# Setting Up a LAMP Stack (Linux, Apache, MySQL, PHP) on Ubuntu
The LAMP stack (Linux, Apache, MySQL, PHP) is a collection of software used to serve dynamic web pages and PHP applications.
It consists of a Linux operating system, the Apache web server, a MySQL database for data storage, and PHP for handling dynamic content.
This guide will walk you through setting up a LAMP stack on a server running Ubuntu 22.04. With Ubuntu managing the Linux component, we’ll cover how to configure each of the remaining parts of the stack.
## Prerequisites
- A server with Ubuntu installed. I will use Ubuntu 22.04
- A user account with admin or sudo access
## Step 1: Installing the Apache Web Server
Apache is a popular, efficient web server that we'll use to serve pages to our visitors. Begin by updating your server’s package index:
```
sudo apt update
```

Then install apache:
```
sudo apt install apache2 -y
```
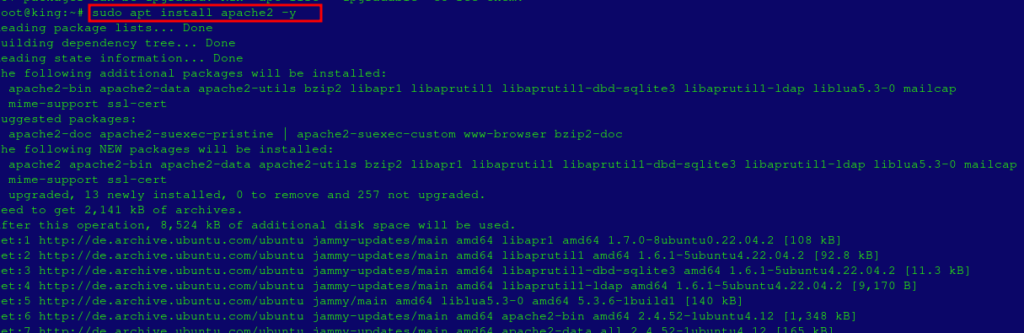
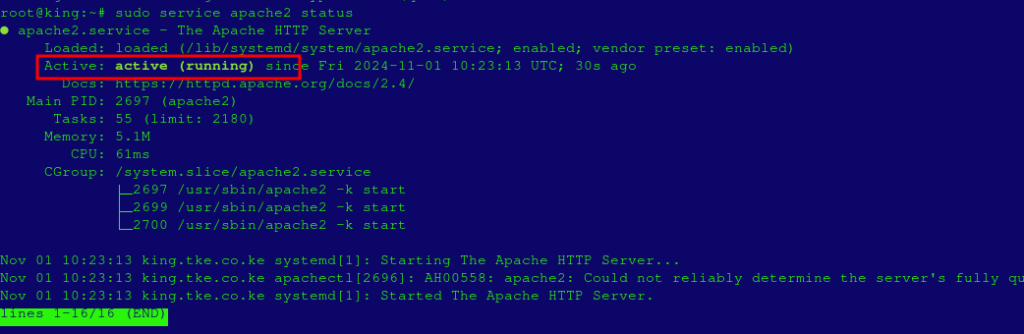
Check if Apache installed correctly by checking the Apache service status:
```
sudo service apache2 status
```
#### **Allowing Apache Through the Firewall**
If you’re using UFW (Uncomplicated Firewall), you’ll need to allow HTTP traffic through it. Check available UFW application profiles with:
```
sudo ufw app list
```

Ensure the **Apache Full** profile allows the traffic on ports **80** and **443** by running the command:
```
sudo ufw app info "Apache Full"
```

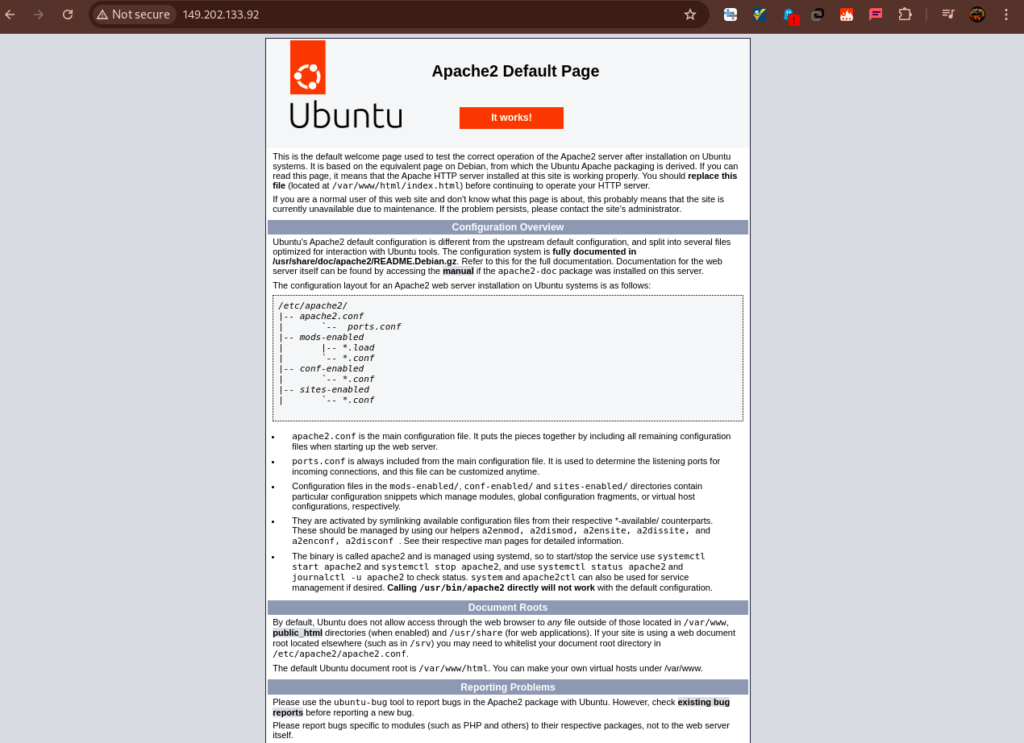
To verify that Apache is running, open your server’s public IP or domain in a web browser. If unsure about your public IP, run one of the following commands to see it.
```
ip addr show
hostname -I
```
In your browser, navigate to:
```
http://server_domain_or_ip_address
```
This should display the Apache default landing page.
## Step 2: Installing MySQL
With Apache installed, we’ll move on to installing MySQL, which will manage and store site data.
You can also use MariaDB. Please refer to **[these steps](https://truehost.com/support/knowledge-base/how-to-install-mariadb-on-ubuntu-22-04/)** on how to install MariaDB database on Ubuntu
For MySQL, run:
```
sudo apt install mysql-server -y
```
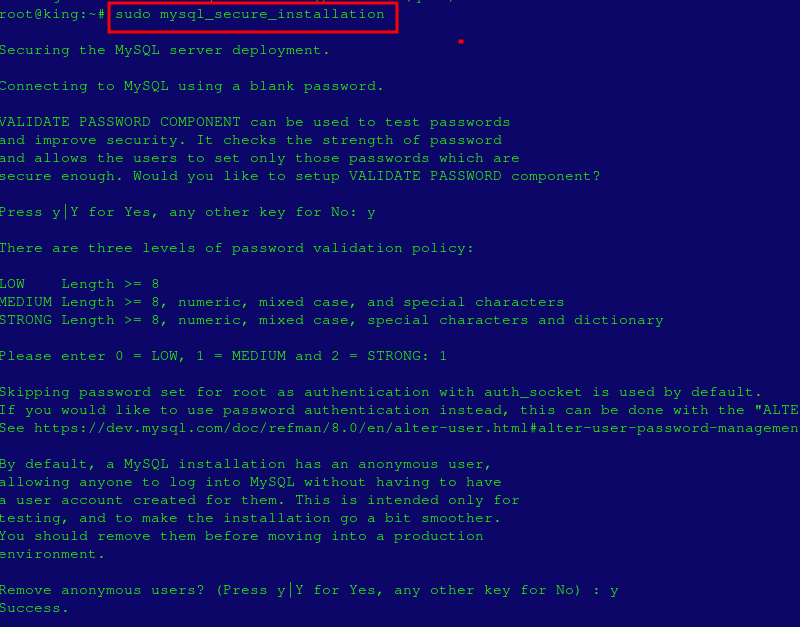
After installing MySQL, it is a good idea to run a security script included with it
```
sudo mysql_secure_installation
```
You’ll be prompted to configure the VALIDATE PASSWORD PLUGIN—type Y for yes or any other key to continue without enabling it.
If you select “yes,” you’ll be prompted to choose a level of password validation. I prefer that you choose level 1.
It is fine to select yes fort he rest of the prompts, but then you can also choose differently according to your preference.
Once done, check if you can log in to the MySQL console:
```
sudo mysql
```
This command connects to the MySQL server using the administrative database user root, indicated by sudo. The expected output is as follows:
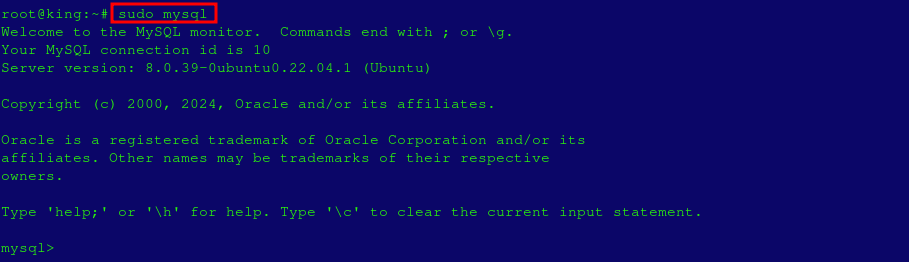
You may then run the command below to exit the console;
```
exit
```

## Step 3: Installing PHP
Next, install PHP to generate dynamic content. Apache uses **PHP-FPM** (FastCGI Process Manager) for this purpose. Install PHP and the PHP MySQL extension with:
```
sudo apt install php libapache2-mod-php php-mysql -y
```
## Step 4: Configuring Apache to Use PHP
We’ll configure apache to handle PHP requests. By default, Apache uses the directory `/var/www/html` for its root web directory.
```
sudo vi /etc/apache2/mods-enabled/dir.conf
```
Modify the line so index.php is first:
```
DirectoryIndex index.php index.html index.cgi index.pl index.xhtml index.htm
```
Also, we’ll create a new directory for our website and set up a configuration file.
In the steps below, remember to replace *your_domain* with your actual domain or subdomain. I will use *doll.tke.co.ke*
1. Create the web root directory:
```
sudo mkdir /var/www/doll.tke.co.ke
```
2. Assign ownership of the directory to the current user:
```
sudo chown -R $USER:$USER /var/www/doll.tke.co.ke
```
3. Open a new configuration file in the **sites-available** directory:
```
sudo vi /etc/apache2/sites-available/doll.tke.co.ke.conf
```
4. Add the following configuration:
```
ServerName doll.tke.co.ke
ServerAlias www.doll.tke.co.ke
DocumentRoot /var/www/your_domain
Options Indexes FollowSymLinks
AllowOverride All
Require all granted
DirectoryIndex index.php index.html index.htm
ErrorLog ${APACHE_LOG_DIR}/error.log
CustomLog ${APACHE_LOG_DIR}/access.log combined
SetHandler application/x-httpd-php
# Deny access to .htaccess files
Require all denied
```
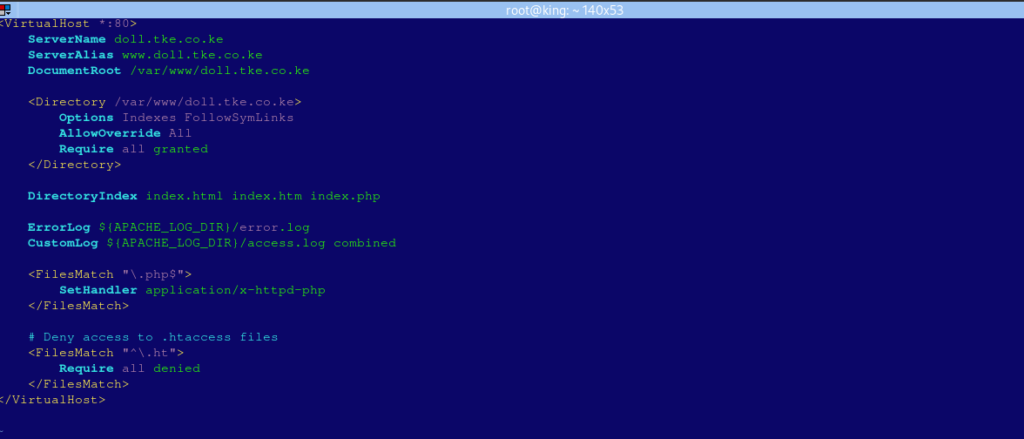
Below is what each of the directives do
- **ServerName and ServerAlias**: Define the domain names for this virtual host.
- **DocumentRoot**: Points to the directory where your website files are stored.
- **Directory Directive**: Sets permissions for the document root.
- **DirectoryIndex**: Specifies which files to serve when a directory is requested.
- **ErrorLog and CustomLog**: Directives to log errors and access requests.
- **FilesMatch**: Applies a handler for PHP files.
- **Deny access to .htaccess files**: Prevents access to `.ht` files for security.
5. Save and close the file (in **vi**, press **Esc**, type `:wq`, and press **Enter**).
6. Enable your configuration by running the following command
```
sudo a2ensite doll.tke.co.ke.conf
sudo ln -s /etc/apache2/sites-available/doll.tke.co.ke.conf /etc/apache2/sites-enabled/
```
7. Unlink the default configuration:
```
sudo a2dissite 000-default.conf
```
8. Test your configuration for syntax errors:
```
sudo apachectl configtest
```

9. Restart Apache to apply the changes:
```
sudo systemctl restart apache2
```
10. Add a sample **index.html** file to verify that your new server block works:
```
vi /var/www/doll.tke.co.ke/index.html
```
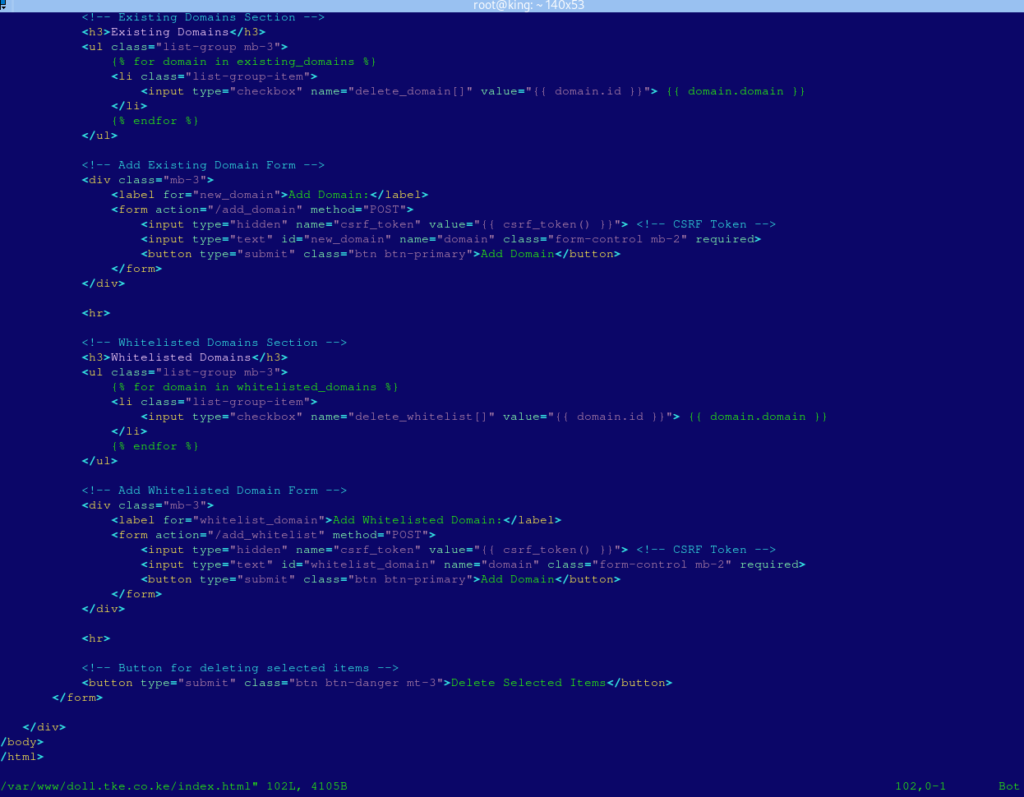
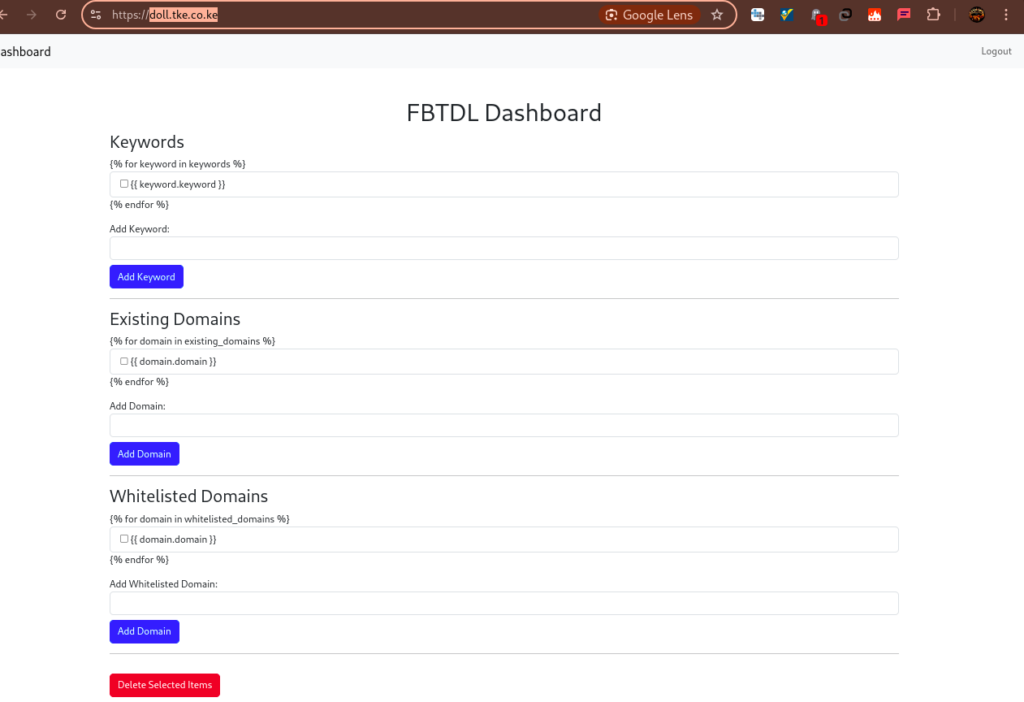
11. Visit `http://doll.tke.co.ke` in your browser to confirm.
## Step 5: Testing PHP with Apache
To test PHP, create a file called **info.php** in your document root:
```
vi /var/www/doll.tke.co.ke/info.php
```
Add the following code:
```
```
Access this page by navigating to:
```
http://doll.tke.co.ke/info.php
```
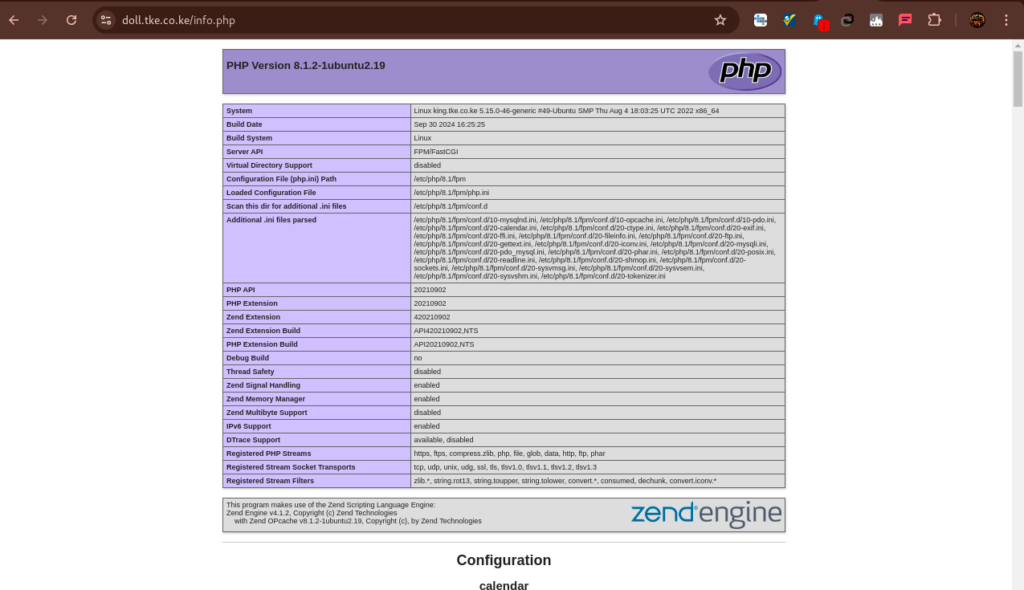
After confirming, delete the file to avoid exposing sensitive information:
```
sudo rm /var/www/doll.tke.co.ke/info.php
```
## Step 6: Testing Database Connection from PHP
Create a test database and user in MySQL:
**Log in to MySQL:**
```
sudo mysql
```
**Create a new database:**
- Replace test_db with your preferred database name
```
CREATE DATABASE test_db;
```

**Add a new user:**
- Replace test_user with your preferred user name
```
CREATE USER 'test_user'@'%' IDENTIFIED WITH mysql_native_password BY 'password';
```

**Note:**When running the command you may get this error ERROR 1819 (HY000): Your password does not satisfy the current policy requirements
In that case, just ensure that your password has a mixture of special characters, numbers, uppercase and lowercase characters, then re-run it.
**Grant the user privileges on the new database:**
```
GRANT ALL ON test_db.* TO 'test_user'@'%';
```

**Exit MySQL:**
```
exit
```
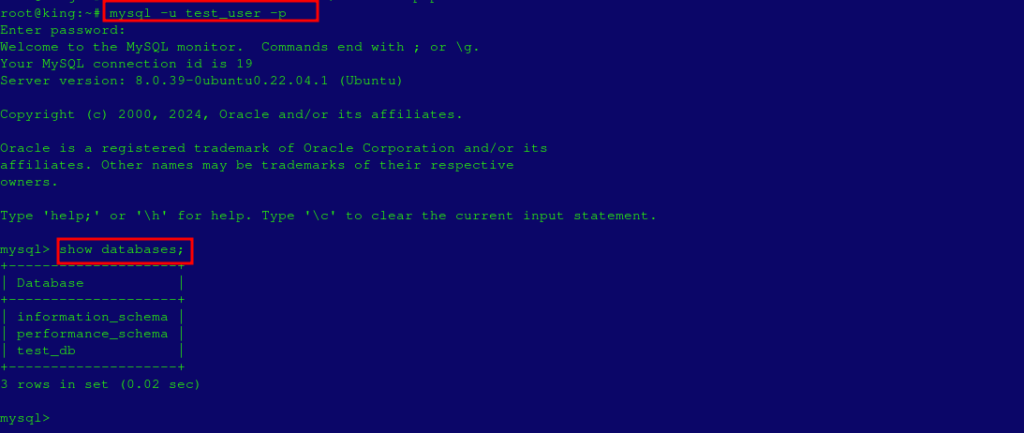
To confirm that the new user has the correct permissions, log into the MySQL console again using the custom user credentials.
Be sure to include the `-p` flag in the command, as it will prompt for the password set when creating the "test_user" user.
```
mysql -u test_user -p
```
Enter your password and confirm to access test_DB.
You can then check the databases available;
```
SHOW DATABASES;
```
Let’s now create a test table named “**tech_list**.” Execute the following statement from the MySQL console:
```
CREATE TABLE test_db.tech_list (tech_id INT AUTO_INCREMENT,technology VARCHAR(255),PRIMARY KEY(tech_id));
```

You may now insert values into the table by running multiple inatances of the command below
```
INSERT INTO test_db.tech_list (technology) VALUES ("IOT");
INSERT INTO test_db.tech_list (technology) VALUES ("Cloud");
INSERT INTO test_db.tech_list (technology) VALUES ("DevOPs");
INSERT INTO test_db.tech_list (technology) VALUES ("ML");
INSERT INTO test_db.tech_list (technology) VALUES ("Networking");
```

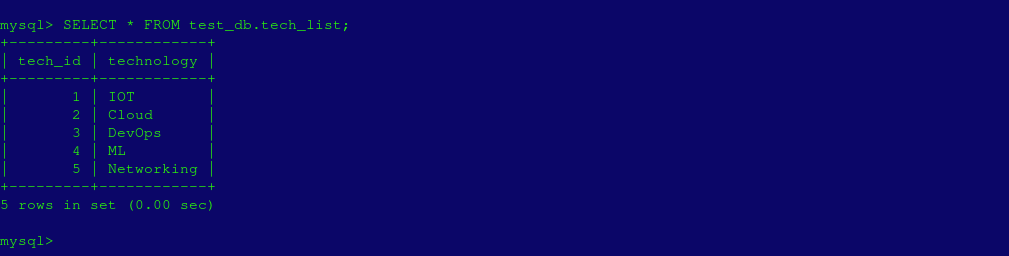
You could check the entries using the command below;
```
SELECT * FROM test_db.tech_list;
```
You may exit the MySQL console using the **exit** command.
## Test MySQL Connection
To test, create a PHP script to connect to MySQL:
Open a file called **testlist.php**:
```
vi /var/www/doll.tke.co.ke/testlist.php
```
Add PHP code to connect and query. In the code below, remember to replace the **dummy database**details with **your own**.
```
connect_error) {
die("Connection failed: " . $conn->connect_error);
}
$sql = "SELECT * FROM tech_list";
$result = $conn->query($sql);
if ($result->num_rows > 0) {
while($row = $result->fetch_assoc()) {
echo $row["tech_id"] . ": Technology: " . $row["technology"] . "
";
}
} else {
echo "0 results";
}
$conn->close();
?>
```
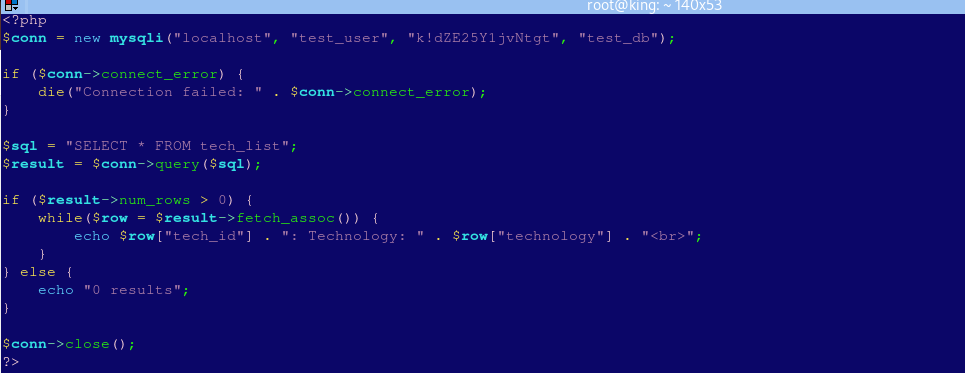
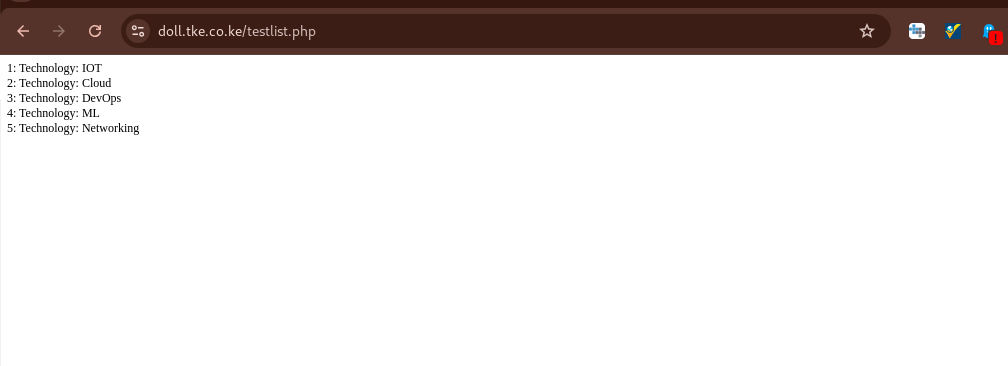
Access this script:
```
http://doll.tke.co.ke/testlist.php
```
## Author's final word
Congratulations! You’ve successfully set up a LAMP stack on Ubuntu 20.04, creating a powerful foundation to host PHP-based applications. This configuration, combining Apache and MySQL, is optimized for speed and security in dynamic web hosting environments.