
Moodle is a popular Learning Management System (LMS). Unfortunately, the upgrade of Moodle is not as seamless as popular CMS such as WordPress.
The guide below will assist with how to upgrade Moodle.
Note: Before you commence, please take a backup of your Moodle site. The upgrade process may result in incompatibilities that will cause your site downtime. Use this guide to backup your Moodle site
Now, follow these steps
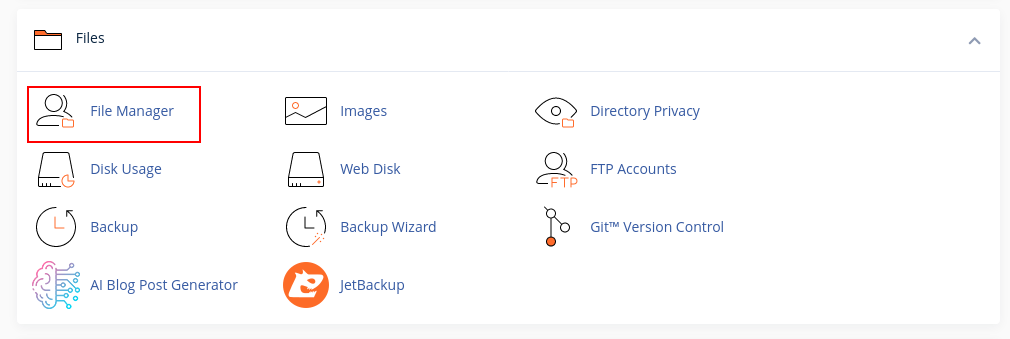
1.Login to cPanel and go to File Manager
2.Go to the your public_html folder and create a new folder. Call it moodle.old
3.Move all files inside public_html folder into the moodle.old folder
4.Download the required Moodle version from https://download.moodle.org/ and upload it to your cPanel public_html folder.
5.Extract the new moodle zip file and move the contents of the folder to the exact same location your old Moodle files were.
6.Copy the old config.php file from the files you backed up at moodle.old folder. See below
7.Next, if you added any new plugins to your site, copy them over from moodle.old/blocks folder to your new installation
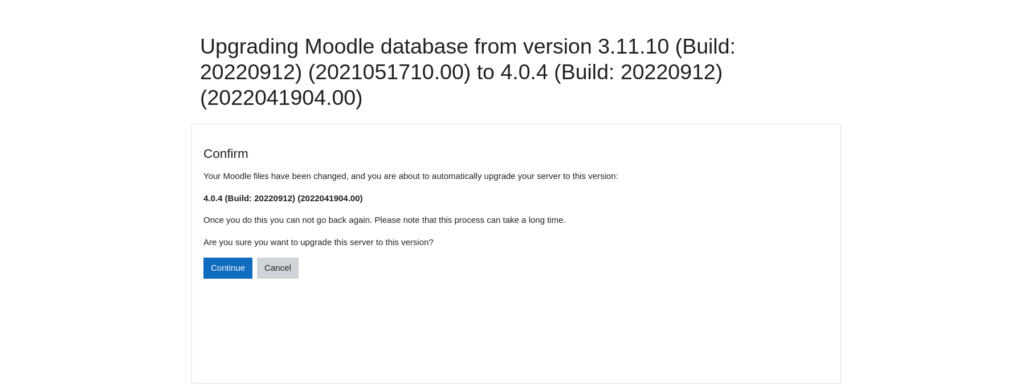
8.Next, access your moodle admin page to complete the upgrade. Click Continue then Continue again
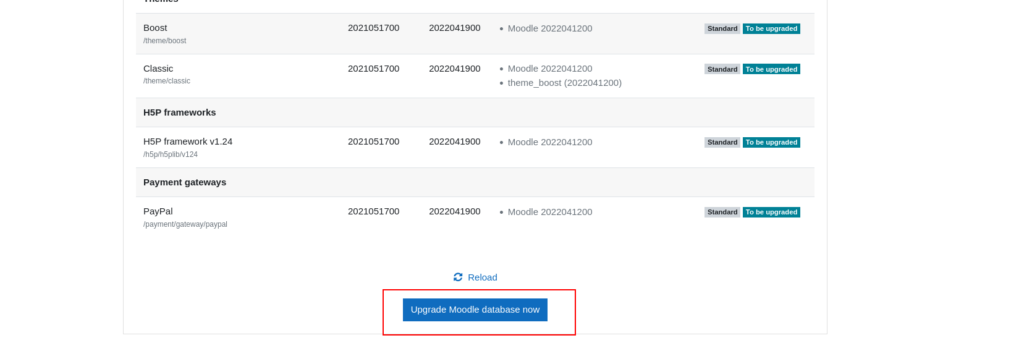
8.Next, a plugins page will be displayed for you to see a summary of plugins and actions that will be taken on them. Scroll down this page and click Upgrade Moodle database now
9. Allow sometime as upgrade completes. Progress will be shown on your browser. Once done, click Continue
Congratulations! You have successfully updated your Moodle Installation.

Leave A Comment?