Do you want your emails to look professional and stop hearing clients say they never got your messages?
Or maybe your email campaigns keep failing, and you’re tired of seeing them land in spam. You’ve been using a generic address that makes your messages look unofficial, and now you want an email with your domain name, but you’re not sure how to set it up.
This article will show you exactly how to do it.
When you set up email with your domain name, your messages become clear, organized, secure, and more likely to reach the right inbox.
This guide will walk you step by step through the full setup, so your email works fast, stays safe, and makes your business look professional from the first message.
Ready?
1) Pick Your Email Hosting Option
You can’t use your domain for email without a place to store your messages. This is called email hosting, and it keeps your emails safe, lets you send and receive without delays, and ensures they don’t get lost.
Here are factors to consider when picking your email hosting option.
1.1 Cost
Some email hosts are free, while others charge a monthly fee. Free options might be enough if you only need one address.
Paid plans give extra storage, better security, and faster support. Email hosting costs $1 to 25$ a month, perfect for freelancers to big corporations.
1.2 Storage
Your inbox needs space. If it fills up, you can’t get new emails. A good starting point is 30GB.
1.3 Speed
Slow email servers mean delays in sending or receiving messages. A fast host keeps your communication smooth and reliable.
1.4 Security
Email is one of the main ways malware spreads. 94% of malware comes through email. Look for hosts with built-in spam filters and security features like SPF, DKIM, and DMARC.
1.5 Number of Accounts
Think about how many email addresses you need. Each extra account gives you flexibility, like separating general inquiries from personal emails.
Once you pick your host, you’re ready to create your email account.
2) Create Your Email Account
Now that you’ve picked your host, it’s time to create your email account. This is the address you’ll use to send and receive messages from your domain, like info@yourdomain.com.
Let’s create your professional business account.
2.1 Log In
Start by logging into your hosting panel or email provider. You’ll usually see an option called “Email Accounts”. Click “Add New” or “Create”.
2.2 Choose Your Email Name
Pick a name that is simple and professional. For example, yourname@yourdomain.com works for personal emails, while info@yourdomain.com or support@yourdomain.com works if you expect messages from clients or customers.
2.3 Set a Strong Password
Your password protects your inbox. Use a mix of letters, numbers, and symbols. Some hosts also offer two-factor authentication for extra security.
2.4 Add Extra Accounts if Needed
If you want separate addresses for different purposes, you can create multiple accounts now. For instance, one for general inquiries and another for newsletters.
On average, businesses with multiple accounts report smoother communication and faster responses, which makes managing emails easier.
2.5 Confirm and Test
After creating your account, send a quick test email to yourself. Make sure it sends and arrives correctly. This simple check prevents frustration later.
Once your email account is active, the next step is making sure it can actually send and receive messages by updating your MX records.
3) Update Your MX Records
Creating your email account isn’t enough. You also need to tell the internet where to deliver your messages. This is done through MX records, which act like the address label for your inbox.
Without them, emails can bounce or land in spam.
3.1 Find Your DNS Settings
Go to where your domain is registered, like your control panel or Truehost dashboard, and look for the DNS settings or zone editor.
This is where all the instructions for your domain live.
3.2 Remove Old MX Records
If you have any old MX records, delete them. Leaving old records can confuse email servers, making delivery slow or unreliable. Failed emails are caused by misconfigured DNS or MX records, so taking this step seriously prevents headaches.
3.3 Add New MX Records
Your email host provides specific MX records. Copy them exactly and paste them into your DNS editor. This tells the internet which server is now responsible for your email. Some hosts also give priority numbers for the records; the higher priority goes first.
3.4 Save Changes and Double-Check
After updating, save your changes and verify that everything matches what your host gave you. Mistakes here are a common reason emails get lost.
3.5 Wait for Propagation
DNS changes don’t take effect instantly. Usually, it takes 5–30 minutes, but sometimes up to 24 hours. During this time, emails might not reach you. Be patient and avoid redoing the steps unless necessary.
Once your MX records are set, the next step is securing your emails so they’re not flagged as spam.
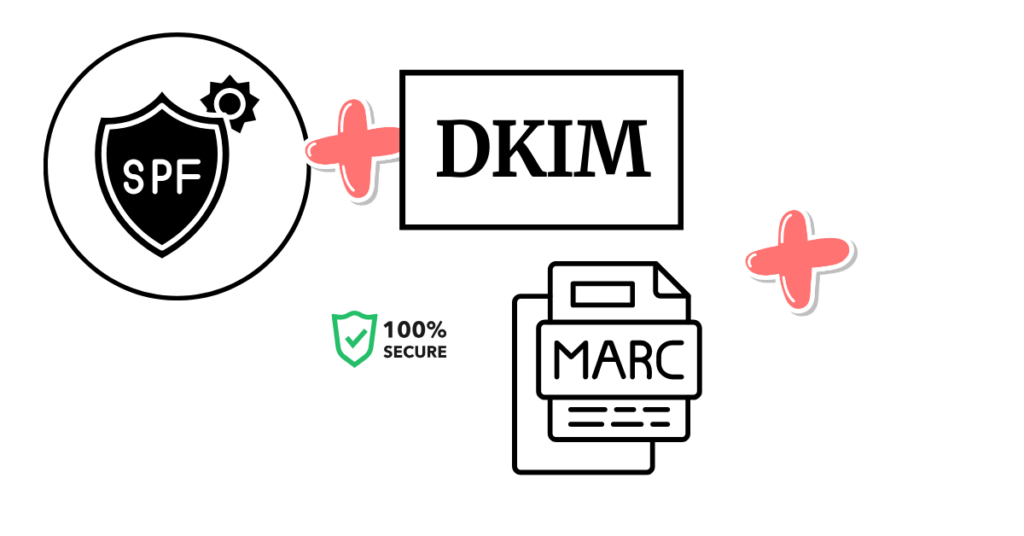
4) Add SPF, DKIM, and DMARC for Security and Delivery
Once your MX records are set, the next step is making sure your emails actually reach the inbox and aren’t flagged as spam.
This is where SPF, DKIM, and DMARC come in. They are like security badges for your email.
4.1 SPF (Sender Policy Framework)
SPF tells email servers which servers are allowed to send emails on behalf of your domain. Without it, your messages could be marked as spam.
4.2 DKIM (DomainKeys Identified Mail)
DKIM adds a digital signature to your emails. This confirms that the email wasn’t tampered with during delivery.
4.3 DMARC (Domain-based Message Authentication, Reporting, and Conformance)
DMARC ties SPF and DKIM together and gives instructions to email servers on what to do if a message fails authentication. Even a simple DMARC rule helps protect your domain from being used in phishing attacks.
How to Set Them Up
Your email provider gives you the exact records to add to your DNS. Copy the values and paste them into your DNS editor, then save. Most providers also have guides for one-click setup.
Double-Check Everything
After saving, test your setup using online tools. Properly configured SPF, DKIM, and DMARC make your email look professional and trustworthy. They dramatically reduce the chance of your emails landing in spam.
5) Wait for DNS Propagation
After updating your MX, SPF, DKIM, and DMARC records, your email isn’t fully ready yet. The changes you made need time to travel across the internet.
This process is called DNS propagation.
How Long It Take
Propagation usually takes 5–30 minutes, but sometimes it can take up to 24 hours. During this time, some emails might arrive instantly while others could be delayed.
What to Do While Waiting
You can check that your records are correct using online DNS tools. This ensures that all your updates are visible globally. Avoid making repeated changes during propagation. Changing the records too often can actually slow things down.
Why It Happens
Every device and server on the internet keeps a local copy of DNS records. When you update your MX or security records, these devices take time to refresh.
As a result, some servers might still use the old information for a while.
Quick Tips
- Double-check your entries before saving
- Test sending emails to a separate account to see if they arrive.
- Be patient and plan propagation during a period when immediate email access isn’t critical.
Once propagation finishes, your email with your domain name will be fully functional. You’ll be able to send and receive messages reliably, and you can move on to logging in and testing your webmail.
6) Log in to Your Webmail
After DNS propagation, your email is technically ready. The next step is logging into your webmail so you can start sending and receiving messages.
6.1 Find Your Webmail Link
Your provider gives a URL to access your email, often something like webmail.yourdomain.com.
Bookmark this link. It’s the place you’ll check your emails if you’re not using an app on your phone or computer.
6.2 Enter Your Credentials
Type in your new email address and password. If your provider supports two-factor authentication, turn it on for extra security.
6.3 Test Sending and Receiving
Send a test email to another account you own. Then, reply to it. This confirms that your email with your domain name is working correctly and that emails aren’t landing in spam.
6.4 Explore Webmail Features
Most webmail services have built-in tools like folders, filters, and signature settings. Take a few minutes to get familiar with them.
Using folders or labels can improve organization and prevent important messages from getting lost.
6.5 Troubleshooting Tips
If emails aren’t sending or arriving, check your MX, SPF, DKIM, and DMARC records again. Sometimes propagation isn’t fully complete, or a typo in the records can block delivery.
Once your webmail works, the next step is connecting your email to your phone or laptop. This lets you read and send emails wherever you go.
7) Connect Email to Your Phone or Laptop

Checking email only in webmail can be slow. Connecting your email to your domain name to your phone or laptop lets you read and respond anywhere.
7.1 Open Your Mail App
Most phones and computers have a built-in mail app. Open it and choose “Add New Account.”
7.2 Enter Your Email and Password
Type your full email address and password. Make sure you enter them precisely as created.
7.3 Use IMAP Settings
When prompted, select IMAP. IMAP keeps your emails synced across all devices, so deleting or reading a message on your phone updates it on your laptop too.
POP, on the other hand, only downloads messages to one device, which can cause confusion.
7.4 Enter Server Settings
Your email provider gives the incoming and outgoing server names. Copy these exactly. This ensures emails are sent and received correctly.
Without this, messages can bounce or get stuck.
7.5 Test the Connection
Send a quick test email to yourself and reply. Make sure everything syncs between devices. Proper connection prevents lost messages, missed replies, and confusion about which emails have been read.
Tips for Smooth Syncing
- Enable notifications on your phone for new messages.
- Check your folders to ensure everything is syncing correctly.
- Update your mail app regularly to avoid security issues.
Once your email is connected to your devices, you can move on to optional features like forwarding and adding a professional signature.
8) Set Up Forwarding (Optional)
Once your email is working on your devices, forward messages to another inbox you check more often.
Forwarding keeps everything in one place without missing important emails.
Why Forwarding Helps
If you manage multiple accounts, forwarding lets you see everything in a single inbox. Studies show that around 38% of professionals check multiple inboxes daily, so forwarding saves time and prevents missed messages.
How to Turn It On
Go to your hosting panel or webmail settings. Look for “Forwarding” or “Email Forwarding.” Enter the email address you want your messages to go to.
Keep Copies in Your Original Inbox
Most providers let you keep a copy in your domain inbox while forwarding. This is useful if you ever need to access emails from the original account.
Use Forwarding for Teams
If you have multiple people handling the same email address, forwarding can distribute incoming messages automatically. This makes collaboration easier and ensures no email is missed.
Test Forwarding
Send a test email to your domain email and check that it arrives in the forwarded inbox. Make sure the message shows up quickly and without errors. Forwarding should be seamless, so you don’t have to check multiple accounts constantly.
After setting up forwarding, your emails are not only accessible everywhere but also organized in the way that works best for you.
The next step is personalizing your emails with a signature and brand look.
9) Add Your Signature and Brand Look
Your emails are no longer just messages; they’re a reflection of you and your brand. Adding a signature and a consistent look makes every email look professional.
9.1 Create a Simple Signature
Include your name, role, and website link. You can also add a phone number if needed.
9.2 Add Your Logo
If your email host allows it, add your logo to the signature. This reinforces your brand every time you send a message. Visual branding helps people recognize your emails instantly.
9.3 Keep It Clean
Don’t overcrowd your signature. Stick to essentials: name, role, website, and logo. Too many images or links can trigger spam filters.
9.4 Set It Across Devices
Once you create a signature, make sure it appears on both webmail and your phone or laptop mail apps.
This ensures consistency no matter where you send your emails from.
9.5 Test Your Signature
Send a test email to yourself and a colleague to check formatting, images, and links. Make adjustments if anything looks off. This guarantees that every recipient sees your professional setup.
After adding your signature and brand look, your email with your domain name feels complete and professional.
The final step is testing everything to make sure it works perfectly.
10) Test Everything
Now that your email is set up, it’s time to make sure everything works as it should. Testing prevents issues like lost emails, delivery to spam, or formatting problems.
10.1 Send a Test to Yourself
Start by sending an email from your new address to itself. Check that it arrives correctly, formatting is intact, and your signature appears properly.
10.2 Test Sending to Others
Next, send an email to a friend, colleague, or alternate account. Ask them to reply. This ensures your new business email can send and receive messages without issues.
10.3 Check the Spam Folder
Sometimes emails land in spam even with correct MX, SPF, DKIM, and DMARC records. If that happens, double-check your DNS settings and email provider instructions.
10.4 Test on Devices
Open your email on your phone, tablet, and computer. Confirm messages sync across all devices. This ensures IMAP settings are correct and you don’t miss anything important.
Final Adjustments
Make minor tweaks to your signature, folders, or forwarding settings if needed. Once everything passes these tests, your setup is complete.
With testing finished, your email with your domain name is fully functional, secure, and professional. You’re ready to communicate confidently, and you can now use it for both personal and business purposes.
Ready to Get Started?
If you want a fast, reliable email setup with your own domain, Truehost can help you get it running in minutes, with secure hosting, easy DNS management, and 24/7 support. Get it now.
How to Set Up Email With Your Domain Name FAQs
Using email with your domain name means your email matches your website name, like info@yourdomain.com. This makes your business look real and trusted.
It helps your messages look professional, reach inboxes more easily, and keep your business and personal mail separate.
Yes. You need an email host to set up an email with your domain name. This can be cPanel email or Truehost email hosting.
To create an email account for your domain, log in to your hosting panel, open “Email Accounts,” click “Create,” and add the name you want. That’s it.
MX records tell the internet where to send your email. If they’re wrong, your email will not work.
Most changes take 5–30 minutes. In rare cases, it can take up to 24 hours.
They protect your email from spam and help your messages land in the inbox instead of the spam folder.
Yes. You can add it to any mail app using the IMAP settings your email host gives you.
Yes. You can turn on forwarding in your hosting panel and send all mail to any inbox you prefer.