Domain RegistrationFind and register the perfect domain for your website.
 .COM DomainChoose a widely recognized domain to build global credibility.
 Domain TransferSeamless domain transfers with zero downtime and complete control.
 All TLDsFind and register your perfect domain. Choose from local and global extensions.
 SSL CertificatesKeep your website safe with reliable SSL Certificates that protect customer data and build trust.
 whoisCheck domain ownership details, expiration dates, and registrar information.
 US DomainRegister a .US domain and build trust in the USA.
 Web HostingEverything your website needs to run smoothly
 WordPress HostingWordPress hosting that just works
 Windows HostingReliable hosting for Windows environments
 Reseller HostingTurn hosting into your business
 Email HostingEmail that looks professional and works anywhere
 cPanel HostingFull control of your hosting with cPanel
 Affiliate ProgramJoin as a partner and earn commissions on every referral you send our way.
 Vps HostingScalable virtual servers that expand as you need.
 Dedicated ServersGet complete access and full control over your dedicated physical server.
 Managed vpsNot tech-savvy? We will take care of everything with our fully managed VPS hosting for you.
 AI Website BuilderCreate stunning websites in seconds with AI.
 Online ShopSet up a professional online store. No coding required.
 Web design serviceGet a tailored website designed to match your brand and support your goals.
 BlogFind helpful guides on web hosting, online selling, digital marketing, and more.
 Contact USYou can reach us anytime, day or night, through chat or email.
 SupportBrowse helpful guides and answers for all of our services.
A brand new VPS gives you a blank terminal and nothing else. No dashboard, no wizard, just a blinking cursor and an IP address.
One wrong step here can lock you out completely. Or it can leave the door open for the first bot that scans your IP.
Most guides only cover half of this process. People end up piecing together five different tutorials and still miss a step.
This guide walks the full path, from your first login to a server ready for real traffic.
Follow it in order, and your Ubuntu VPS ends up secure and ready to use.
What You Need Before You Start
Before you connect to anything, gather a few basics.
You need your server’s IP address and either a root password or an SSH key from your hosting provider. Your provider’s control panel holds these details after signup.
Pick your resources based on what you plan to run. A basic website runs fine on 1GB of RAM. An app with a database or heavier traffic needs 2GB or more.
You also need an SSH client on your own computer. Mac and Linux users already have Terminal built in. Windows users can install PuTTY or use the newer Windows Terminal.
Stick with an Ubuntu LTS release for this setup. Long-term support versions get five years of security patches. That keeps your server stable for far longer than a standard release.
Step 1: Connect to Your Ubuntu VPS for the First Time
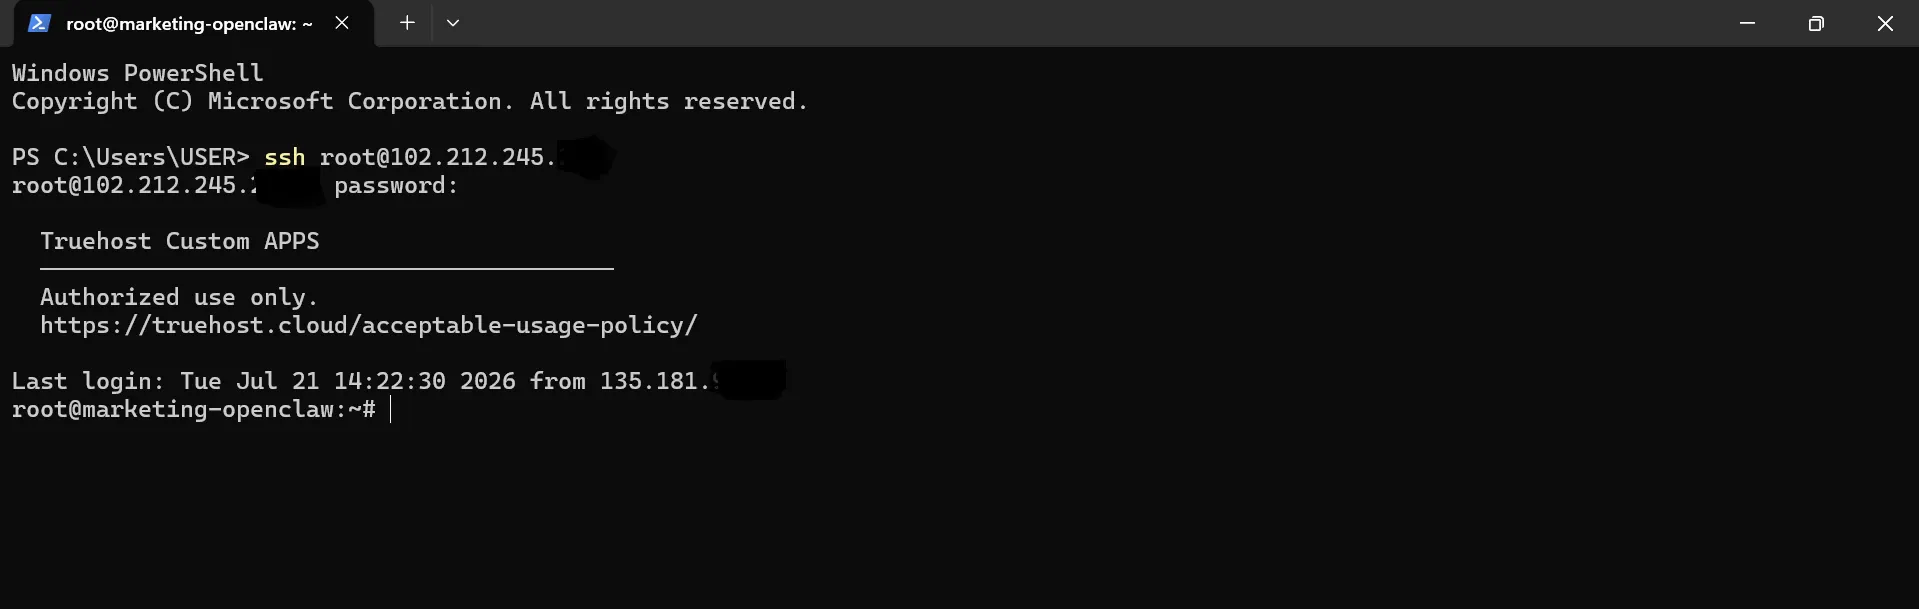
Open your SSH client and run this command, swapping in your own IP address:
ssh root@your-server-ipThe first time you connect, your client asks you to confirm the server’s fingerprint.
Type “yes” and press Enter to continue. Enter your root password when prompted, or your client will use your SSH key automatically if one is set up.
A few errors show up often at this stage. “Permission denied” usually indicates an incorrect password or key file.
“Connection timed out” often means the wrong IP address or a firewall blocking port 22 on your end. Double-check both before trying again.
Once logged in, you land at a root shell prompt. That confirms the connection worked.
Step 2: Update Ubuntu and Set the Hostname
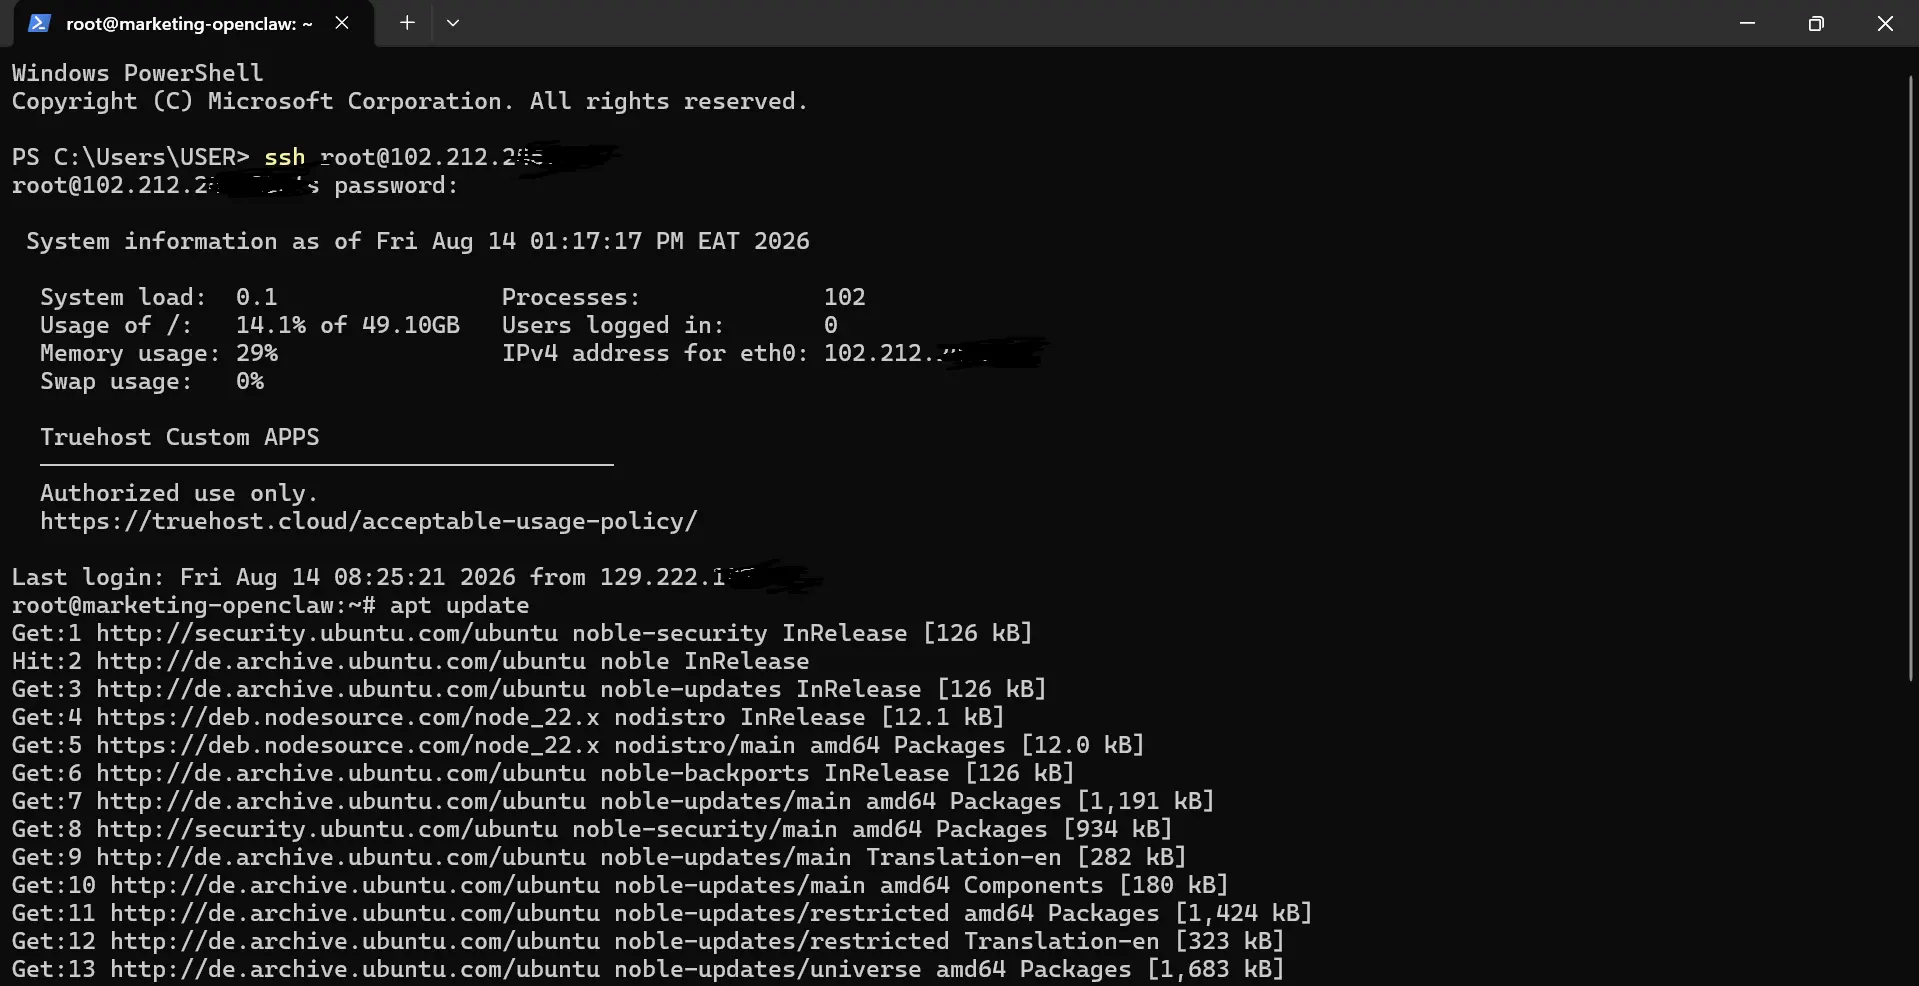
Run these two commands first, before installing anything else:
apt updateapt upgrade -yThis pulls the latest package list and installs any pending security patches. Skipping this step leaves known vulnerabilities open on a server that’s barely a few minutes old.
Next, set your hostname so the server identifies itself correctly on your network:
hostnamectl set-hostname your-hostname

Set the correct timezone too, using:

dpkg-reconfigure tzdata
Pick your region from the list that appears. Finally, turn on automatic security updates so future patches install without manual work:
apt install unattended-upgradesStep 3: Create a Non-Root User With Sudo Privileges
Running everything as root is risky. One mistyped command can wipe out data or break the whole system. Create a separate user account instead.
adduser yourusernameFollow the prompts to set a password. Add this new user to the sudo group so they can run admin commands when needed:
usermod -aG sudo yourusernameTest this before you log out of root. Switch to the new account and confirm sudo access works:
su - yourusername

sudo whoami
If the command returns “root,” sudo access works correctly.
Keep your original root session open until this check passes, so you don’t get locked out by mistake.
Step 4: Set Up SSH Key Authentication
Passwords alone leave your server open to brute-force attempts. SSH keys give you a stronger, more convenient way to log in.
On your local computer, generate a key pair:
ssh-keygen -t ed25519Ed25519 keys are smaller and faster than older RSA keys, while still offering strong protection.
Press enter to accept the default file location, and add a passphrase if you want extra protection.
Copy your public key to the server:
ssh-copy-id yourusername@your-server-ipLog out, then log back in using SSH to confirm the key works before you continue:
ssh yourusername@your-server-ipNever share your private key file with anyone. Only the public key should ever leave your computer.
Step 5: Disable Root Login and Password Authentication
Once your SSH key login works, close the password-based root login for good. Open the SSH configuration file:
sudo nano /etc/ssh/sshd_configFind and change these two lines:
PermitRootLogin no

PasswordAuthentication no
Save the file and restart the SSH service to apply the changes:
sudo systemctl restart sshBefore you close your current session, open a fresh terminal window and test a new login attempt.
Confirm your SSH key still gets you in, and that password login now fails. Keep your original session open until that test passes.
Step 6: Configure the Firewall With UFW
UFW gives you a simple way to control which ports stay open on your server. Start by allowing SSH so you don’t lock yourself out:
sudo ufw allow OpenSSHThen turn the firewall on:
sudo ufw enableAdd rules for any other services you plan to run, like a web server:
sudo ufw allow 80

sudo ufw allow 443
Check your current rules at any point with:
sudo ufw statusAdjust these rules later as you add new applications. Only open the ports your server actually uses, and leave everything else closed by default.
Step 7: Harden the Server Against Brute-Force Attacks
Fail2Ban watches your login attempts and blocks IP addresses that fail repeatedly. Install it with:
sudo apt install fail2banIt runs with sensible default settings right after installation.
You can adjust the ban time and retry limits in its configuration file. That file lives at /etc/fail2ban/jail.local.
Changing your SSH port from the default 22 reduces automated scanning attempts, though it’s optional. If you do this, update your UFW rules to match the new port.
Check who’s been trying to log in with:
sudo fail2ban-client status sshdReview this occasionally so you know what’s hitting your server.
Troubleshooting Common Setup Issues

Every step in this guide can hit a snag. Here’s how to spot the problem fast and fix it without losing access to your server.
1) “Permission Denied” When You Try to Log In
This error shows up in two forms: permission denied (password) or permission denied (publickey). Both point to an authentication mismatch, not a broken server.
- Check for typos in your username or IP address first, since small mistakes cause most of these errors.
- Confirm you’re using the right key file if key-based login is set up
- Log in through your provider’s web console to test the password directly, bypassing SSH entirely
- If the key variant appears, confirm your public key actually made it into
~/.ssh/authorized_keyson the server
2) “Connection Timed Out” vs “Connection Refused”
These two errors look similar but point to different problems. A timeout means your packets never reach the server. A refusal means they arrived and got rejected.
- A timeout usually points to a firewall dropping traffic, either on your VPS, your local network, or somewhere in between
- A refusal usually means the SSH service isn’t running, or something else is using port 22
- Run ping your-server-ip first. If that fails too, the problem sits with routing or your network, not SSH.
- Check the SSH service status with sudo systemctl status ssh from the console if you still have access.
3) Locked Out After Disabling Password Authentication
This is the most common mistake in the whole setup process. Test your SSH key login in a fresh terminal window before you close your original session, every time.
- If you’re already locked out, log in through your provider’s web console or rescue mode instead.
- From there, edit
/etc/ssh/sshd_configand temporarily setPasswordAuthentication yes - Restart SSH with
sudo systemctl restart ssh, then retry your key login from your own machine. - Once the key login works, flip the setting back to no and restart SSH again.
4) UFW Blocking Your Own SSH Access
Enabling UFW before allowing SSH immediately cuts off your own connection. Always allow SSH first, then enable the firewall.
- If you’re locked out this way, use your provider’s console to log back in
- Run
sudo ufw allow OpenSSHorsudo ufwallow 22/tcpto reopen the port - Check current rules with
sudo ufw status numberedbefore making further changes - As a last resort,
sudo ufw --force resetclears every rule and starts the firewall over from scratch
5) “Could Not Get Lock” Errors During apt update
This error means another process already holds the package manager lock. It’s common right after boot, since unattended upgrades often run in the background automatically.
- Check for an active process first with
ps aux | grep -E '(apt|dpkg)' - Wait a few minutes if unattended-upgrades shows up, since it usually finishes on its own
- Find the exact process holding the lock with
sudo lsof /var/lib/dpkg/lock-frontend - Only remove the lock file manually once you confirm no legitimate process still holds it
6) New User Can’t Run Sudo Commands
If sudo whoami doesn’t show root right after creating your user, the group change likely hasn’t taken effect yet.
- Log out and log back in as that user so the new group membership loads properly.
- Confirm group membership with the groups yourusername command
- Re-run
sudo usermod -aG sudo yourusernameif the sudo group is missing from the list - Keep your original root session open the entire time you troubleshoot this
FAQs
How much RAM does an Ubuntu VPS need?
A basic website or blog runs fine on 1GB of RAM. Anything that runs a database or handles heavier traffic should start at 2GB or more. Add more RAM later if traffic grows.
Is Ubuntu good for beginners running a VPS?
Yes. Ubuntu has wide community support, clear documentation, and predictable commands. Its LTS releases remain stable for years, which suits anyone new to server management.
How do I protect an Ubuntu VPS from brute-force attacks beyond Fail2Ban?
Combine Fail2Ban with SSH key-only login and a locked-down firewall. Changing your SSH port and disabling root login both add extra layers of protection on top of that.
What is a VPS, and how is it different from shared hosting?
A VPS gives you a dedicated slice of a server’s resources, with full control over the operating system and software. Shared hosting allocates a single server among many accounts, offering far less control and flexibility for each user.
Your Ubuntu VPS Is Ready. What’s Next
Your server now runs updated software, has a dedicated user account, has locked-down SSH access, and has an active firewall. That covers the setup this article promised.
From here, the next move depends on what you plan to build. Installing Nginx or Apache gets you ready to serve a website. Setting up MySQL or PostgreSQL prepares your server for a database-driven application.
Before you deploy anything live, set up a backup routine; a snapshot from your hosting provider works well.
A scheduled backup script works just as well. Either one saves you from losing everything to a single bad update.
If you don’t have a VPS yet, Truehost’s Ubuntu VPS plans give you a fresh server for these steps.