Domain RegistrationFind and register the perfect domain for your website.
 .COM DomainChoose a widely recognized domain to build global credibility.
 Domain TransferSeamless domain transfers with zero downtime and complete control.
 All TLDsFind and register your perfect domain. Choose from local and global extensions.
 SSL CertificatesKeep your website safe with reliable SSL Certificates that protect customer data and build trust.
 whoisCheck domain ownership details, expiration dates, and registrar information.
 US DomainRegister a .US domain and build trust in the USA.
 Web HostingEverything your website needs to run smoothly
 WordPress HostingWordPress hosting that just works
 Windows HostingReliable hosting for Windows environments
 Reseller HostingTurn hosting into your business
 Email HostingEmail that looks professional and works anywhere
 cPanel HostingFull control of your hosting with cPanel
 Affiliate ProgramJoin as a partner and earn commissions on every referral you send our way.
 Vps HostingScalable virtual servers that expand as you need.
 Dedicated ServersGet complete access and full control over your dedicated physical server.
 Managed vpsNot tech-savvy? We will take care of everything with our fully managed VPS hosting for you.
 AI Website BuilderCreate stunning websites in seconds with AI.
 Online ShopSet up a professional online store. No coding required.
 Web design serviceGet a tailored website designed to match your brand and support your goals.
 BlogFind helpful guides on web hosting, online selling, digital marketing, and more.
 Contact USYou can reach us anytime, day or night, through chat or email.
 SupportBrowse helpful guides and answers for all of our services.
A fresh VPS gives you a blank Ubuntu server with nothing running on it yet. That blank slate is useful, but it also means every app you install lives directly on the host.
One bad dependency conflict can knock out the whole server, and rebuilding from scratch wastes hours you don’t have.
Running services directly on the host operating system works fine at first, but it gets messy fast.
Every app competes for the same libraries and system resources, and one conflict can affect everything else.
Docker solves this by wrapping each app, along with its dependencies, into a self-contained container.
If one container crashes, the others keep running without interruption. That isolation alone saves a lot of debugging time later.
Docker also makes redeployment simple. Containers package everything an app needs. You can move that same container to a different VPS and expect it to behave the same way.
There is no need to reconfigure the environment from scratch every time you migrate or scale.
Installing Docker correctly on a new VPS takes about ten minutes once you know the right order. That order is exactly what this guide walks through.
What You Need Before You Start
A few basics need to be in place before touching any Docker commands. Skipping these steps almost always leads to problems later.
- RAM and storage: Docker itself is light, but the containers you run on top of it add up fast. A VPS with at least 2GB of RAM handles most small to mid-size workloads without slowdown. SSD or NVMe storage speeds up image pulls and container startup noticeably.
- Operating system: This guide covers Ubuntu 24.04 LTS, which is currently the most widely supported release for Docker Engine. Older or newer versions may require slightly different repository codenames, so confirm your OS version before running any commands.
- SSH access: Log in through SSH with a non-root user that has sudo privileges already set up. Running everything as root works, but it skips a security step you’ll want later.
- Outbound HTTPS access: Docker’s installer pulls packages directly from download.docker.com. If your VPS provider runs a strict outbound firewall, confirm port 443 is open before you begin.
Step 1: Update Your VPS and Remove Conflicting Packages
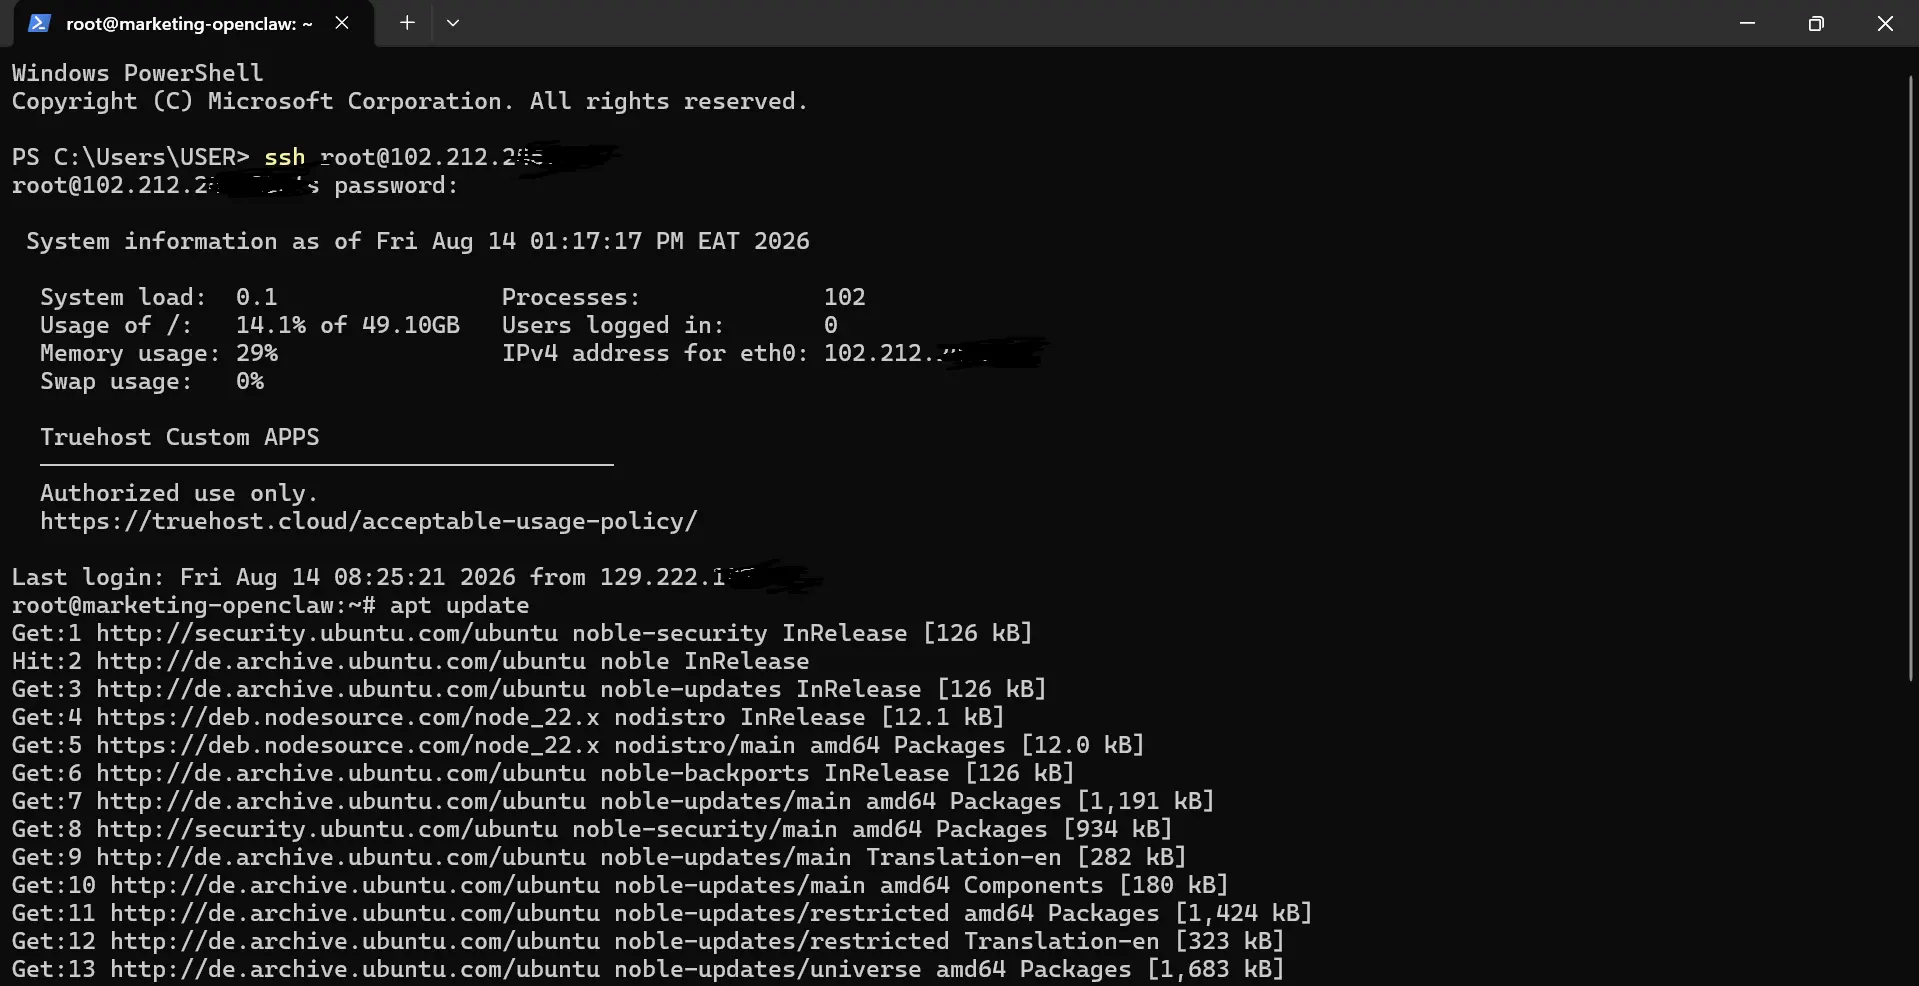
Start every fresh install with a full system update. This pulls in security patches and keeps your package list current.
sudo apt update && sudo apt upgrade -yOlder or partial Docker installs sometimes leave behind conflicting packages. Remove them before continuing, even if your VPS has never had Docker on it.
for pkg in docker.io docker-doc docker-compose docker-compose-v2 podman-docker containerd runc; do sudo apt-get remove $pkg -yLeftover packages like these cause version mismatches during install. Clearing them out first avoids a headache you’d otherwise hit two steps from now.
Step 2: Add the Official Docker Repository
The default Ubuntu repository often carries an outdated Docker version. Adding Docker’s official repository gets you the current release instead, along with faster security updates going forward.
First, set up the keyring directory and download Docker’s GPG key.
sudo install -m 0755 -d /etc/apt/keyringscurl -fsSL https://download.docker.com/linux/ubuntu/gpg | sudo gpg --dearmor -o /etc/apt/keyrings/docker.gpgsudo chmod a+r /etc/apt/keyrings/docker.gpgNext, add the Docker source list, letting the system detect your Ubuntu codename automatically.
echo \

  "deb [arch=$(dpkg --print-architecture) signed-by=/etc/apt/keyrings/docker.gpg] \

  https://download.docker.com/linux/ubuntu $(. /etc/os-release && echo $VERSION_CODENAME) stable" | \

  sudo tee /etc/apt/sources.list.d/docker.list > /dev/null
Update your package index again so apt picks up the new repository.
sudo apt updateStep 3: Install Docker Engine
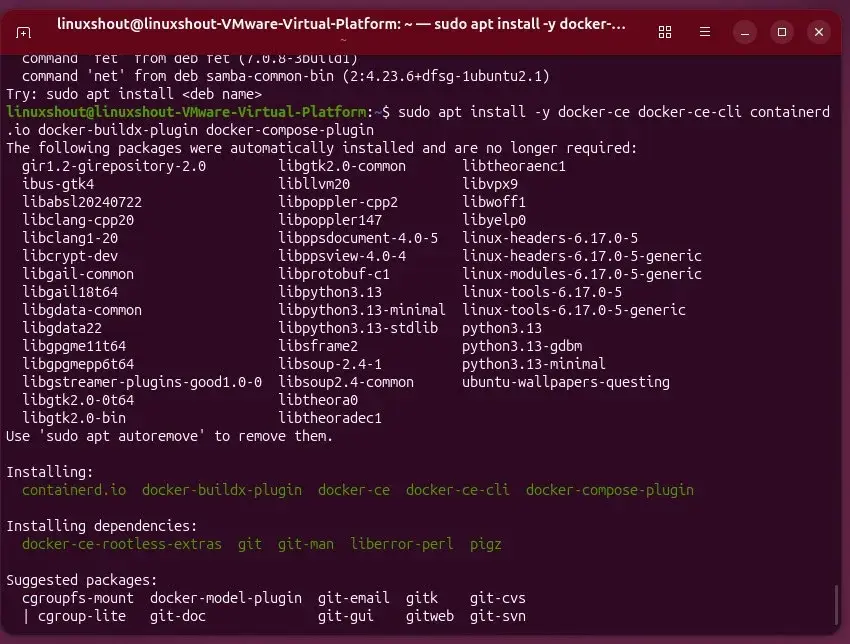
With the repository in place, install Docker Engine, the CLI, containerd, and the Compose plugin in one command.
sudo apt install docker-ce docker-ce-cli containerd.io docker-buildx-plugin docker-compose-plugin -yOnce the install finishes, confirm the version that landed on your server.
docker --versionA clean install shows a version number that matches what’s currently published on Docker’s site.
If the command returns “command not found” instead, something failed silently during install. Scroll back through the terminal output to find the error.
Step 4: Run Docker Without Root Access
By default, only root can run Docker commands. That’s inconvenient for daily use, so the next step adds your user to the Docker group instead.
sudo usermod -aG docker $USERGroup membership only takes effect after your session refreshes. Either log out and back in, or apply the change immediately with:
newgrp dockerTest that it worked by running a Docker command without sudo.
docker psKeep in mind that Docker group membership is close to root-level access. Anyone in that group can mount the host filesystem through a container, so only add trusted users to it.
Step 5: Configure Your Firewall Correctly
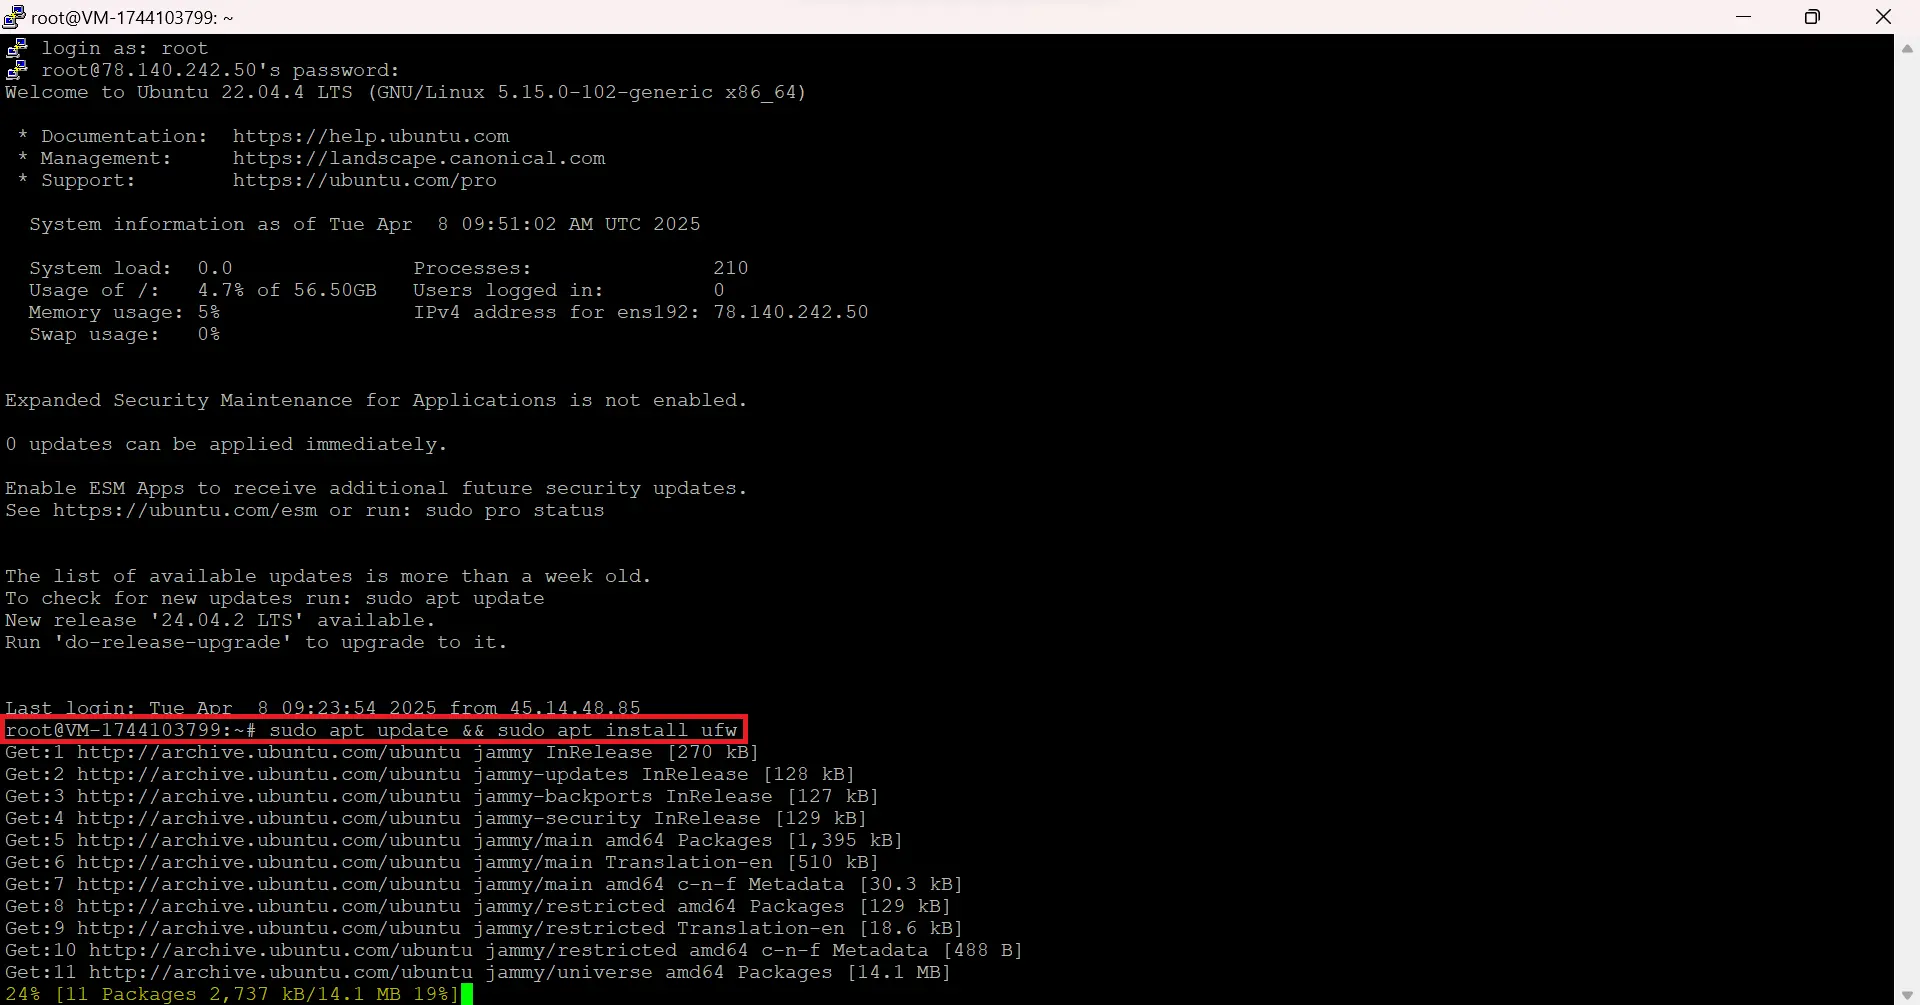
Firewall setup gets skipped or rushed in a lot of guides, but it deserves real attention. A misconfigured firewall on a Docker host can quietly expose ports you never meant to open.
Start with the basics. Allow SSH before enabling UFW, or you risk locking yourself out of the server entirely.
sudo ufw allow 22/tcp

sudo ufw allow 80/tcp

sudo ufw allow 443/tcp

sudo ufw enable
Here’s the part most tutorials leave out. When Docker publishes a container port, it inserts its own iptables rules directly, and those rules bypass UFW completely.
A container port you never explicitly allowed in UFW can still be reachable from the internet.
The correct fix is to add restrictions to Docker’s own DOCKER-USER iptables chain, rather than relying on UFW alone.
sudo iptables -I DOCKER-USER -i eth0 ! -s 127.0.0.1 -p tcp --dport 5432 -j DROPAdjust the interface name and port to match your setup. This example blocks external access to a database port while still letting other containers on the same host reach it.
One habit worth avoiding entirely: some guides suggest disabling UFW or firewalld altogether to sidestep this conflict.
That removes protection for every other service on the box, not just Docker, so skip that shortcut.
Step 6: Verify the Installation
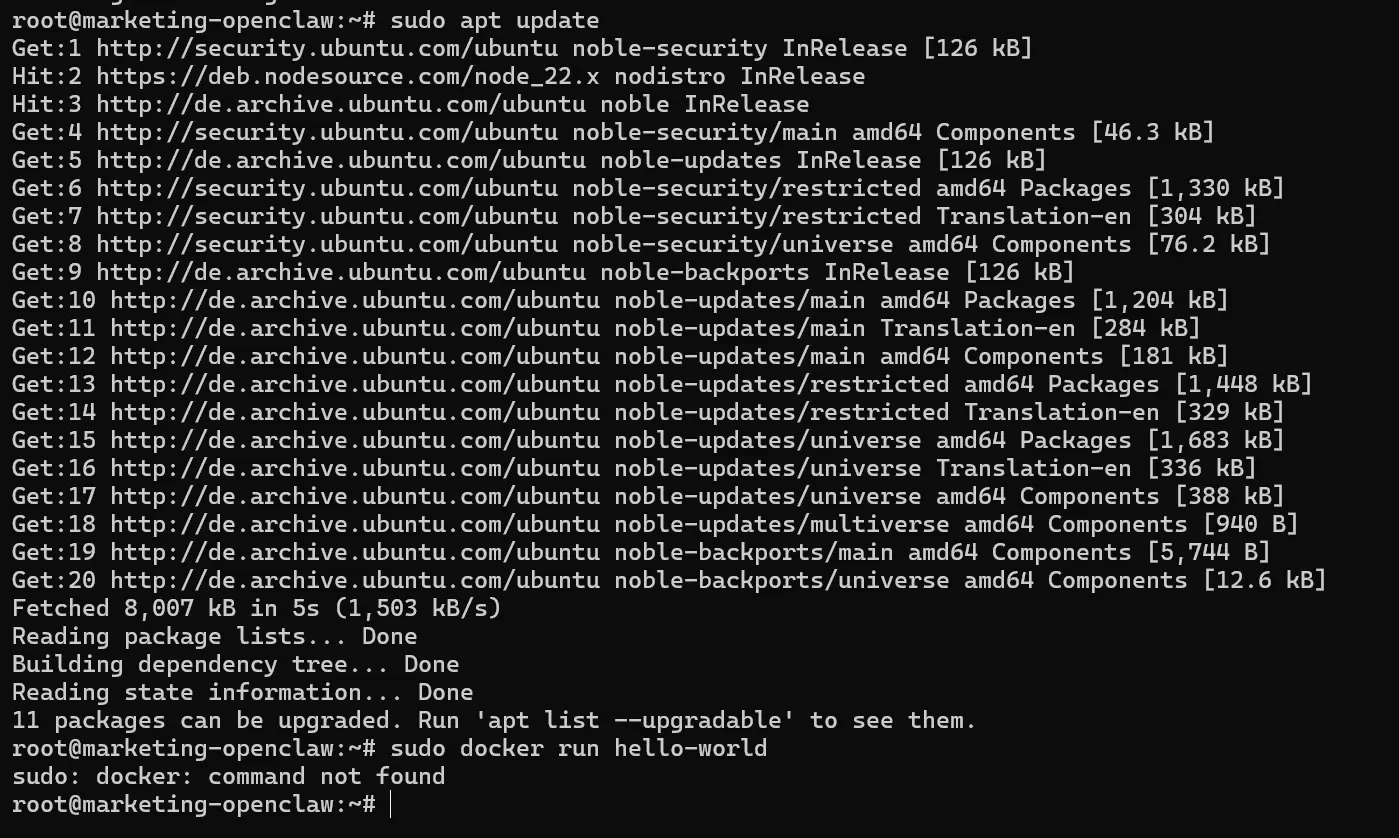
Run Docker’s test image to confirm the daemon is working correctly.
sudo docker run hello-worldA successful run downloads a small image and prints a confirmation message explaining that your installation is working.
If the pull fails or the command hangs, check your outbound HTTPS access from Step 0 first.
Next, make sure Docker starts automatically after every reboot, so you don’t have to restart it manually each time.
sudo systemctl enable docker

sudo systemctl status docker
Finally, confirm the Compose plugin is installed correctly alongside the engine.
docker compose versionIf that command returns a version number, your install is complete and ready for real workloads.
Troubleshooting Common Docker VPS Installation Errors
Even a careful install can hit a snag on a fresh server. These are the errors people run into most often, along with what actually fixes them.
1) “Could not get lock” errors during apt install
This error usually shows up right after a fresh VPS boots.
E: Could not get lock /var/lib/dpkg/lock-frontendAnother process, often unattended-upgrades or a leftover cloud-init task, is still using apt in the background. Check what’s holding the lock before doing anything else.
sudo lsof /var/lib/dpkg/lock-frontendIf a legitimate process shows up, wait a minute or two and try again. If nothing shows up but the error persists, remove the stale lock files directly.
sudo rm /var/lib/dpkg/lock-frontend

sudo rm /var/lib/dpkg/lock

sudo dpkg --configure -a
Only use this second method after confirming no active process still holds the lock. Removing an active lock can corrupt your package database.
2) GPG key or signature verification errors
This one shows up as a signature warning instead of a hard failure, but it still blocks the install.
NO_PUBKEY 7EA0A9C3F273FCD8The keyring file usually exists but sits in the wrong path, so apt can’t find it. Double-check that the path in your source list matches where you saved the key in Step 2.
ls -la /etc/apt/keyrings/docker.gpg

cat /etc/apt/sources.list.d/docker.list
If the paths don’t line up, most tutorials online use outdated key paths from older Ubuntu releases. Rerun the keyring commands from Step 2 exactly as written.
3) “Cannot connect to the Docker daemon”
This error means the CLI can’t reach the daemon at all.
Cannot connect to the Docker daemon at unix:///var/run/docker.sockCheck whether the daemon is even running first.
sudo systemctl status dockerIf it’s stopped, start it and check the logs for the reason it failed in the first place.
sudo systemctl start docker

sudo journalctl -u docker.service --no-pager -n 50
A less common but real cause is a broken overlay2 storage driver. If the logs mention “failed to mount overlay” resetting Docker’s data directory usually clears it. Note that this deletes existing containers and images.
sudo systemctl stop docker

sudo rm -rf /var/lib/docker

sudo systemctl start docker
4) “Permission denied” when running Docker without sudo
This looks similar to the daemon connection error above, but the cause and fix differ.
Got permission denied while trying to connect to the Docker daemon socket
Confirm your user is actually in the Docker group.
groups $USERIf Docker isn’t listed, rerun the usermod command from Step 4. If it is listed but the error still appears, your current shell session likely didn’t pick up the change yet.
A new terminal tab sometimes inherits the old session’s group list, so a full logout and login usually resolves it.
5) Containers can’t reach the internet or resolve DNS
This shows up as failed package installs or timeouts from inside a running container. Two things usually cause it: a host DNS misconfiguration or a conflicting iptables ruleset from Step 5.
Check what DNS servers Docker is handing to containers.
docker run --rm busybox cat /etc/resolv.confIf that list looks wrong, set Docker’s default DNS servers directly in its daemon configuration file, then restart the service.
sudo nano /etc/docker/daemon.json

{

  "dns": ["8.8.8.8", "1.1.1.1"]

}
sudo systemctl restart docker
6) Docker eating disk space after repeated use.
This isn’t a hard error, but it causes real problems on smaller VPS plans with limited storage. Unused images, stopped containers, and build cache pile up quietly.
Check current usage first.
docker system dfClear out anything not actively in use.
docker system prune -aRun this check periodically, especially on VPS plans under 40GB of storage. Docker’s cache can fill the disk faster than expected.
FAQs
Can I install Docker without root access?
You need root or sudo access to install Docker itself, since it installs system packages and creates system services. Once installed, adding your user to the Docker group lets you run containers without typing sudo every time.
Is Docker safe to run on a production VPS?
Yes, as long as you follow a few basic practices. Keep Docker and your container images updated.
Restrict Docker group membership to trusted users, and configure your firewall the way Step 5 describes. Most Docker security issues come from skipped configuration, not a flaw in Docker itself.
Why does my firewall not block Docker container ports?
Docker inserts its own iptables rules when you publish a container port, and those rules run ahead of UFW’s rules.
A port can be reachable from the internet even if UFW never explicitly allowed it. The fix is adding restrictions to Docker’s DOCKER-USER iptables chain, covered in Step 5 above.
How do I update Docker after installation?
Run the same repository update and install commands from Step 3 again.
sudo apt updatesudo apt install docker-ce docker-ce-cli containerd.io docker-buildx-plugin docker-compose-plugin -yApt pulls in the newer version automatically since your source list already points to Docker’s official repository.
What is the difference between Docker Engine and Docker Desktop?
Docker Engine is the core service that runs containers, and it’s what this guide installs on your VPS.
Docker Desktop is a separate application built for local development on Mac and Windows, bundling the Engine with a graphical interface. A Linux VPS only needs an engine, never a desktop.
How do I uninstall Docker from a VPS?
Remove the installed packages first, then clean up leftover data if you want a completely fresh slate.
sudo apt purge docker-ce docker-ce-cli containerd.io docker-buildx-plugin docker-compose-plugin -ysudo rm -rf /var/lib/dockersudo rm -rf /var/lib/containerdSkip the second step if you plan to reinstall Docker later and want to keep your existing images and volumes.
Get Docker Set Up on Your VPS
Docker turns a blank VPS into a flexible environment where every app runs in its own isolated space.
You’ve now installed Docker Engine, set up a non-root user, and locked down your firewall correctly. You also covered the errors most likely to trip up a fresh install.
The next logical step is putting that setup to work. Try deploying a small containerized app with Docker Compose to see the full workflow, from image to running service.
If your current VPS plan feels tight for container workloads, Truehost’s VPS hosting has you covered. It gives you the RAM and storage this guide recommends, ready for Docker from the first login.