Domain RegistrationFind and register the perfect domain for your website.
 .COM DomainChoose a widely recognized domain to build global credibility.
 All TLDsFind and register your perfect domain. Choose from local and global extensions.
 whoisCheck domain ownership details, expiration dates, and registrar information.
 US DomainRegister a .US domain and build trust in the USA.
 Web HostingEverything your website needs to run smoothly
 WordPress HostingWordPress hosting that just works
 Windows HostingReliable hosting for Windows environments
 Reseller HostingTurn hosting into your business
 Email HostingEmail that looks professional and works anywhere
 cPanel HostingFull control of your hosting with cPanel
 Affiliate ProgramJoin as a partner and earn commissions on every referral you send our way.
 Vps HostingScalable virtual servers that expand as you need.
 Dedicated ServersGet complete access and full control over your dedicated physical server.
 Managed vpsNot tech-savvy? We will take care of everything with our fully managed VPS hosting for you.
Have you ever bought a domain name and web hosting, then stared at your screen wondering how to make them work together? I know you feel completely lost.
This exact confusion stops thousands of people every single day.
You have paid for both services and are excited to launch your website, but the two pieces won’t talk to each other. The domain sits at one company doing nothing. The hosting company sits at another company, waiting for a website. Meanwhile, you’re stuck in the middle trying to figure out what connects them.
The frustration multiplies when you search for help. Most guides throw around confusing terms like “DNS propagation” and “nameservers” without explaining what they mean. You just want your website to show up when someone types your domain name. Instead, you get technical mumbo jumbo that makes everything worse.
I’ll help you out.
Here’s what we’ll cover:
- What you need before you start (takes 2 minutes to gather)
- The easiest way to connect a domain to website hosting using nameservers
- A backup method using something called A records
- How long you’ll wait before everything works
- What to do when things don’t work right
Let’s break this down into steps anyone can follow.
Why Your Domain and Hosting Don’t Work Together Yet
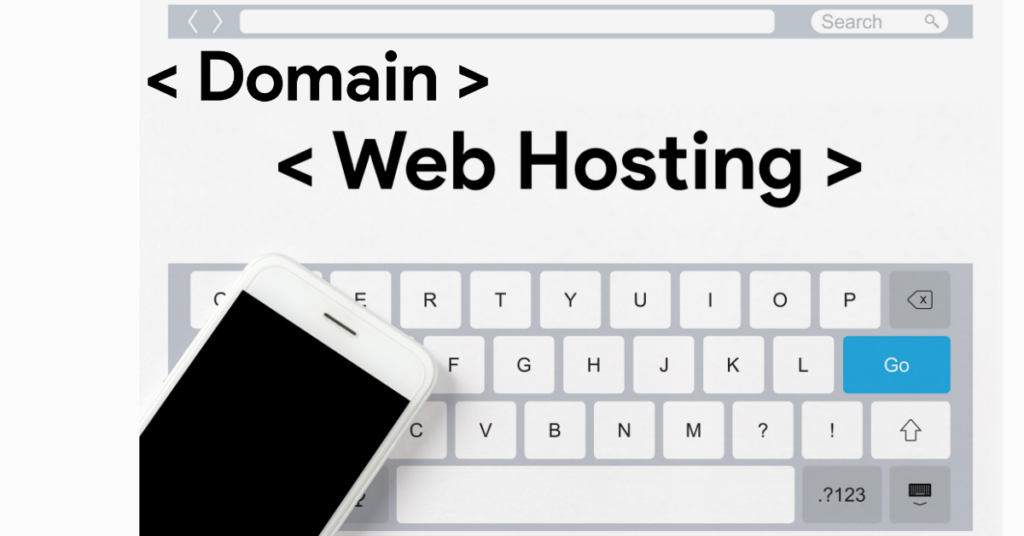
Think of your domain name like your home address. It’s what people type to find you online. Your hosting is like the actual house where you store all your stuff (your website files, images, and pages).
Right now, your address doesn’t point to your house. When someone types your domain, the internet doesn’t know where to send them. Your job is to create that connection.
The good news?
You only need to do this once. After you connect the domain to website hosting, it stays connected until you change something.
What You Need Before Starting to Connect a Domain Name to Web Hosting
Before you begin, grab two pieces of information. Having these ready makes everything faster.
First, you need login details for the domain registrar where you bought your domain. This might be Namecheap, GoDaddy, Google Domains, or Truehost. Find your username and password for that site.
Second, you need information from your hosting company. Log in to your hosting account (Truehost or whoever hosts your site). Look for something called “nameservers” in your account area. They look like this:
- ns1.yourhosting.com
- ns2.yourhosting.com
Write these down or copy them somewhere. You’ll need them in just a minute.
That’s it. With these two things in place, you’re ready to connect the domain to website hosting.
The Main Way: Using Nameservers
This is the method most people use because it’s the most reliable. We’re going to change a setting at your domain registrar to point your domain to your hosting provider.
Step 1: Find Your Hosting Nameservers
Log in to your hosting account. The exact location varies by company, but look for these sections:
- Account Information
- Domain Settings
- Getting Started
- Server Information
When you find the right section, you’ll see two to four web addresses that start with “ns1” or “ns2.” They might look like:
- ns1.truehost.com
- ns2.truehost.com
Copy these exactly as they appear. One tiny typo will break everything, so triple-check them. Most hosting companies let you copy them with a single click, which helps prevent mistakes.
Step 2: Log in to Your Domain Company
Open a new browser tab and go to the website where you bought your domain. Log in with your username and password.
Find your list of domains. Most companies show this on the main page after you log in. If you own multiple domains, find the specific one you’re working with today.
Click on that domain to open its settings. You’re looking for buttons or links that say:
- Manage
- DNS Settings
- Nameservers
- Advanced Settings
Different companies put these in different places. Don’t worry if it takes a minute to find. They all have this option somewhere.
Step 3: Change the Nameservers
Once you find the nameservers section, you’ll see entries that are currently set to your domain’s company defaults. They might say something like:
- ns1.domainregistrar.com
- ns2.domainregistrar.com
Look for a button that says “Custom Nameservers” or “Use Custom DNS.” Click it.
Now you’ll see blank boxes where you can type new nameserver addresses. Delete the old ones and enter your hosting nameservers from Step 1.
Type the first one in the first box. Type the second one in the second box. If you have three or four nameservers, enter all of them.
Double-check every letter and dot. Seriously, check three times. One mistake means your website won’t work.
Step 4: Save Your Changes
Click the “Save” or “Update” button. Some companies ask you to confirm, so click “Yes” if they do.
You’ll probably see a message saying your changes were saved. Good! You just did the hard part.
Here’s the catch.
Your changes won’t happen instantly. The internet needs time to spread this new information around the world. This waiting period is completely normal.
Step 5: Wait for the Connection to Spread
Research shows that the average time for domain changes to take effect globally is 8 hours, though companies often cite 24 to 48 hours to be safe.
During this waiting time, nothing will look different. Your domain might still show a parking page or an error. This is normal. Don’t panic and don’t make more changes. Just wait.
Think of it like telling everyone in the world your new phone number. It takes time for everyone to update their contacts. The internet works the same way.
Step 6: Check If It Worked
After waiting at least 4 hours, open a web browser and enter your domain name. If you see your hosting company’s default page (usually says something like “Coming Soon” or “Your hosting is active”), congratulations! You successfully managed to connect a domain to website hosting.
If you have already uploaded the website files, you should see your actual website. If you see your old parking page, wait longer. It might work in your location, but not everywhere yet.
Try checking from your phone using mobile data instead of WiFi. Sometimes your home internet service caches old information longer than other networks do.
The Backup Way: Using an A Record
Sometimes you can’t or don’t want to change nameservers. You may be using email at your domain company, and changing nameservers would break it. In this case, you can use a different method.
This method keeps the nameservers where they are, but adds a specific pointer to your hosting.
Step 1: Get Your Hosting IP Address
An IP address is like a phone number for your hosting server. It’s a bunch of numbers separated by dots, like 192.168.1.1.
Log in to your hosting account and look for “Server Information” or “Account Details.” You should find your IP address listed there. Copy it exactly.
Step 2: Add an A Record at Your Domain
Go back to your domain company’s website and log in. Find the DNS Settings or DNS Management section.
Look for a section called “DNS Records” or “Add Record.” You’ll see a button to add a new record. Click it.
You’ll see some options. Choose “A Record” from the list.
Now you’ll see a form with a few boxes:
For “Host” or “Name,” type the @ symbol. This represents your main domain.
For “Value” or “Points To,” paste your hosting IP address.
For “TTL,” leave it at the default setting (usually says “Auto” or “3600”).
Save this record.
Step 3: Add Another A Record for WWW
People might type your domain with or without the “www” prefix. You need both versions to work.
Click to add another A Record. This time:
For “Host” or “Name,” type: www
For “Value,” paste the same IP address again.
Save this second record.
Step 4: Wait and Test
This method usually works faster than changing nameservers. Studies indicate that an A record change typically completes within 1 to 4 hours for most users.
After a few hours, test your domain in a browser. Both yourdomain.com and www.yourdomain.com should work.
What to Do When Things Don’t Work
Even when following every step perfectly, problems can still happen. Here’s how to fix the most common issues.
Your Domain Still Shows the Old Page After 48 Hours
First, clear your browser’s memory. Your browser remembers old versions of websites to load them faster. Press Ctrl+F5 on Windows (or Cmd+Shift+R on Mac) to force a fresh check.
Try a different browser entirely. If it works in one browser but not another, you just need to clear the cache for that browser.
Ask a friend to check from their computer or phone. If it works for them, the problem is on your device, not with your connection settings.
You See an Error Message
If you see “This site can’t be reached” or similar errors, go back and verify your nameservers or IP address. One wrong character breaks everything.
Log back into your domain settings and check what you entered. Compare it character by character with what your hosting company provided.
WWW Works, But the Plain Domain Doesn’t
You probably only added one A record instead of two. Go back to your DNS settings and make sure you have A records for both @ (root domain) and www.
Your Email Stopped Working
This happens when you change nameservers and your email lives at your domain company. The solution requires adding special email records called MX records.
Contact your email provider and ask for their MX record information. Add these records to your new DNS settings. This is a bit advanced, so don’t hesitate to ask your hosting company’s support team for help.
Research from email hosting providers shows that 23% of people who change nameservers accidentally break their email because they forget about MX records.
Different Companies, Same Basic Steps
The core process for connecting a domain to website hosting remains the same regardless of which companies you use. However, different companies label things differently.
If your domain is at Namecheap, you’ll find nameserver settings under “Domain List,” then click “Manage” next to your domain, and look for “Nameservers” on that page.
If your domain is at GoDaddy, go to “My Products,” find your domain, click “DNS,” then scroll down to find “Nameservers.”
If your domain is at Google Domains, select your domain, click “DNS” in the left menu, then scroll to “Name servers.”
The buttons and locations change, but you’re always looking for the same thing: a place to enter custom nameservers or add DNS records.
For hosting, Truehost shows nameservers in your cPanel under “Account Information.”
Don’t worry if your companies organize things differently. The core information exists somewhere in your account. If you can’t find it after 5 minutes, use their live chat or support ticket system. Support teams answer these questions 100 times a day and can point you to the exact spot.
How Long Does Everything Take?
Let’s talk realistic timeframes, so you know what to expect.
The work you do, logging in, copying nameservers, pasting them, and saving, takes about 5 to 10 minutes total.
Waiting for your changes to spread globally is the long part. For nameserver changes, plan on 4 to 8 hours minimum, with up to 48 hours possible. Data from internet infrastructure providers shows that 89% of nameserver changes are complete within 12 hours worldwide.
For A record changes, most people see results within 1 to 4 hours.
During the wait, you can’t speed things up. The internet updates at its own pace as thousands of servers around the world learn about your new settings.
After Your Domain Connects
Once you’ve successfully managed to connect a domain to website hosting, a few important next steps will complete your setup.
First, set up a security certificate.
Most hosting companies offer free certificates that make your site show “https” and a lock icon in browsers. This takes about 30 minutes to install and signals to visitors that your site is secure.
Second, create professional email addresses using your domain.
Instead of [email protected], you can have [email protected]. Your hosting company usually offers this feature in the same control panel where you found your nameservers.
Third, upload your website if you haven’t already.
Your domain now points to your hosting, but you need website files there for people to see. Access your hosting’s file manager or use FTP to upload your pages.
Fourth, test everything thoroughly.
Visit your site from different devices. Check that all your pages load correctly. Make sure any contact forms work. Click through your entire site as if you were a visitor.
Keep Your Connection Working
After you successfully connect a domain to website hosting, you don’t need to do anything else unless you change hosting providers or want to move your domain.
Your domain requires annual renewal. Mark your calendar with your renewal date and set up auto-renewal. If your domain expires, your website stops working immediately.
Your hosting also requires periodic renewal, usually monthly or annually, depending on your plan. Keep both services active, and they’ll keep working together.
Don’t make changes to your nameservers or DNS records unless you know exactly what you’re doing. These settings control where your domain points, and random changes break your connection.
If you ever need to switch hosting companies, you’ll repeat this process with your new hosting provider’s nameservers. The steps stay exactly the same.
When to Ask for Help
Most hosting companies offer free support specifically for helping customers connect their domain to website hosting. They walk customers through this constantly and can usually solve your problem in minutes.
Good times to contact support:
- You’ve waited 48 hours, and nothing has changed
- You see error messages you don’t recognize
- Your email stopped working after making changes
- You can’t find the nameserver information anywhere
- You’re not confident about which buttons to click
Support teams don’t judge you for asking. They genuinely want your website to work because it means you’ll stay a happy customer. Use their knowledge when you feel stuck.
Most hosting companies offer live chat, which gets you answers in minutes. Email support takes longer but works fine if your question isn’t urgent.
Your Website Is Almost Live
You now know how to connect a domain to website hosting using two different methods. You know what information to gather, where to find settings, what to type in which boxes, and how long to wait.
The process isn’t as scary as it seems before you start. Yes, the terms sound technical. Yes, the waiting feels long when you’re excited to launch. But the steps themselves are straightforward: copy some information from one place and paste it into another.
Your domain and hosting are waiting to work together. All they need is for you to introduce them. Log in to both accounts, find your nameservers, make the change, and give the internet a few hours to propagate the change.
Before you know it, your domain name will load your website, and you’ll be officially live on the internet. That’s worth the few minutes of setup and hours of waiting.
Do you want to connect your domain to a hosting service? Truehost’s migration process is free with 24/7 human support. Contact us, and we will help you connect your domain name to a website hosting service of your choice.
Connect a Domain to Website Hosting FAQs
Nameserver changes take 24-48 hours to fully propagate globally. A record update typically completes in 1-4 hours.
Yes, use A records instead. This keeps the nameservers at the registrar while pointing the domain.
If the email is hosted separately, you must add MX records. Changing nameservers without MX records will break email.
Usually, it connects automatically. Verify in the hosting dashboard that the domain is active and configured.
Yes. The domain will show the hosting default page until you upload website files. This is normal and safe.
Visit your domain in the browser. If you see a hosting provider’s page or your website (not the registrar parking page), it’s connected.
Yes. Domain registration and hosting are separate services with separate renewal dates and costs.
Yes. Change the nameservers back to the previous ones, or remove the A records. Takes another 24-48 hours to revert.