Domain RegistrationFind and register the perfect domain for your website.
 .COM DomainChoose a widely recognized domain to build global credibility.
 Domain TransferSeamless domain transfers with zero downtime and complete control.
 All TLDsFind and register your perfect domain. Choose from local and global extensions.
 SSL CertificatesKeep your website safe with reliable SSL Certificates that protect customer data and build trust.
 whoisCheck domain ownership details, expiration dates, and registrar information.
 US DomainRegister a .US domain and build trust in the USA.
 Web HostingEverything your website needs to run smoothly
 WordPress HostingWordPress hosting that just works
 Windows HostingReliable hosting for Windows environments
 Reseller HostingTurn hosting into your business
 Email HostingEmail that looks professional and works anywhere
 cPanel HostingFull control of your hosting with cPanel
 Affiliate ProgramJoin as a partner and earn commissions on every referral you send our way.
 Vps HostingScalable virtual servers that expand as you need.
 Dedicated ServersGet complete access and full control over your dedicated physical server.
 Managed vpsNot tech-savvy? We will take care of everything with our fully managed VPS hosting for you.
 AI Website BuilderCreate stunning websites in seconds with AI.
 Online ShopSet up a professional online store. No coding required.
 Web design serviceGet a tailored website designed to match your brand and support your goals.
 BlogFind helpful guides on web hosting, online selling, digital marketing, and more.
 Contact USYou can reach us anytime, day or night, through chat or email.
 SupportBrowse helpful guides and answers for all of our services.
Your ASP.NET app runs fine on your laptop. Every page loads, and every test passes. Then you try to put it online, and the real work starts.
Many guides jump straight to commands and skip the reasons behind them.
This one walks through every step in order, from a blank Windows VPS to a live, secured site.
You will get exact commands, the settings that count, and the errors you might run into along the way.
What You Need Before You Start
A few things should be ready before you touch the server. Getting these sorted first will save you time later.
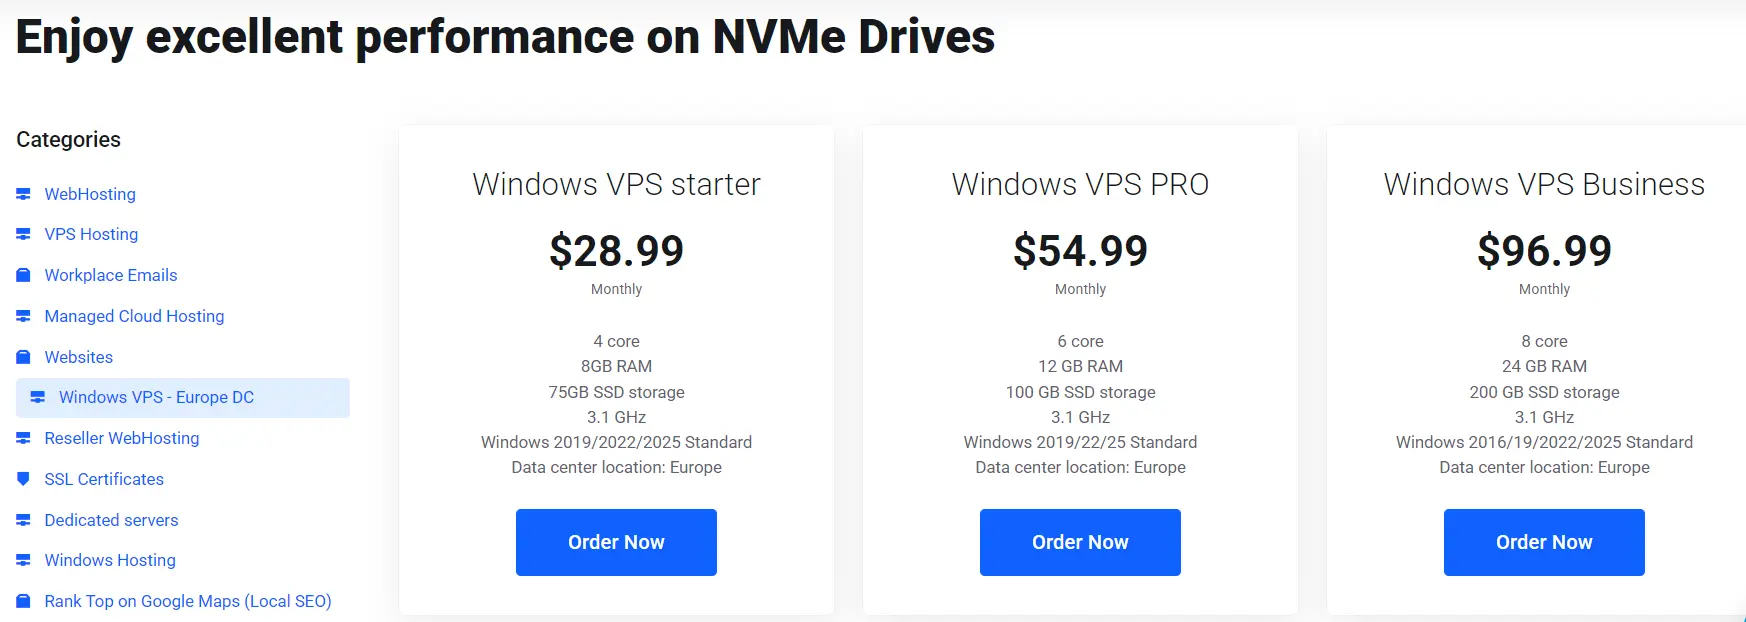
- A VPS running Windows Server 2019, 2022, or 2025, with the license included in the plan
- At least 4GB of RAM and 2 vCPU cores for small to medium apps. Larger apps should start at 8GB or more.
- The correct .NET Framework or .NET SDK version for your app
- RDP credentials and the server IP address from your hosting provider
- A domain name ready to point at the VPS once the app goes live
Skipping any of these tends to cause delays partway through setup, so check each one off before moving on.
1) Connect to Your Windows VPS
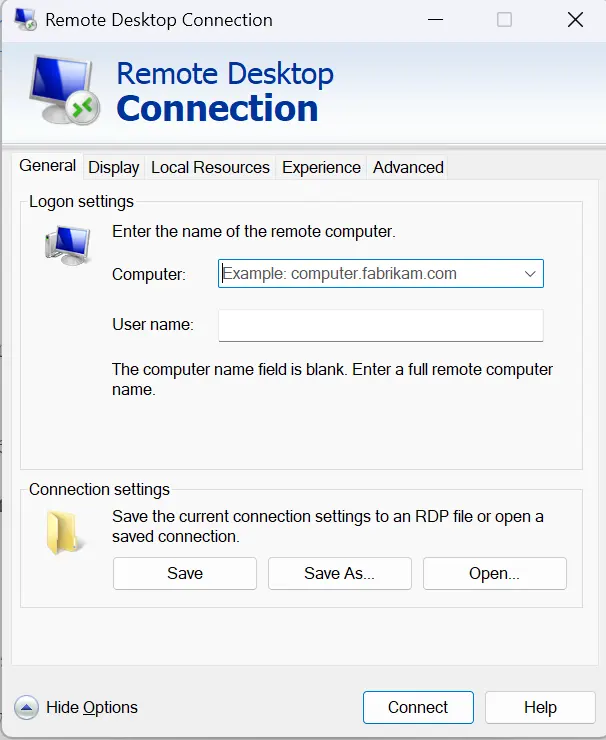
Once your VPS is active, the first job is getting into it.
On Windows, open Remote Desktop Connection by typing mstsc into the Run dialog. On a Mac, use Microsoft Remote Desktop from the App Store.
Either way, enter the server IP address and sign in with the admin credentials your provider sent you.
After you log in for the first time, change the default administrator password right away.
Leaving the default in place is an open invitation for trouble. Then run Windows Update and install any pending patches before you install server roles. A server that starts clean tends to stay clean.
2) Install IIS and the Required Windows Roles
With the server ready, the next step is to install Internet Information Services, or IIS. This is the web server that will actually run your ASP.NET app.
Open Server Manager, click Manage, then Add Roles and Features. Click Next through the first screen, then choose Role-based or feature-based installation. Pick a server from the pool, then click Next again.
On the Server Roles screen, check the box next to Web Server (IIS). A pop-up will ask you to add supporting features. Click Add Features, then click Next.
If your app uses classic ASP.NET Framework, look for the Role Services screen further along. Select ASP.NET 4.8, along with Static Content and Default Document. These give IIS what it needs to serve a Framework app correctly.
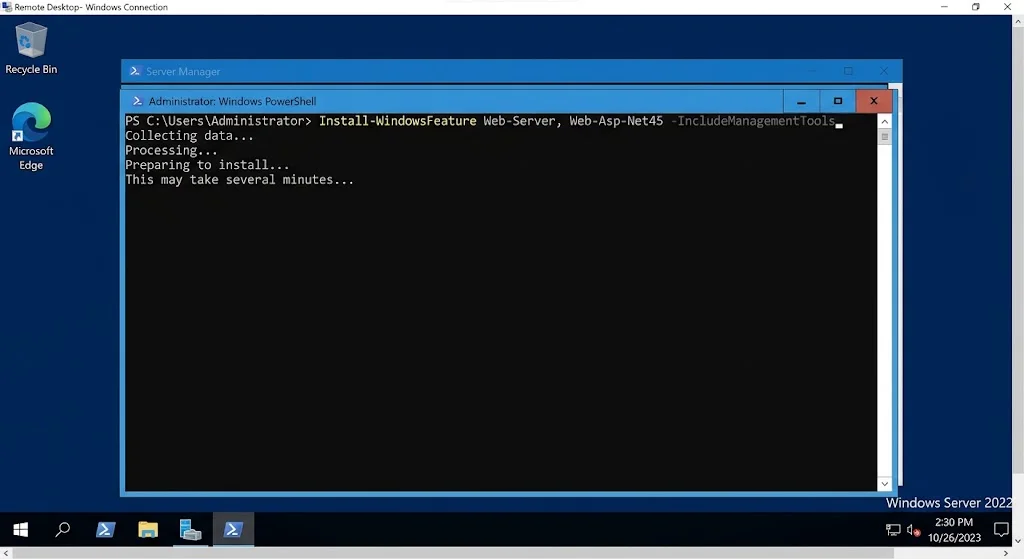
If you would rather skip the wizard, PowerShell gets you there faster. Run this as an administrator:
Install-WindowsFeature Web-Server, Web-Asp-Net45 -IncludeManagementToolsOnce installation finishes, restart the server. After it comes back up, open a browser and go to http://localhost. Seeing the IIS welcome page confirms the role was installed correctly.
3) Set Up the Correct Runtime for Your Application Type
ASP.NET Framework and ASP.NET Core need different setup steps. Pick the section that matches your app.
Hosting Classic ASP.NET Framework Applications
Check that ASP.NET 4.8 shows up under IIS role services in Server Manager. If it is missing, go back and add it through the Add Roles and Features wizard.
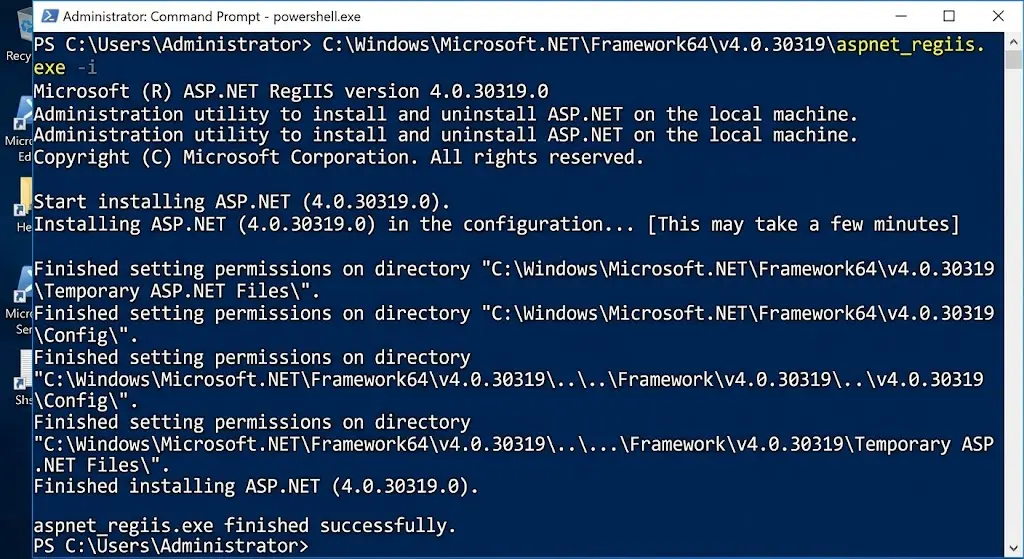
Sometimes the application pool throws a registration error even after ASP.NET is installed. If that happens, run this command from an elevated prompt:
%windir%\Microsoft.NET\Framework64\v4.0.30319\aspnet_regiis.exe -iThen open IIS Manager and match the application pool’s .NET CLR version to the version your app targets. A mismatch here is a common source of startup failures.
Hosting ASP.NET Core Applications
ASP.NET Core needs one extra piece that Framework apps do not: the .NET Hosting Bundle. Download the version that matches your app’s target framework from the official .NET download page.
Install order counts here. Install IIS first, then run the Hosting Bundle installer. If you installed the bundle before IIS, run the installer again to repair it.
After installation, confirm that AspNetCoreModuleV2 shows up under Modules in IIS Manager, or check the globalModules section of applicationHost.config directly.
Then run iisreset from an elevated command prompt so IIS picks up the new module.
4) Deploy Your Application Files to the VPS
With the runtime in place, it is time to get your app onto the server.
Publish the app from Visual Studio, or run this from the .NET CLI:
dotnet publish -c ReleaseYou can move the published files to the VPS through Web Deploy, FTP, or a straight file copy over RDP. Web Deploy tends to work best for repeat deployments, since it handles file locks and syncing on its own.
Place the files in a folder under C:\inetpub\wwwroot, or use a custom path outside the system drive if you prefer. Then open the folder’s security settings.
Grant read and write permissions to the application pool identity, usually listed as IIS AppPool\YourAppPoolName. Without this, the app can fail to start even though the files are in place.
One thing worth avoiding: do not publish directly from a mapped network drive. IIS can hold file locks that block future deployments, and troubleshooting that mess costs more time than it saves.
5) Configure IIS, Open Firewall Ports, and Secure the Site
Your files are on the server, so now IIS needs to know how to serve them.
Open IIS Manager and create a new site pointed at your published folder. Bind it to port 80 for now. Then build a dedicated application pool instead of reusing the Default App Pool.
Separate apps sharing one pool can let a bad deploy bring down another site. For ASP.NET Core apps, set the CLR version to No Managed Code. The app runs its own runtime outside IIS, so IIS does not need to manage it.
Next, update your domain’s A record to point at the VPS IP address. DNS propagation can take a few hours, so give it time before assuming something broke.
For SSL, you can install a certificate directly through IIS, or use a free option like win-acme for Let’s Encrypt. Once the certificate is in place, add an HTTPS binding to your site.
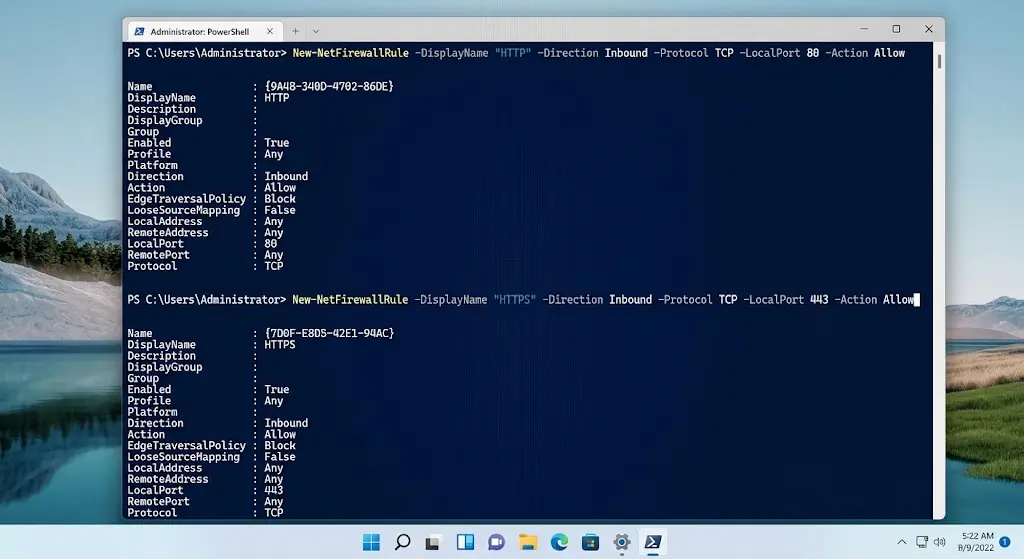
Finally, open the ports your app needs. Run these commands from an elevated PowerShell prompt:
New-NetFirewallRule -DisplayName "HTTP" -Direction Inbound -Protocol TCP -LocalPort 80 -Action AllowNew-NetFirewallRule -DisplayName "HTTPS" -Direction Inbound -Protocol TCP -LocalPort 443 -Action AllowWithout these rules, the site will load locally on the server but stay unreachable from outside.
6) Test and Verify Your Deployment
Before calling the job done, run a few checks on the deployment.
Start by browsing to the site directly on the server. This rules out DNS delays and confirms IIS is serving the app at all. From there, check that static files, API routes, and any database connections all respond the way you expect.
If something looks off, check the IIS logs and Windows Event Viewer for the details. Both tend to point straight at the cause.
Once everything checks out, reboot the server once and confirm the app comes back up without you touching anything. A deployment that survives a reboot is one you can trust.
Common Errors and How to Fix Them
Even a careful deployment can hit a snag. Here are the errors you are most likely to run into, along with what causes each one.
I) HTTP 500.19 This usually means the ASP.NET Core Module is not registered in IIS. Install or repair the .NET Hosting Bundle, then run iisreset.
II) HTTP 500.30, ANCM In-Process Start Failure. The app crashed on startup inside the IIS worker process. This error alone will not tell you why, so check the Windows Application Event Log for the actual exception.
III) HTTP 500.31 The ASP.NET Core Module cannot find the runtime your app targets. Run dotnet --list-runtimes on the server to see which runtimes are installed, then add the missing version.
IV) HTTP 500.36, ANCM Out-of-Process Handler Load Failure: A file is missing from the Hosting Bundle installation. Repair the bundle instead of reinstalling everything from scratch.
V) HTTP 500.37: Startup took longer than 120 seconds, often due to several apps competing for CPU at once. Raise the startupTimeLimit setting in web.config, or stagger how your app pools start.
VI) HTTP 502.5 or 502.3, Process Failure: The backend process either failed to launch or failed to bind to its port. Turn on the stdout log in web.config and check it for the real exception.
VII) The app works locally but not on the VPS. This almost always comes down to NTFS permissions. Go back and confirm that the application pool identity can read and write to the app folder.
FAQs
Do I need SQL Server installed on the same VPS as my ASP.NET app?
Not always. Some apps run fine with a database hosted elsewhere. Still, keeping SQL Server on the same VPS reduces network latency between the app and its data. For small to medium projects, that tends to be the simpler setup.
Can I host multiple ASP.NET applications on one Windows VPS?
Yes, as long as the server has the RAM and CPU to handle it. Give each app its own application pool and its own IIS site. This keeps one app’s problems from spilling over into another.
Is Windows VPS hosting better than Linux for ASP.NET applications?
Neither option is better across the board. If your app depends on IIS, MSSQL, or Windows-only libraries, Windows VPS hosting is the lower-friction choice. ASP.NET Core can run on Linux, too, but Framework apps typically require Windows.
Do I need Plesk, or can I manage IIS manually?
Plesk adds a graphical dashboard for managing sites, SSL certificates, and databases, which can help teams without a dedicated sysadmin. IIS Manager alone covers everything in this guide, so Plesk is a convenience rather than a requirement.
Get Your ASP.NET App Live
You now have a clear path from a blank VPS to a live, secured site running on IIS. It covers both classic ASP.NET Framework and ASP.NET Core setups.
You also have a troubleshooting section to lean on if something goes sideways.
If you are ready to put this into practice, check out Truehost’s Windows VPS plans. They come with Windows Server pre-licensed and RDP-ready right out of the box.
That means you can skip the licensing step covered above and start deploying today.