Domain RegistrationFind and register the perfect domain for your website.
 .COM DomainChoose a widely recognized domain to build global credibility.
 Domain TransferSeamless domain transfers with zero downtime and complete control.
 All TLDsFind and register your perfect domain. Choose from local and global extensions.
 SSL CertificatesKeep your website safe with reliable SSL Certificates that protect customer data and build trust.
 whoisCheck domain ownership details, expiration dates, and registrar information.
 US DomainRegister a .US domain and build trust in the USA.
 Web HostingEverything your website needs to run smoothly
 WordPress HostingWordPress hosting that just works
 Windows HostingReliable hosting for Windows environments
 Reseller HostingTurn hosting into your business
 Email HostingEmail that looks professional and works anywhere
 cPanel HostingFull control of your hosting with cPanel
 Affiliate ProgramJoin as a partner and earn commissions on every referral you send our way.
 Vps HostingScalable virtual servers that expand as you need.
 Dedicated ServersGet complete access and full control over your dedicated physical server.
 Managed vpsNot tech-savvy? We will take care of everything with our fully managed VPS hosting for you.
 AI Website BuilderCreate stunning websites in seconds with AI.
 Online ShopSet up a professional online store. No coding required.
 Web design serviceGet a tailored website designed to match your brand and support your goals.
 BlogFind helpful guides on web hosting, online selling, digital marketing, and more.
 Contact USYou can reach us anytime, day or night, through chat or email.
 SupportBrowse helpful guides and answers for all of our services.
You just checked out on a new VPS plan. The confirmation email is sitting in your inbox. Now you have an IP address, a root password, and nothing else on the server.
No dashboard, installer button, or safety net.
This is the point where a lot of people get stuck. One wrong command can leave a half-working server or a database that never connects to WordPress at all.
Skip a permission fix, and you get a blank white screen with zero explanation.
This guide walks you through the full path, from a bare server to a working WordPress login screen.
Each step below is written for a real Ubuntu 24.04 VPS so that you can follow along in your own terminal.
What You Need Before You Start
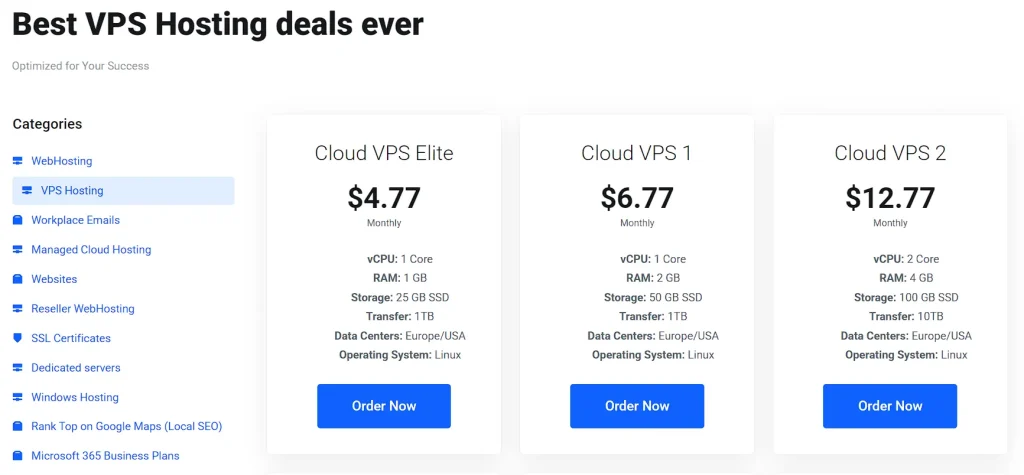
Before you touch the terminal, confirm a few basics so the rest of the setup goes smoothly.
- A VPS with root or sudo access, running Ubuntu 24.04 LTS
- At least 1 vCPU, 10 GB SSD storage, and 1GB of RAM as a working floor for a small WordPress site
- An SSH client, such as PuTTY on Windows or the built-in Terminal app on macOS and Linux
- A registered domain name, though you can test with the raw IP first
- Your VPS provider login, in case you need to check firewall or network settings later
Once these are in place, you are ready to connect.
1) Connect to Your VPS via SSH
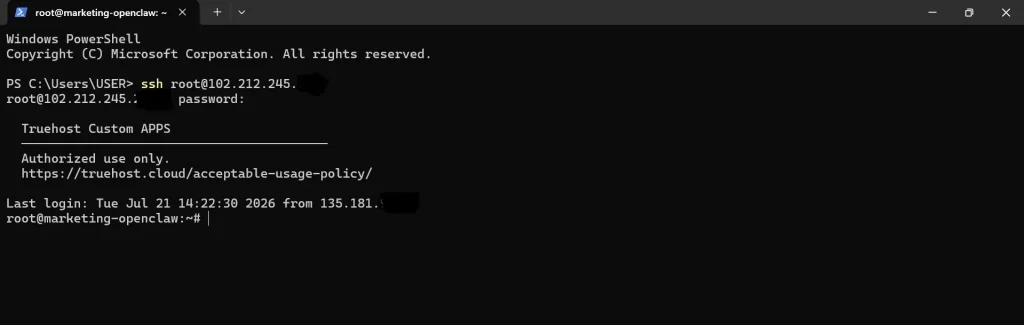
SSH is how you talk to your server from your own computer. Open your terminal and type this, replacing the placeholders with your own details:
ssh root@your_server_ipThe first time you connect, your terminal will ask you to confirm the server’s fingerprint. Type yes and press enter.
Once connected, you are logged in as root. Root has full access to everything on the server, so it carries real risk if a command goes wrong.
Create a new user with sudo privileges instead, and switch to that account for daily work:
adduser yourusernameusermod -aG sudo yourusernamesu - yourusernameConfirm the new user works by running a simple command like whoami before moving forward.
2) Update the Server and Install the LEMP Stack
WordPress needs a small stack of software to run: a web server, a database, and PHP. This guide uses Nginx, MySQL, and PHP, known together as the LEMP stack.
Start by updating the package list and installed software:
sudo apt update && sudo apt upgrade -yThen install Nginx:
sudo apt install nginx -yNginx handles web traffic with a lighter footprint than Apache, which helps on smaller VPS plans.
Next, install MySQL and run the built-in security script:
sudo apt install mysql-server -ysudo mysql_secure_installationAnswer yes to the prompts about removing test databases and disabling remote root login. These steps close off common attack paths early.
Now install PHP along with the extensions WordPress needs:
sudo apt install php-fpm php-mysql php-curl php-xml php-mbstring php-zip -yAt this point, your server has everything it needs to run WordPress. The next step is setting up a database for it.
3) Create the WordPress Database and User
Log in to MySQL as root:
sudo mysqlThen create a database, a user, and grant that user access. Replace the placeholder values with your own:
CREATE DATABASE wordpress_db;

CREATE USER 'wp_user'@'localhost' IDENTIFIED BY 'your_strong_password';

GRANT ALL PRIVILEGES ON wordpress_db.* TO 'wp_user'@'localhost';

FLUSH PRIVILEGES;

EXIT;
Pick a database prefix other than the default wp_ later in the setup screen. This small change adds a layer of protection against automated attacks that target default table names.
4) Download and Configure WordPress
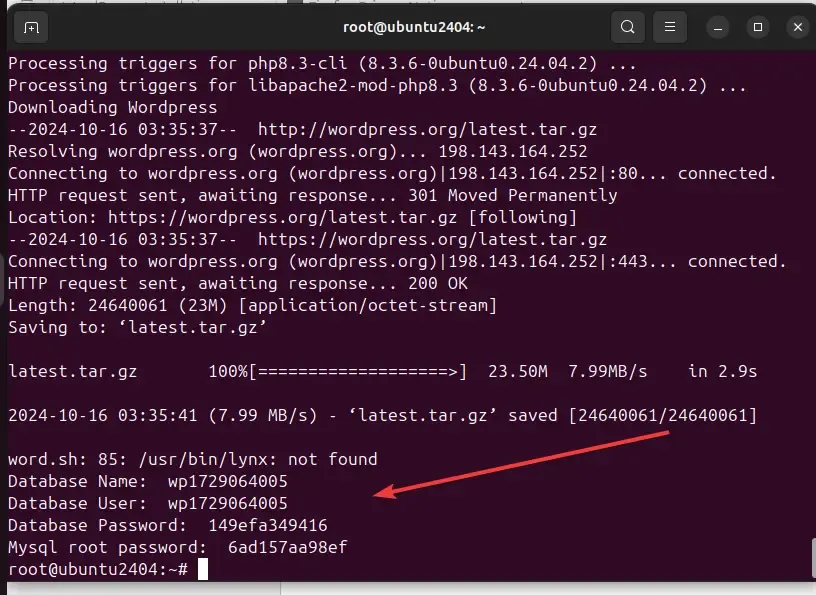
Move to a working directory and pull down the latest WordPress files:
cd /tmp

wget https://wordpress.org/latest.tar.gz

tar -xzvf latest.tar.gz
Copy the extracted files into your website directory:
sudo cp -a /tmp/wordpress/. /var/www/html/Fix ownership so Nginx and PHP can read and write the files properly:
sudo chown -R www-data:www-data /var/www/html

sudo chmod -R 755 /var/www/html
Skipping this step is a common cause of the “directory is not writable” error, so do not skip it.
Now, rename and edit the config file:
cd /var/www/html

sudo cp wp-config-sample.php wp-config.php

sudo nano wp-config.php
Enter your database name, username, and password from the previous step.
Then visit the WordPress salt key generator online, copy the output, and paste it to replace the placeholder keys. Save and exit with Ctrl+X, then Y.
5) Configure Nginx for WordPress
Nginx needs a server block that specifies where to find your WordPress files and how to handle PHP requests.
Create a new config file:
sudo nano /etc/nginx/sites-available/yourdomain.comPaste in a block like this, adjusting the domain and PHP version as needed:
server {

    listen 80;

    server_name yourdomain.com www.yourdomain.com;

    root /var/www/html;

    index index.php index.html;

    location / {

        try_files $uri $uri/ /index.php?$args;

    }

    location ~ \.php$ {

        include snippets/fastcgi-php.conf;

        fastcgi_pass unix:/var/run/php/php8.3-fpm.sock;

    }

}
Enable the site and remove the default one:
sudo ln -s /etc/nginx/sites-available/yourdomain.com /etc/nginx/sites-enabled/

sudo rm /etc/nginx/sites-enabled/default
Test the config before reloading, so a typo does not take down the whole server:
sudo nginx -t

sudo systemctl reload nginx
A blank page or a 502 error at this stage usually indicates a mismatched PHP socket path in this file.
6) Point Your Domain and Run the Web Installer
Log in to your domain registrar and update the A record to point at your VPS IP address. This step often takes a few hours to spread across the internet, so patience helps here.
Once the domain resolves, or if you are testing with the raw IP, open a browser and visit it. You should see the WordPress welcome screen.
Follow the prompts on screen:
- Pick your language
- Set your site title
- Choose an admin username that is not “admin”
- Set a strong admin password
- Enter your email address
Click Install WordPress, and your site is live.
7) Secure and Harden the Installation
A fresh install is functional, but not locked down yet. A few steps here go a long way.
Install a free SSL certificate with Certbot, so traffic between your visitors and your server stays encrypted:
sudo apt install certbot python3-certbot-nginx -y

sudo certbot --nginx -d yourdomain.com -d www.yourdomain.com
Certbot will ask for an email and offer to redirect all traffic to HTTPS. Choose the redirect option.
Next, set up a firewall so only the ports you actually need stay open:
sudo ufw allow OpenSSHsudo ufw allow 'Nginx Full'sudo ufw enableInside the WordPress dashboard, disable file editing from the admin area by adding this line to wp-config.php:
define('DISALLOW_FILE_EDIT', true);Finally, set up automated backups for both your database and your files, and store copies off the server.
A cron job that runs mysqldump on a schedule works well for this, paired with a backup plugin or a script that archives the wp-content folder.
Common Errors and How to Fix Them
| Error | Likely Cause | Fix |
|---|---|---|
| 502 Bad Gateway | Nginx cannot reach PHP-FPM, often due to a wrong socket path | Check the fastcgi_pass line in your Nginx config, confirm the PHP-FPM version matches, then run sudo systemctl restart php8.3-fpm nginx |
| 504 Gateway Timeout | PHP-FPM is running, but taking too long to respond | Raise fastcgi_read_timeout in your Nginx config and check for a slow plugin or query once the site loads |
| Error establishing a database connection | Wrong credentials in wp-config.php, or MySQL is not running | Recheck the database name, user, and password, then run sudo systemctl status mysql to confirm the service is active |
| Directory not writable / permission denied | File ownership was not set correctly after copying WordPress files | Run sudo chown -R www-data:www-data /var/www/html and sudo chmod -R 755 /var/www/html again |
| White screen with no error message | A plugin or theme conflict, or a low PHP memory limit | Add define('WP_MEMORY_LIMIT', '256M'); to wp-config.php, and rename the plugins folder to test |
| 403 Forbidden | Missing index file, or Nginx root path pointing to the wrong folder | Confirm the root directive in your Nginx config matches where WordPress actually lives |
| 404 error on every post or page | Permalinks were never saved, or the Nginx try_files block is missing | Go to Settings, Permalinks, and click Save, then confirm the try_files line sits inside your Nginx config |
| SSH connection refused | The VPS firewall is blocking port 22, or the service is not running | Check your provider’s network panel, then run sudo systemctl status ssh from the console if you can reach it another way |
| SSL certificate fails to issue | DNS has not finished pointing at the server yet | Wait for DNS to propagate fully, then rerun sudo certbot --nginx -d yourdomain.com |
| Access denied for MySQL user | A typo in the username or password used during database setup | Log back into MySQL as root and reset the password with ALTER USER 'wp_user'@'localhost' IDENTIFIED BY 'new_password'; |
How to Go About It
Even with every step followed closely, something can still go wrong. The table above is a quick reference for the most common errors during a manual VPS install.
Check the Nginx error log at /var/log/nginx/error.log first whenever a fix does not line up with the symptom. It usually points straight at the real cause.
FAQs
Can I install WordPress on a VPS without cPanel?
Yes. The steps above use SSH and the command line directly, with no control panel needed at any point.
How much RAM does a VPS need to run WordPress?
A single small site can run on 1GB of RAM. Larger sites with more traffic or heavier plugins run smoother with 2GB or more.
Is it hard to install WordPress manually on a VPS?
The command line steps look intimidating at first glance, but each one is short and repeatable once you follow them in order.
Can I use a one-click installer instead of the manual method?
Yes, many providers offer a WordPress image or a Softaculous installer. The manual route in this guide gives you full control over each part of the stack instead.
How long does it take to install WordPress on a VPS?
A manual install through this guide takes roughly 30 to 45 minutes on a first attempt, faster on repeat setups.
Set Up WordPress on VPS Today
A manual install takes more typing than a one-click button, but it hands you full control over every layer of your stack. You know exactly what software is running, what ports are open, and how your files are structured.
Before you add a single theme or plugin, run back through your setup. Confirm HTTPS is active, check that your permalinks work under Settings, and confirm your backup job actually ran once.
Once that checklist is clear, your next stop should be tuning your new server for speed, since a fresh WordPress install on a VPS still has real room to improve with caching and PHP tuning.