 Domain RegistrationFind and register the perfect domain for your website.
 .COM DomainChoose a widely recognized domain to build global credibility.
 All TLDsFind and register your perfect domain. Choose from local and global extensions.
 whoisCheck domain ownership details, expiration dates, and registrar information.
 US DomainRegister a .US domain and build trust in the USA.
 Web HostingEverything your website needs to run smoothly
 WordPress HostingWordPress hosting that just works
 Windows HostingReliable hosting for Windows environments
 Reseller HostingTurn hosting into your business
 Email HostingEmail that looks professional and works anywhere
 cPanel HostingFull control of your hosting with cPanel
 Affiliate ProgramJoin as a partner and earn commissions on every referral you send our way.
 Vps HostingScalable virtual servers that expand as you need.
 Dedicated ServersGet complete access and full control over your dedicated physical server.
 Managed vpsNot tech-savvy? We will take care of everything with our fully managed VPS hosting for you.
You have built your web app, tested every feature, and finally launched it. But when it’s time to share it, the URL looks something like myapp.vercel.app or myproject.netlify.app. While functional, a default platform URL does little to build trust or strengthen your brand.
A custom domain such as yourbrand.com instantly makes your web app look more professional, credible, and established. It creates a memorable identity for your product and gives users confidence that they are interacting with a legitimate business or service.
Connecting a custom domain to your web app is a straightforward process that typically requires only a few DNS changes. Whether your app is hosted on Vercel, Netlify, Render, AWS, or another platform, you can usually complete the setup in a matter of minutes.
In this article, you will learn how to connect a custom domain name to your web app step by step, from registering a domain and configuring DNS records to enabling HTTPS and verifying that everything works correctly.
Ready to give your web app a professional online identity? Register your domain with Truehost today, then follow the steps below to connect it to your web app and get online with a branded URL.

What Is a Custom Domain Name?
A custom domain is a web address you own and control, like yourbrand.com or myapp.io, as opposed to a subdomain assigned by a hosting or deployment platform.
When you deploy a web app on a platform like Vercel or Netlify, the platform gives you a default URL to access it. That URL belongs to the platform, not to you.
A custom domain is one you register yourself and point wherever you want. It travels with you if you switch platforms, and it looks the way you choose.
Why Web Apps Use Custom Domains
Default platform URLs are fine for testing but not for production. Real users, investors, and customers judge credibility partly by the web address they see in a browser.
A custom domain also anchors your app to your brand, making it easier to build recognition and trust over time.
Examples of Custom Domains
A custom domain can be a .com, .io, .app, .co, or any other extension you register. Examples include dashboard.yourbrand.com, app.startupname.io, or simply yourbusiness.com i.e Truehost.com pointing directly to the app.
Subdomains like app.yourdomain.com are also common when a company wants to separate the app from the main marketing site.
Why Connect a Custom Domain to Your Web App?
Switching from a platform URL to a custom domain is one of the highest-impact low-effort improvements you can make when launching a product.
1) Professional Branding
yourbrand.com signals that this is a real product. myapp.up.railway.app signals a side project someone has not fully committed to yet.
That perception affects whether users sign up, whether investors take you seriously, and whether customers feel comfortable paying you.
2) Improved User Trust
A branded domain paired with HTTPS immediately tells visitors the site is legitimate. Many people will not share personal data or payment information on a subdomain they do not recognize.
A custom domain setup with a valid SSL certificate removes that hesitation before it becomes a reason to leave.
3) Easier Sharing and Marketing
A short, clean domain is far easier to put in an ad, a pitch deck, a social post, or on a business card. Platform-generated URLs are long, forgettable, and look odd in print.
When your domain matches your brand name, every mention of the app is also a mention of the brand.
4) Better Customer Experience
Users who can type your domain directly into a browser have a faster, smoother experience than ones who have to search for you or follow a long link.
It also reduces confusion when users try to return to your app after their first visit.
5) Long-Term Business Growth
If you ever migrate your app to a new platform, change hosting providers, or scale your infrastructure, your custom domain stays the same. Your users, your links, and your SEO history all remain intact.
Building on a custom domain from day one protects that continuity.
What You Need Before Connecting a Custom Domain
Before you start configuring anything, make sure you have these four things in place.
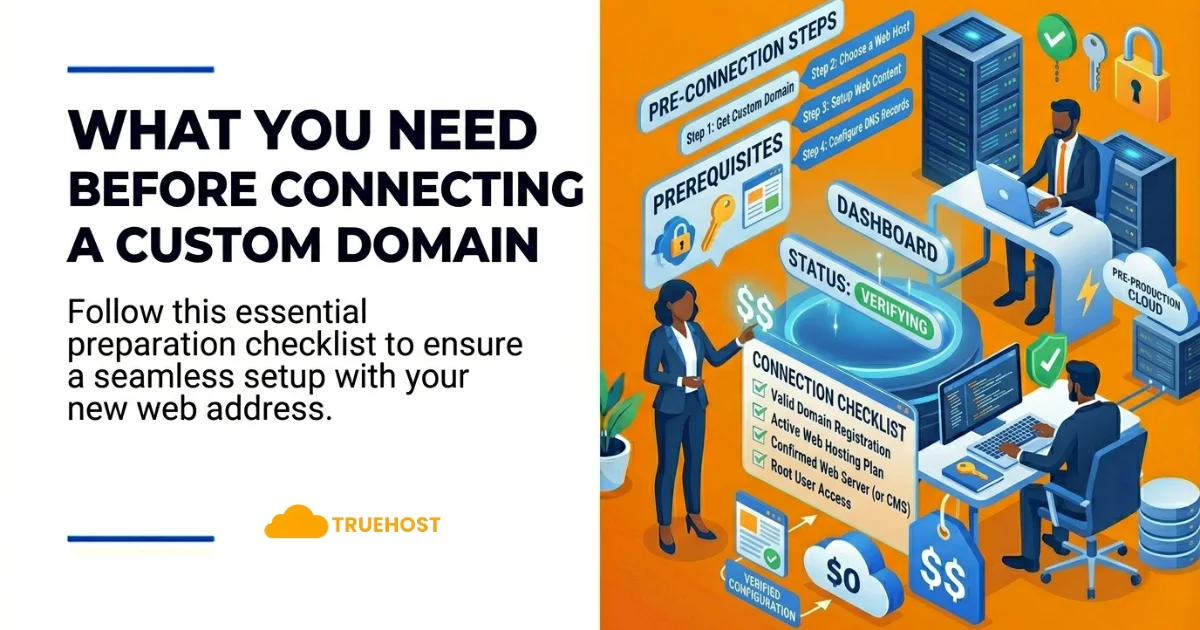
1) A Registered Domain Name
You need to own the domain before you can connect it to anything. If you have not registered one yet, Truehost’s domain search lets you check availability and register in a few minutes.
2) Access to DNS Settings
DNS settings are managed through your domain registrar’s dashboard. This is where you will add the records that point your domain at your web app.
If you registered your domain through Truehost, you can manage DNS directly from your Truehost account.
3) A Live Web App
Your web app needs to already be deployed and accessible via a platform URL before you connect a custom domain to it. Most platforms will ask you to verify that the app is live before accepting a custom domain.
4) SSL Certificate Support
Almost every modern deployment platform includes free SSL certificate provisioning through Let’s Encrypt or similar services. Confirm your platform supports this before you start, because HTTPS is no longer optional for any production web app.
A Quick Guide to DNS Records Before You Begin
You do not need to be a network engineer to connect a domain, but understanding a few DNS record types will save you a lot of confusion.
1) A Records
An A record maps your domain name to a specific IP address. When someone types your domain into a browser, the A record tells the internet where to send them.
If your web app platform gives you a static IP address, you will use an A record to point your domain at it.
2) CNAME Records
A CNAME record maps your domain to another domain name rather than an IP address. Most modern platforms prefer CNAME records because they can handle IP changes automatically on their end.
For example, you might set your domain to point to your-app.vercel.app using a CNAME, and Vercel handles the rest.
3) TXT Records
TXT records are used for verification purposes. When a platform asks you to prove you own a domain, it usually asks you to add a TXT record with a specific value to your DNS settings.
These records do not affect where your domain points. They are just used for identity confirmation.
4) Nameservers
Nameservers tell the internet which DNS provider is responsible for your domain. If you want a platform to manage your DNS entirely, you may be asked to update your nameservers to point to theirs.
Most setups do not require this. You can usually keep your nameservers at your registrar and just add individual records.
How to Connect a Custom Domain Name to Your Web App
Here is the full web app domain configuration process from start to finish.
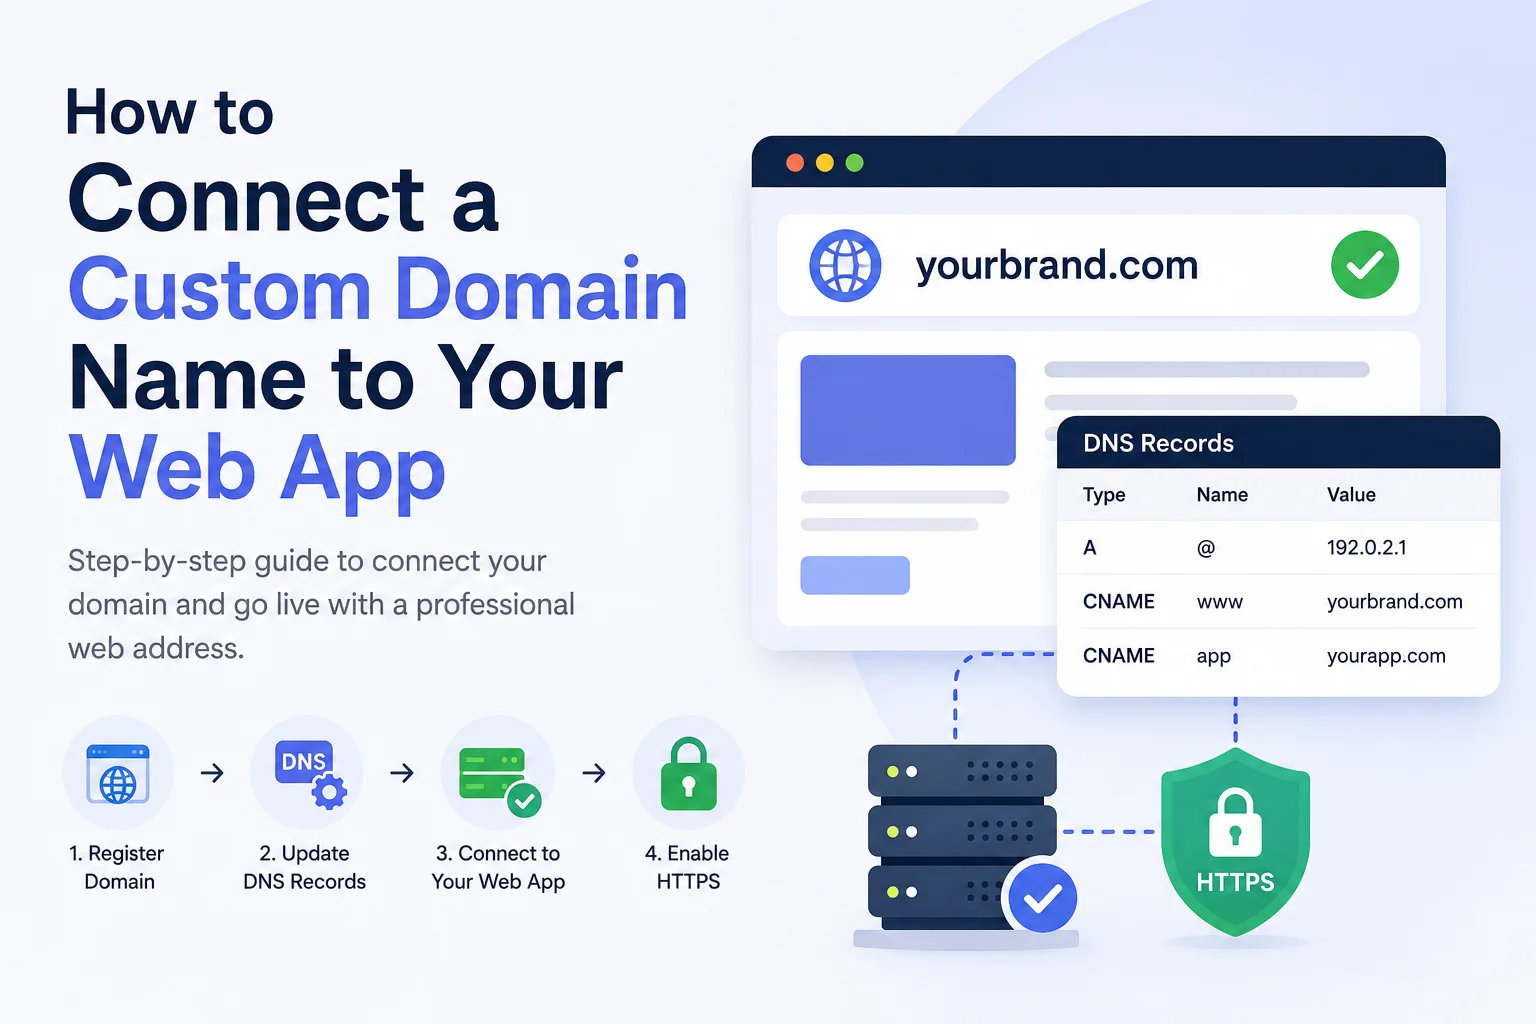
Step 1: Buy or Register a Domain Name
If you do not have a domain yet, register one that matches your app or brand name. Keep it short, easy to spell, and ideally a .com or .io depending on your audience.
Search for and register your domain on Truehost to get started quickly with DNS access included from day one.
Step 2: Access Your DNS Settings
Log into your domain registrar’s dashboard and navigate to the DNS management section. This is where you will be adding records in the next step.
Keep this tab open alongside your web app platform’s dashboard. You will be copying values between the two.
Step 3: Add the Required DNS Records
Your web app platform will tell you exactly which DNS records to add. This is usually one of two things:
- An A record pointing to the platform’s IP address
- A CNAME record pointing to the platform’s default domain
Copy the values your platform provides and enter them into your registrar’s DNS panel. Double-check for typos because a single wrong character will break the connection.
Step 4: Verify Domain Ownership
Most platforms require you to prove you own the domain before they activate the custom domain connection. They will give you a TXT record value to add to your DNS settings.
Add that TXT record, save it, and then return to the platform and click verify. It can take a few minutes for the record to be visible.
Step 5: Enable SSL Security
Once the domain is connected, your platform should automatically provision an SSL certificate for it. This enables HTTPS and shows the padlock in the browser.
If it does not happen automatically, check your platform’s domain settings for an option to enable SSL or force HTTPS. Never leave a production app running on plain HTTP.
Step 6: Test the Domain Connection
Type your custom domain into a browser and confirm it loads your web app correctly. Check that the URL shows https:// and that there are no certificate warnings.
Also test the www version if you added that record, and make sure it redirects or resolves as expected.
Connecting a Custom Domain to Popular Web App Platforms
The overall DNS configuration process is the same across platforms. Here is what to expect on the most common ones.
Vercel
Vercel makes custom domain setup straightforward. Add your domain in the project settings, and Vercel will show you the exact A record or CNAME to add at your registrar. SSL is provisioned automatically. Learn more in Vercel’s custom domains documentation.
Netlify
Netlify offers two options: manage DNS through Netlify directly, or keep DNS at your registrar and add a CNAME or A record. The second option is simpler for most users. SSL is handled automatically via Let’s Encrypt.
Render
Render asks you to add a CNAME record pointing to your Render service URL. Once the DNS propagates, Render provisions SSL automatically and marks the domain as verified.
Heroku
Heroku requires you to add the domain in your app settings first, which generates a Heroku DNS target. You then add a CNAME record at your registrar pointing to that target. SSL requires a paid dyno tier on Heroku.
Railway
Railway’s custom domain setup follows the same pattern. Add your domain in the project settings, copy the CNAME target Railway provides, add it at your registrar, and Railway handles SSL once it detects the record.
Common Problems When Connecting a Custom Domain
Even with the right steps, things occasionally go wrong. Here is what to look for.
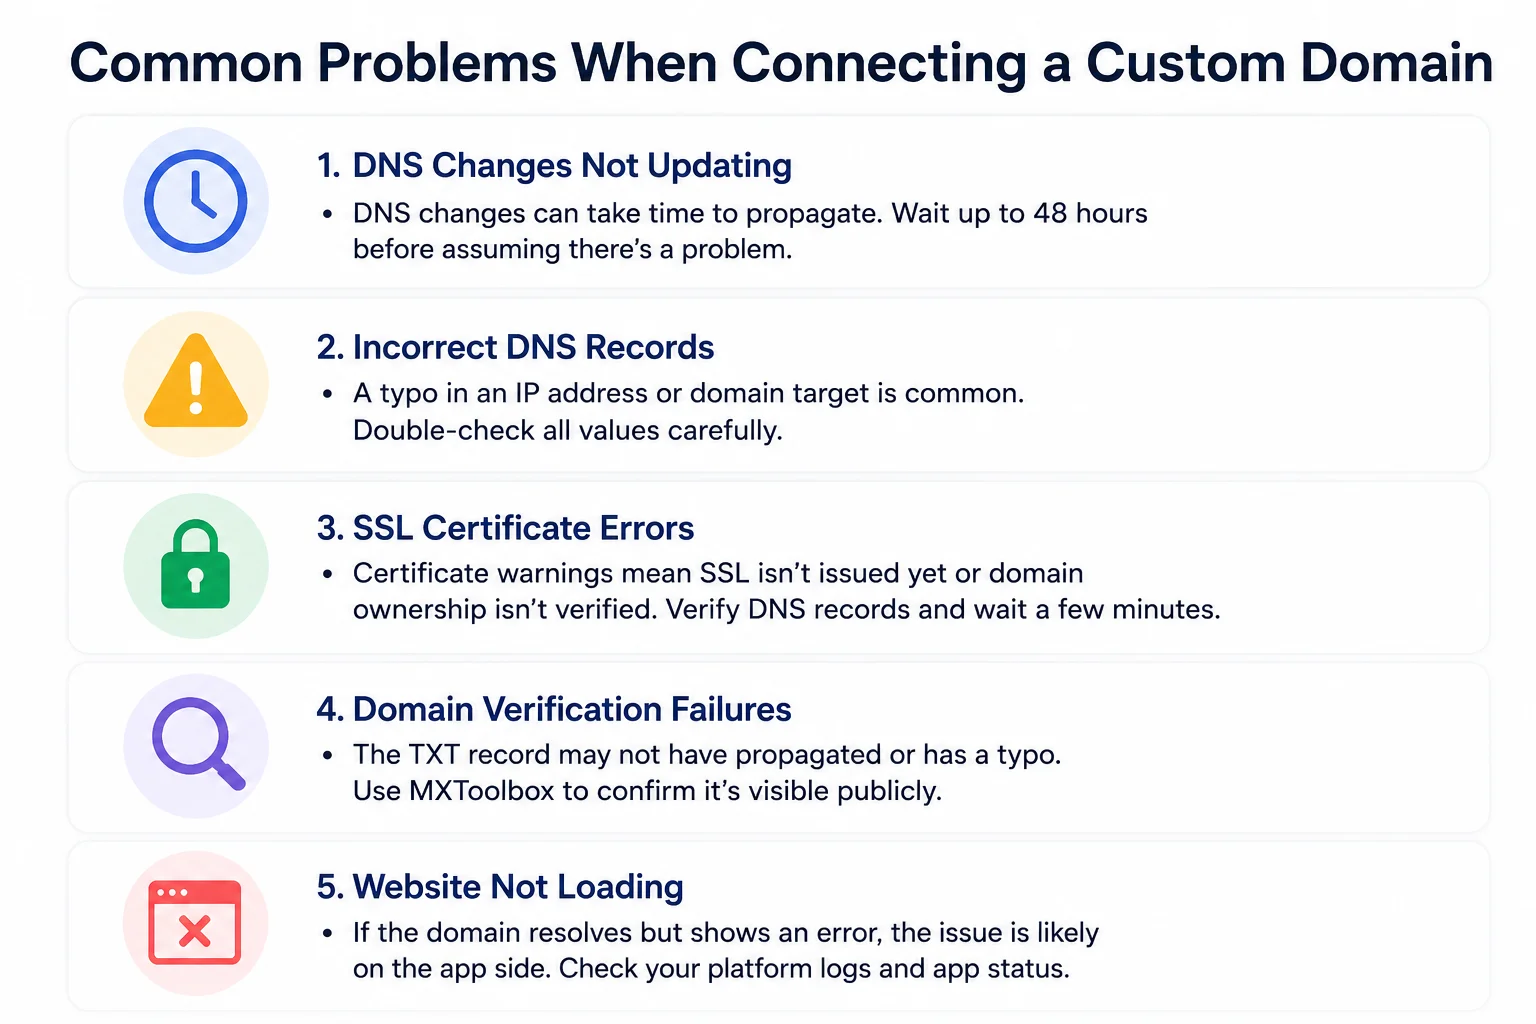
Common Problems When Connecting a Custom Domain
- DNS changes not updating
- DNS propagation can take up to 48 hours.
- Wait before troubleshooting further.
- Incorrect DNS records
- A typo in an IP address or domain target can prevent your domain from connecting.
- Double-check all DNS values carefully.
- SSL certificate errors
- SSL may still be provisioning, or domain verification may be incomplete.
- Verify your DNS records and allow a little more time.
- Domain verification failures
- TXT records may not have propagated yet or could contain errors.
- Use a DNS lookup tool to confirm the record is publicly visible.
- Website not loading
- If the domain resolves but shows an error, the issue is likely with your web app.
- Check deployment logs and confirm the application is running correctly.
Securing Your Custom Domain
A connected domain is not secure by default. Here is how to lock it down properly.
Enabling HTTPS
Most platforms handle this automatically once the domain is connected. If not, look for a setting in your platform dashboard to force HTTPS redirects so all traffic uses the secure version of your domain.
Using SSL Certificates
Let’s Encrypt provides free SSL certificates and is supported by virtually every major deployment platform. If your platform does not provision SSL automatically, you can often enable it manually in one click from the domain settings.
Protecting DNS Settings
Keep your registrar account secure with a strong password and two-factor authentication. Your DNS settings control where your domain points, and unauthorized changes can take your app offline or redirect users somewhere dangerous.
Enabling Domain Security Features
Enable domain lock through your registrar to prevent unauthorized transfers. Truehost includes domain lock and WHOIS privacy as part of their standard domain management tools, which helps keep your domain protected while you focus on building your app.
Common Mistakes to Avoid
- Adding the wrong DNS record type. Check whether your platform wants an A record or a CNAME before entering anything.
- Forgetting to verify domain ownership. Most platforms will not activate the connection until the TXT record verification is complete.
- Not enabling SSL. An HTTP-only web app will be flagged as not secure by browsers, which drives users away immediately.
- Using outdated DNS information. If your platform regenerates its target URL or IP, update your DNS records to match.
- Making changes without noting the originals. Before editing anything in your DNS panel, write down or screenshot the existing records so you can restore them if something breaks.
- Ignoring propagation delays. Changes take time. Refreshing the page every 30 seconds will not speed anything up, and may make it harder to tell when it has actually resolved.
FAQs
How do I connect a custom domain to my web app?
Register a domain, access your DNS settings, add the A record or CNAME your platform requires, complete domain verification, and enable SSL. This guide walks through all six steps in detail.
How Long Does It Take for a Domain to Connect?
DNS propagation is the process of your new DNS records spreading across servers worldwide. It is the main reason a domain does not connect instantly.
Typical Waiting Times
Most DNS changes propagate within a few minutes to a few hours. In some cases it can take up to 48 hours, though this is less common with modern DNS infrastructure.
Factors That Affect Updates
Your previous DNS records have a TTL (Time to Live) value that determines how long they are cached. A lower TTL means changes spread faster. If your TTL was set high before you made changes, propagation may take longer.
How to Check Progress
Use DNS Checker to see how your records are propagating across different locations around the world. It shows you which regions have picked up the new records and which are still waiting.
Do I need hosting to use a custom domain?
You need somewhere for your web app to run, whether that is a cloud platform, a VPS, or a managed hosting service. The custom domain just points to wherever your app is already deployed.
What is DNS propagation?
DNS propagation is the time it takes for your new DNS records to spread across servers worldwide. It can take a few minutes to 48 hours depending on your TTL settings and DNS provider.
How long does it take for a custom domain to work?
Most connections work within a few minutes to a few hours. In some cases it can take up to 48 hours. Use a propagation checker to monitor progress.
Should I use an A record or a CNAME record?
Use a CNAME when your platform provides a target domain name. Use an A record when your platform provides a static IP address, or when pointing a root domain that does not support CNAMEs.
Why is my domain not connecting to my web app?
The most common causes are incorrect DNS records, a typo in the record values, or DNS changes that have not propagated yet. Check your records carefully and give it more time before troubleshooting further.
Ready to Connect Your Custom Domain?
Connecting a custom domain to your web app is one of the simplest ways to make your product look professional and ready for real users. With the right DNS configuration and SSL in place, the whole setup can be done in under an hour.
The key steps are straightforward: register your domain, add the correct DNS records, verify ownership, and enable HTTPS. Once those are done, your web app has a permanent, branded home that travels with you no matter where you host it.
Register and manage your domain through Truehost and get your custom domain setup done today.